By Ed Malaker
Posted 08/02/2022
In this article, we’ll provide a Peavey pickup installation guide to help you install any of their pickups into your guitar. Peavey isn’t known for their pickups, as DiMarzio and Seymour Duncan are, but they come stock on all Peavey guitars, so you’ll probably run across one sooner or later. We’ll discuss all of the different Peavey pickups we’ve been able to find, and if you own a Peavey guitar, this will help serve as a reference manual.
Before You Begin
This Peavey installation guide does not intend to be a step-by-step tutorial. Instead, it is a reference guide for those that own these pickups and want to install them. It assumes you know how to remove and install pickups, and how to solder connections. If you need step-by-step instructions, we recommend checking out the many wiring diagrams we have here at Humbucker Soup, to get you started.
Single Coil Wiring
Peavey has several guitar models that use single-coil pickups. The Raptor model currently features a very similar design to the Fender Stratocaster, and it uses the same kind of single-coil pickups. As the name suggests, single-coil pickups have a single coil of copper wire wrapped around six metal posts. Either the posts are magnetic, or a magnet at the bottom forms an electromagnetic field that creates electricity in the coil when the strings vibrate. There is a wire at each end of the coil, and you use them to install it in your guitar.
Peavey usually uses a red wire as the HOT and a black wire as the GROUND. We’ve illustrated a common way to install Peavey pickups in a Fender Stratocaster type guitar in Example 1.
Example 1

Humbucker Wiring (4-Wires)
Peavey also makes a wide range of humbuckers for many of their guitars, including their current HP 2 Series. All of the humbuckers we were able to find were the four-wire design. We aren’t aware of a braided wire design, so if you come across one, let us know. The humbucker has four wires because it uses two single-coils, and each coil has two wires. The bare wire grounds the chassis and does not affect the operation of the pickup.
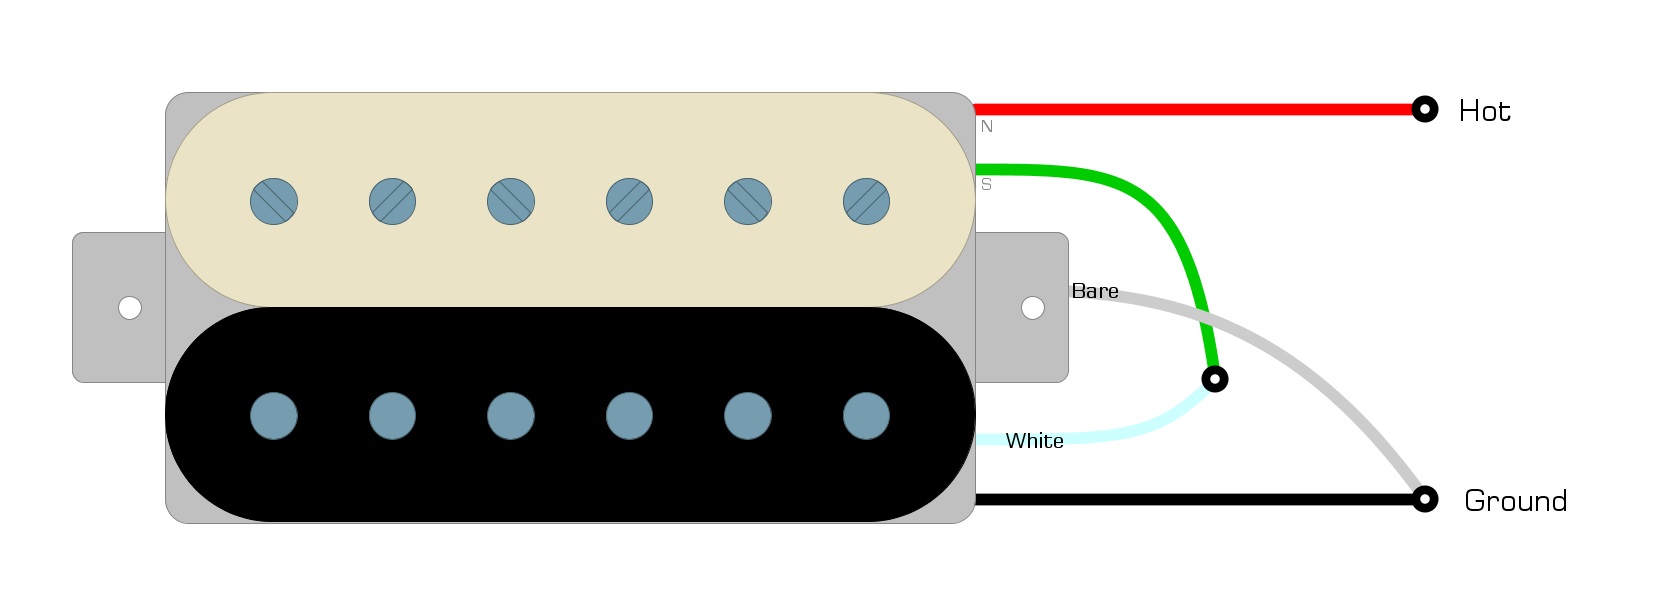
To install a humbucker, you need the wiring code to find the HOT and GROUND wires. Peavey pickups use the following code:
Peavey Wiring Code
- Red = HOT
- White + green = soldered together and taped off
- Black + bare = soldered together and GROUND
We’ve illustrated the Peavey wiring code in Example 2.
Example 2
Once we know the wiring code, we can install the pickups using the HOT and GROUND wires. Example 3 illustrates a common way to install Peavey Humbuckers in a Gibson Les Paul style guitar.
Example 3

Humbucker Coil Splitting (4-Wires)
You may be wondering why you solder the white and green wires together and tape them off. This is because it connects the two coils to pick up the sound, while canceling or “bucking” the noise that often plagues single-coil pickups. Braided or two-wire humbuckers connect these two wires internally. Modern pickups usually expose all four wires so you can perform modifications on your guitar that use the wires differently. One such mod is the Coil Split.
What is a coil-split?
Coil splitting turns off one of the two coils to give you access to single-coil tones without changing the look of your guitar. It’s easy to install and 100% reversible.
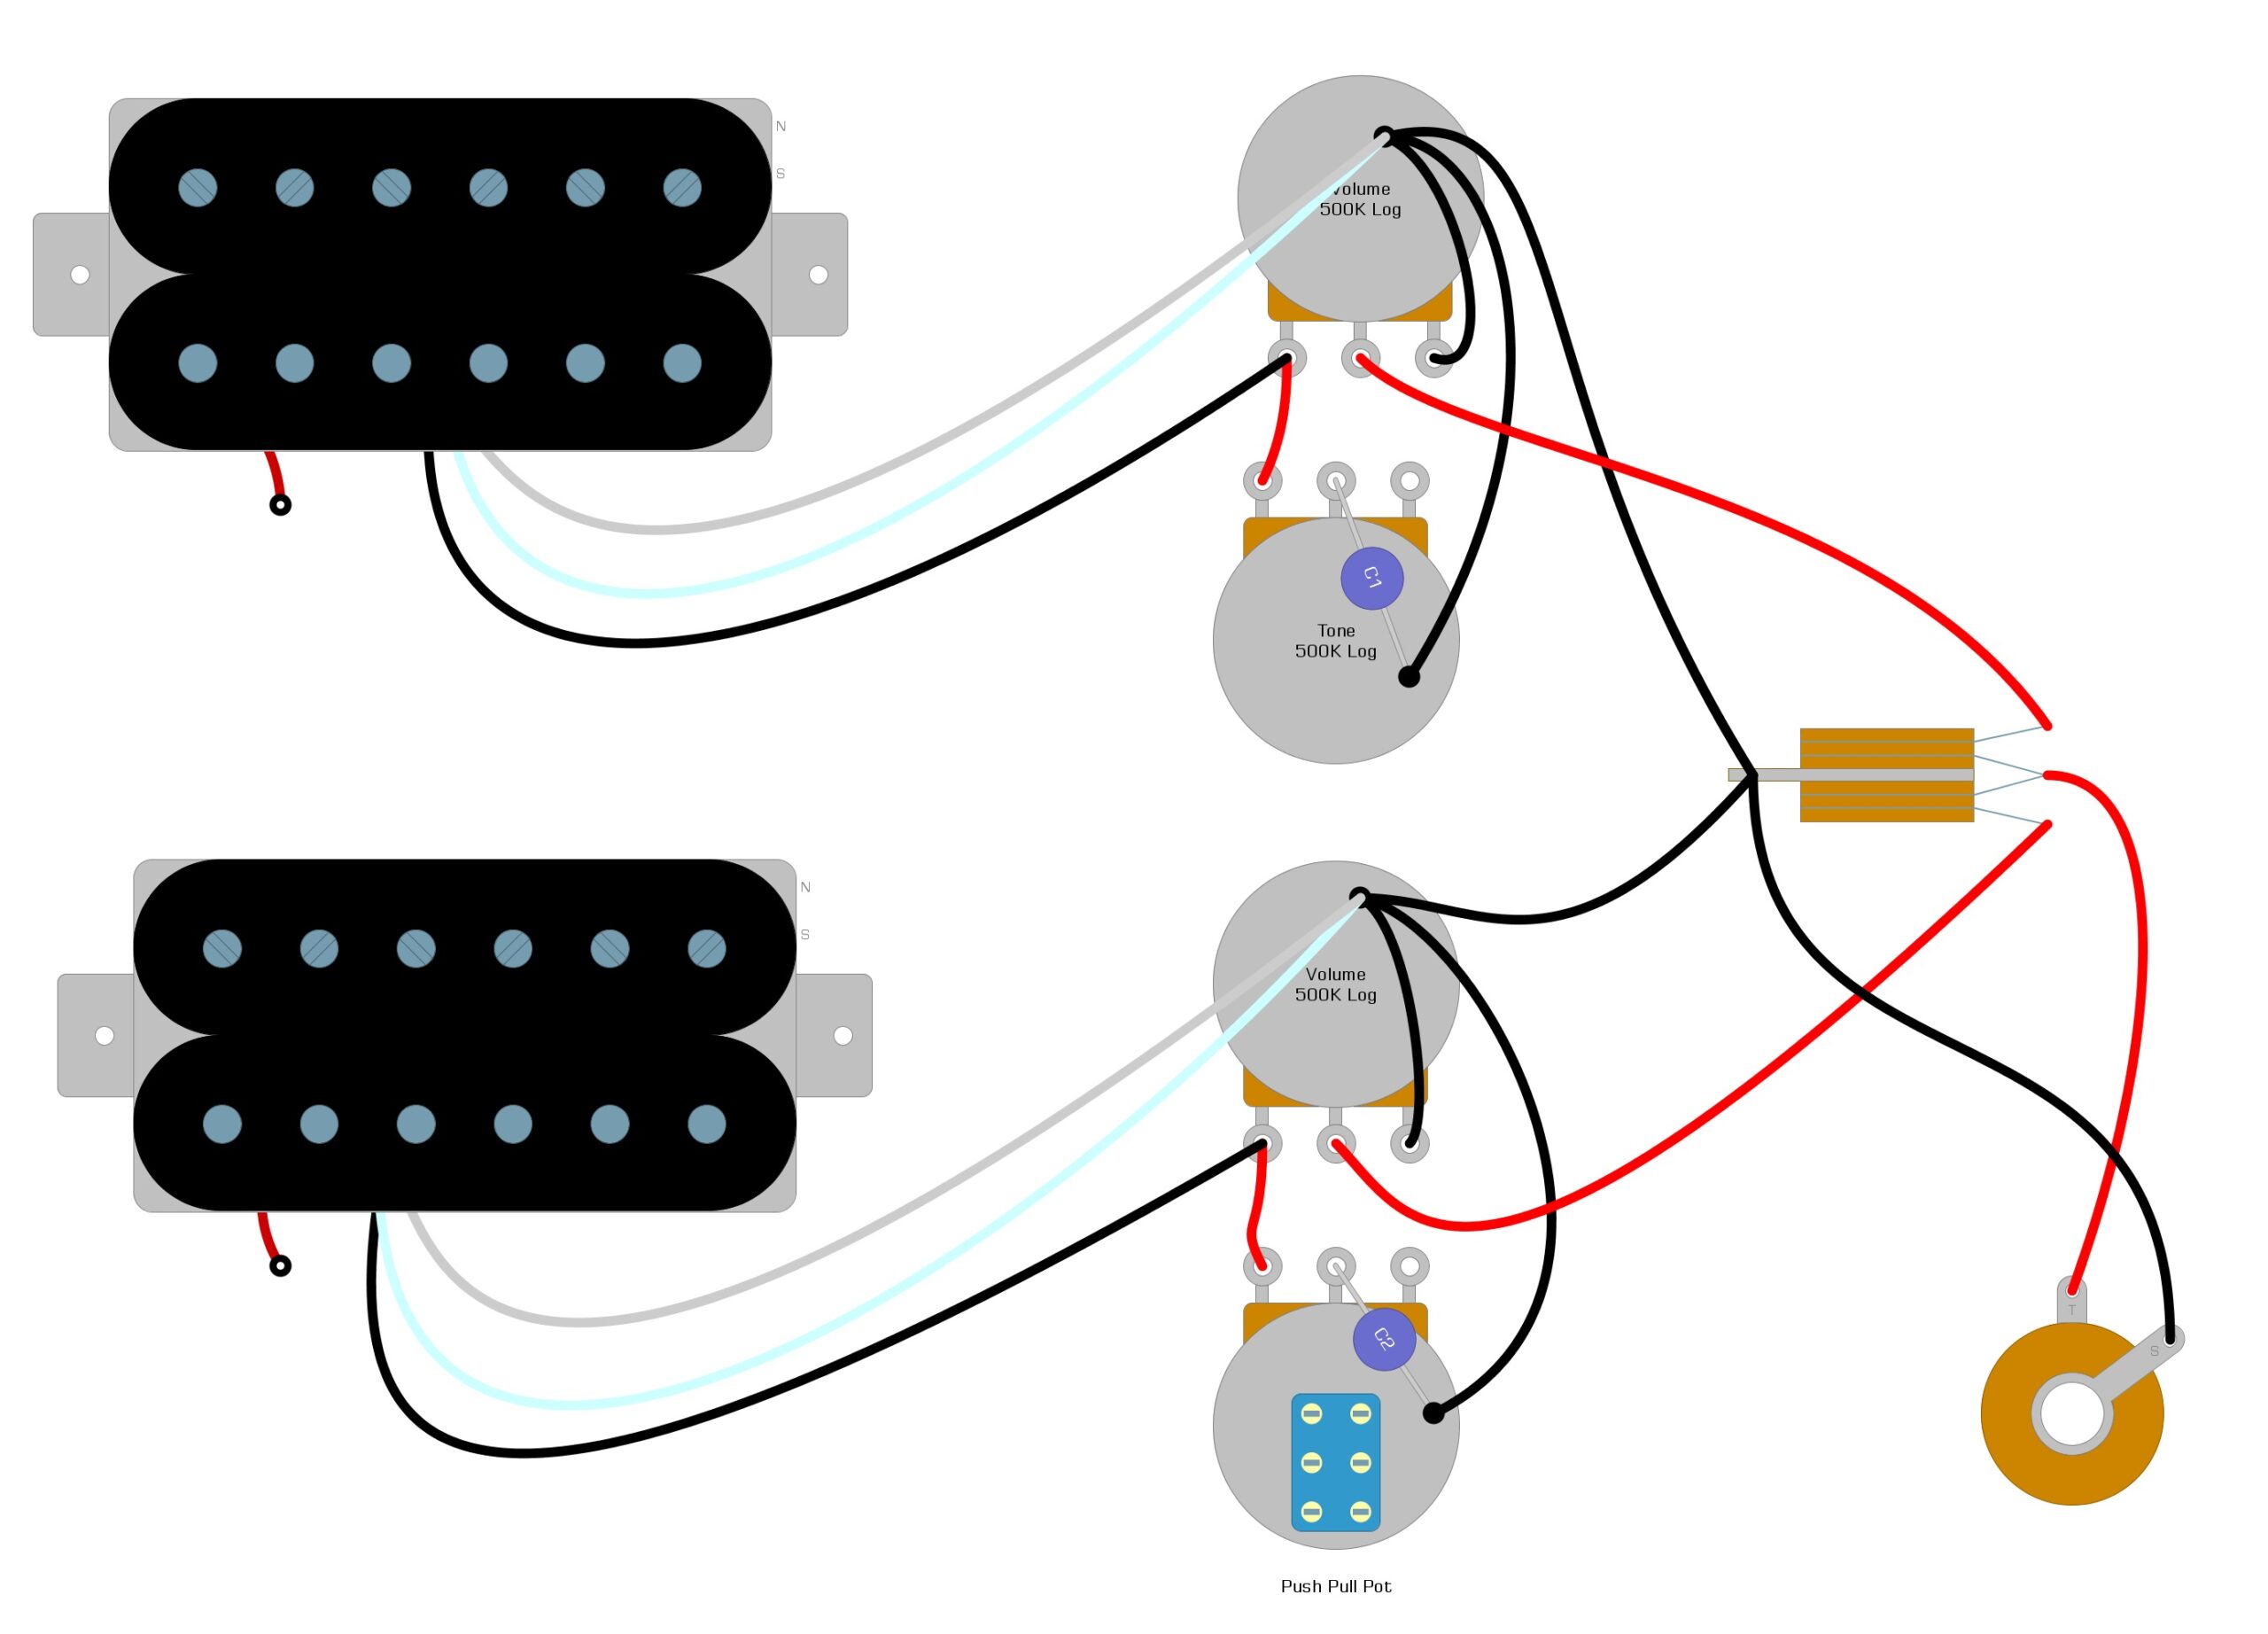
Convert to a push-pull pot
The first thing you will need to do is convert one of your tone controls to a push-pull pot. A push-pull pot is the same as a standard tone pot, but it has an added switching mechanism built-in. Ignore the switch for now and install the potentiometer the same way your old one was.
We’ve illustrated what the converted pot would look like in a Gibson Les Paul style guitar in Example 4.
Example 4
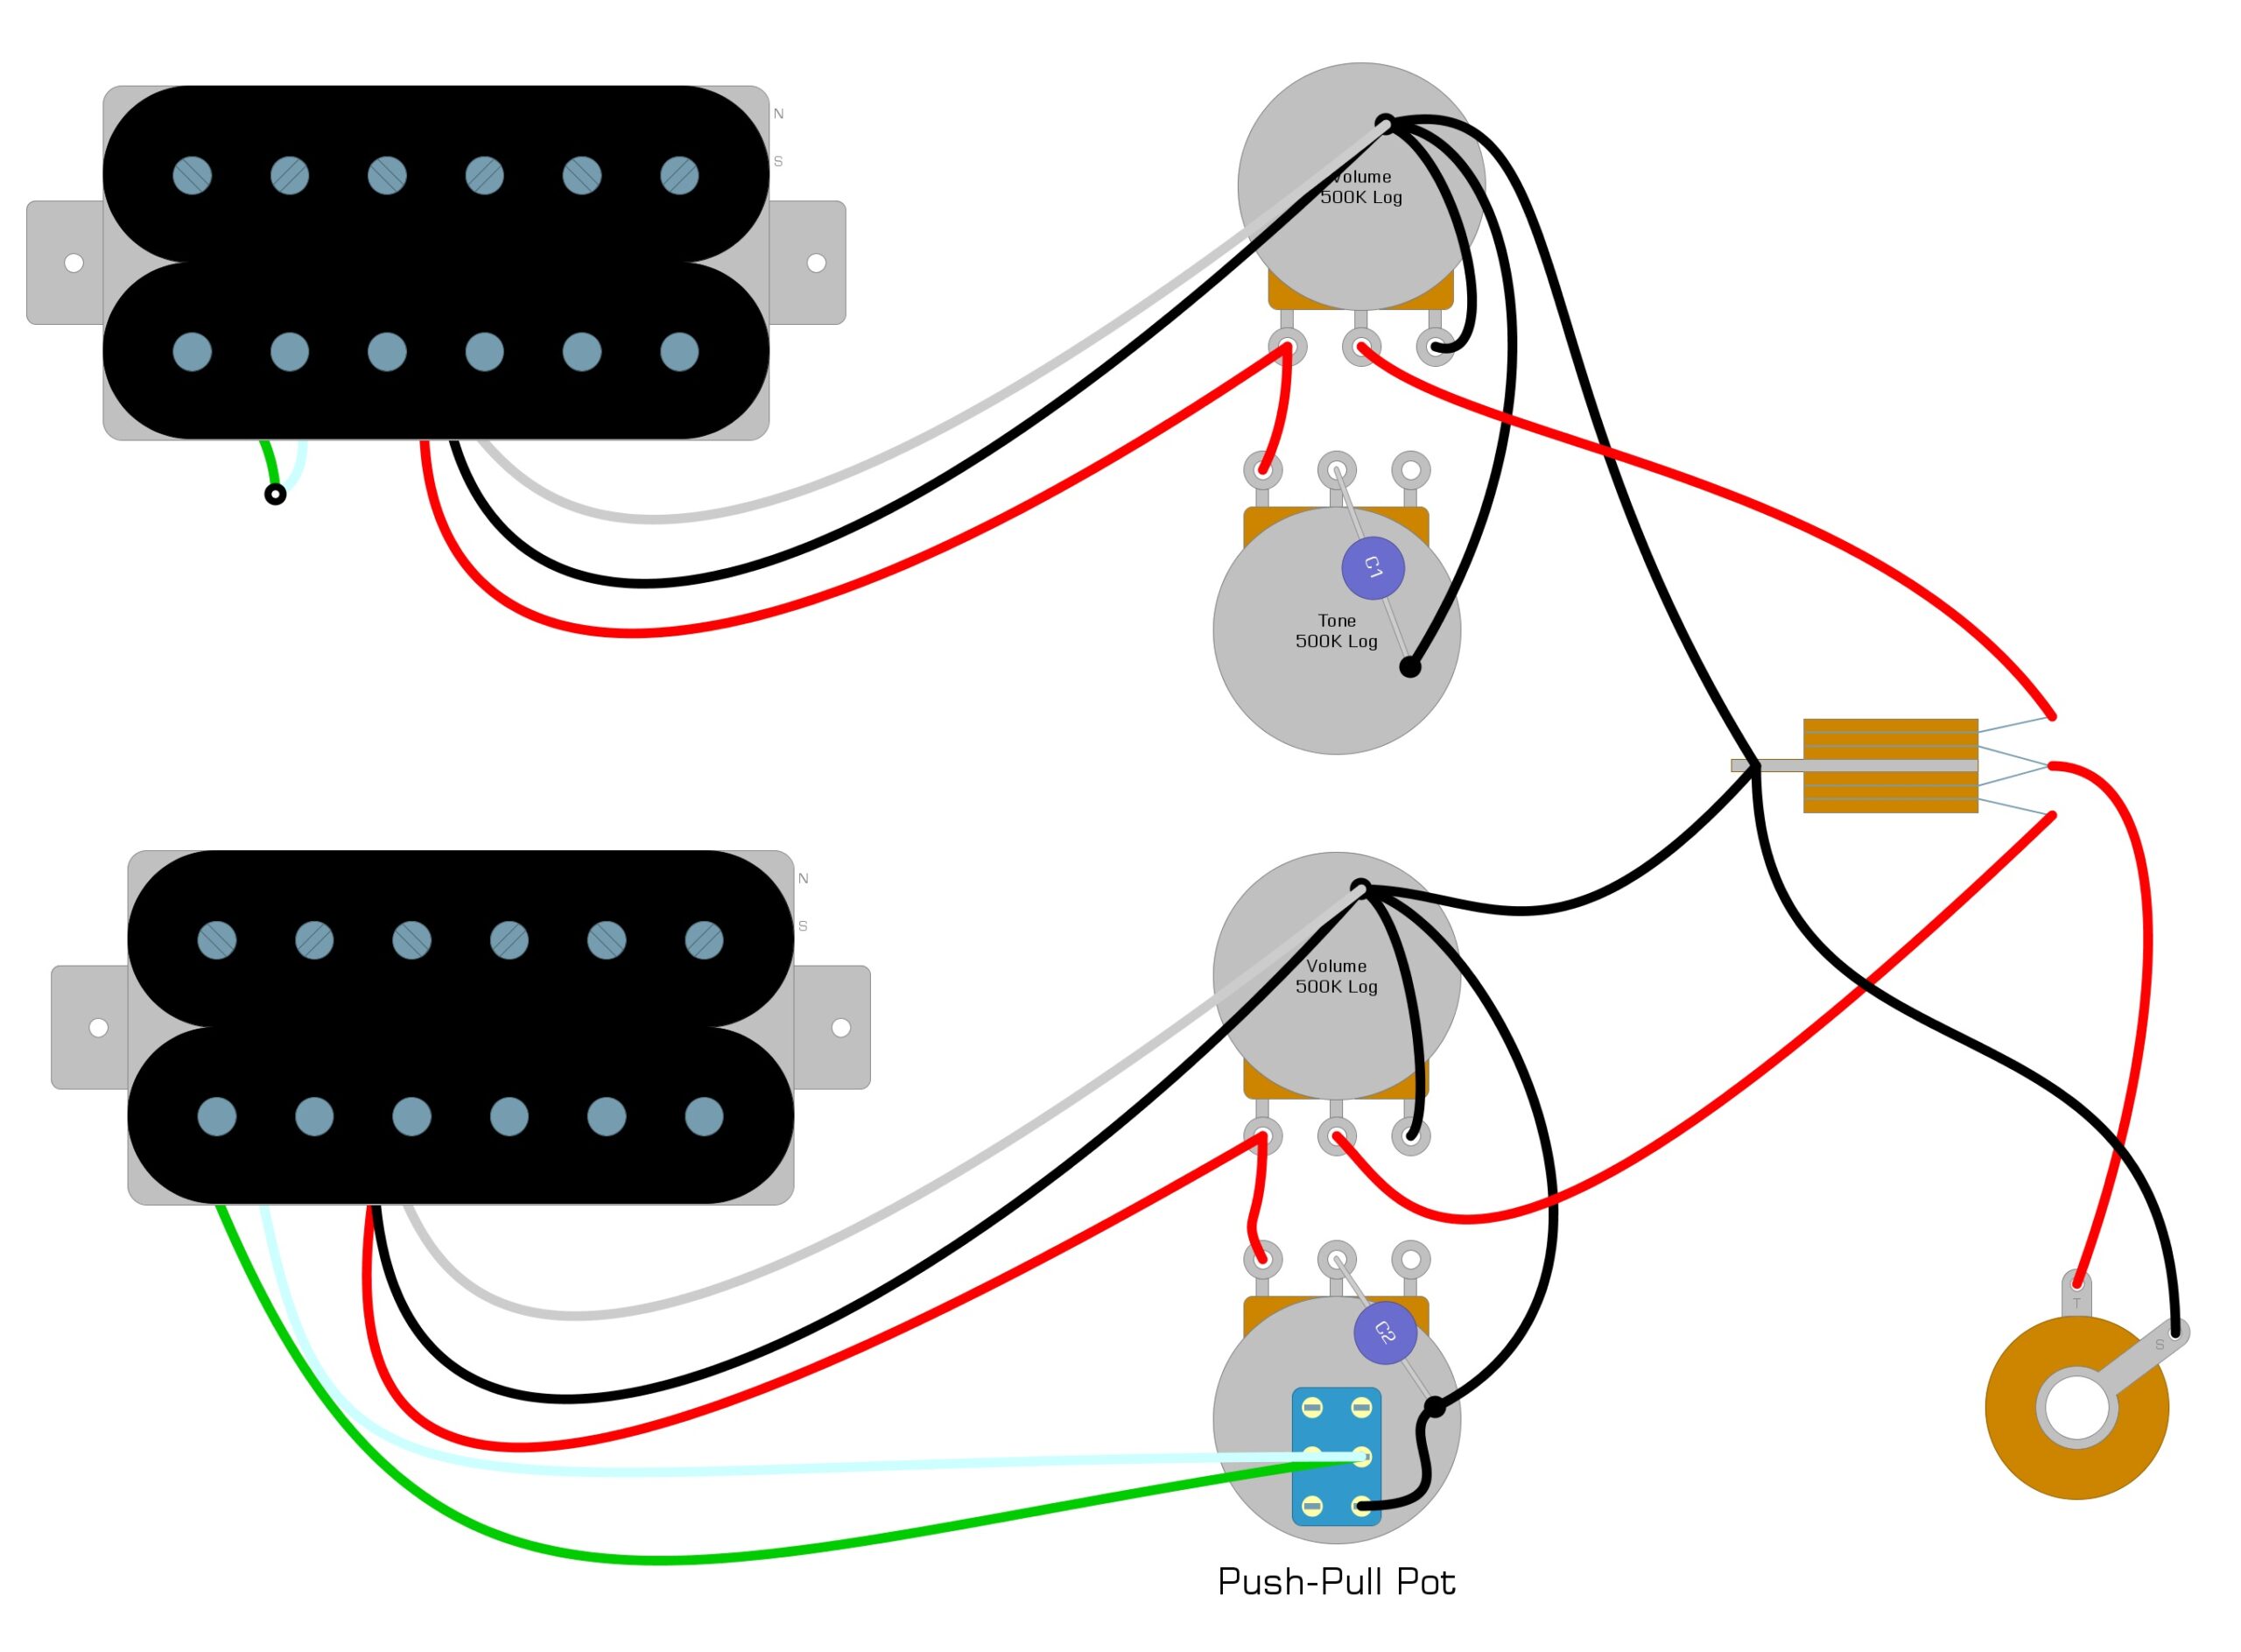
Complete the modification
With the push-pull pot installed, you can complete the modification by connecting the white and green wires from the Peavey pickup to the switching mechanism and installing a short GROUND wire from the switch to the back of the pot.
We’ve illustrated what these final connections will look like in a Gibson Les Paul style guitar in Example 5.
Example 5
How it works
With the modification complete, pulling out the shaft will allow the current from the first coil to go to GROUND instead of the second coil, effectively shutting it off. Pushing the switch back in will disengage the ground wire, allowing the pickup to act normally.
Conclusion
We hope you’ve enjoyed reading, and you’ve found this guide helpful on Peavey pickup installation. If you know of any other Peavey pickups we didn’t cover, let us know so we can add them to the guide. Peavey pickups sound great, but don’t often provide pickup documentation with the guitar upon purchase — if you change pickups a lot, you’ll need this guide. If we have helped you get your pickups working, please feel free to share this Peavey pickup installation guide on Facebook and Twitter. For more articles on guitar electronics, visit humbuckersoup.com.