By Ed Malaker
Posted 12/18/2020
With this Bartolini installation guide, we’ll show you how to install every type of passive guitar pickup that they make. Founded in 2010, Bartolini is a California-based company; the founders, Bill and Pat Bartolini, have been working on pickups long before starting their own operation, and this experience has given them insight into the types of tone guitar players seek.
Before You Begin
The Bartolini pickup installation guide is not a step-by-step tutorial, but a collection of illustrations that show you how to install your pickups with some explanation added to explain how they work and why they are unique. To use this guide, you will need to know how to read the illustrations and apply them to your installation. Visit some of our articles on pickup wiring and installation if you need more background information.
Single Coil Wiring
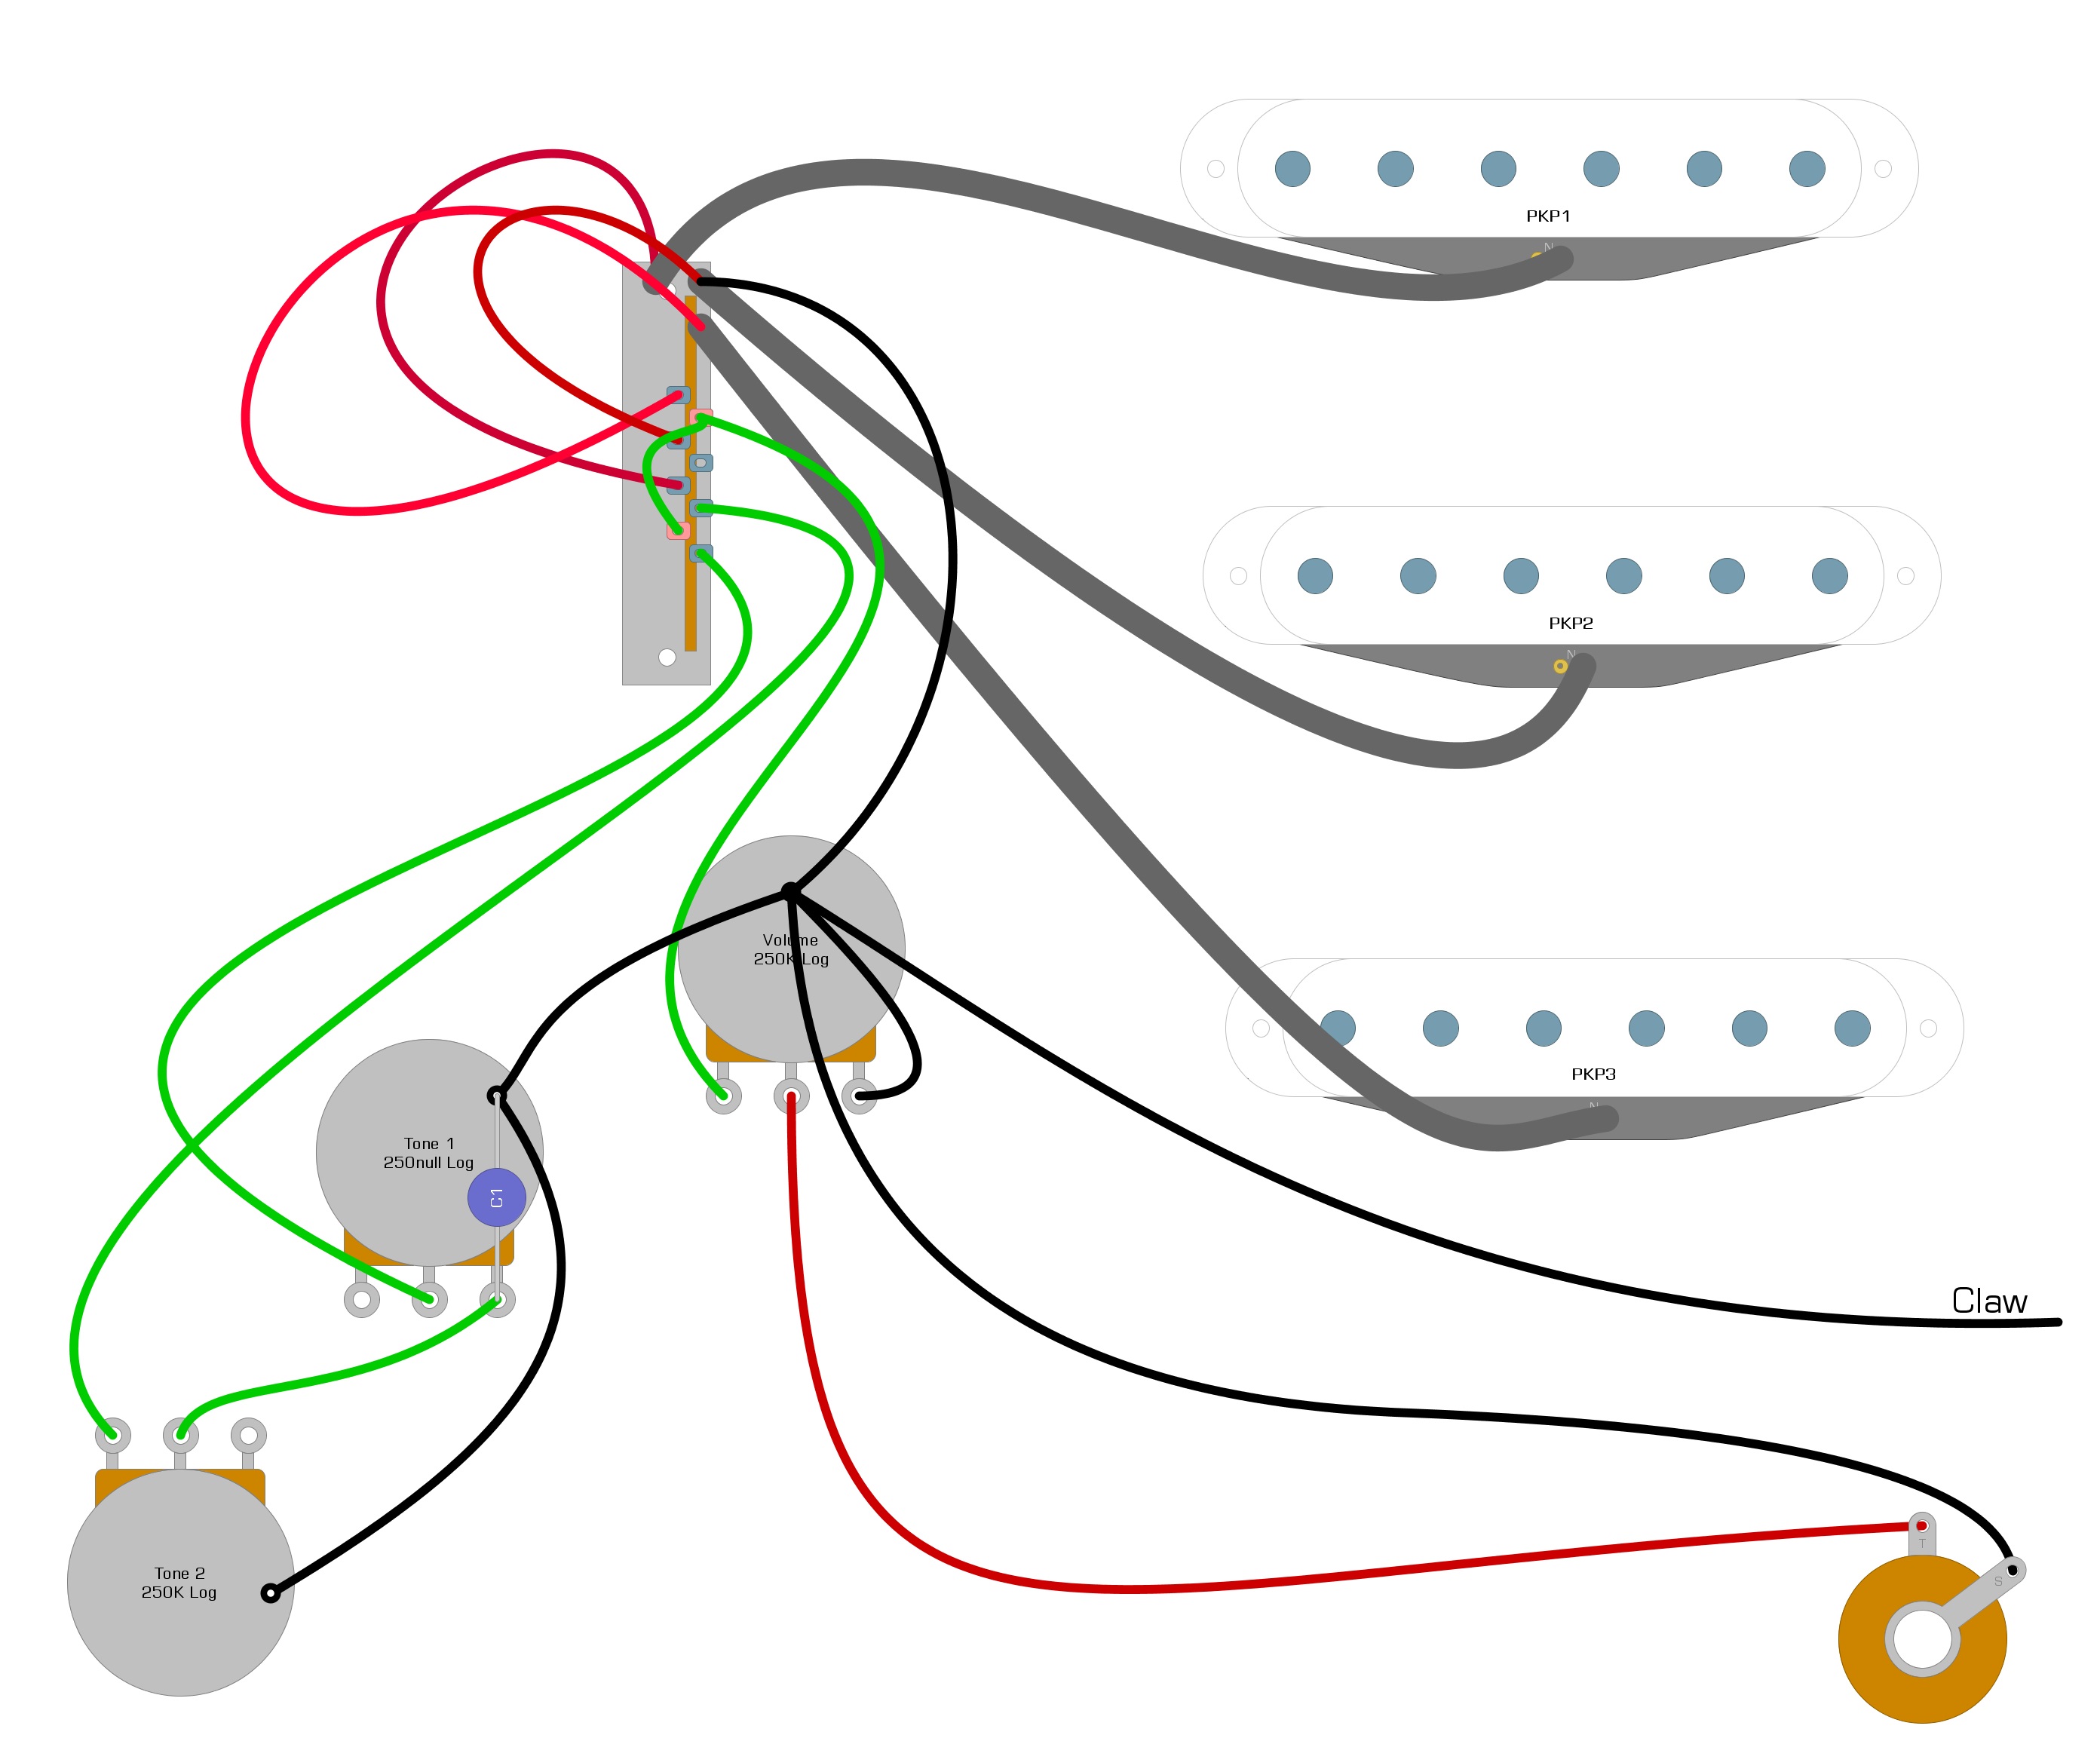
The Fender Stratocaster uses three single-coil pickups to create five possible tones with its five-way pickup selector switch. Single-coil pickups have two wires that you’ll need to solder to install into your guitar. Bartolini has several single-coil models for sale that you can use to replace any other, including those in a Fender Stratocaster. They use a braided wire scheme, which means the HOT wire is inside a braided metal shield wire that acts as the GROUND.
We’ve illustrated how to install Bartolini pickups in your Fender Stratocaster in Example 1.
Example 1
Humbucker Wiring (4-Wires)
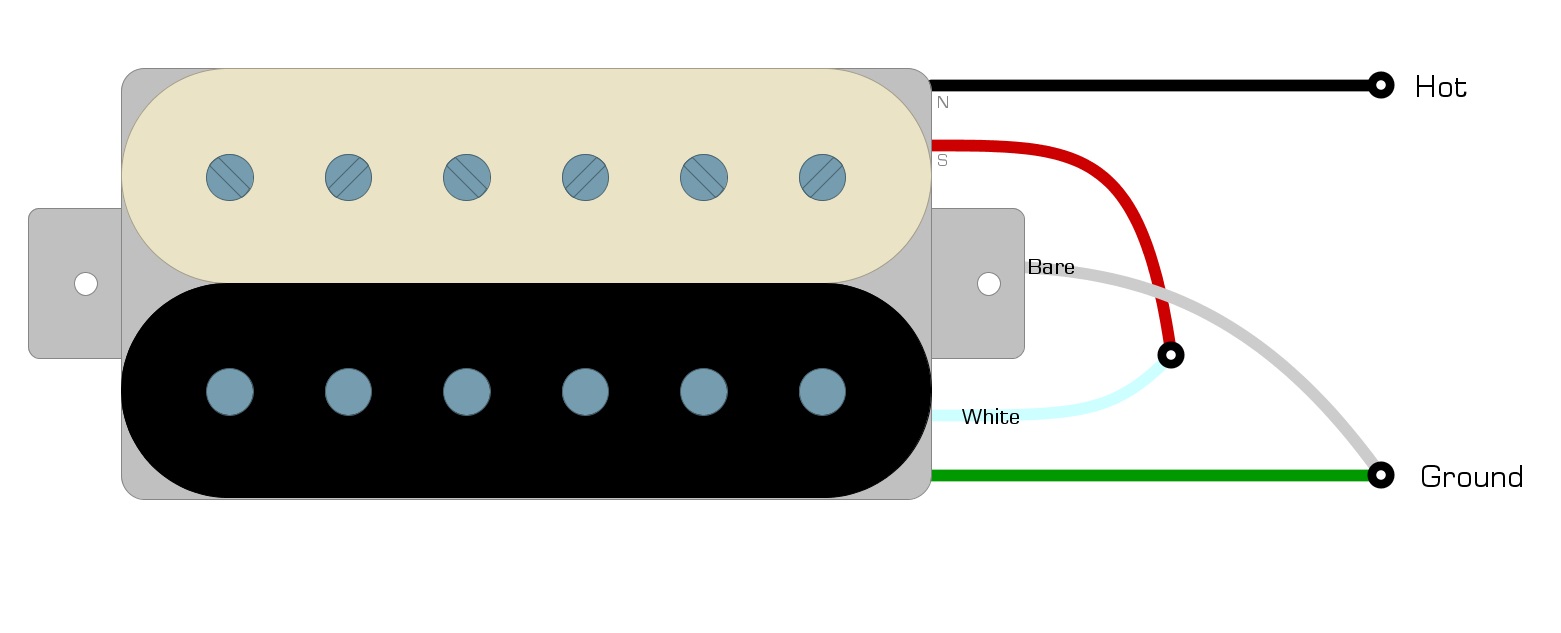
The humbucker uses two coils to eliminate the noise inherent in single coils. They wind the coils opposite each other, and the signal from the two are combined, which removes the noise through phase cancellation but leaves the guitar signal unchanged. Bartolini has several humbucker models available, and they each have four colored wires plus one bare wire so you can perform modifications on your guitar to find new tones. To install a four-wire humbucker, you need to know the wiring code to know which wire is HOT and which is GROUND.
Bartolini Wiring Code
- Black = HOT
- Red + white = soldered together and taped off
- Green + bare = soldered together and GROUND
We’ve illustrated the Bartolini wiring code in Example 2.
Example 2
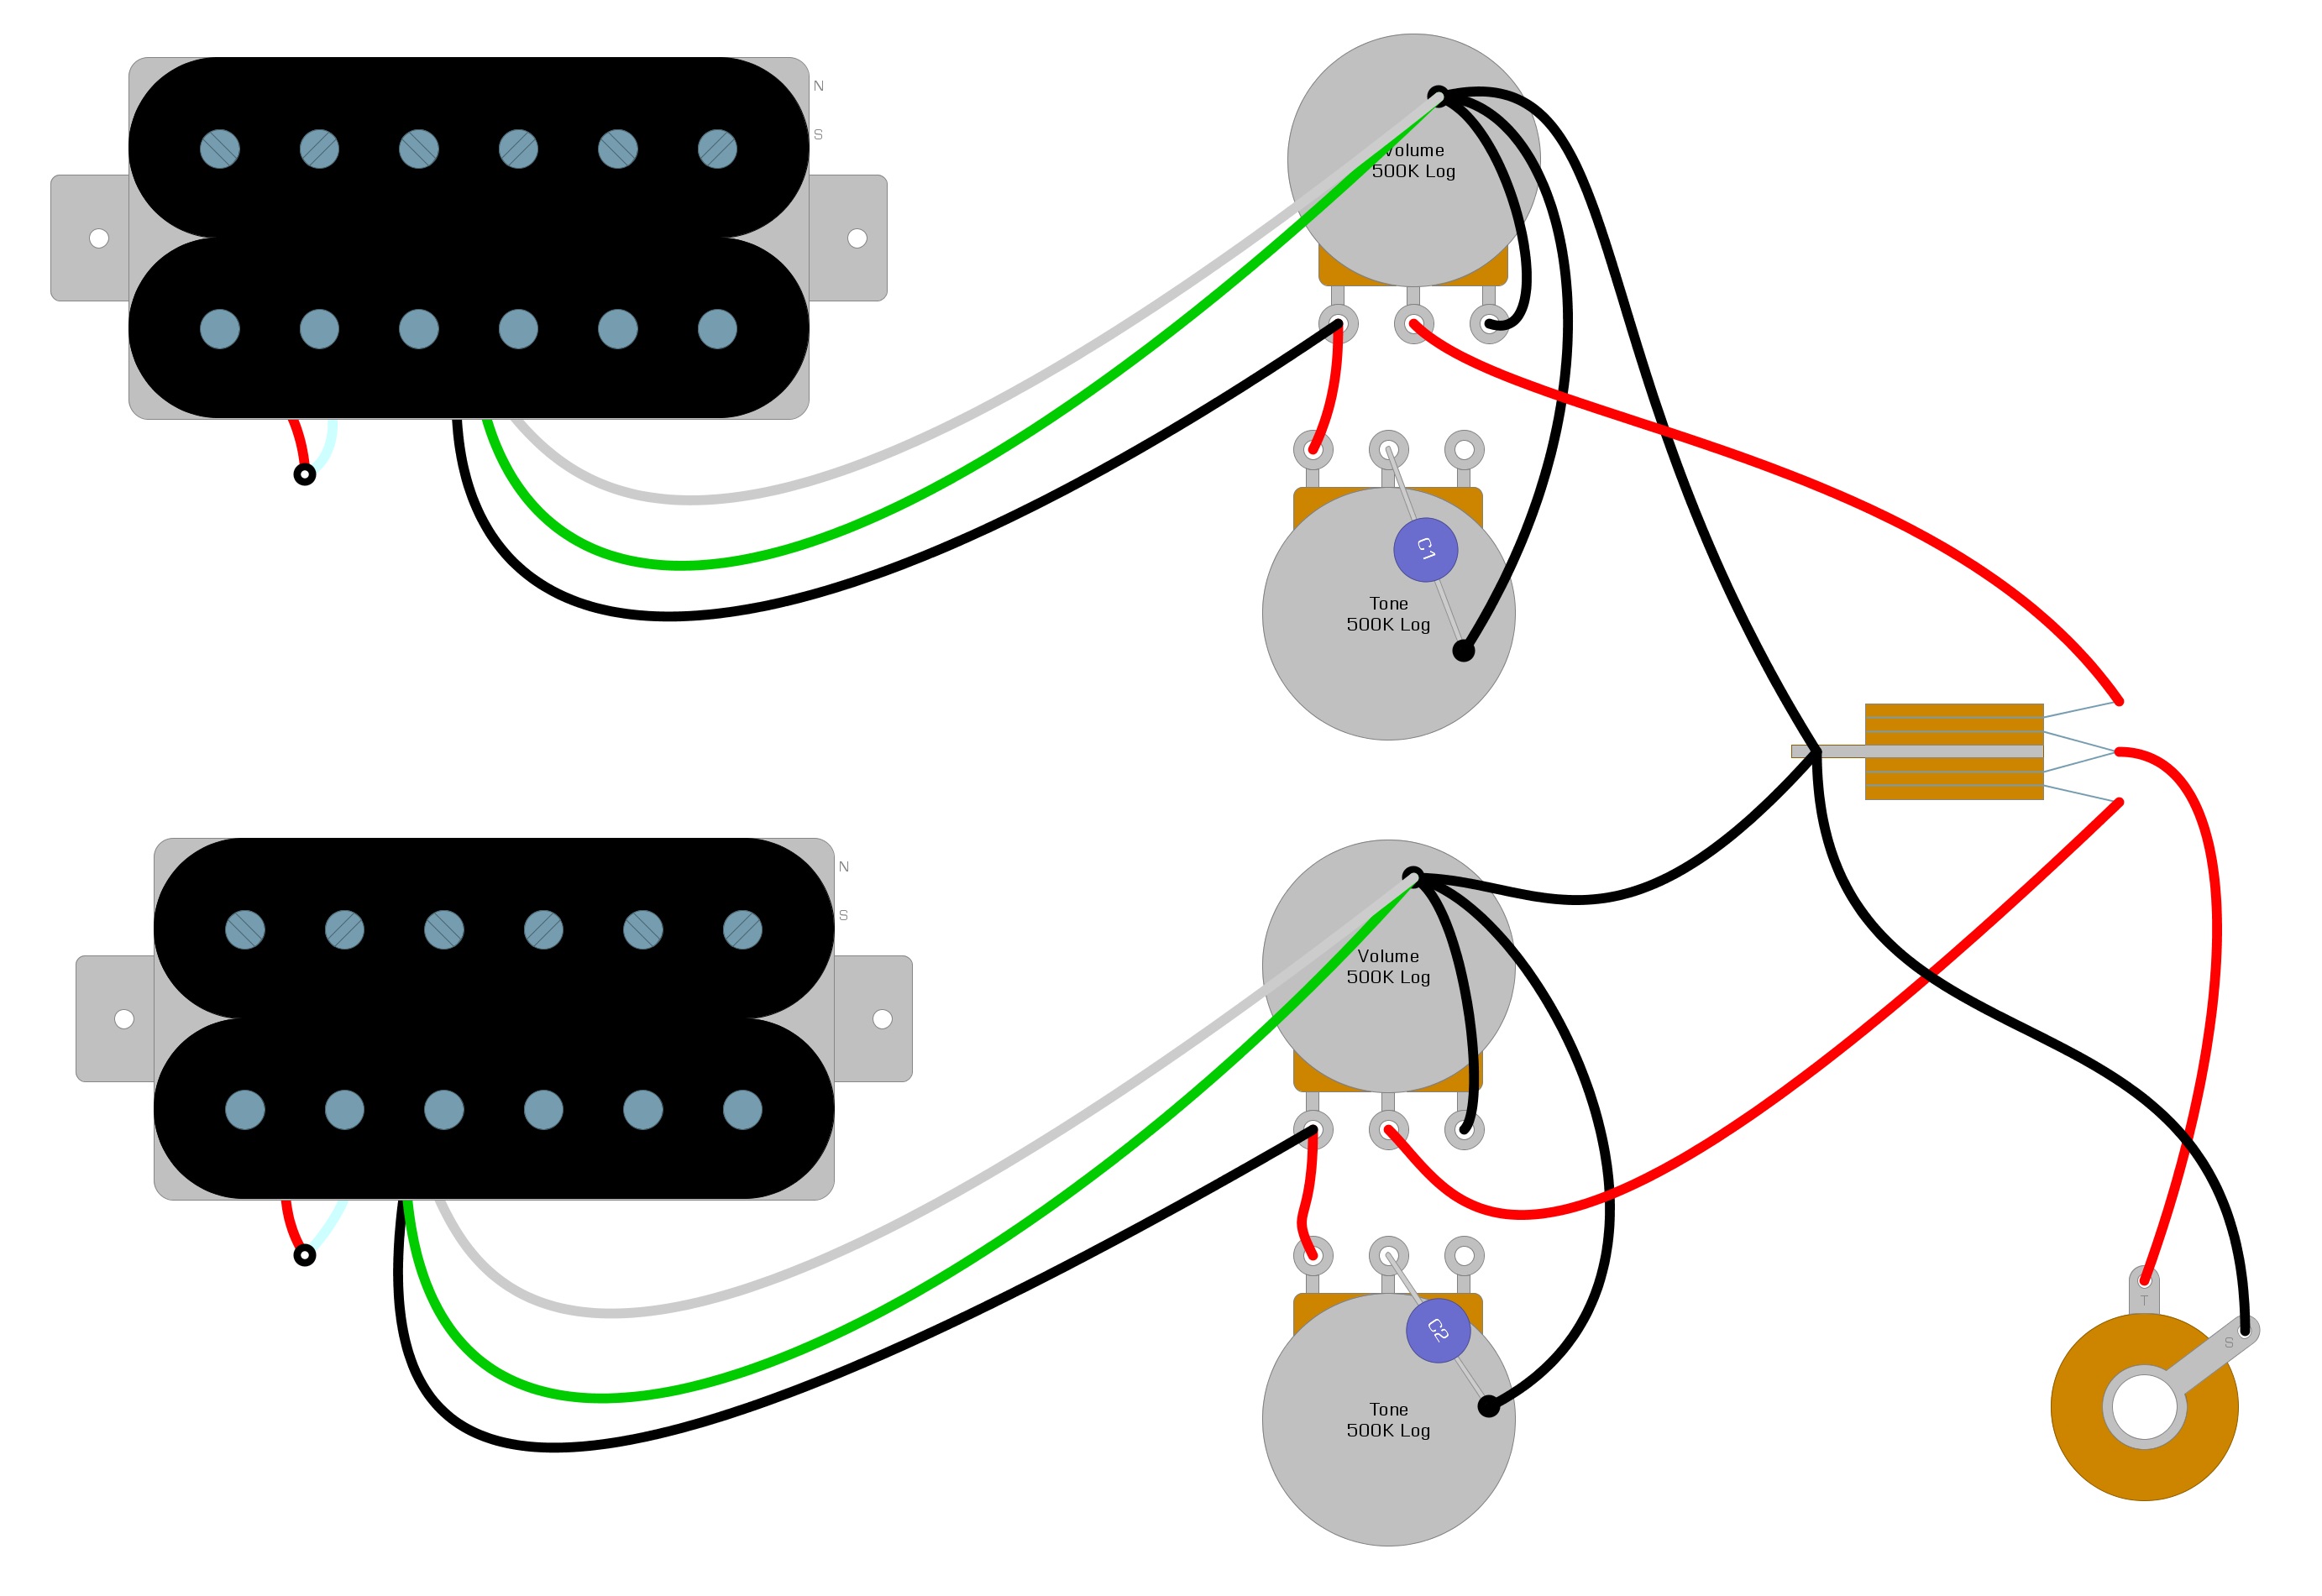
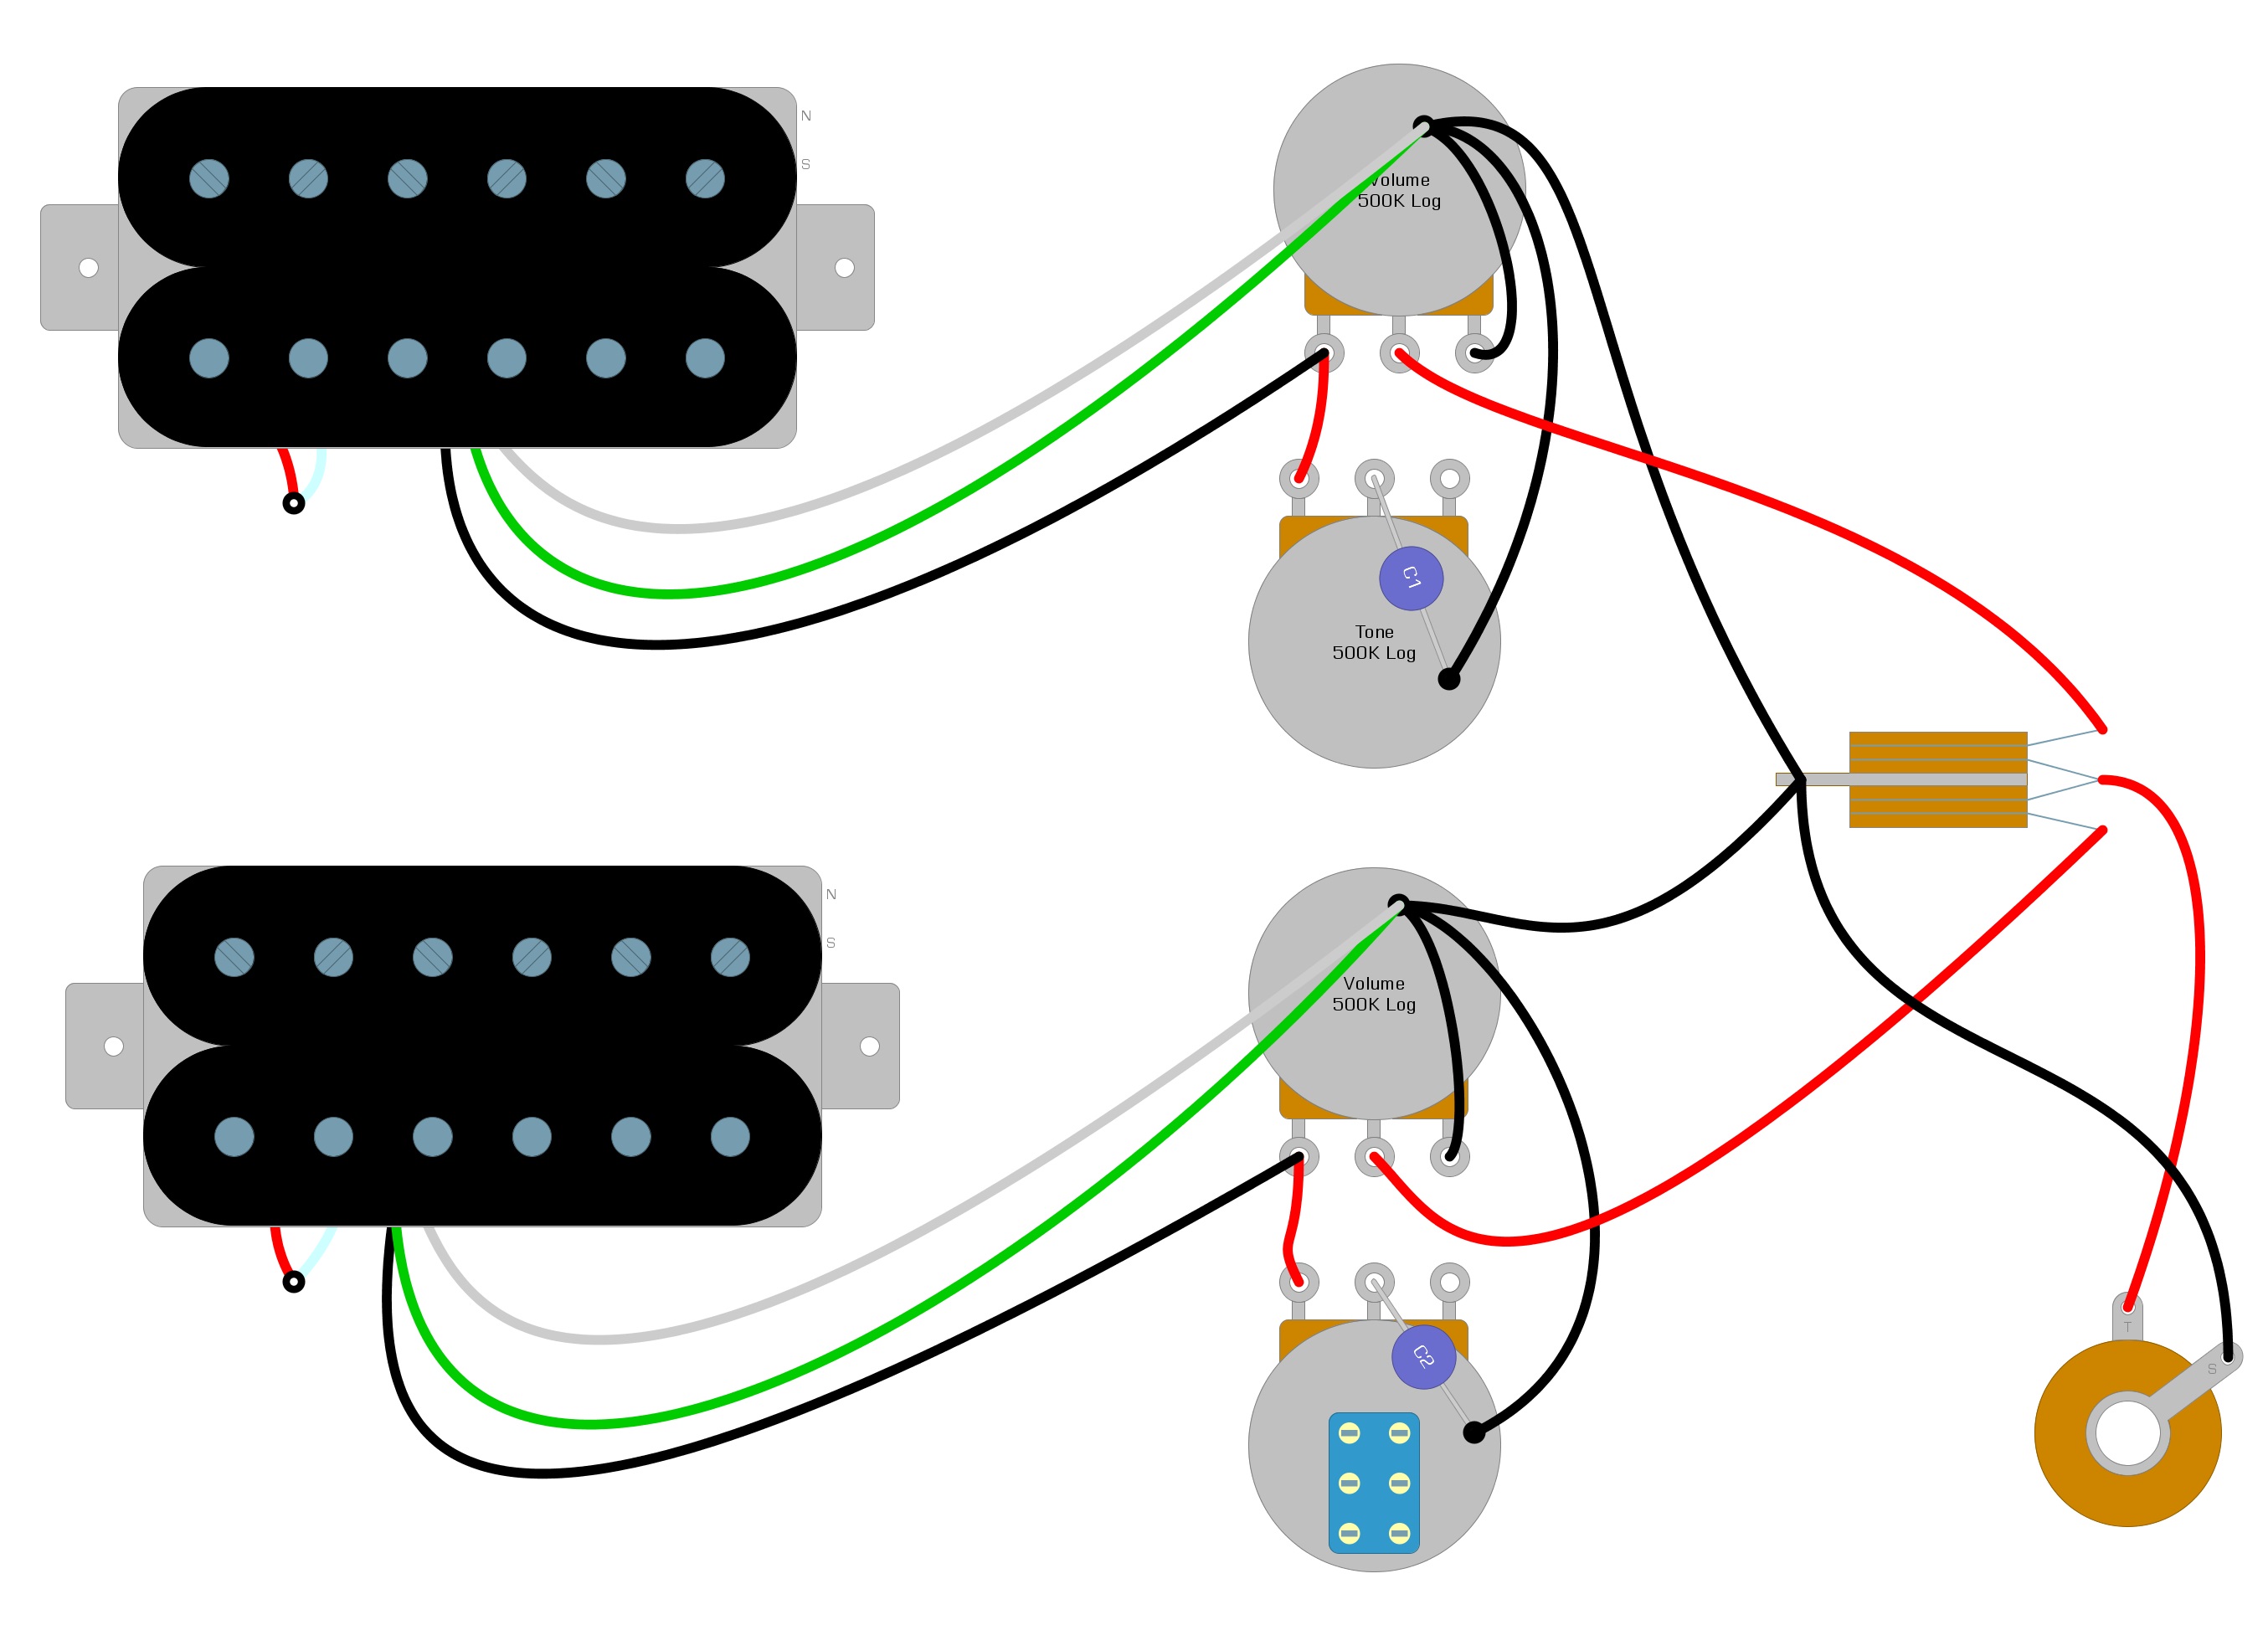
Once you know the wiring code, you can install the pickup. We’ve illustrated how to install Bartolini in your Gibson Les Paul-style guitar in Example 3
Example 3
Humbucker Coil Splitting (4-Wires)
In this next section, we’ll show you how you can perform a coil-split modification on your guitar. A coil-split modification will allow you to turn off one of the coils in your humbucker to one that produces a new tone, similar to a single-coil. First, you convert one of your standard tone controls into a push-pull pot. The push-pull pot looks complicated, but it’s quite simple, and it is initially installed in the same way as a typical tone knob.
In Example 4, we illustrate what a Gibson Les Paul style guitar would look like with the push-pull pot.
Example 4
Once you have the push-pull installed, you only have two steps left.
- Solder the red and white wires from the Bartolini humbucker to the switch.
- Add a short GROUND wire from the switch to the case of the tone control.
We’ve illustrated these final steps to complete the Bartolini coil split in Example 5.
Example 5
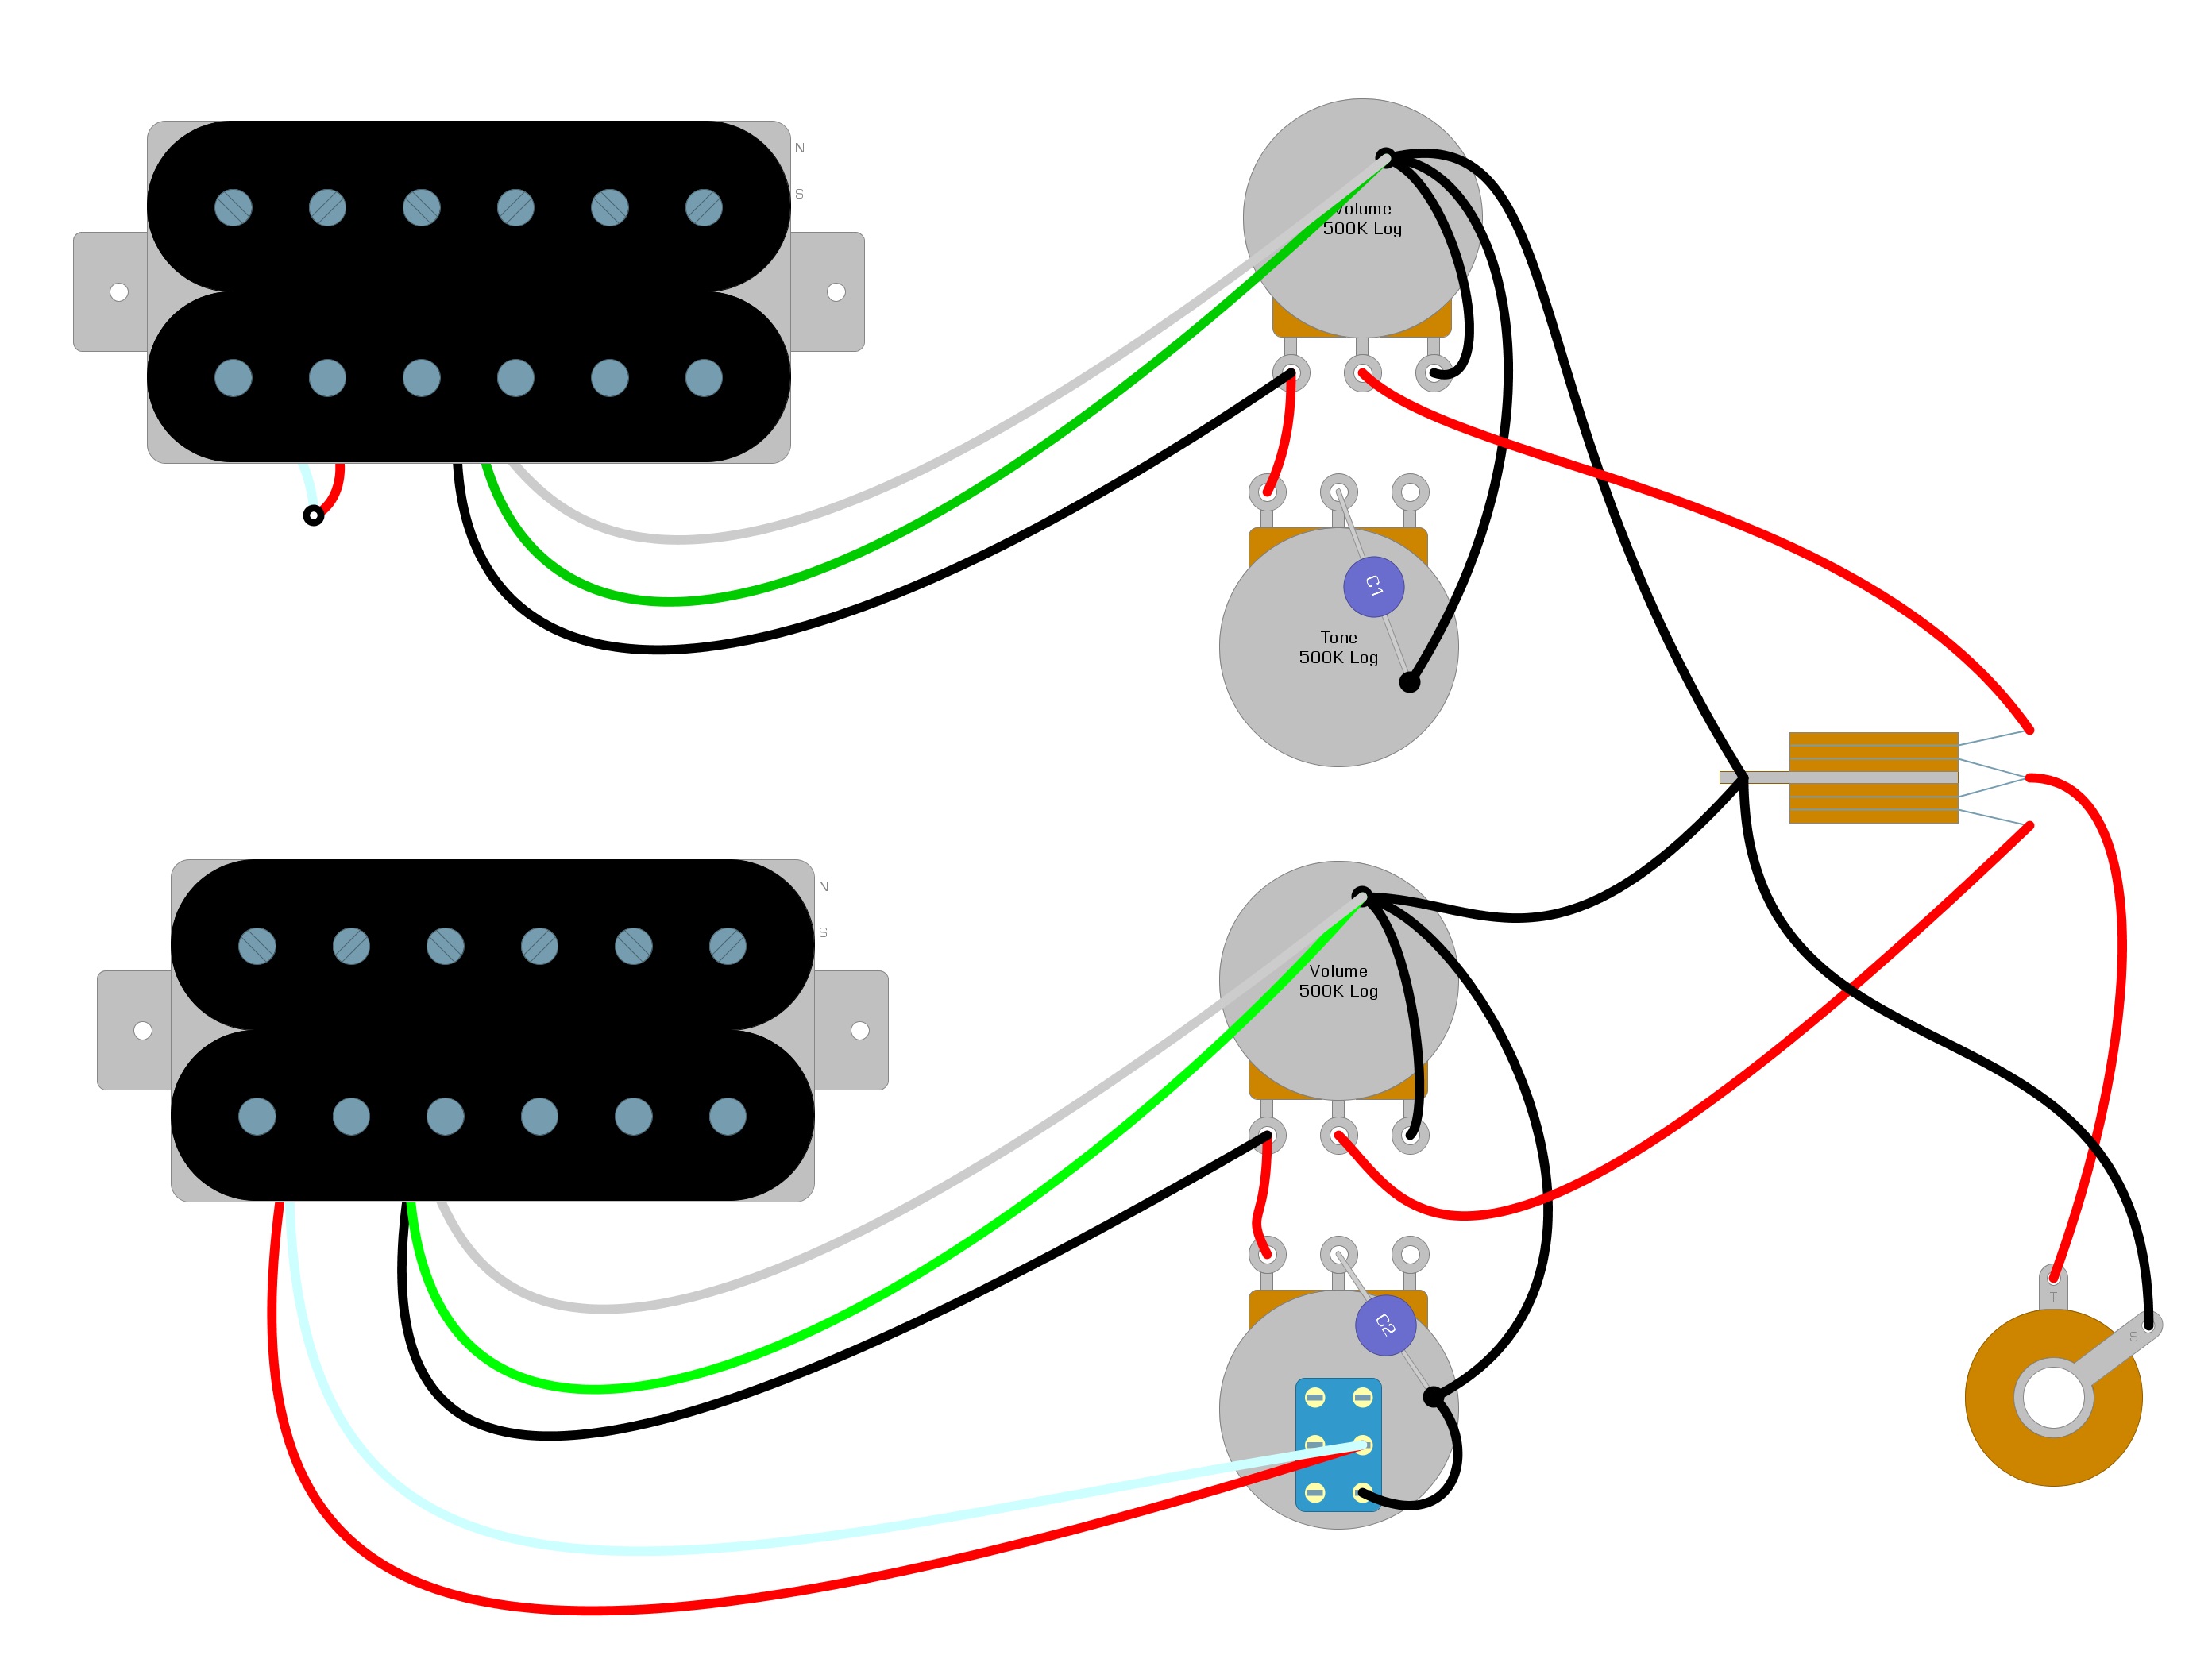
When you complete the modification, pulling out the push-pull will split the coil giving you access to the new tone. Pushing it back, it will return everything to normal.
Summary
Bartolini pickups sound great, and you’ll hear their high quality at the first note, after installing them. They also have a full line of onboard electronics to help shape your sound further. For guitar players that have a lot of versatility in their playing, the access to new combinations of tones and sound is a perfect choice.
We hope that this guide has helped you get your pickups working. If you’ve enjoyed reading, feel free to share this Bartolini pickup installation guide on Facebook and Twitter. For more articles on guitar electronics, visit humbuckersoup.com.