By Ed Malaker
Posted 11/01/2019
If you live in an area with a lot of electromagnetic interference, you might be in need of a shielded guitar cavity. Shielding the control cavity is one of the key methods of getting maximum protection from interference. Shielding kits are often for sale online, but here are some excellent DIY methods you can use to get the job done yourself.
What is a Shielded Guitar Cavity?
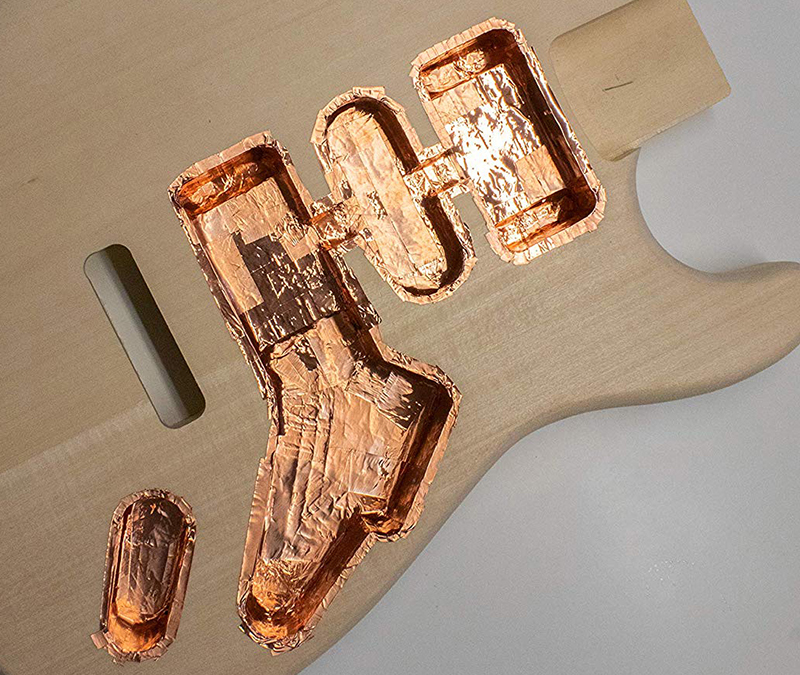
A shielded cavity is when we coat all surfaces inside the guitar with a shielding paint or shielding foil. There are several products available online or at the local hardware store that will work correctly. We’ll need to use the paint or foil to coat the cavity cover or pickguard, essentially creating a metal box to hold all of the guitar’s electronics.
What are the Benefits of a Shielded Guitar Cavity?
The shielded cavity protects our electronics from electromagnetic and radio frequency interference at every angle. This interference can enter your signal and create a static or buzz in your sound. Many items around the home can cause interference, including your refrigerator, microwave, washer, dryer, and fluorescent lighting. Power transformers and street lights can also cause interference.
A shielded guitar cavity will go a long way towards preventing the interference from reaching your signal. Shielded wire leaves your volume and tone pots exposed, so shielding the cavity does a better job of protecting your guitar.
How Much Does it Cost to Shield a Guitar?
The cost of shielding your guitar is going to be dependant on what type of shielding you decide to use. Aluminum foil tape for guitar shielding is not very expensive, and copper foil tape is only a few dollars more.
Shielding paint will be up to about 5x more expensive than foil tape, and can cost up to $50 or more depending on which brand you choose to use.
The least expensive approach to creating a shielded guitar cavity is to use ordinary aluminum foil. Aluminum foil for EMI shielding will work as well as any other shielding method, and you might already have some around the house.
Tape vs Paint for EMI Shielding
Both approaches will have very similar results, and both will have pros and cons.
Tape Pros
- There’s less of a mess
- It’s reversible
- It’s inexpensive
Tape Cons
- Might loosen over time or not stick properly
- Tough to work in tiny areas
- Can be tough to cut to the perfect size
Paint Pros
- Easy application — no measuring or cutting
- Long-lasting and won’t fall off over time
- Useful in tiny, hard-to-reach areas
Paint Cons
- Expensive
- Can be messy
- Irreversible
- May not be as conductive
We recommend the tape, at least at first, because it’s cheap and reversible. You can easily switch to paint later if you think it is necessary.
Copper Tape vs Aluminum Tape
Copper is the more conductive metal, but it’s difficult to say if it’s a better shield. We are creating a type of “Faraday Cage” which might not depend on conductivity. There are examples of useful Faraday Cages made from all kinds of metals. Both metals are popular and work well, but aluminum probably has a larger market share, because of the lower cost.
Copper tape usually has conductive adhesive and is much easier to solder than aluminum. Aluminum tape has more of a general purpose that often lacks conductive adhesive. Aluminum is also tricky to solder.
We recommend going with the copper tape, because of the ease of soldering and because it’s often packaged with conductive adhesive.
How Do We Shield a Guitar Cavity?
Shielding the guitar is quite simple, and only requires removing the cover and electronics from the cavity and coating the inside with a conductive material. You will also need to coat the inside of the cavity cover.
If you unsolder the output jack, you might be able to unscrew the volume and tone controls and leave the rest of the electronics soldered together. Carefully move them to the side while you shield the cavity. If you do need to unsolder more wires, remember to write down or take a picture of the way the wires are supposed to go so you can replace them when finished.
If you’re using tape, take your time and cover the area with long flat strips. If you’re using paint, apply a thick coat evenly across all surfaces. Don’t worry about how it looks — that’s secondary compared to coating the entire surface.
When your shielded guitar cavity is complete, replacing the cover should create a metal box, with the only gaps in coverage being the holes for the volume and tone controls and the switch.
Replacing Your Electronics
Replacing the electronics will be a little more tricky than removing them, because the shielding that we installed can cause guitar grounding issues. The shielding will come in contact with the metal casing of the pots and the switch, creating a ground loop. If you have a ground loop, it will act as an RF antenna which will cause a lot of unnecessary noise.
Install Without Ground Wires
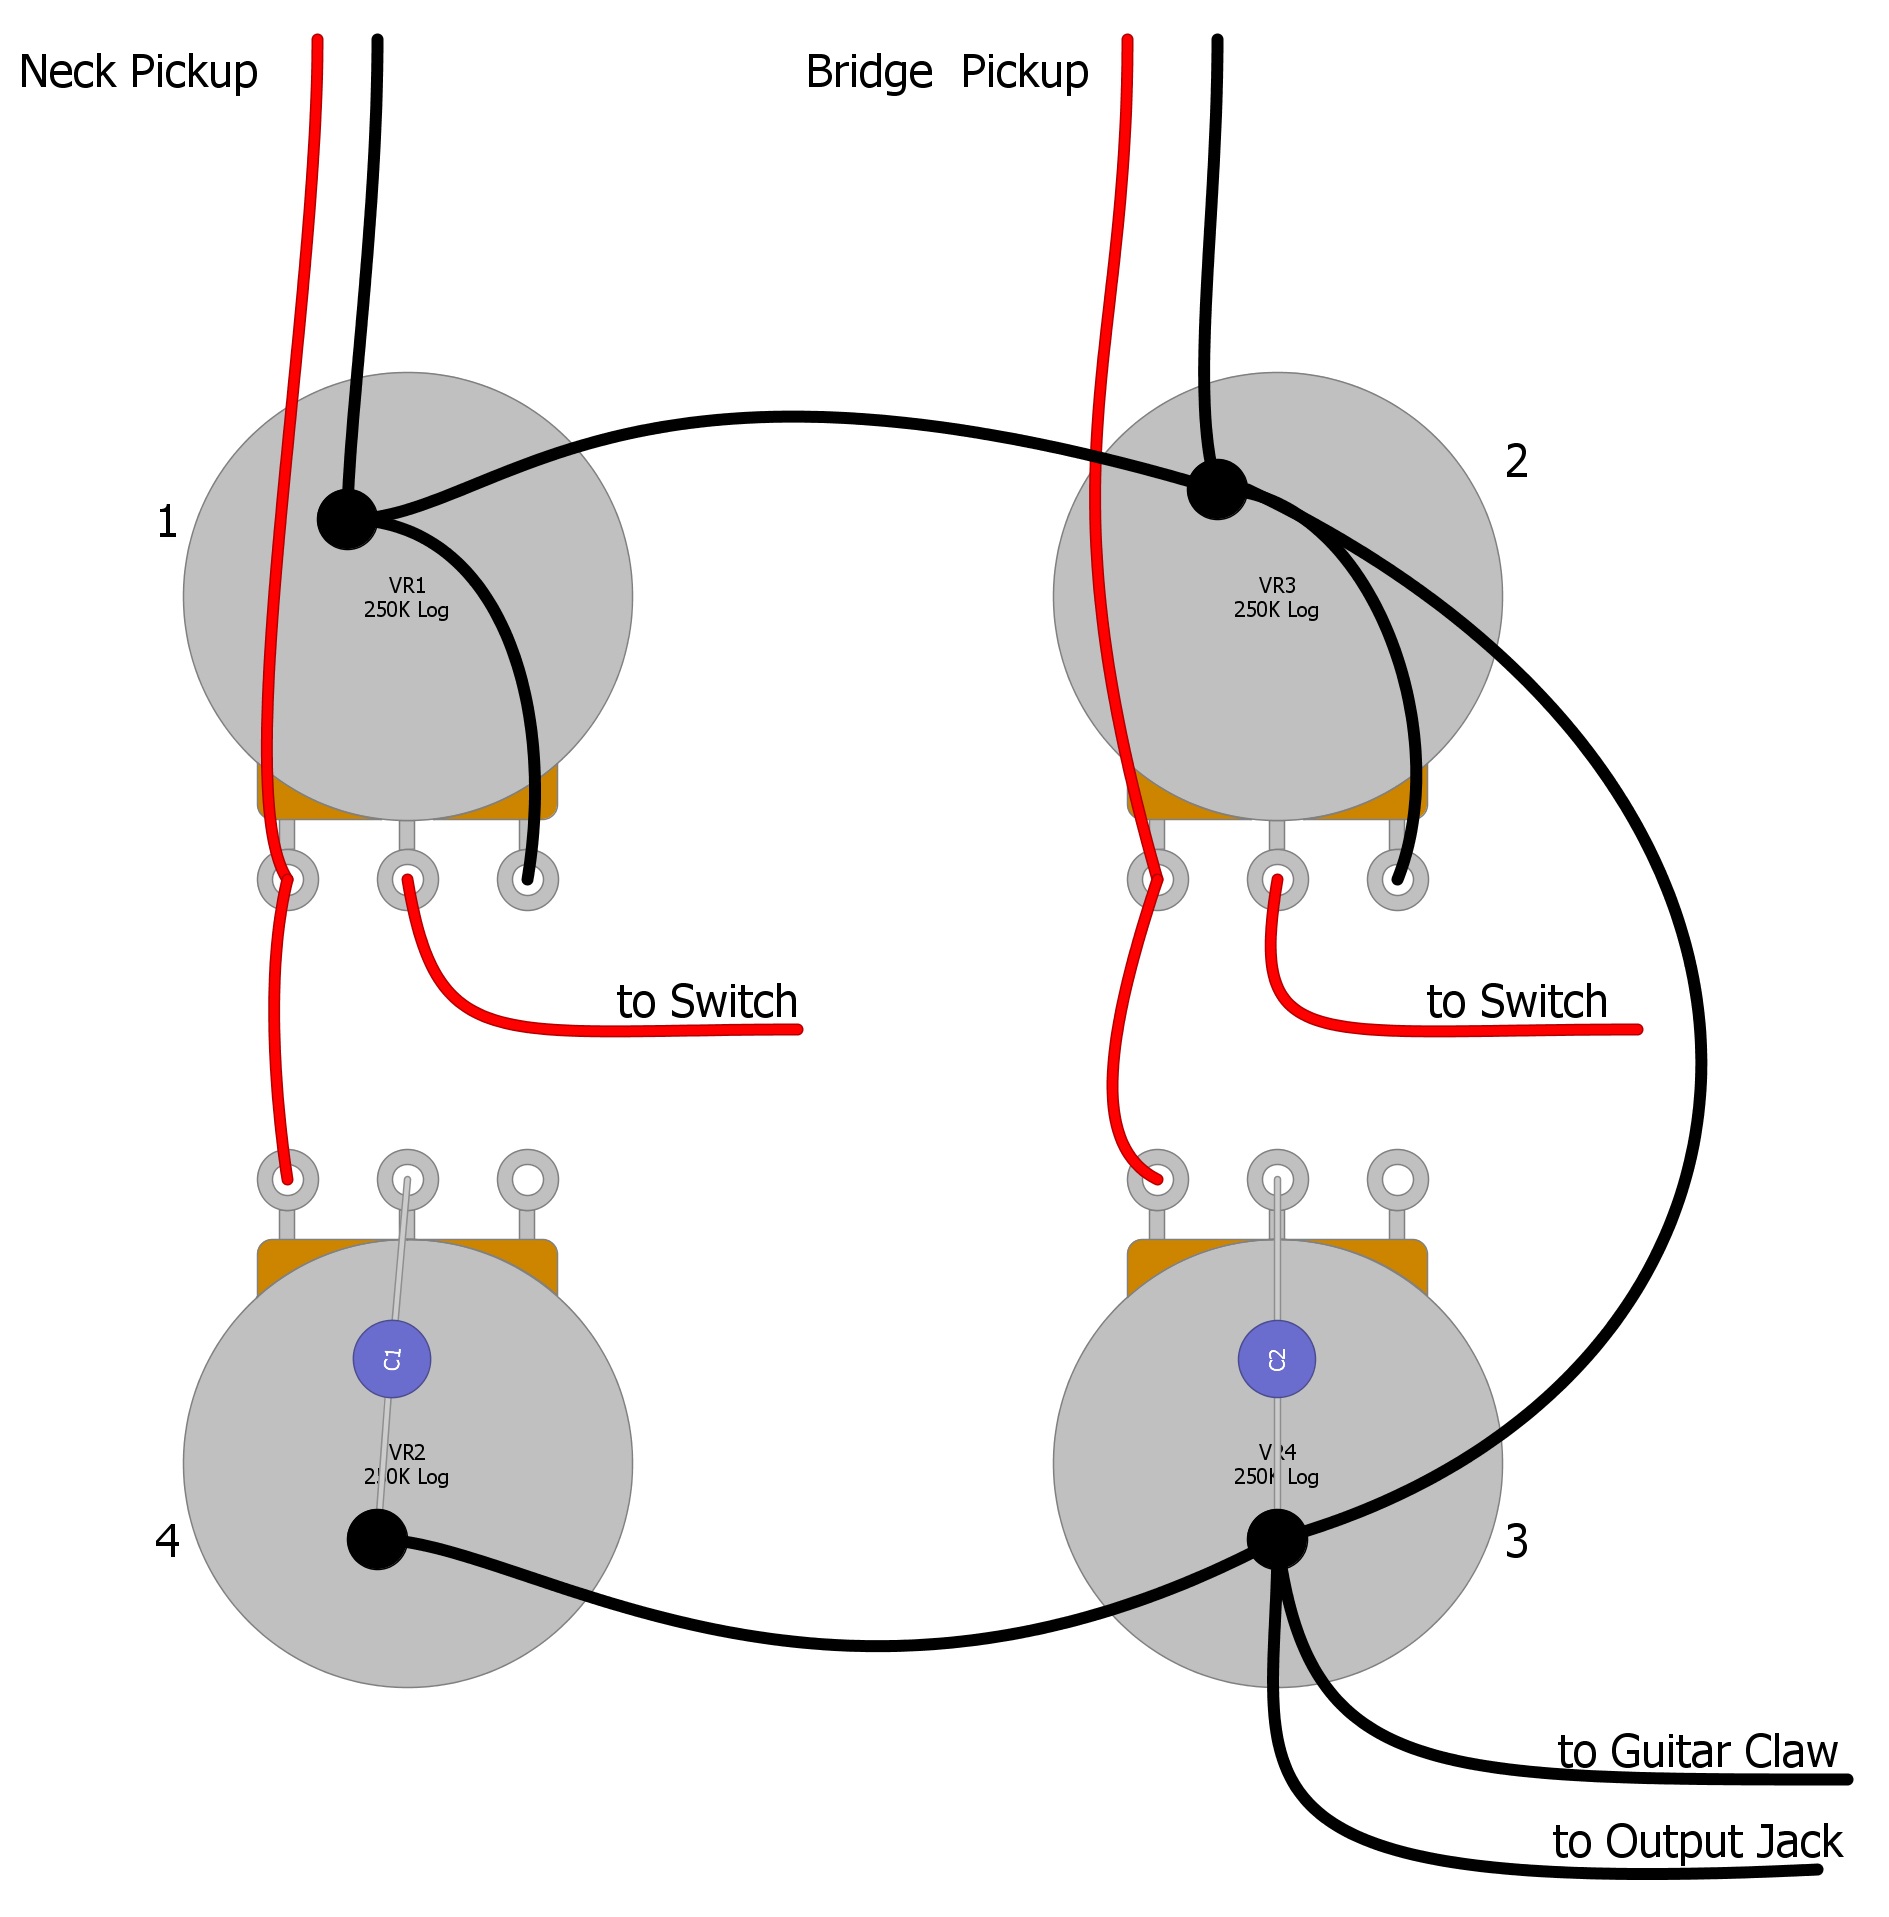
The best solution is to re-install the electronics the way they were, including the output jack and then remove the ground wires. For instance, if you play a double humbucker guitar, such as a Gibson Les Paul, your electronics cavity might typically look similar to Figure 1.
Fig 1
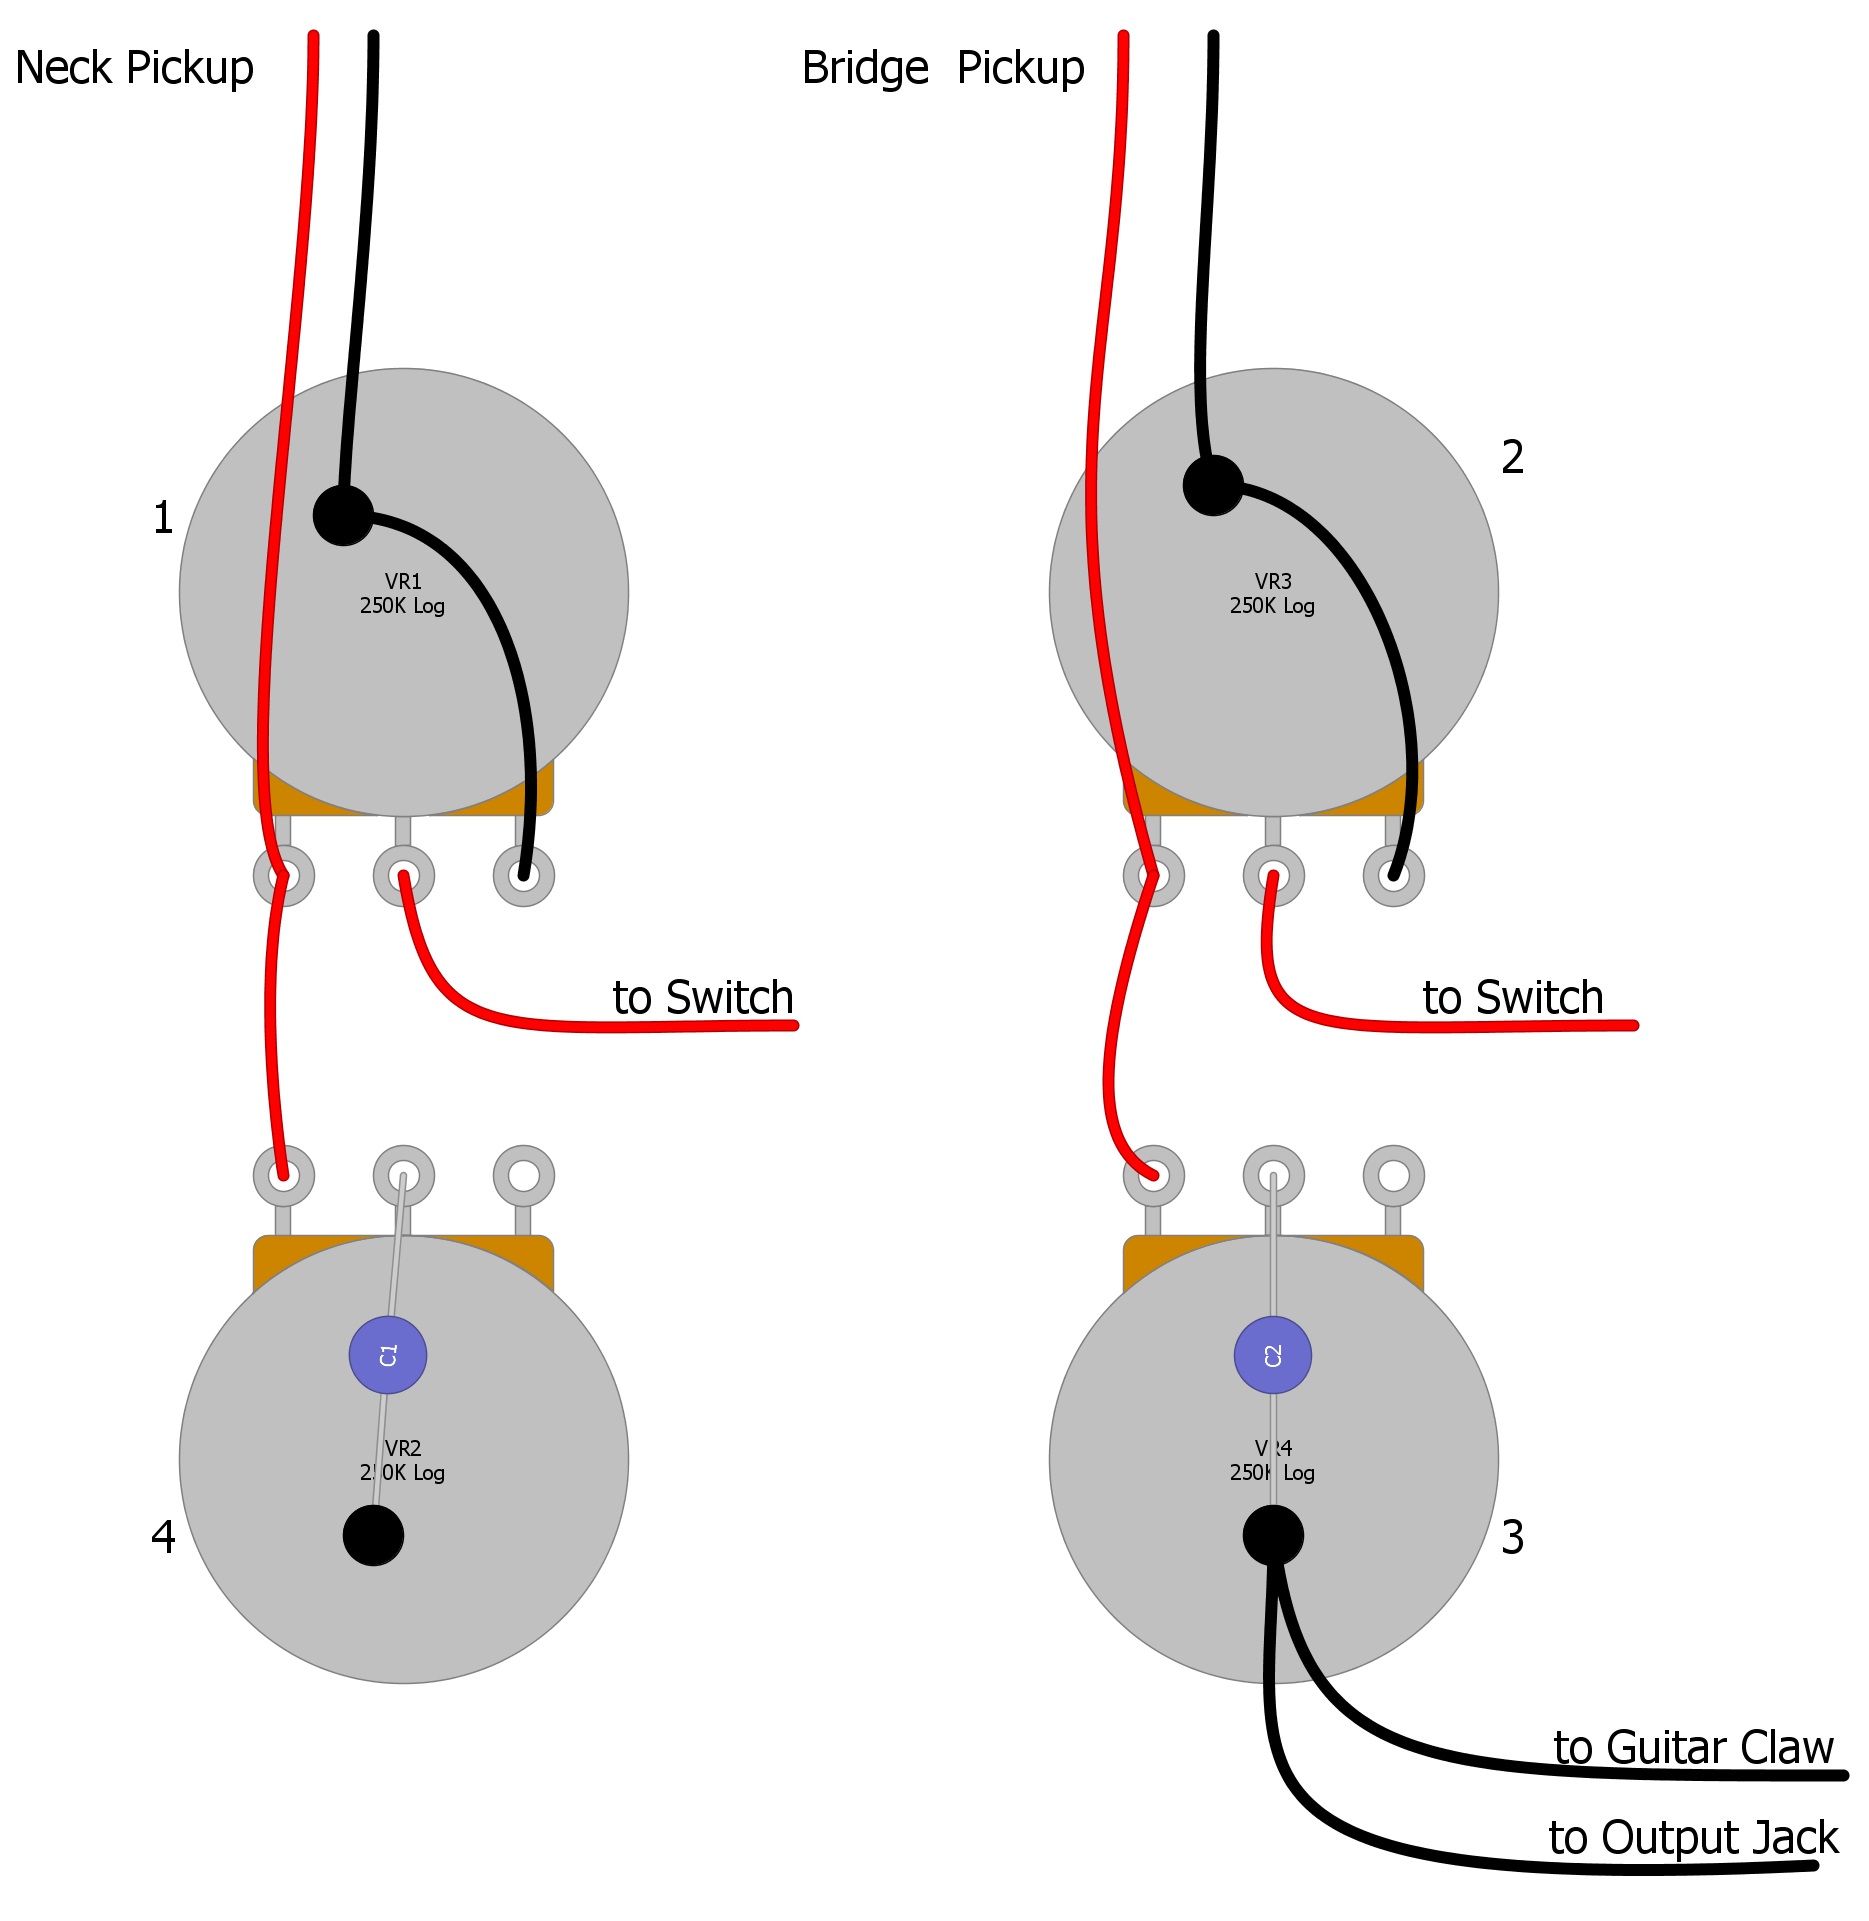
With the shielding in place, you will need to remove some of these wires to make it look like Figure 2.
Fig 2
Ground the Shield
Grounding the shield is the most challenging part of this project. We need to solder a wire from the shield to the back of the volume pot. It sounds simple, but it’s tough to get the shield hot enough for the solder to stick. You will need a good connection between the shield and the back of the volume pot for it to work.
Test the Shield
The best test is to plug the guitar into your amplifier. If the guitar produces sound, the shield is operating correctly. If the guitar isn’t working, the shield is most likely not connected to ground. Less likely, there isn’t a good connection between the pots and the shield.
A poor connection could be caused by the paint not being thick enough, or the tape having a non-conductive adhesive.
Summary
A shielded guitar cavity is not very difficult to create, and it can dramatically quiet the overall sound of your guitar signal. Is it absolutely necessary? No, but if you play your guitar in an environment with a lot of electromagnetic interference, we highly recommend giving this mod a try. If this article helped you out on shielding your guitar, please share this post on Twitter and Facebook. Visit humbuckersoup.com for more articles on guitar electronics.


