By Ed Malaker
Posted 11/29/2020
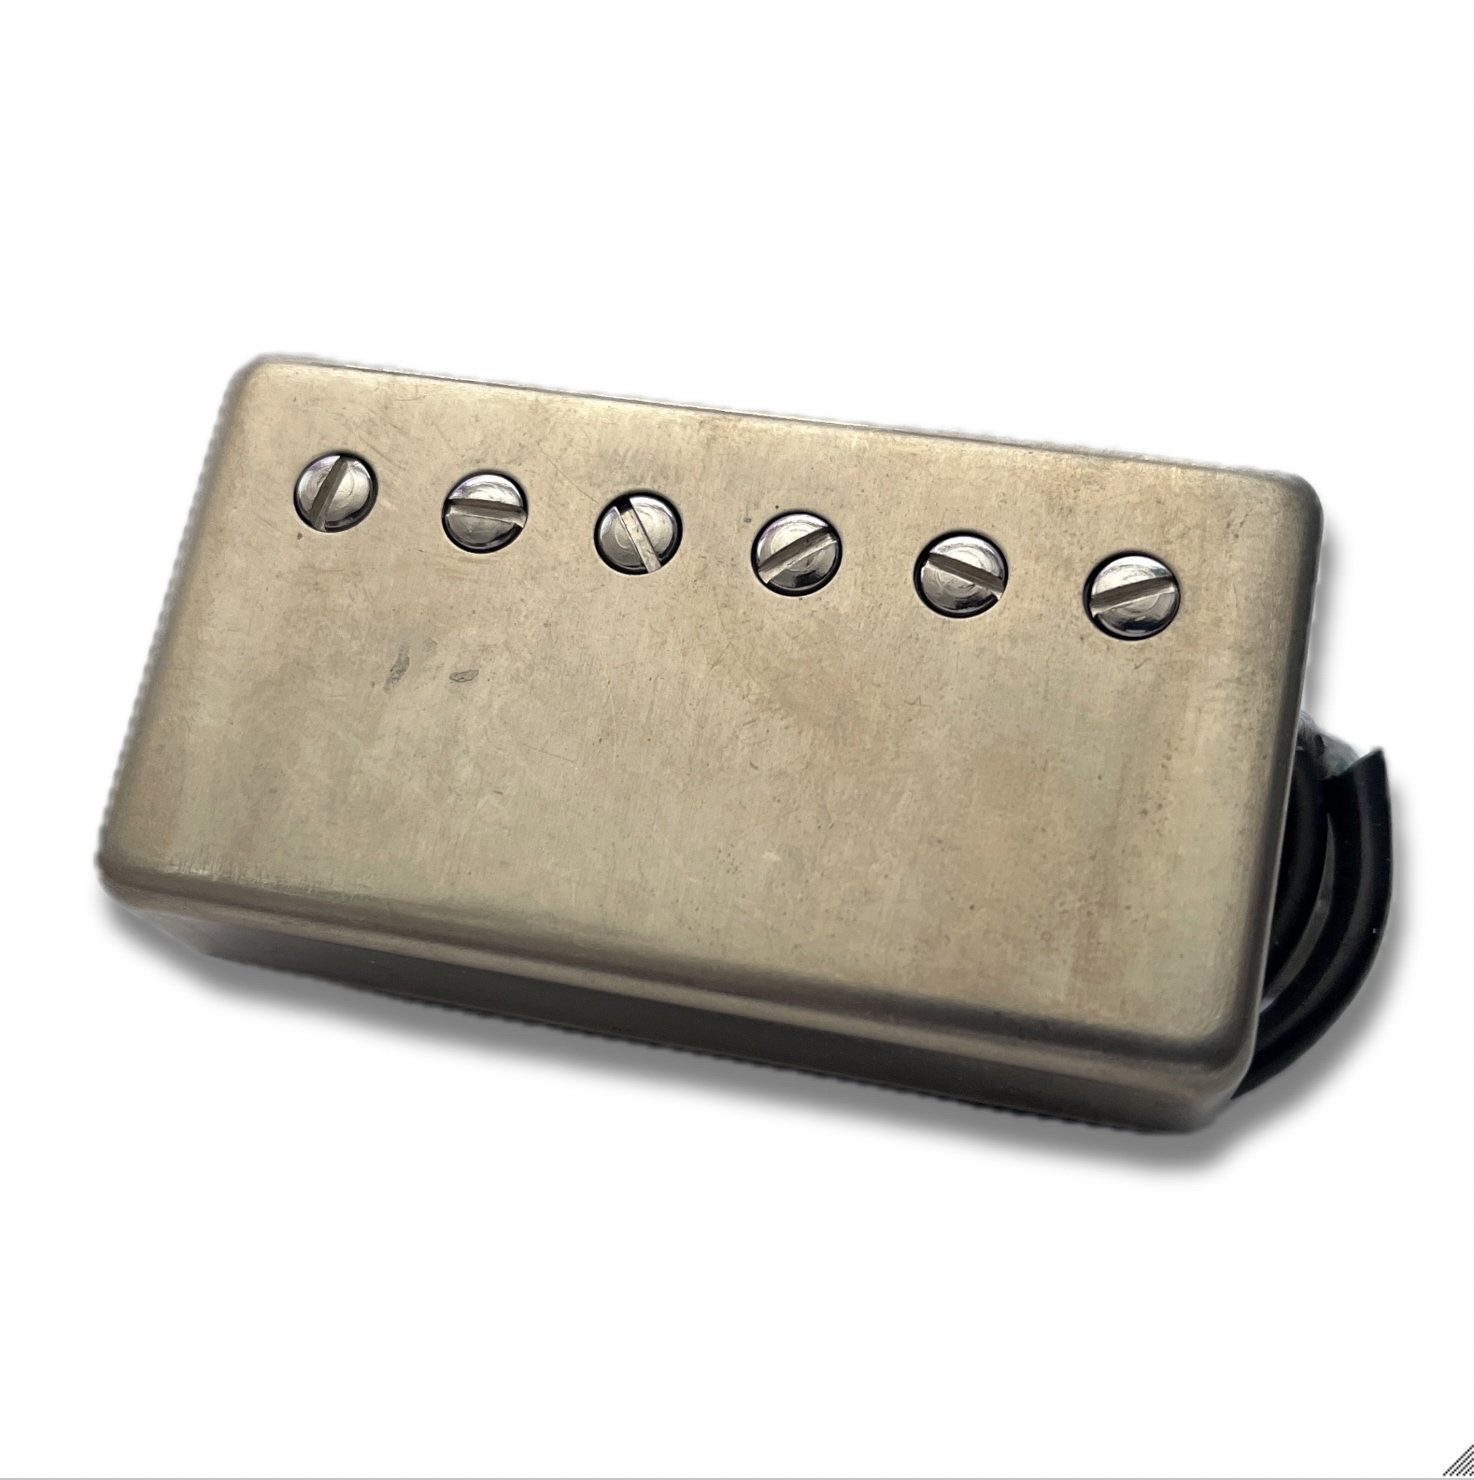
This time around, we’re going to walk through a Seymour Duncan BG1400 wiring diagram. The Seymour Duncan BG1400 is a direct replacement for the standard Fender Telecaster bridge pickup. Unlike the standard single-coil pickup, the BG 1400 is a humbucker. It features two overwound coils for hotter output, and since it’s a humbucker, it’s much quieter than the standard single-coil. It also uses Alnico 5 magnets for more attack and is wax potted to help reduce microphonic noise.
Required Tools
You won’t need a lot of tools to install the Seymour Duncan BG1400. You’ll need a Phillips head screwdriver to remove the control cover, for access to the electronics, and the bridge plate. You’ll also need a soldering iron and a small amount of solder to make the connections. It would help if you also had tape to tape off two of the wires, and you may need wire cutters or pliers, but it’s unlikely.
Make sure you have everything here:
- Phillips screwdriver
- Soldering iron
- Solder
- Electrical tape
- Wire cutters
- Fires
Getting Started
This article assumes that you already have a Telecaster with a working bridge pickup. Since this pickup is currently working, you can open the control cavity and see where the wires are soldered and make a note of it. The Hot wire usually goes to a switch on a Telecaster. We solder the ground wire to the back of the bridge plate, or you can bring it into the control cavity and solder it to the back of the volume pot.
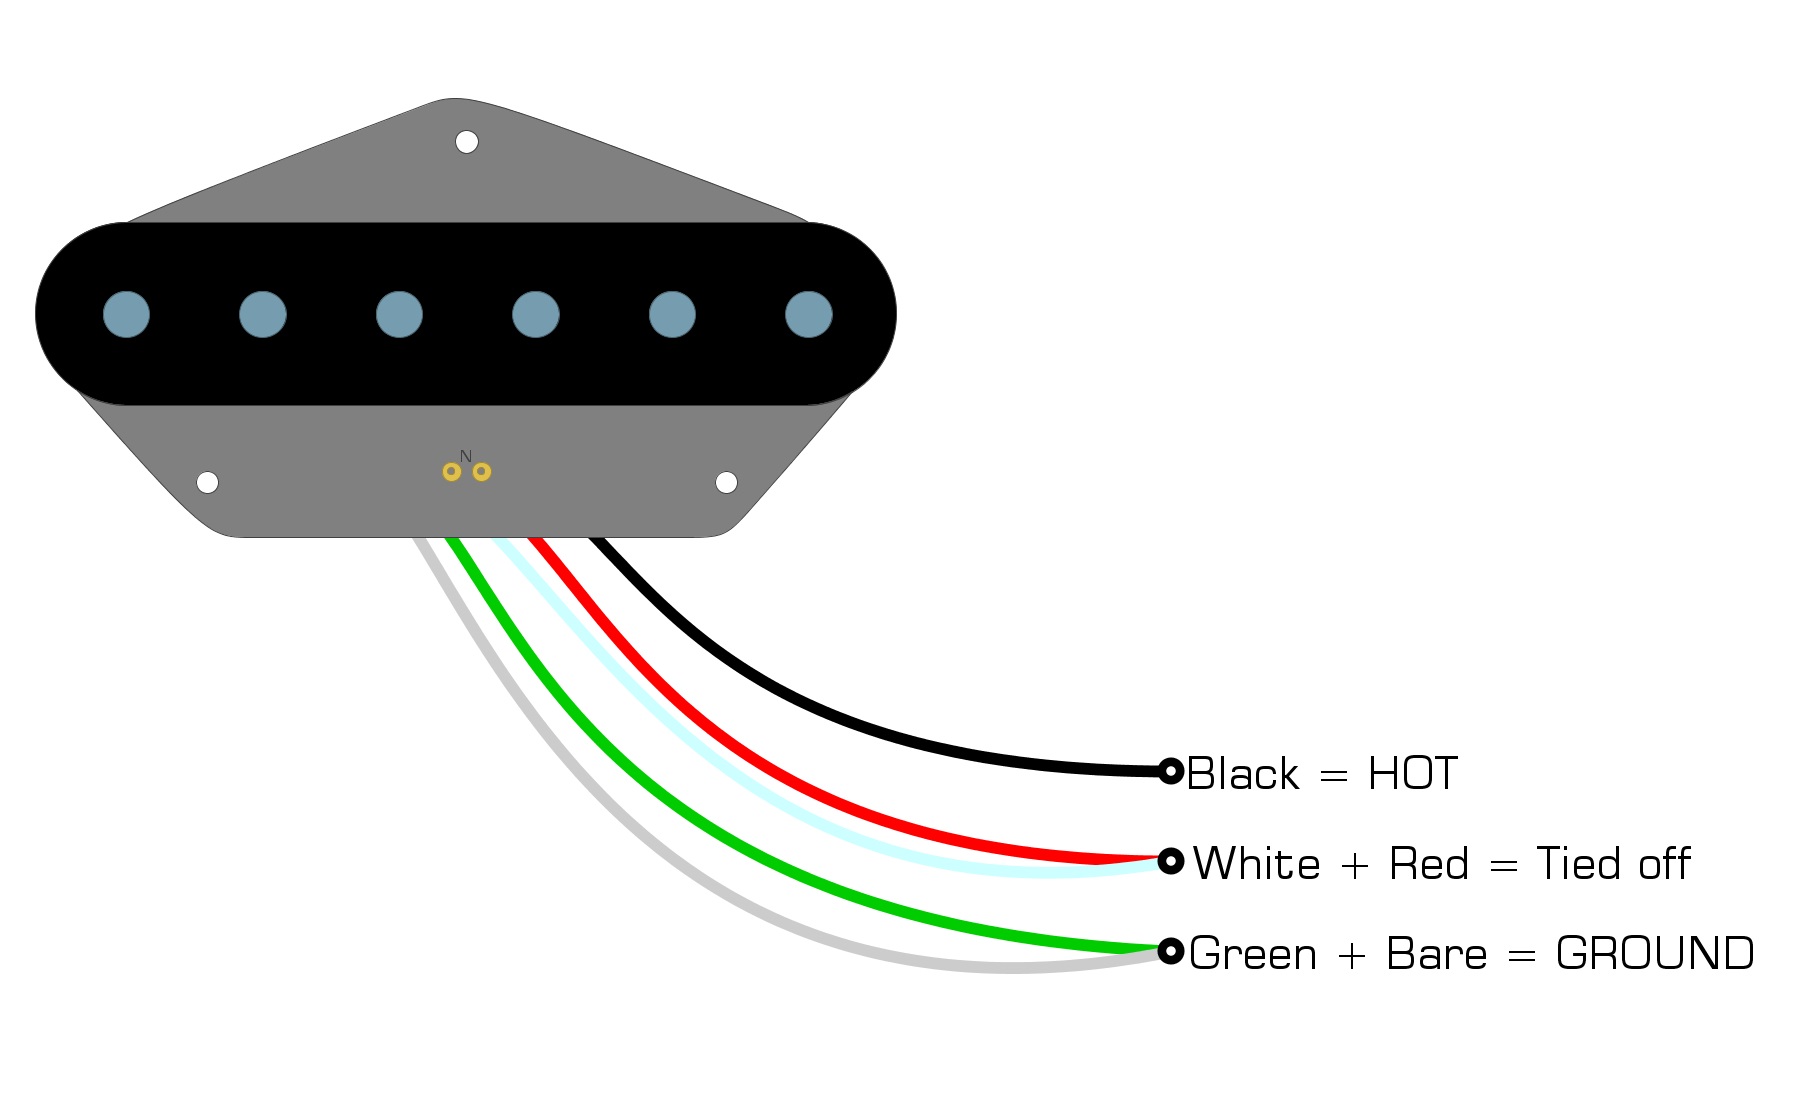
Wiring Code
Unlike single-coil pickups that have two wires, humbucker pickups like the Seymour Duncan BG1400 have four wires. You identify the wiring code by figuring out which of these wires is the Hot, and which is the Ground. Each pickup manufacturer has a unique wiring code, and Seymour Duncan’s is as follows:
Black = HOT
White and Red = Tied and Taped
Green and Bare = Ground
We’ve illustrated this wiring diagram for you in Example 1.
Example 1
Installation
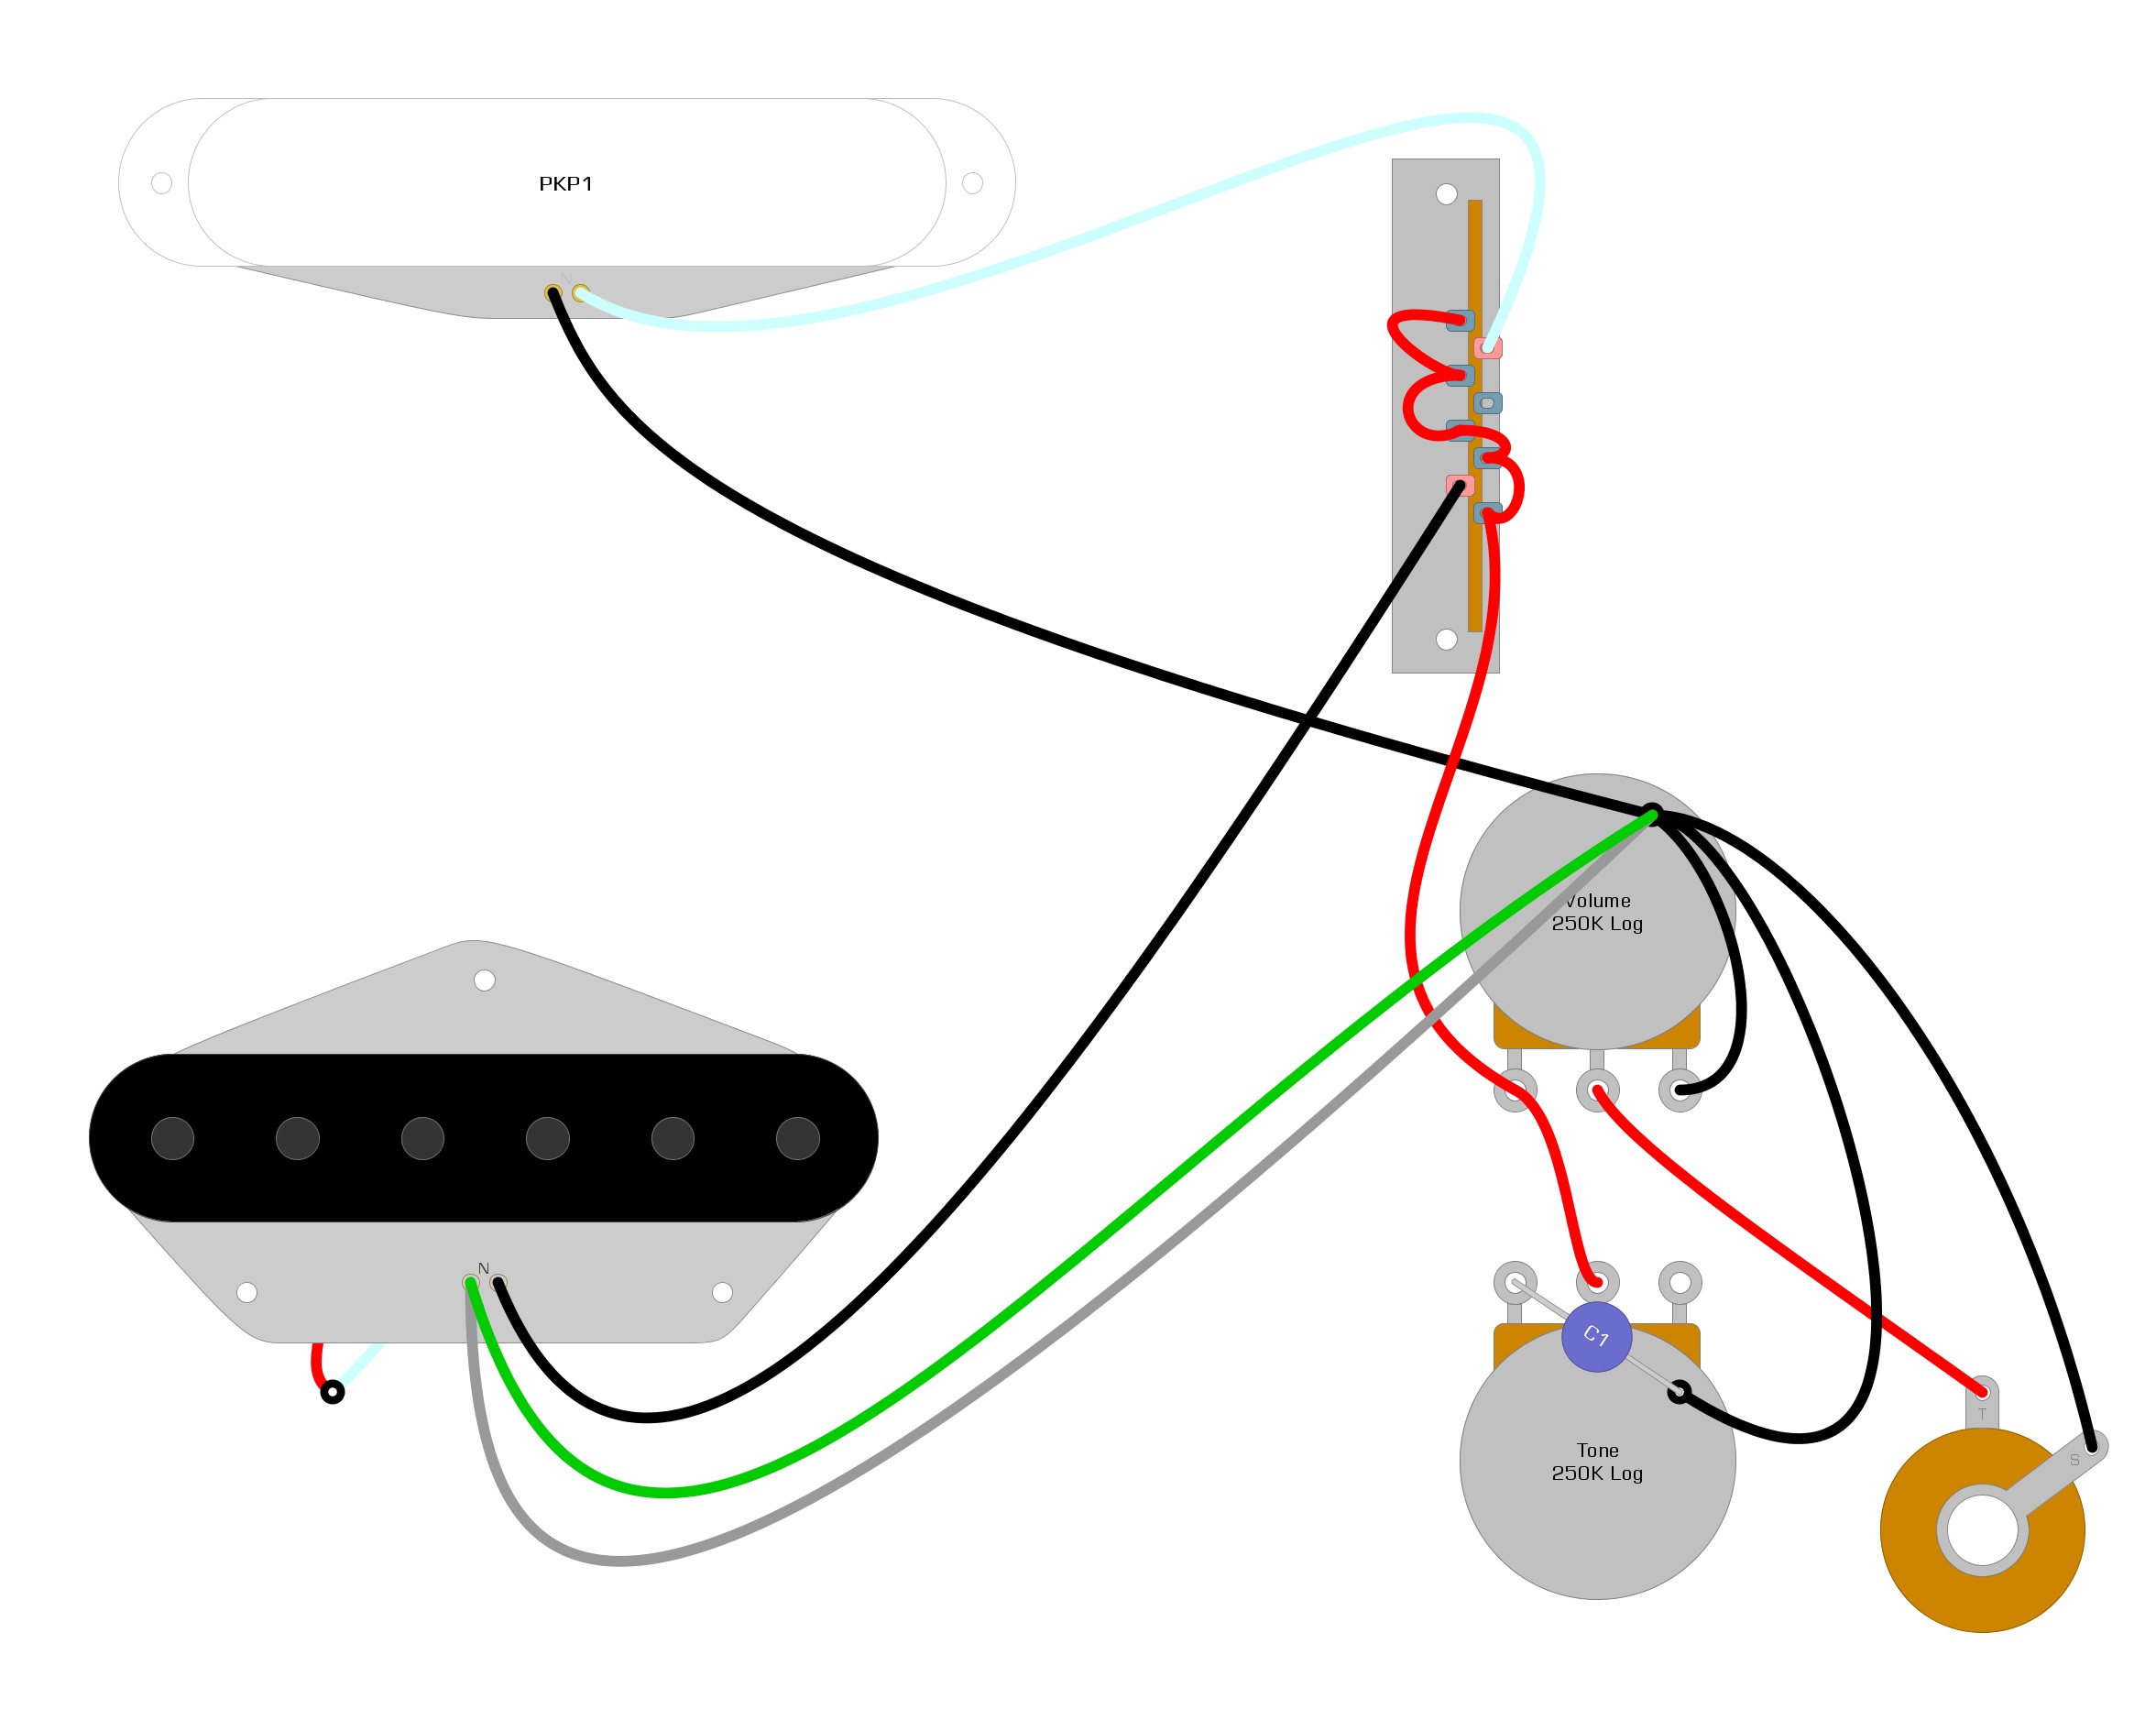
Now that we know the wiring code of the pickup, all we need to do is uninstall the stock pickup and install the Seymour Duncan BG1400 the same way. You will usually need to remove the bridge plate to access the pickup, to uninstall and install. Removing the bridge plate only requires you to remove several screws. If the stock pickup uses the bridge plate for the Ground wire, do the same with the BG1400.
The Hot wire will almost always go to the switch on a Telecaster. We have illustrated a standard Seymour Duncan BG1400 wiring diagram for you in Example 2.
Example 2
Summary
Once you install the pickup in the bridge plate and solder the two wires, you can screw everything back together. Your project is complete and should be ready to play. Changing the pickups in your Telecaster isn’t too hard, and it can make your guitar sound quite a bit better. Even though the Telecaster is a high-quality guitar, some people may not enjoy the noise that single-coils allow into the signal. Switching to the Seymour Duncan BG1400 will eliminate the noise problem.
We hope you have enjoyed reading over this short guide and have learned something new. If we have helped you install this pickup and it has provided you with a useful resource, please feel free to share this wiring diagram on Facebook and Twitter. For more articles on guitar electronics, visit humbuckersoup.com.