By Ed Malaker
Posted 04/28/2020
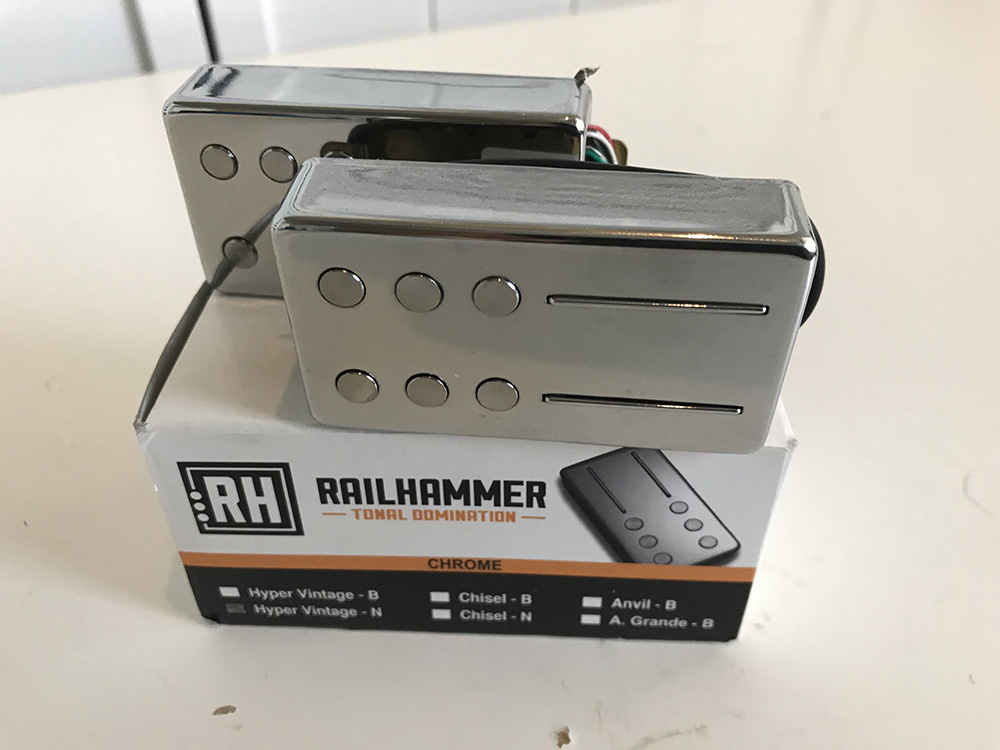
If you have one of the new modern Railhammer Hyper Vintage pickups, you may be wondering if there’s a way that you can modify it to get access to the extra single-coil tones created by coil-splitting. This article will explain how to construct this modification yourself.
If you’re familiar with these pickups, you know that each coil features a half-rail, half-post design. The rail side picks up the bottom three strings, while the posts pick up the higher three strings. This split design is unique to Railhammer. By looking at it, you may feel that you can split the pickup in the middle and have a rail side and a post side, but unfortunately, this is not possible.
Getting Started
This article is assuming that you have already installed a Railhammer Hyper Vintage humbucker pickup and are only trying to learn how to split it. If you need to learn how to install these pickups, check out our article titled Railhammer Hyper Vintage Wiring Diagram for step-by-step instructions. However, we’ll most likely cover most of the information again here.
Wiring Diagram
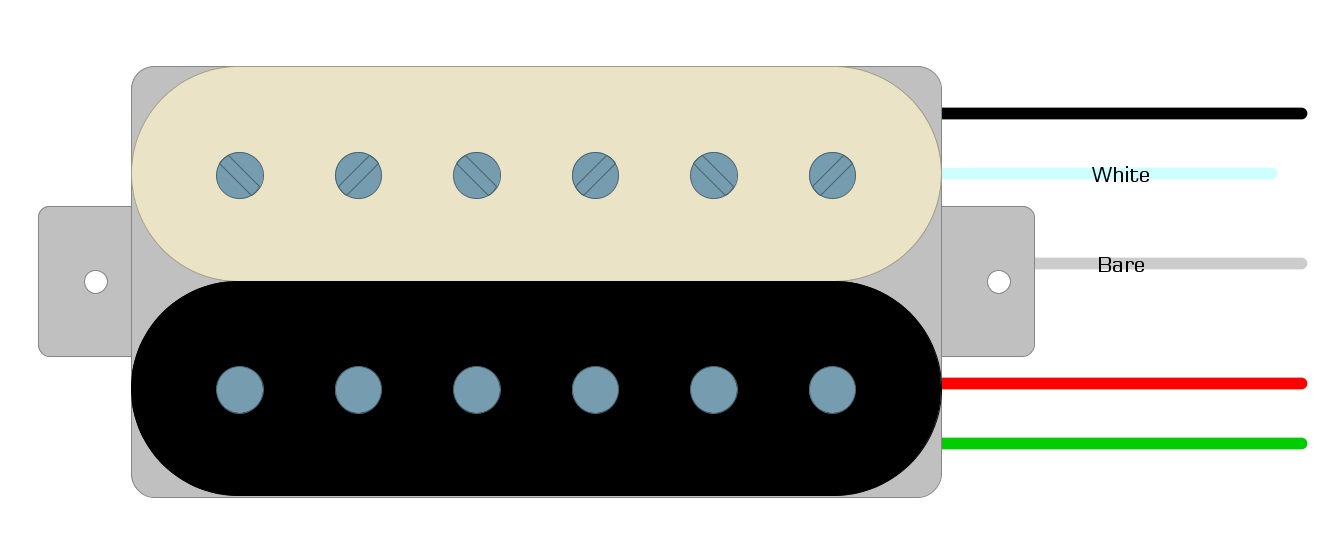
The Railhammer Hyper Vintage humbucker has two coils with four colored wires and one bare wire. Each coil has two colored wires and the bare wire grounds the entire pickup. One coil uses the white and black wires while the other uses the red and green. It looks similar to Figure 1.
Fig 1
Railhammer Hyper Vintage Wiring
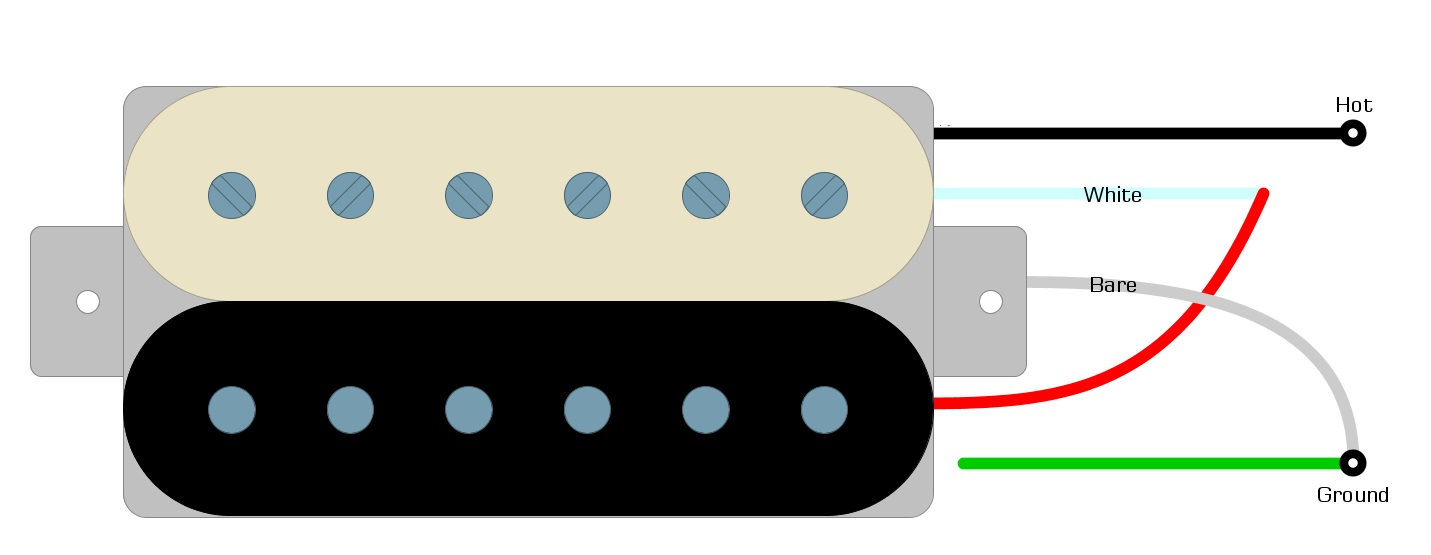
To install the pickup in your guitar, we usually connect the red and white wire and tape them off. We also connect the bare wire to the green wire. We then solder the black wire to the pickup selector and the green and bare wire to the back of the volume pot. When finished, it should look something like Figure 2.
Fig 2
The Switch
To split the pickup, you’re going to need a switch. The two most popular solutions are either a toggle switch or a push-pull knob. A toggle switch is a less expensive solution, but it requires drilling a hole in the pickguard, making this a permanent installation. The other solution, a push-pull pot, is what we recommend. The push-pull pot has the switch built into the volume or tone control, and you activate it by pulling out the knob or pushing it in.
The advantage of the push-pull pot is that it is a reversible modification, and you can go back to your original setup at any time. It’s easy to use and easy to install. The disadvantage of these devices is that they are more expensive than a standard volume pot or a toggle switch. They also require more room in your control cavity, and some guitars may not have space.
We’re going to proceed as if you have chosen to use the push-pull pot, but if you have selected the toggle switch, you perform the modification the same way.
Splitting the Pickup
To start the modification, we’ll use the red and the white wires that should already be connected and taped off. These wires will be left connected, but we’ll take the tape off and solder the pair of wires to the switch. We will also solder a new wire from the switch to Ground. When completed, we should have changed our wiring from looking like Figure 3 to looking like Figure 4.
Fig 3
Fig 4

How It Works
When you pull out the push-pull pot, it will make a connection between the red and white wires and Ground, which will short out the second coil, effectively splitting the pickup.
Summary
As you can see, modifying your guitar to for coil-splitting isn’t too difficult, and it makes for a fantastic first or second guitar mod. You get a dramatic change in sound with minimal effort, and if you choose to go with the push-pull pot, the modification is completely reversible. If you went with the toggle switch, you would see the same lugs to solder the wires to, as you do in Figure 4.
We hope that we have helped you discover a new modification. If you’ve enjoyed this guide and have found it helpful, please feel free to share it on Facebook and Twitter. For more articles on guitar electronics, visit humbuckersoup.com.


