By Ed Malaker
Posted 03/18/2020
In this post, we’re going to show you how to coil-split Seymour Duncan Pearly Gates pickups. Humbucker pickups are usually wired so that they use both coils at the same time. When you split the pickup, however, you shut off one of the coils, making it perform like a single-coil pickup.
Getting Started
Any humbucker pickup that has four colored wires and one bare wire can be coil-split. The modification is always the same, but the color of the wires is not a standard. They can vary between manufacturers, even between models of the same manufacturer. This guide is specifically for the Seymour Duncan Pearly Gates pickups.
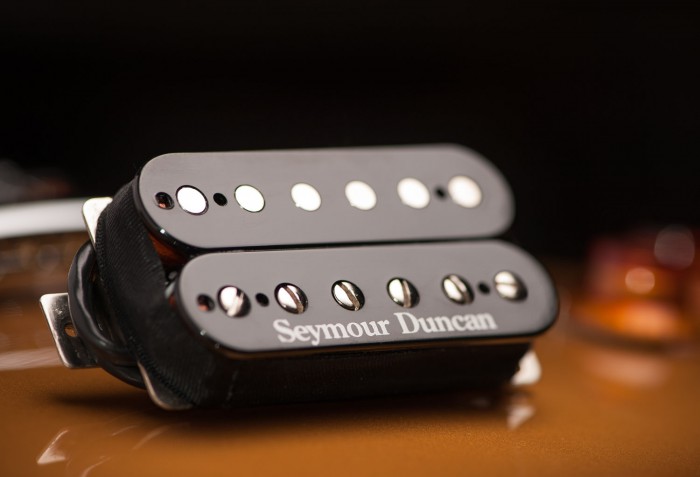
The Pearly Gates is designed to sound like the vintage P.A.F. pickups used in the 1959 Gibson Les Paul Standard. Described as having a warm sound with a bright top end, it works well as a Neck or a Bridge pickup. The Pearly Gates pickup provides more Gain than the vintage P.A.F., making it great for coil-splitting.
The Switch
You will need to purchase a switch that will be used to turn off one of the coils. There are two kinds of switches used in electric guitars: the push-pull potentiometer and the mini-toggle. We are going to use a push-pull pot for this post because it allows our mod to be reversible. You can use a toggle switch, though, if you prefer.
The downside to the push-pull pot is that it requires more space below the Volume or Tone control and some guitars may not have enough room. You will want to make sure the push-pull pot will fit into your guitar before deciding which switch to use.
A toggle switch will use all of the same instructions as the push-pull pot, but you will most likely need to drill a permanent hole in your guitar to attach the switch. Guitars that have pickguards with a lot of open space underneath are candidates for the toggle switch, because you can drill the hole into the pickguard. If you decide later to remove the mod, you can just replace the pickguard.
The Push-Pull Pot
A push-pull pot is a regular Volume or Tone control that has a switch built into it. Pulling out, or pushing in the shaft of the pot toggles the switch.
Installing the Pickup
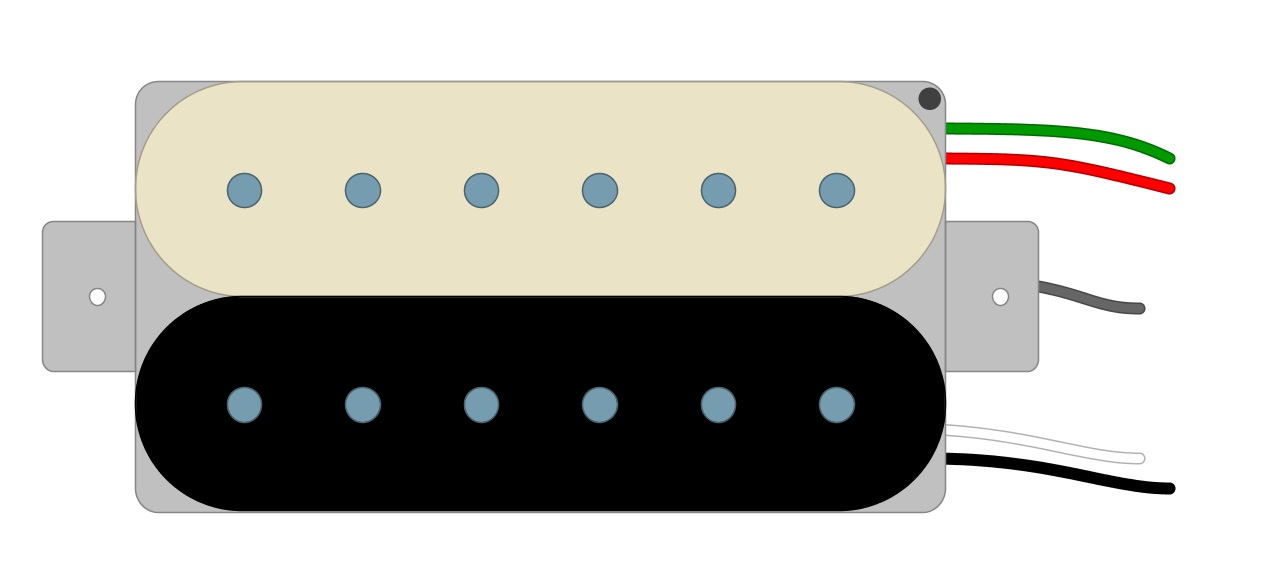
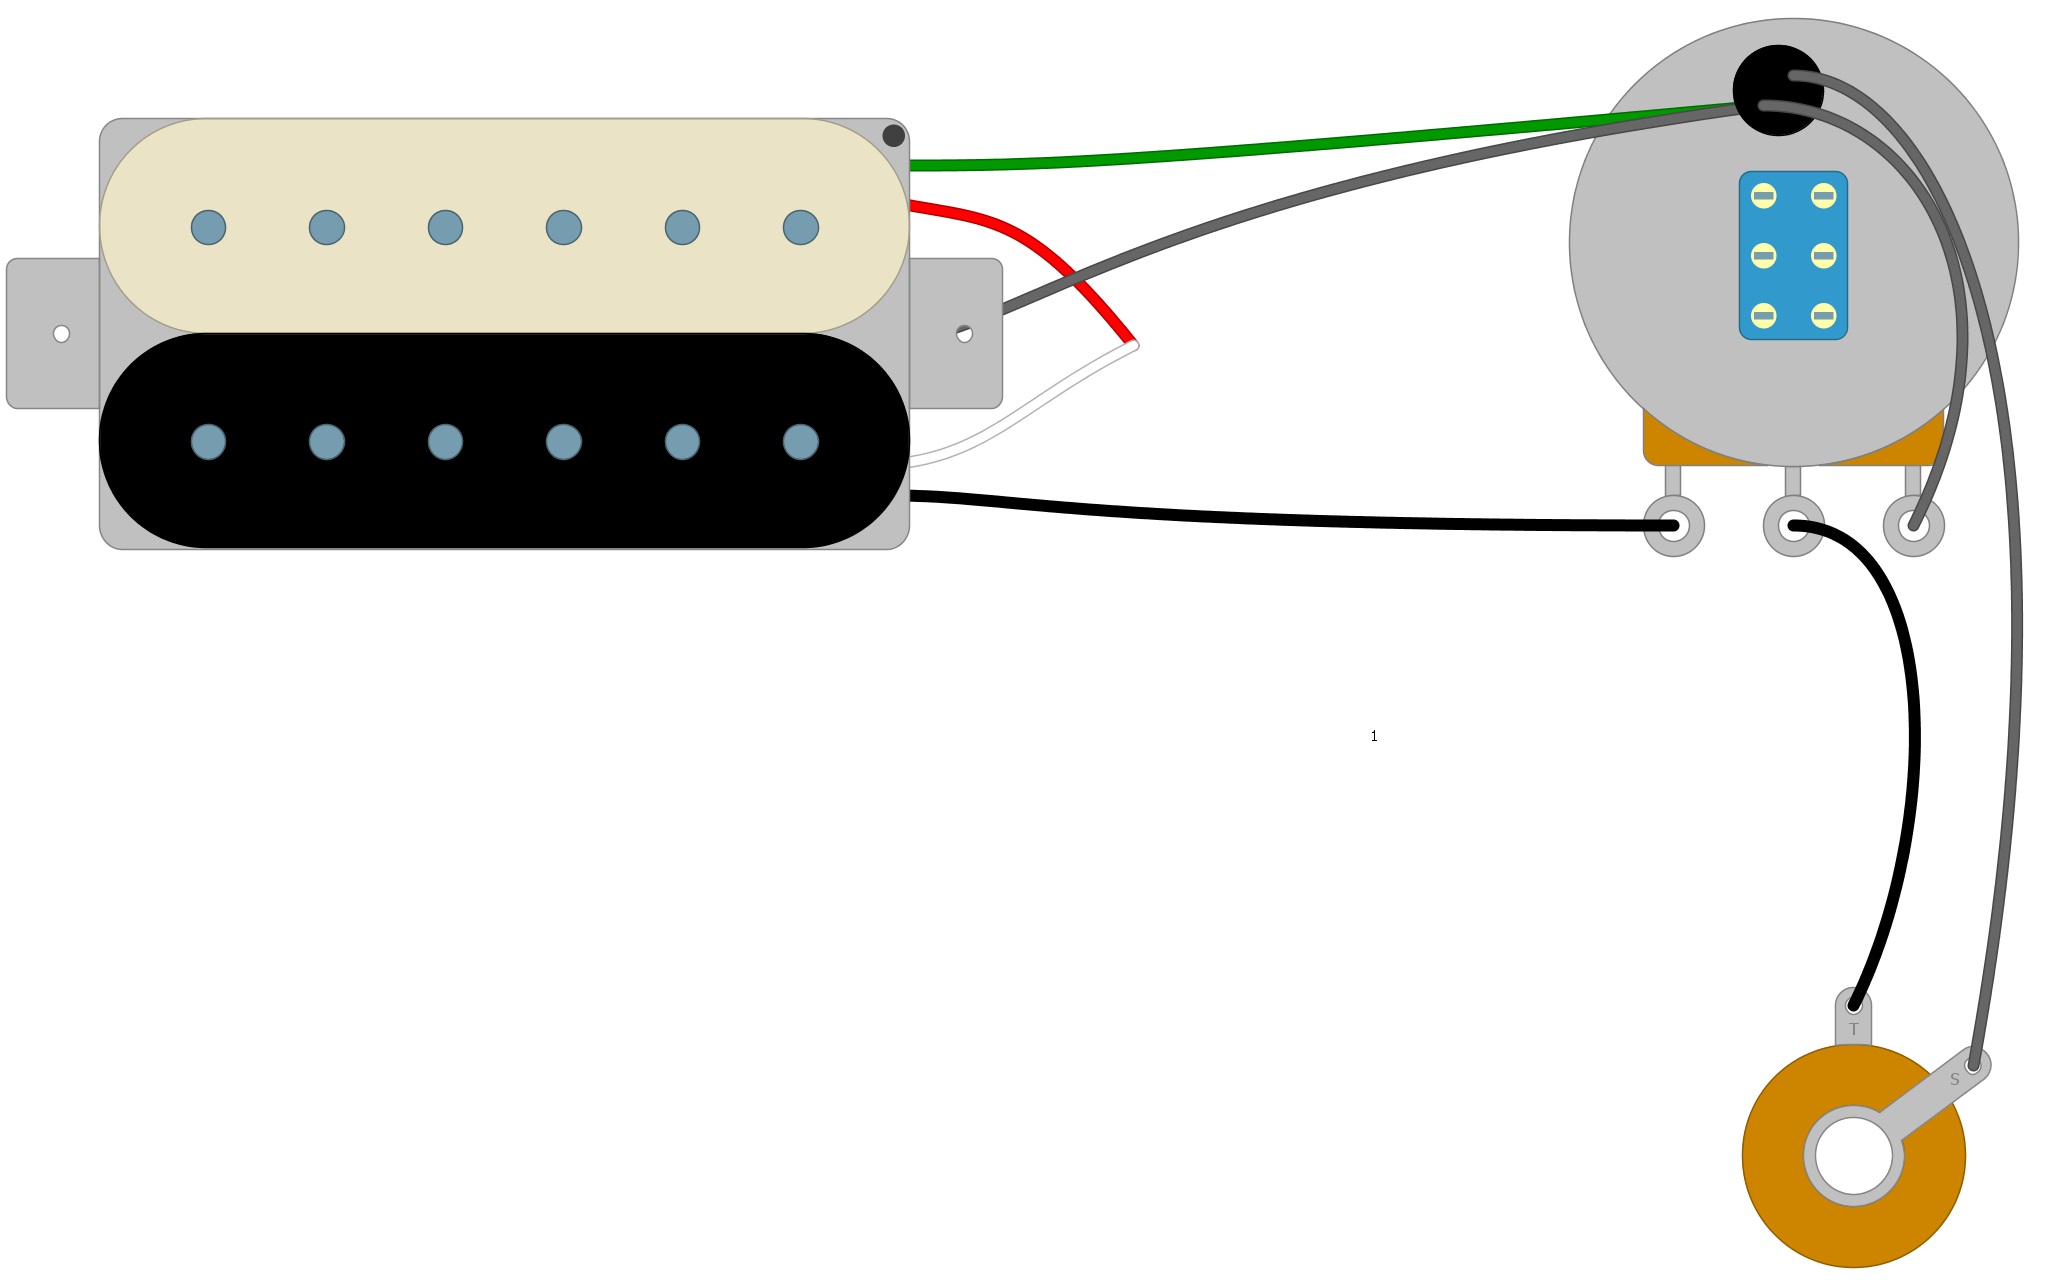
For the Seymour Duncan Pearly Gates pickup, the Green and Red wires go to one of the coils. The White and Black wires go to the other. The bare wire is a shield that is not directly connected to either of the coils and always goes to Ground (Fig 1).
Fig 1
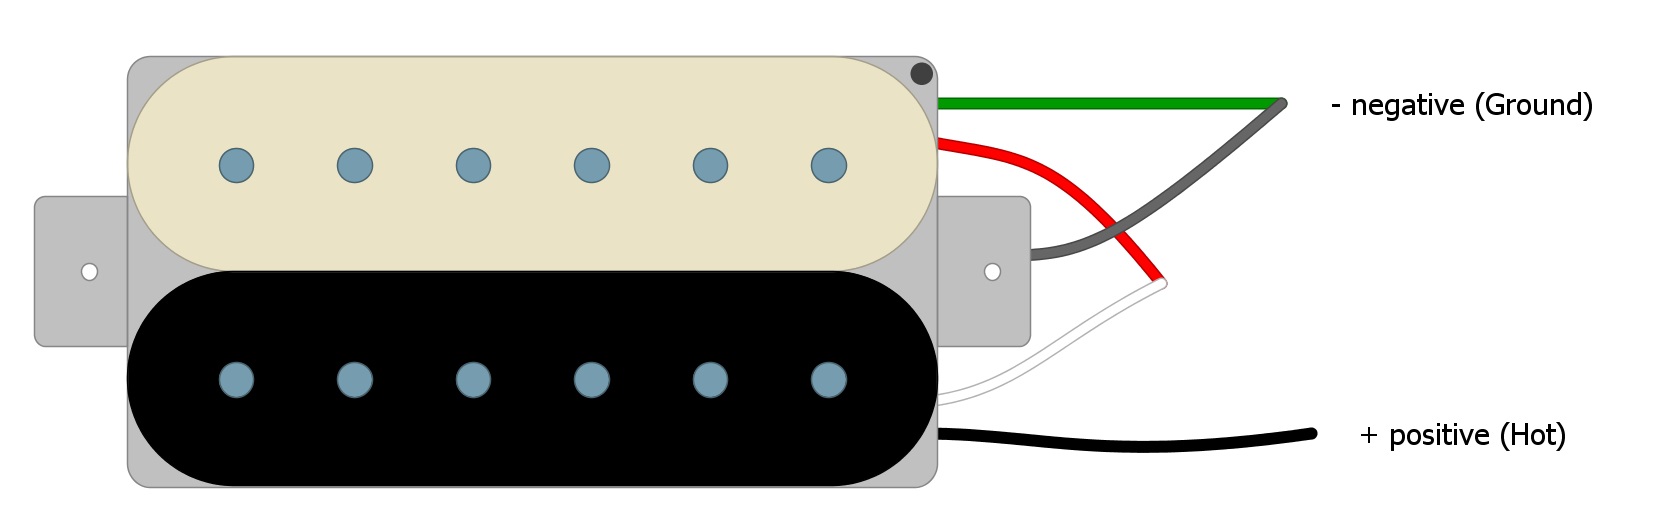
The most common way to wire the Pearly Gates for regular operation is to solder the White and Red wires together. We then use the Black wire as the Hot, and the Green as the Ground, when installing the pickup. The Bare and Green wires are often soldered together (Fig 2).
Fig 2
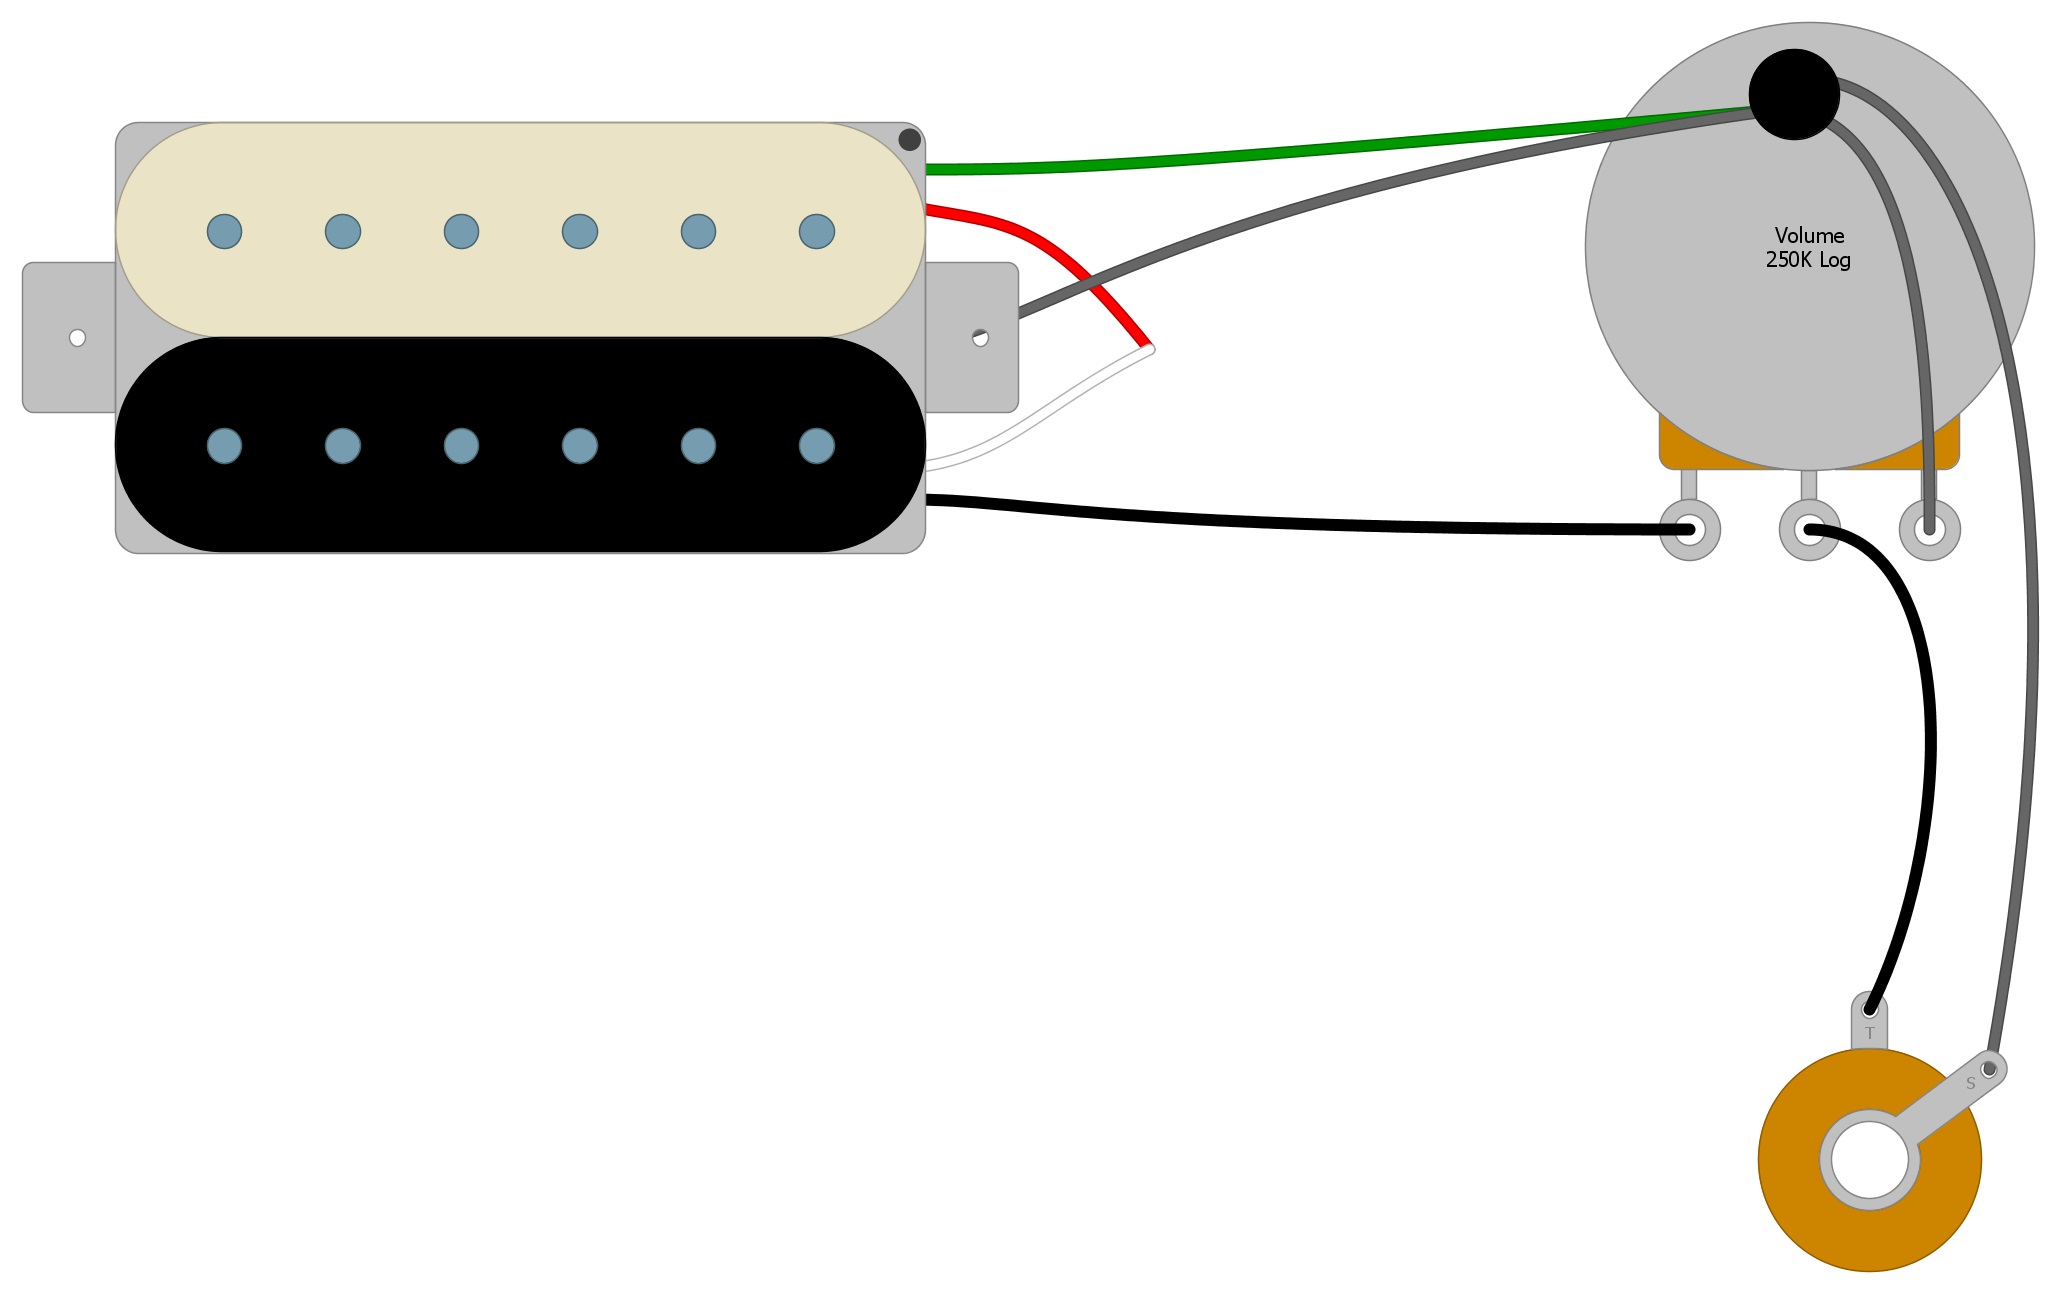
Next is the installation of the pickup into the guitar. We are going to wire it as if it is the only pickup, and we are only going to be concerned with the Volume control and the Output jack. If you need step-by-step instructions installing the Pearly Gates, check out the Seymour Duncan Pearly Gates Wiring Diagram (Fig 3).
Fig 3
Splitting the Coils
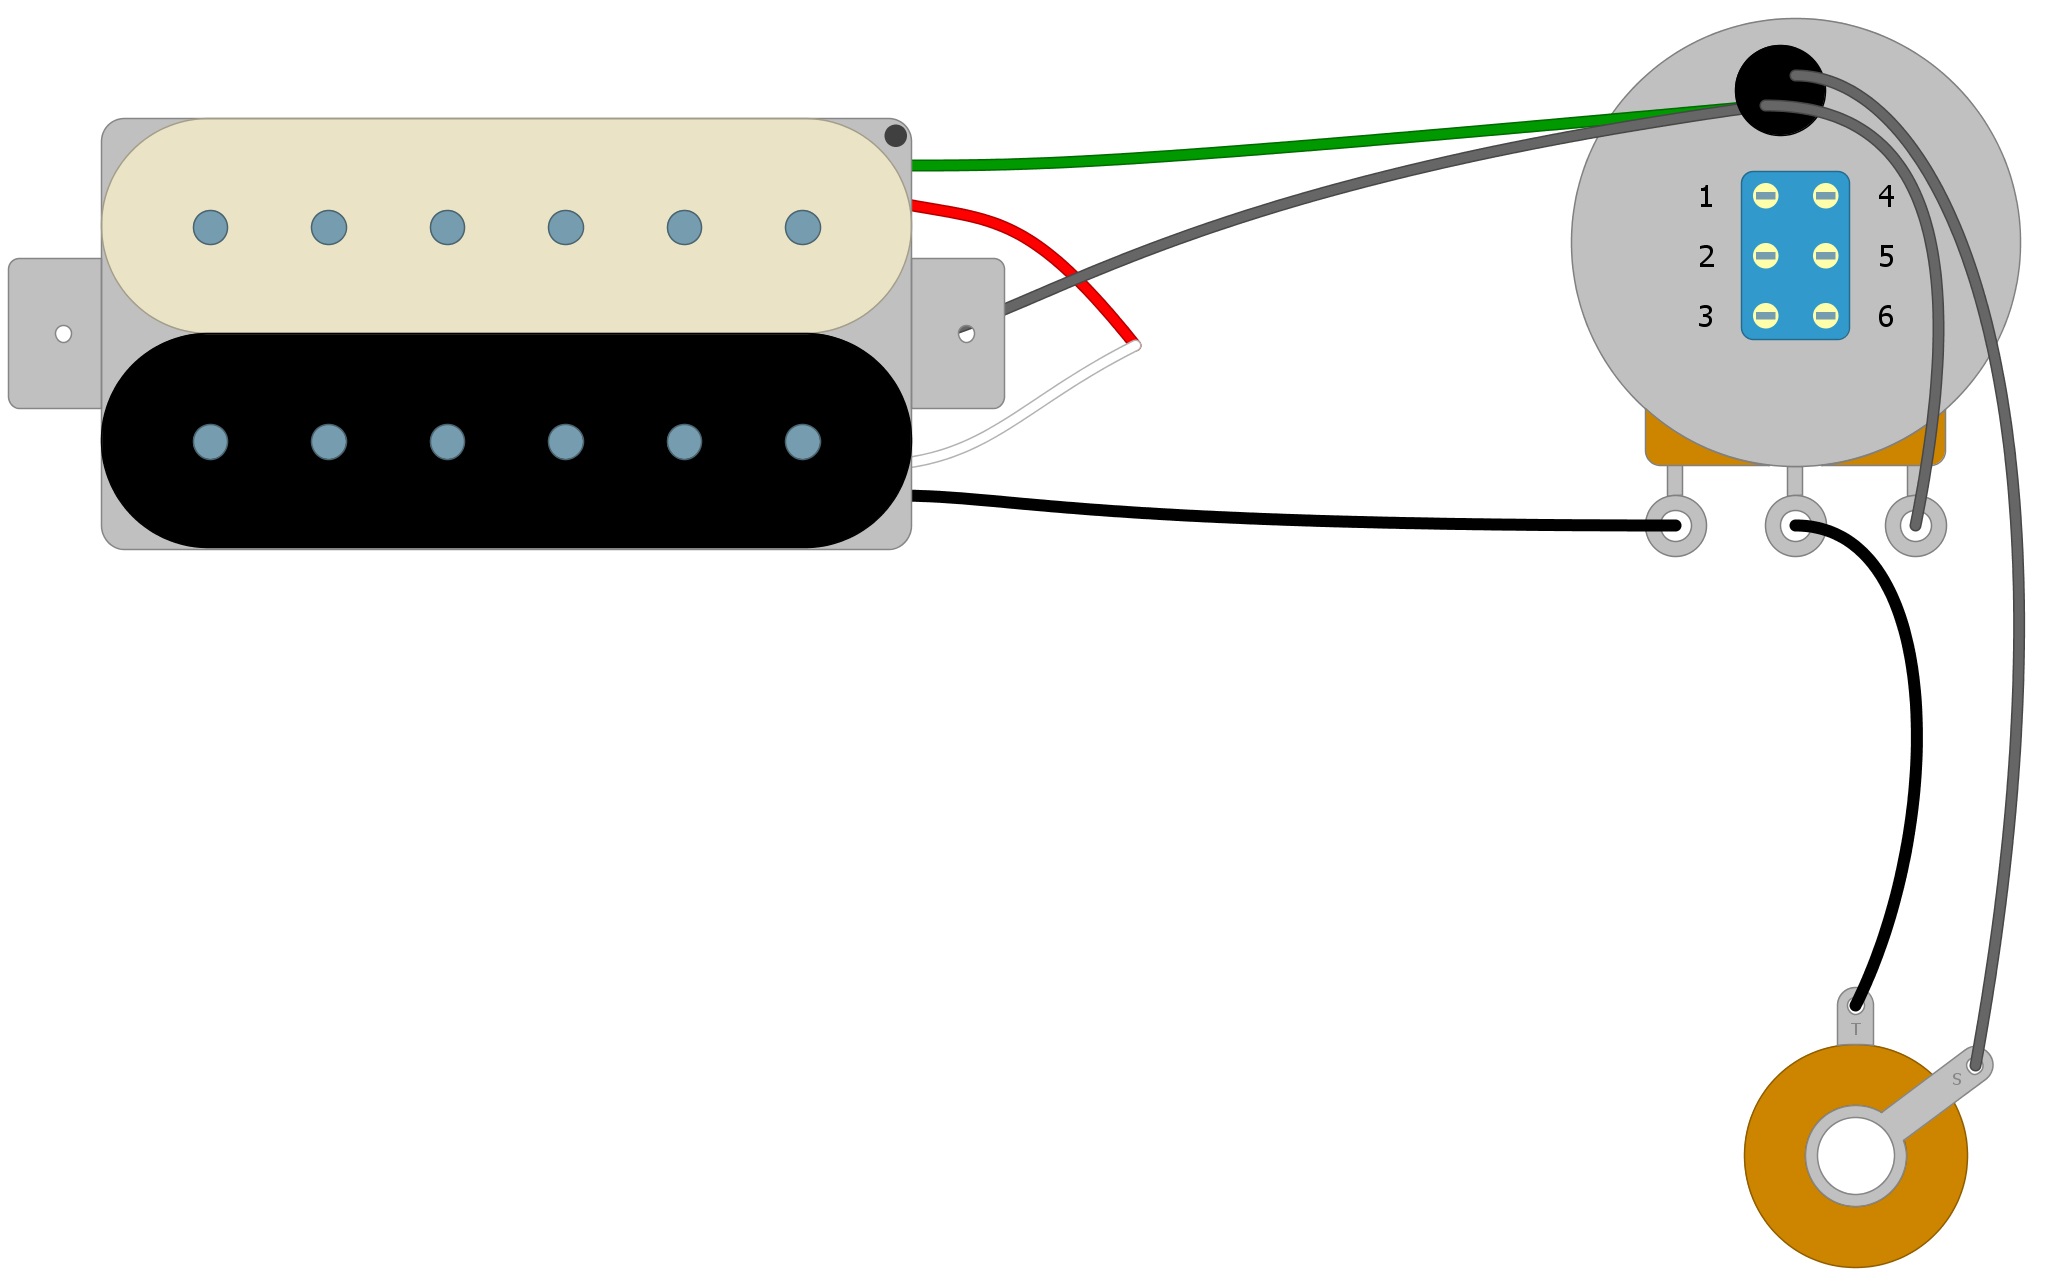
Next, we need to change the Volume pot in your guitar to a Push-Pull Volume pot. The Push-Pull pot will be bulkier and have more connection tabs on it, but you should be able to see the three that were on the original Volume control in the same place. Wire these three tabs the same way as the original (Fig 4).
Fig 4
Now we will number the additional tabs on the Push-Pull pot, one through six (Fig 5).
Fig 5
Now take the Red and White wires that we soldered together in Fig 2 and solder them to Tab 5 on the Push-Pull pot (Fig 6).
Fig 6
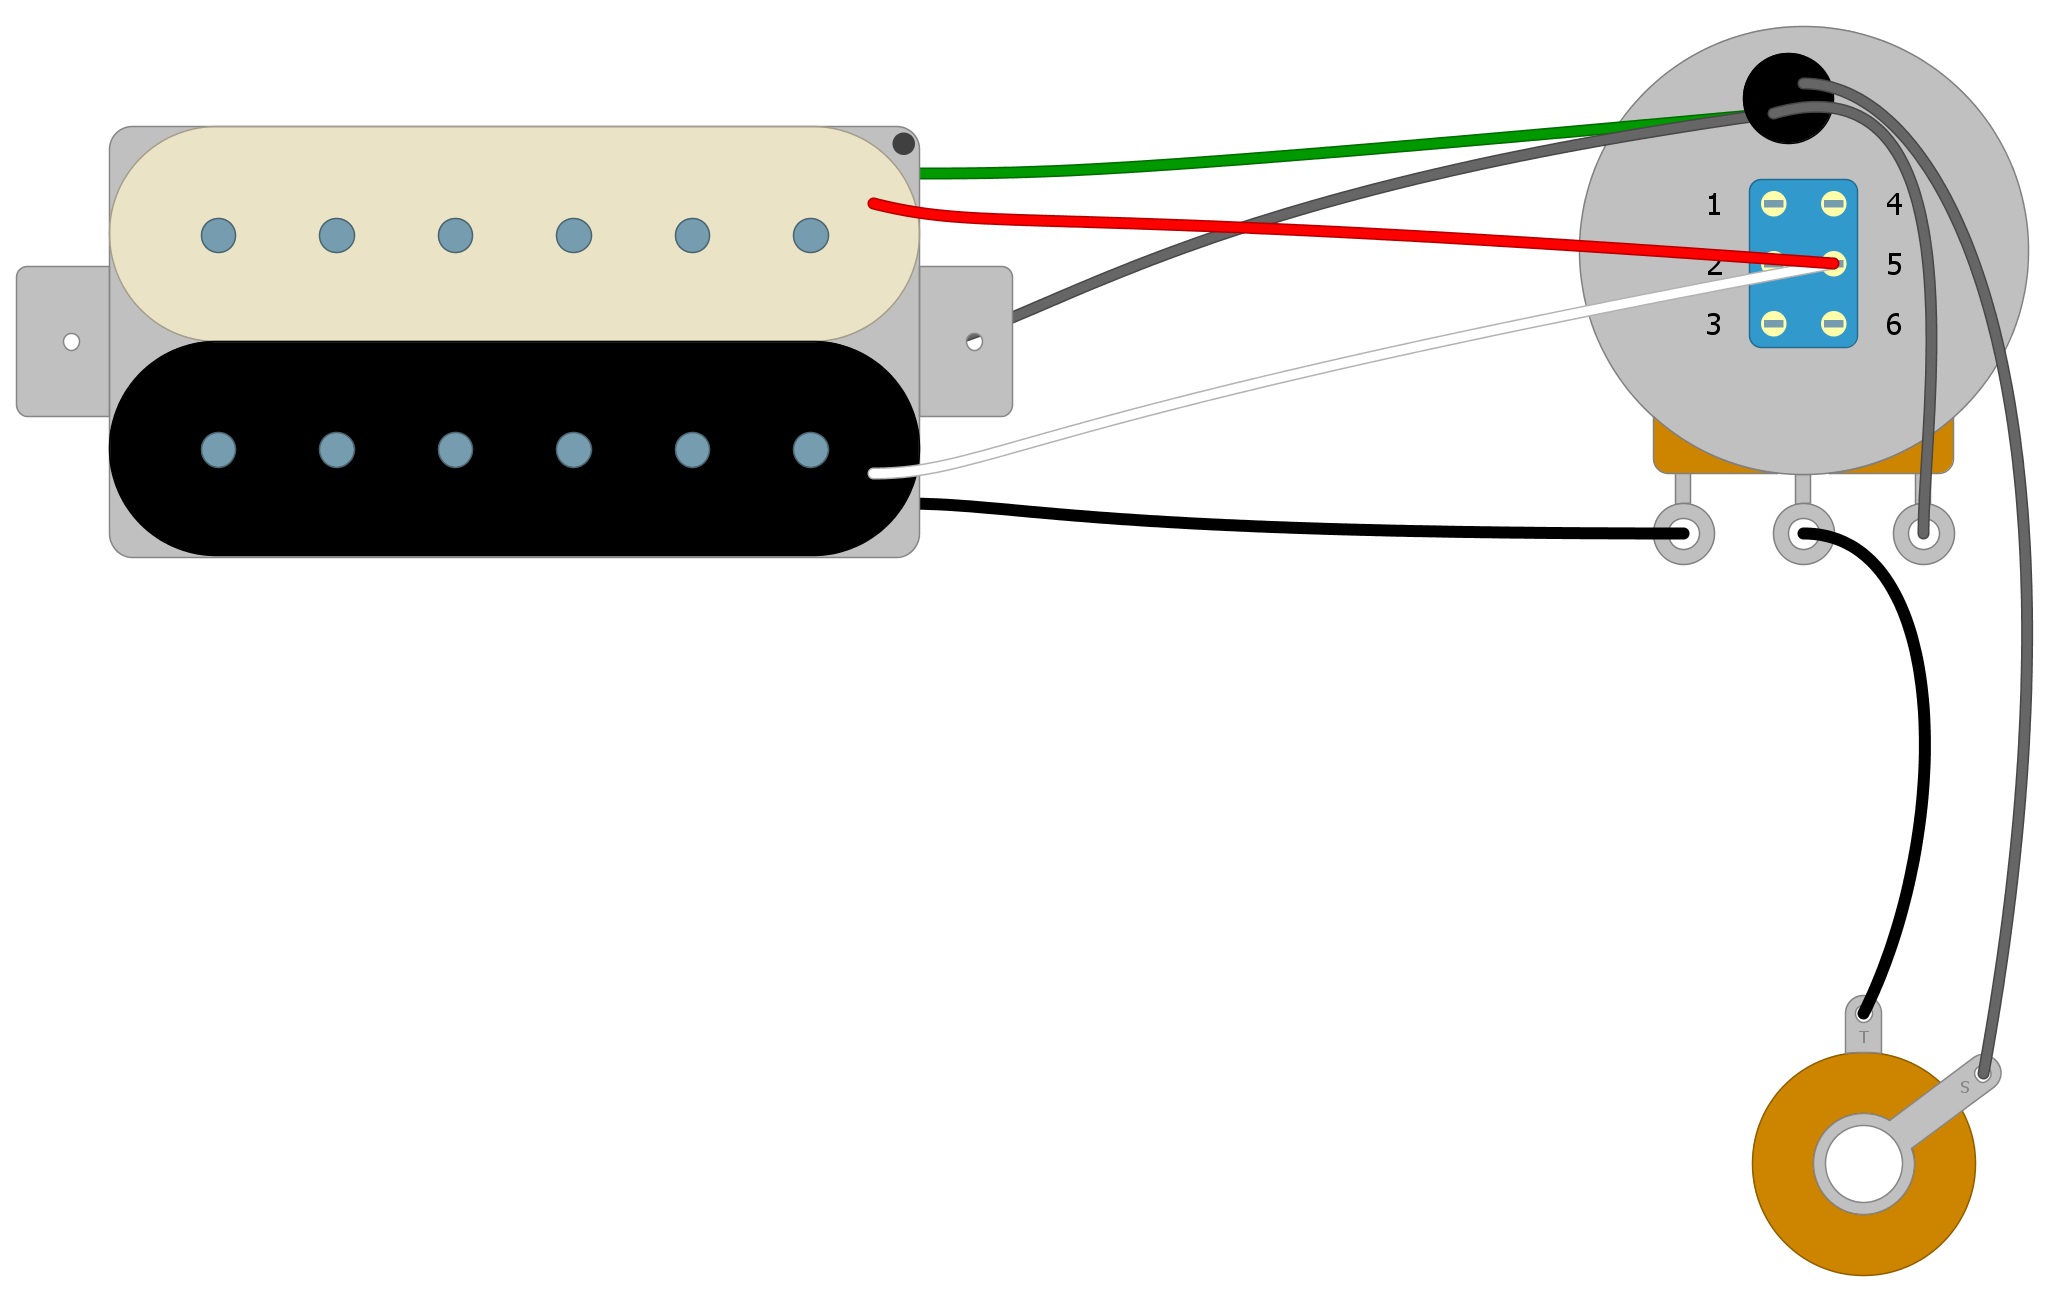
And finally, solder a wire from Tab 6 to the back of the Push-Pull pot.
Note that it can be tricky to fit all of the ground wires onto the back of a Push-Pull pot with the added switching component. This is because there is much less metal surface on which to place them. The steel casing around these components is also thinner than regular potentiometers, and a soldering iron can melt the inside of the device if you are not careful. It might be easier to move your ground wires to the Tone pot if you have one. Or, you can solder all the wires to a single wire and solder that to the pot (Fig 7).
Fig 7

You’re finished!
Note: If you find that the coil is splitting when the Volume knob is pushed in instead of pulled out, move the Ground wire from Tab 6 to Tab 4.
Summary
When the Volume knob is in the “pushed-in” position, your guitar signal travels through the first coil, starting at the Black wire. It continues through the second coil, before exiting via the Green wire. This setting is the way the pickup is designed to work.
When the Volume knob is in the “pulled-out” position, your guitar signal will travel through the first coil, starting at the Black wire, but this time it will exit through the new ground wire that you installed, coming from Tab 6 of the switch. In this case, your signal doesn’t go through the second coil, because your pickup is “split.”
If you’ve found this guide helpful, please feel free to share on Facebook and Twitter. For more articles on guitar electronics, visit humbuckersoup.com.


