By Ed Malaker
Posted 12/29/2020
The Seymour Duncan Custom Custom isn’t a typo. It’s a high-output humbucking pickup that resembles the well-known Seymour Duncan Custom, but with some slight variations. We go into this in greater detail and create a Seymour Duncan Custom Custom wiring diagram to help you get this pickup installed in your guitar.
The Custom Custom is a high-output humbucker that’s perfectly suited for modifications like splitting and wiring out of phase. It uses an Alnico 2 magnet instead of the Custom’s ceramic magnet. This change in magnet results in a similar-sounding pickup with slightly warmer highs and punchier midrange frequencies. It’s a great choice for anyone who feels the original Custom is too hard or brittle sounding. We’re hoping that our Seymour Duncan Custom Custom wiring diagram will help to make your installation earlier.
What Tools Do I Need?
The tools you need may change depending on what type of guitar You are going to install your Seymour Duncan Custom Custom pickups in, but in most cases, you will only need a few items. A screwdriver to remove and install your pickups, and any cover plates to allow access to the electronics. You will also need a soldering iron and a little solder, electrical tape, and possible wire cutters and pliers.
- Phillips screwdriver
- Soldering iron
- Solder
- Electrical Tape
- Wire cutters
- Pliers
Getting Started With the Seymour Duncan Custom Custom Wiring Modification
Once you have the tools, it will be time to get started installing your pickup. First, uninstall the original pickup, taking care to write down where the wires go. There is usually one wire going to the switch or one of the lugs on the Volume pot. Two wires should be twisted together and taped off. The bare wire and another wire should be twisted together and soldered to the back of the Volume pot. Some humbuckers only have two wires. In that case, you will not have the two wires twisted together and taped off.
Once you have taken note of where the wires go, you can use your soldering iron to disconnect them and remove the pickup.
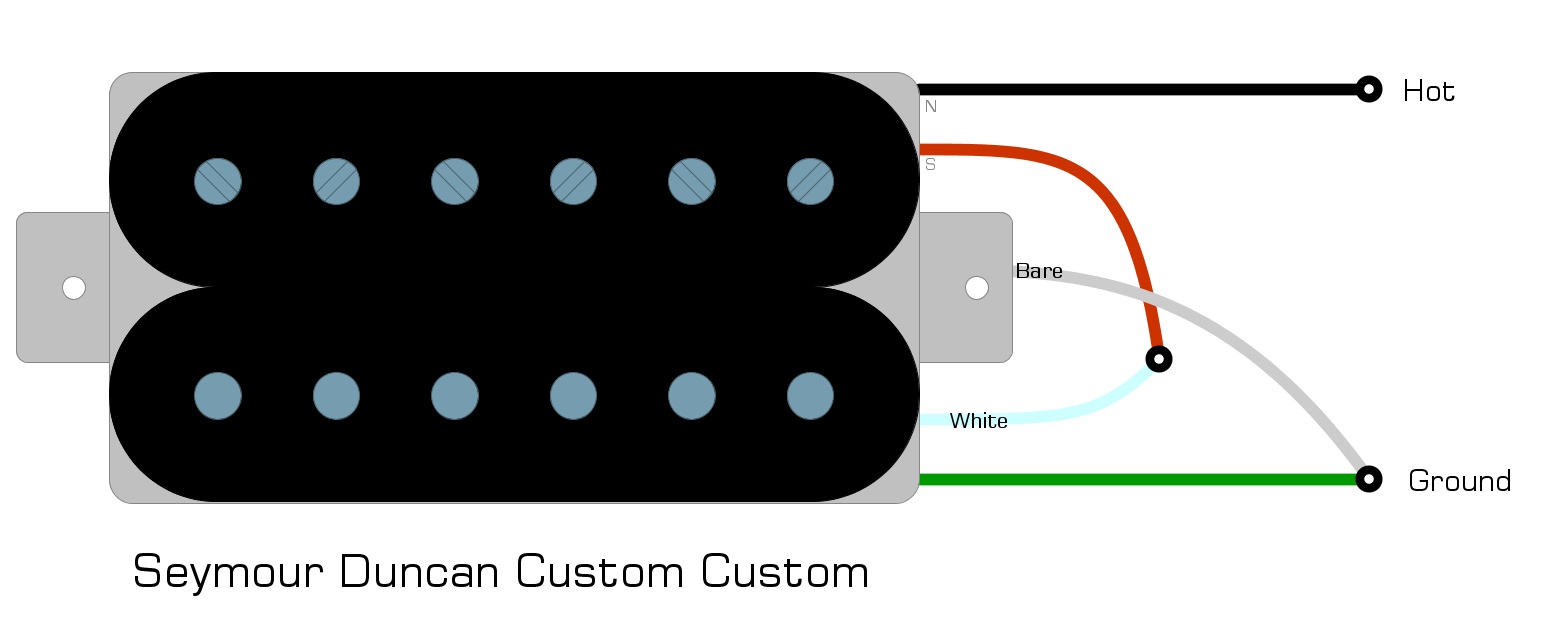
The Wiring Code
The wiring code is what tells you how the wires of the Seymour Duncan Custom Custom match up to the colors used in the stock pickup. Each brand has a unique set of colors that they use as the Hot and the Ground. The Seymour Duncan wiring code for most pickups, including the Custom Custom, is as follows.
- Black = Hot
- Red and White = tied together and taped off
- Green and Bare = tied together = Ground
We’ve illustrated the Seymour Duncan wiring code for you in Example 1.
Example 1
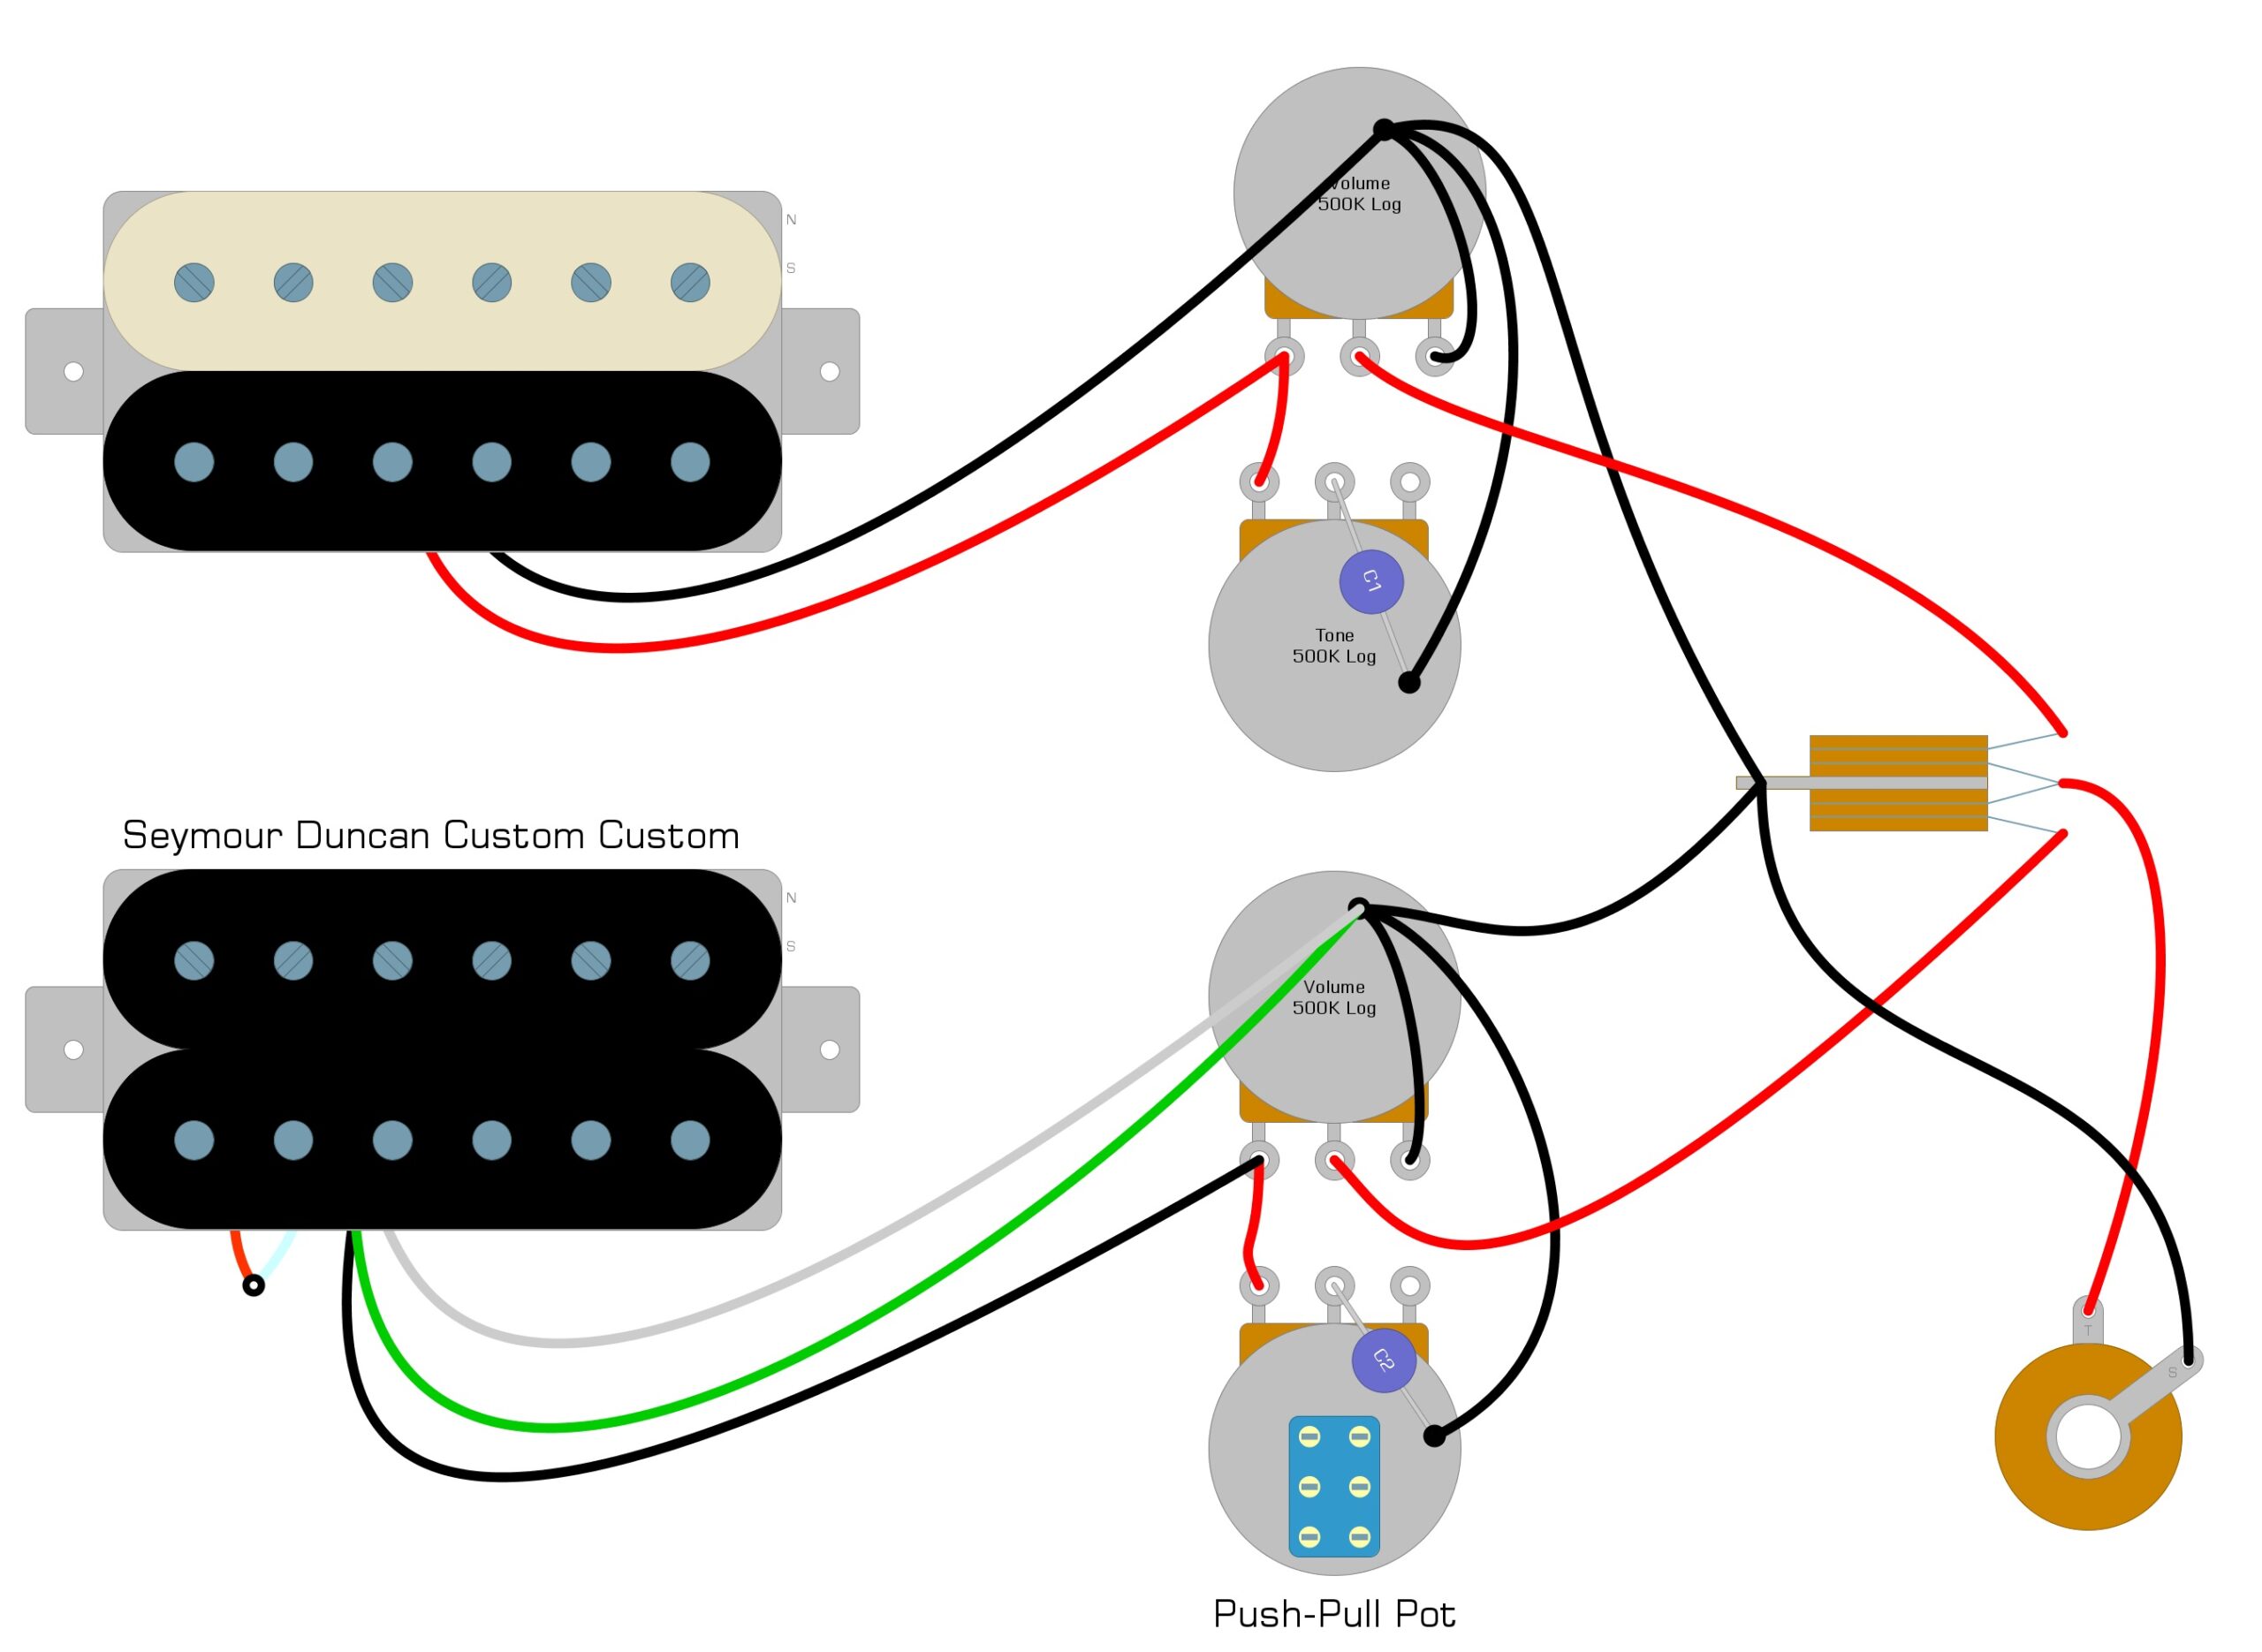
The Seymour Duncan Custom Custom Wiring Installation
Once you have the red and white wires, you can feed them to the electronics cavity and screw the pickup into the guitar. The green and the bare wire are both soldered to the back of the Volume pot. These wires are the Ground. The black wire will go to either the switch or to one of the lugs on the Volume problem pot. This wire is the Hot.
We’ve illustrated what the Seymour Duncan Custom Custom wiring diagram might look like in a Les Paul style guitar in Example 2.
Example 2
We’ve illustrated what the Seymour Duncan Custom Custom wiring diagram might look like in a Super-Strat style guitar, in Example 3.
Example 3

Conclusion
Installing new pickups is one of the best ways to improve your tone, and the Seymour Duncan Custom Custom is a great choice because of its high output and balanced tone. We hope that you have enjoyed reading over this article, and it has helped you get these pickups installed. If you’ve found this Seymour Duncan Custom Custom wiring modification useful, please share it on Facebook and Twitter.


