By Ed Malaker
Posted 05/06/2025
This article will show you how to perform a coil-splitting modification on a Seymour Duncan Custom 5. The Custom 5 is described as similar to the 59 model, but with twice the output gain. The high output gain makes this humbucker perfectly suited for the coil-splitting modification.
This post will walk you through this modification, which you’ll be able to complete in a few minutes with very few tools or materials.
What is Coil-Splitting?
Coil-splitting is when you modify a humbucker to turn off one of the coils, which gives you access to a single-coil sound. You can perform this modification using any humbucker that has four colored wires and one bare wire. In this case, the Custom 5 is our humbucker. We’ll use a switch to turn it off.
Before You Start
This post assumes that you already own the Seymour Duncan Custom 5 and have it installed correctly in your guitar. You will not need to change the current wiring in any way. If you have not installed your Custom 5 yet and need step-by-step instructions, we recommend checking out our post titled Seymour Duncan Custom 5 Wiring before attempting this modification.
Tools and Materials
You will only need to purchase a switch for this modification. Other than the switch, you’ll need a soldering iron and a small amount of solder, a short piece of wire, a screwdriver to help you access the components, some electrical tape, and a pair of pliers.
You can use either a push-pull pot or a mini-toggle switch, both of which will be wired the same way. The push-pull is the switch we recommend because it’s reversible if you decide the modification isn’t for you. The mini-toggle switch will require you to drill a hole in the pickguard, which can look messy and is permanent.
Make sure you have everything here:
- Push-pull pot or mini-toggle switch
- Soldering iron
- Solder
- Short wire
- Phillips screwdriver
- Pliers
- Electrical tape
Getting Started
First, open the guitar so you can access the electronics. You will need to use the white and red wires that are twisted together and taped off from the Seymour Duncan Custom 5, so go ahead and access those wires.
Converting to a Push-Pull Pot
To convert to a push-pull pot, you will need to choose which standard pot you will replace. We recommend choosing a tone control because there are fewer things soldered to it, making the conversion easier, but you can convert any pot you wish.
The push-pull pot is the same as a standard pot, except that it has the switching mechanism built-in. When you install the push-pull pot, solder the wires the same way they were on the standard pot, ignoring the switch section for now.
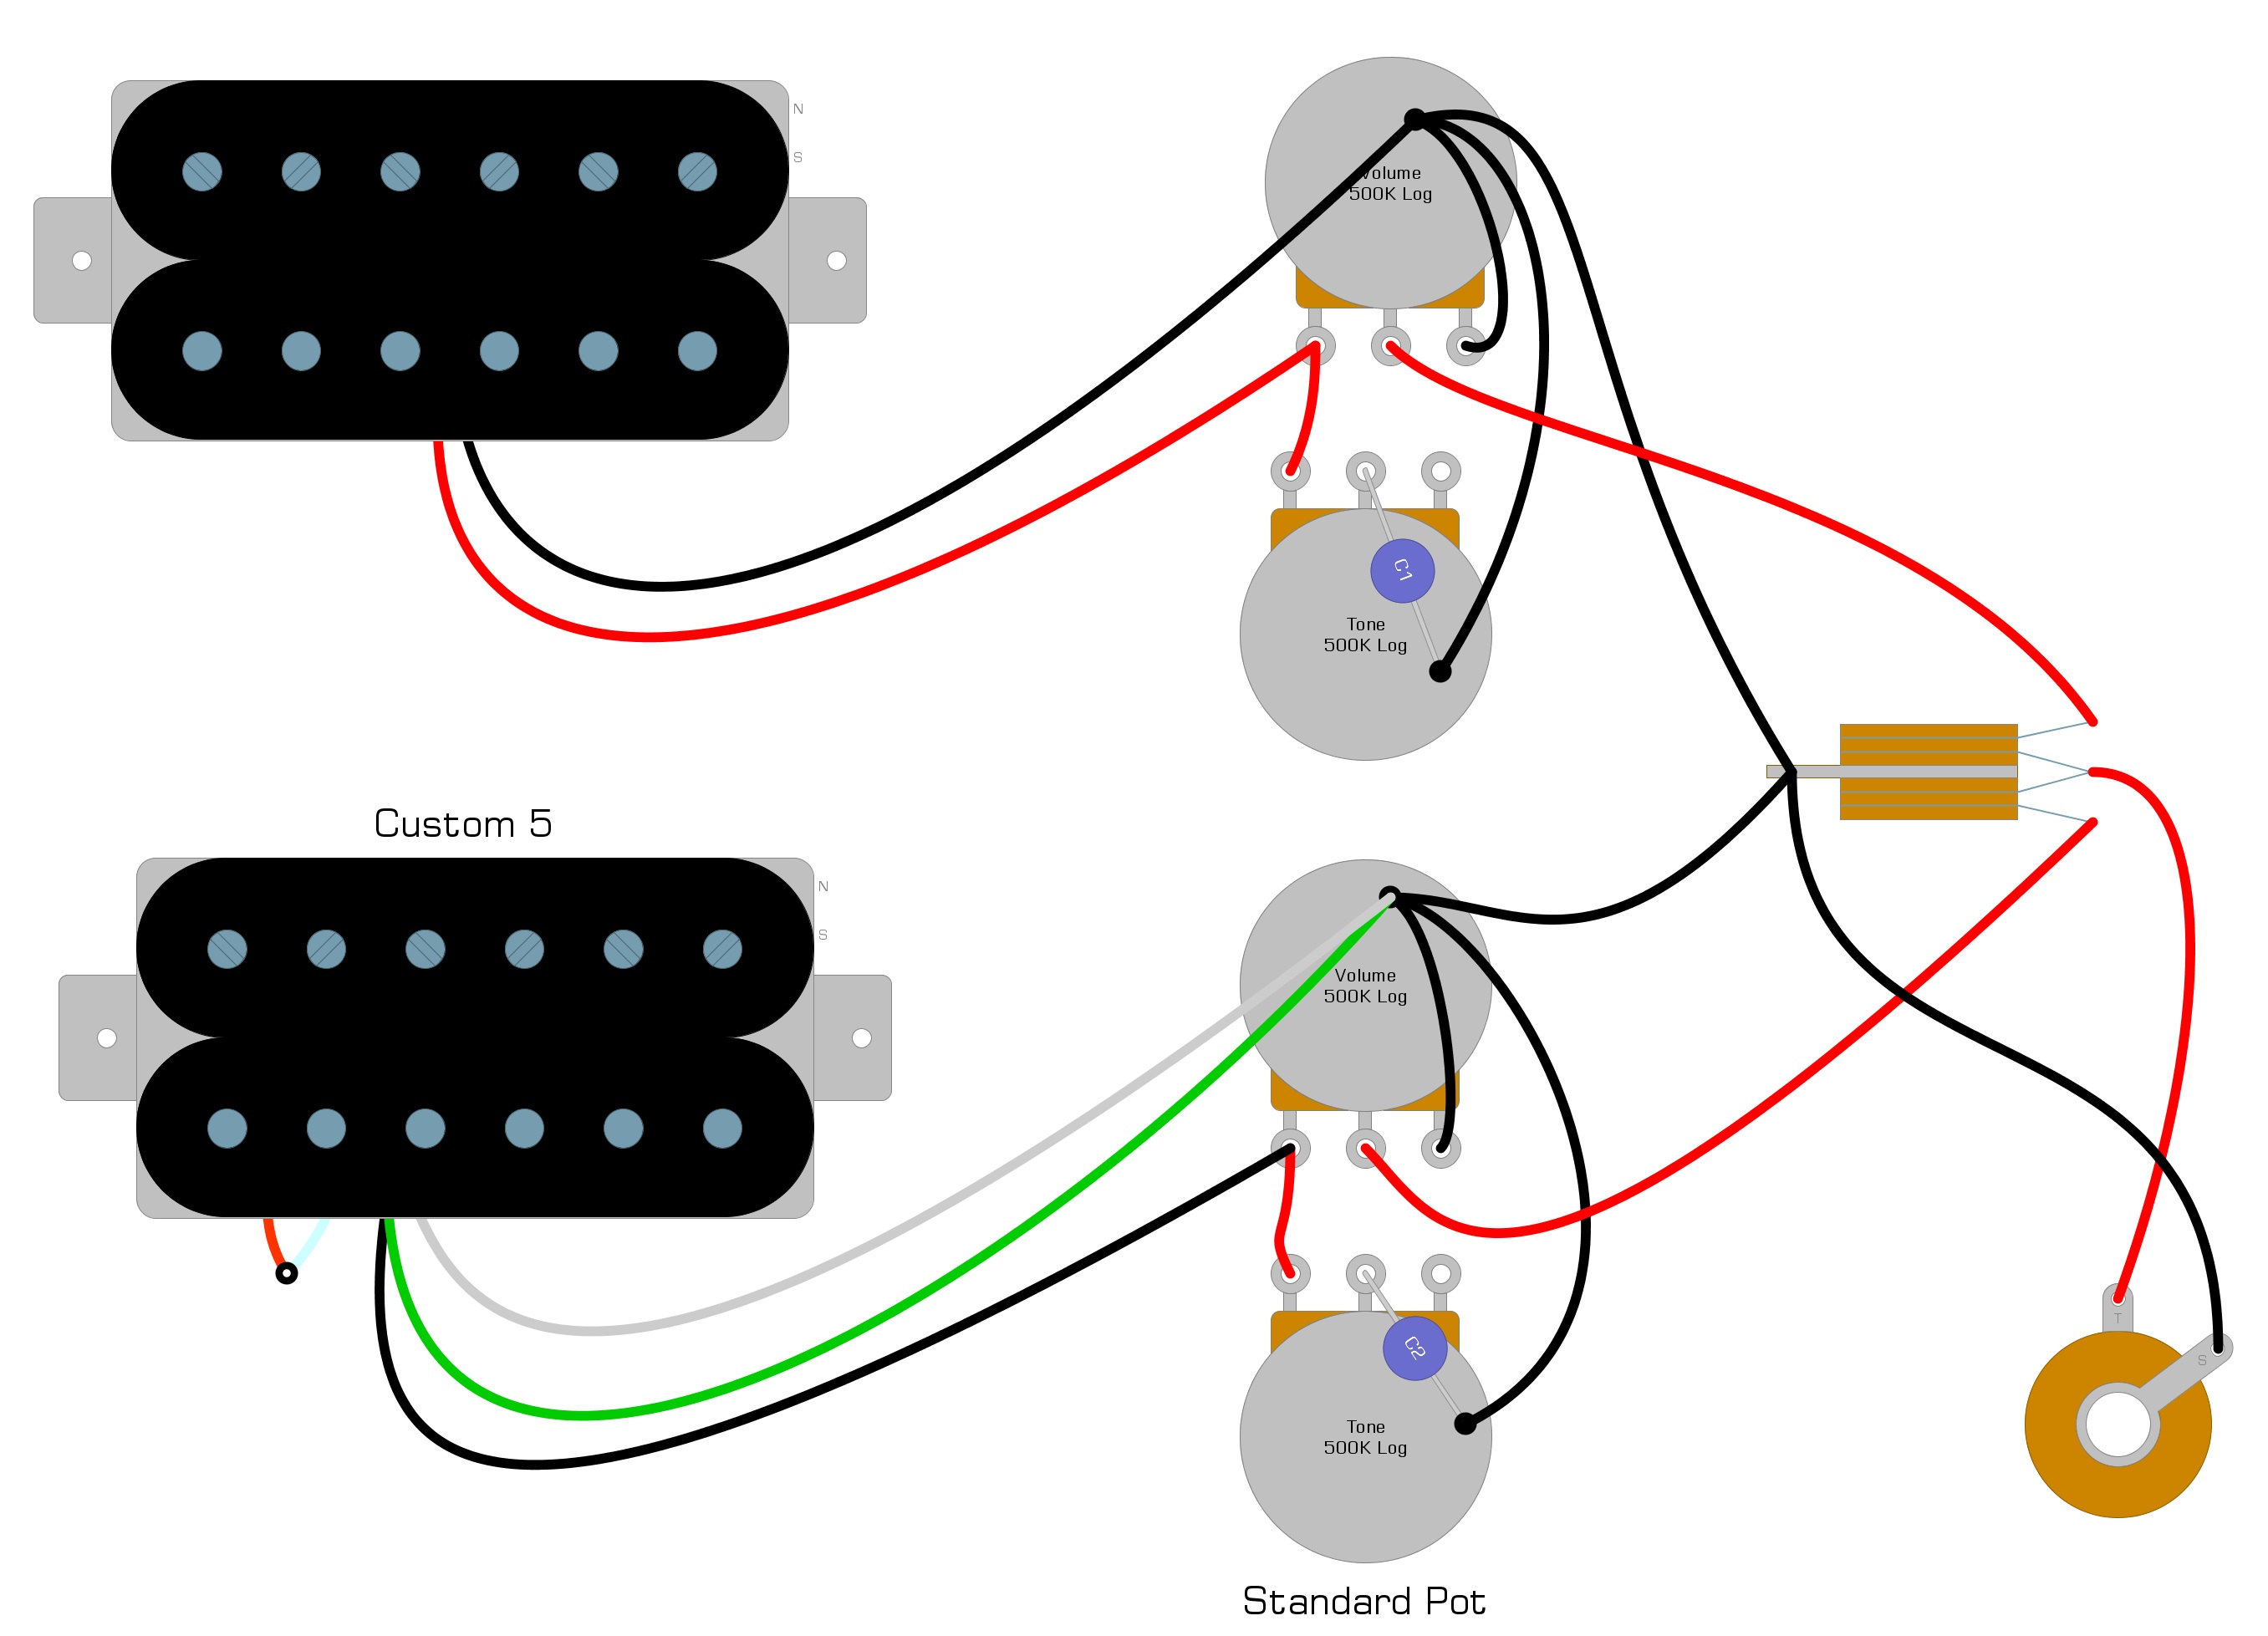
In Example 1, we demonstrate what a circuit might look like for a Gibson Les Paul-style guitar, using a standard tone control.
Example 1
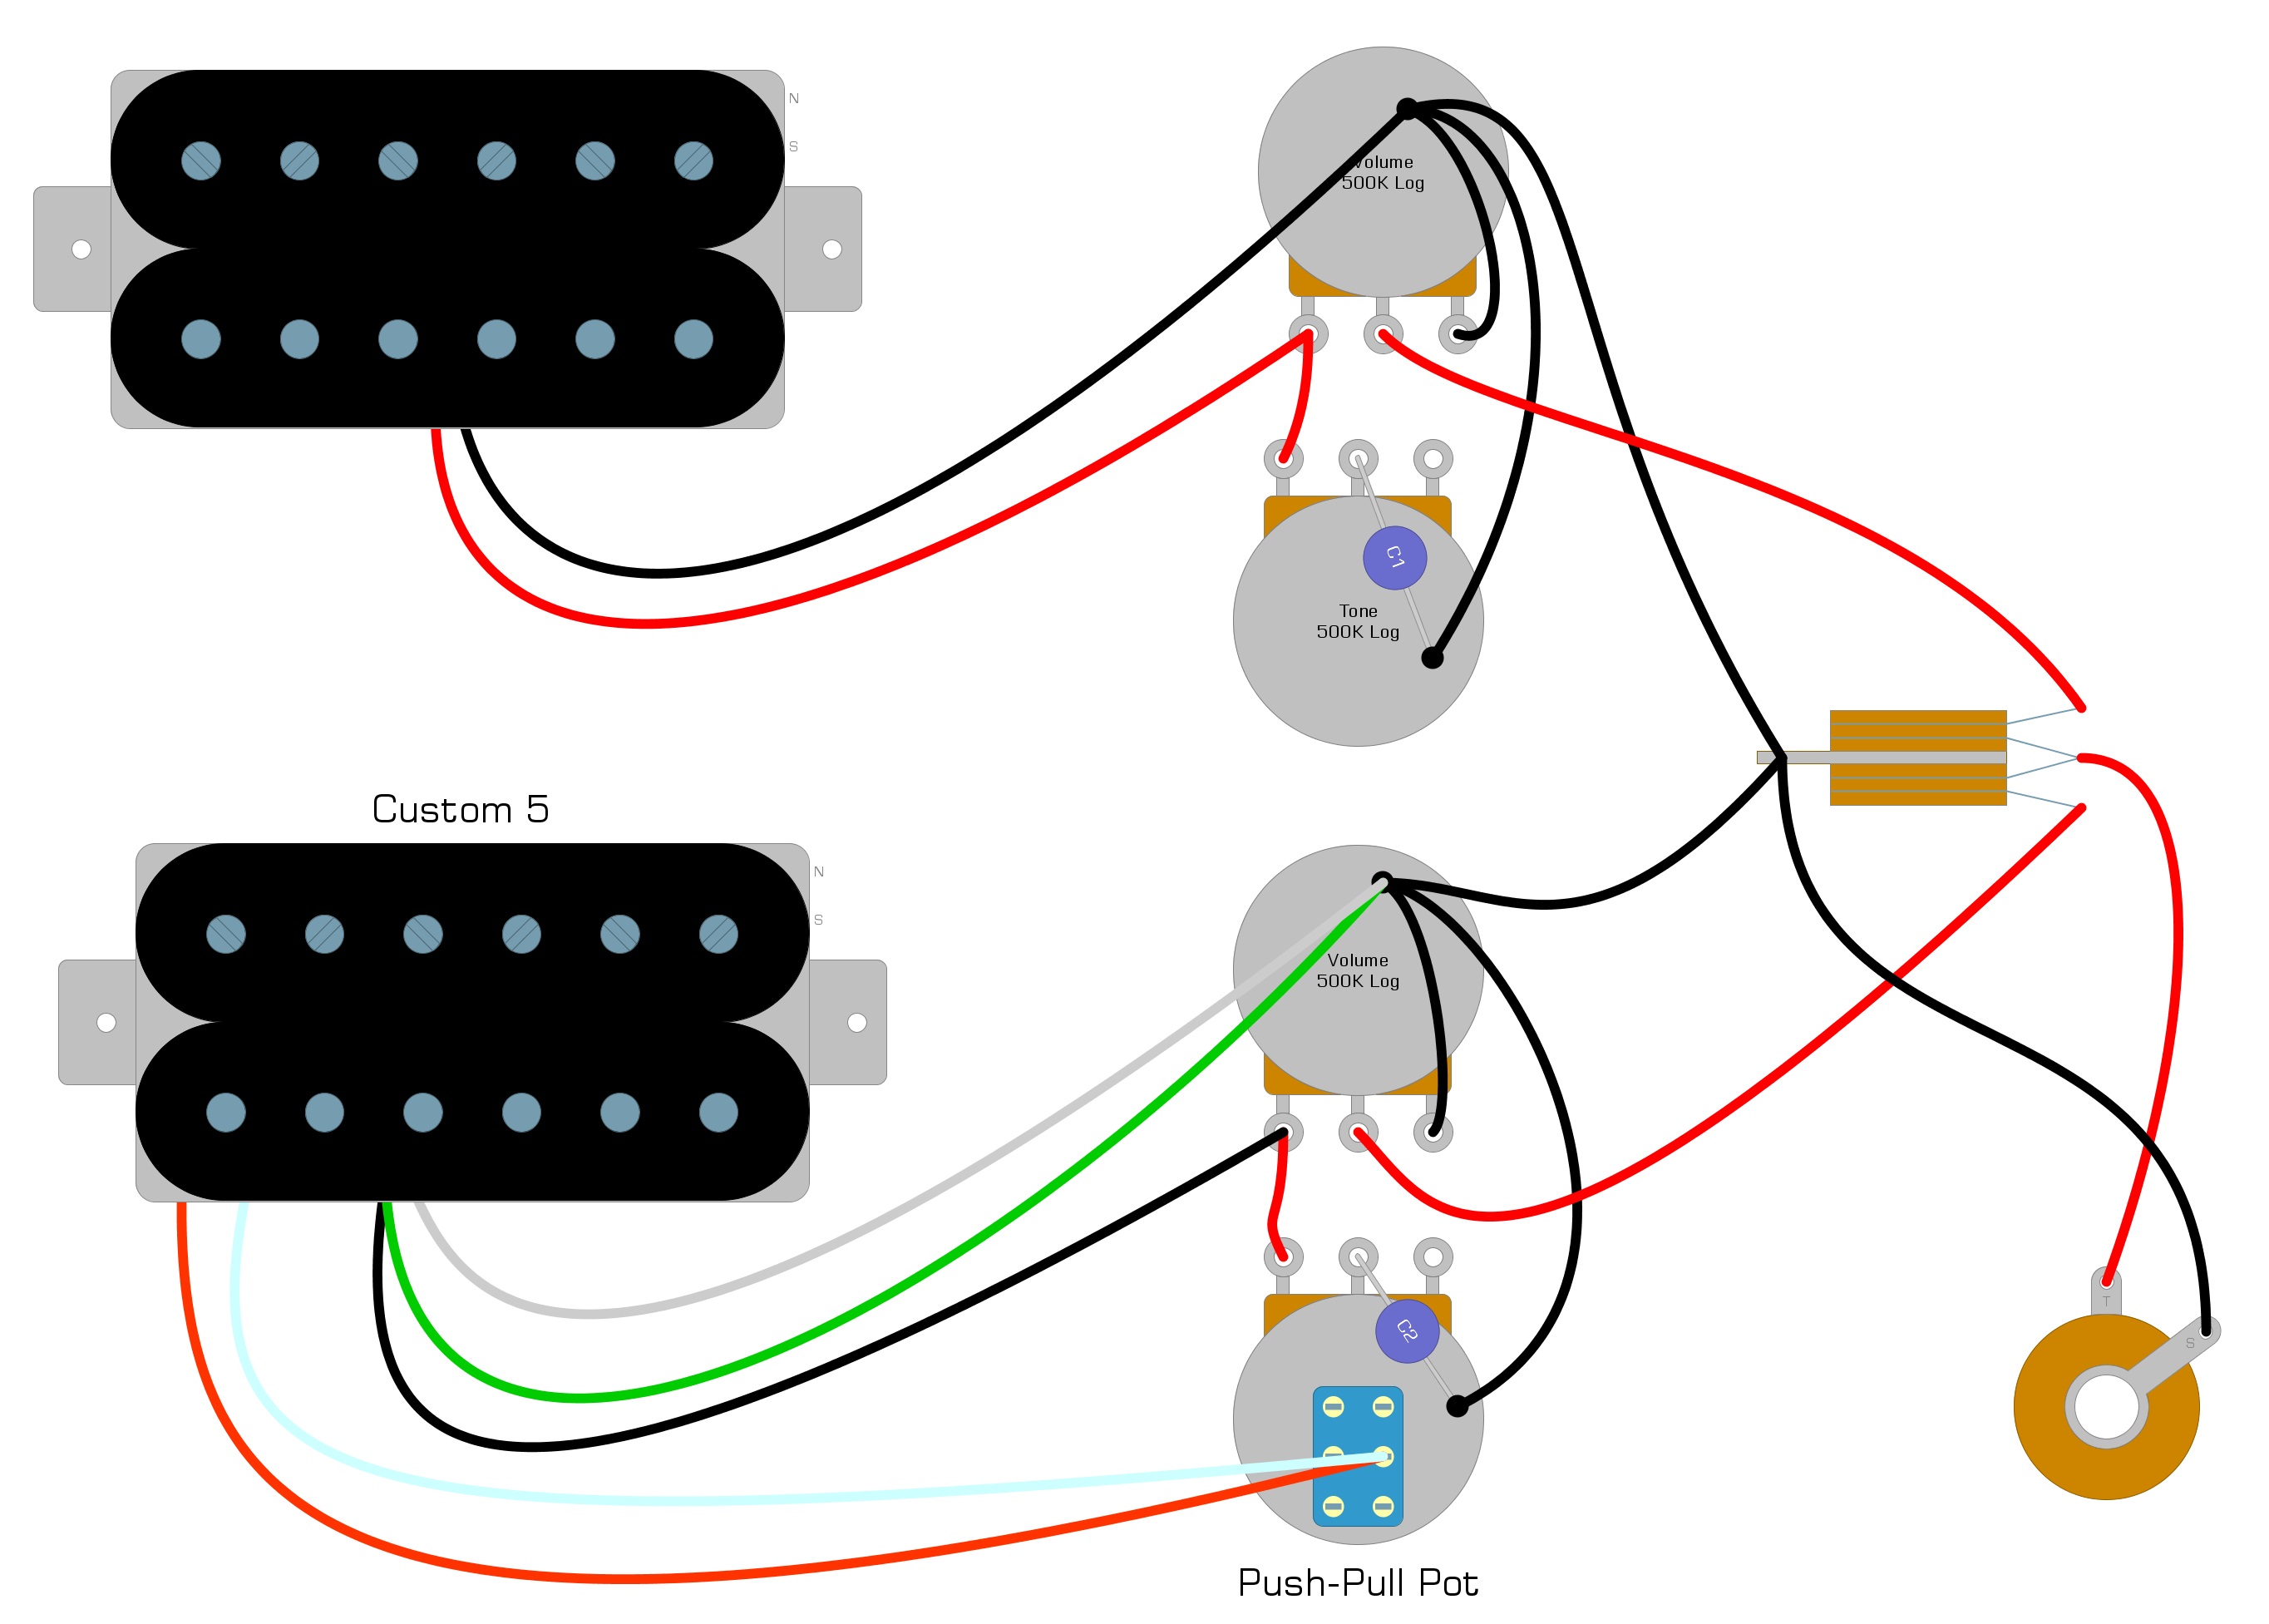
In Example 2, we demonstrate the same circuit, but with the push-pull pot in place.
Example 2

Completing the Modification
Once the push-pull switch is in place, your modification is nearly complete. To finish the mod, solder the red and white wires from the Custom 5 to a center lug of the switch part of the push-pull pot.
We have illustrated this connection in Example 3.
Example 3
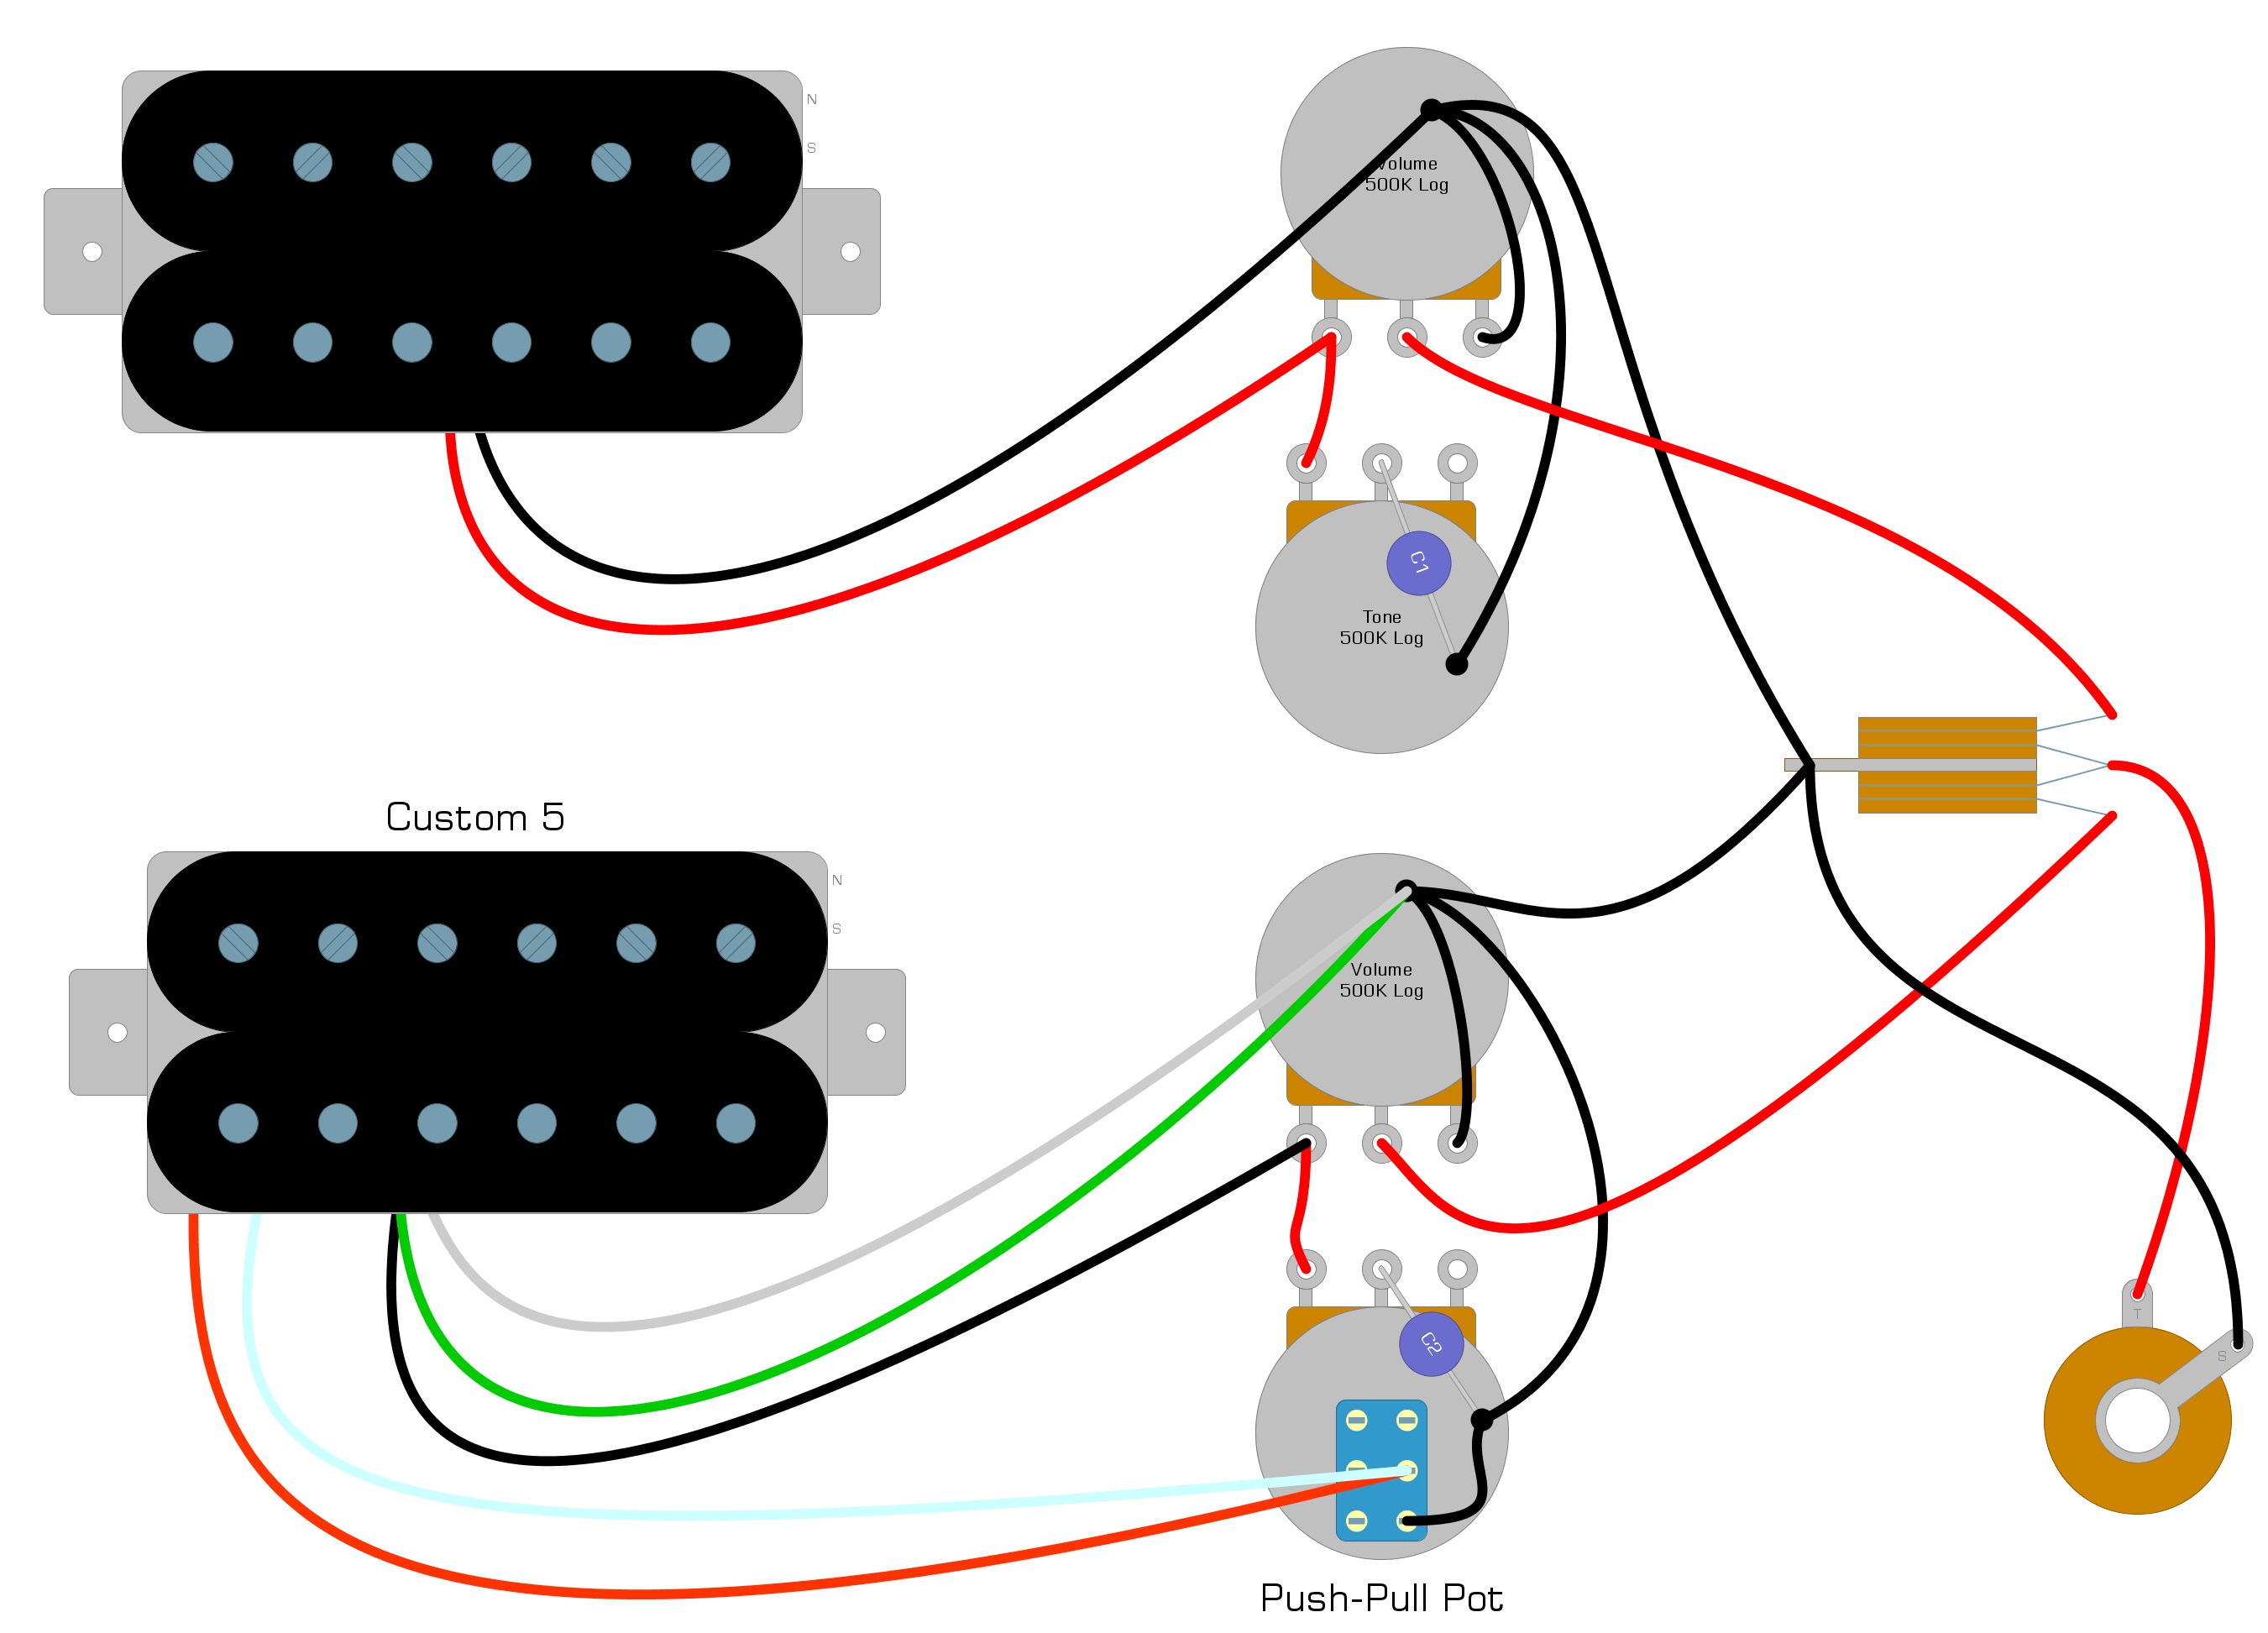
The last step in our modification is to solder the short piece of wire to the bottom lug on the switch part of the push-pull pot to the back casing, to create a Ground wire.
We have illustrated this connection in Example 4.
Example 4
How It Works
This coil-splitting modification works because the white wire is the input to the second coil. The signal normally exits the red wire and enters the white wire, but when we pull out our push-pull pot, the signal exits the red wire and continues out our new wire to Ground, never entering the white wire. When we push the switch back in, the Ground wire is disconnected, and the signal travels into the white wire as it normally would.
Summary
If you opted for the mini-toggle switch, the instructions are the same, only the switch and the pot are separate. You’ll save the need to convert the pot, but you’ll have a permanent hole in your pickguard. This modification is easy to complete and gives you access to a tone that you could not access before.
We hope that you have enjoyed reading over this short guide, and that it’s taught you something new about your guitar. If you were able to install this mod and get it working, please feel free to share this article on Facebook and Twitter. For more articles on guitar electronics, visit humbuckersoup.com.