
By Ed Malaker
Posted 05/10/2022
In this post, we’ll illustrate how to install any type of Rio Grande pickup into your guitar. Rio Grande may not be as well known as Seymour Duncan or DiMarzio, but they have a large selection of great-sounding pickups for any style of player. We’ll take a look at everything from P90s to four-conductor humbuckers.
Before you Begin
This installation guide is intended as more of a reference page of illustrations than a step-by-step tutorial. If you are new to working on electronics, we have plenty of detailed wiring guides here, at Humbucker Soup, for many models of pickups, and we recommend checking one of those out before trying to use these illustrations.
Vintage Stratocaster Wiring
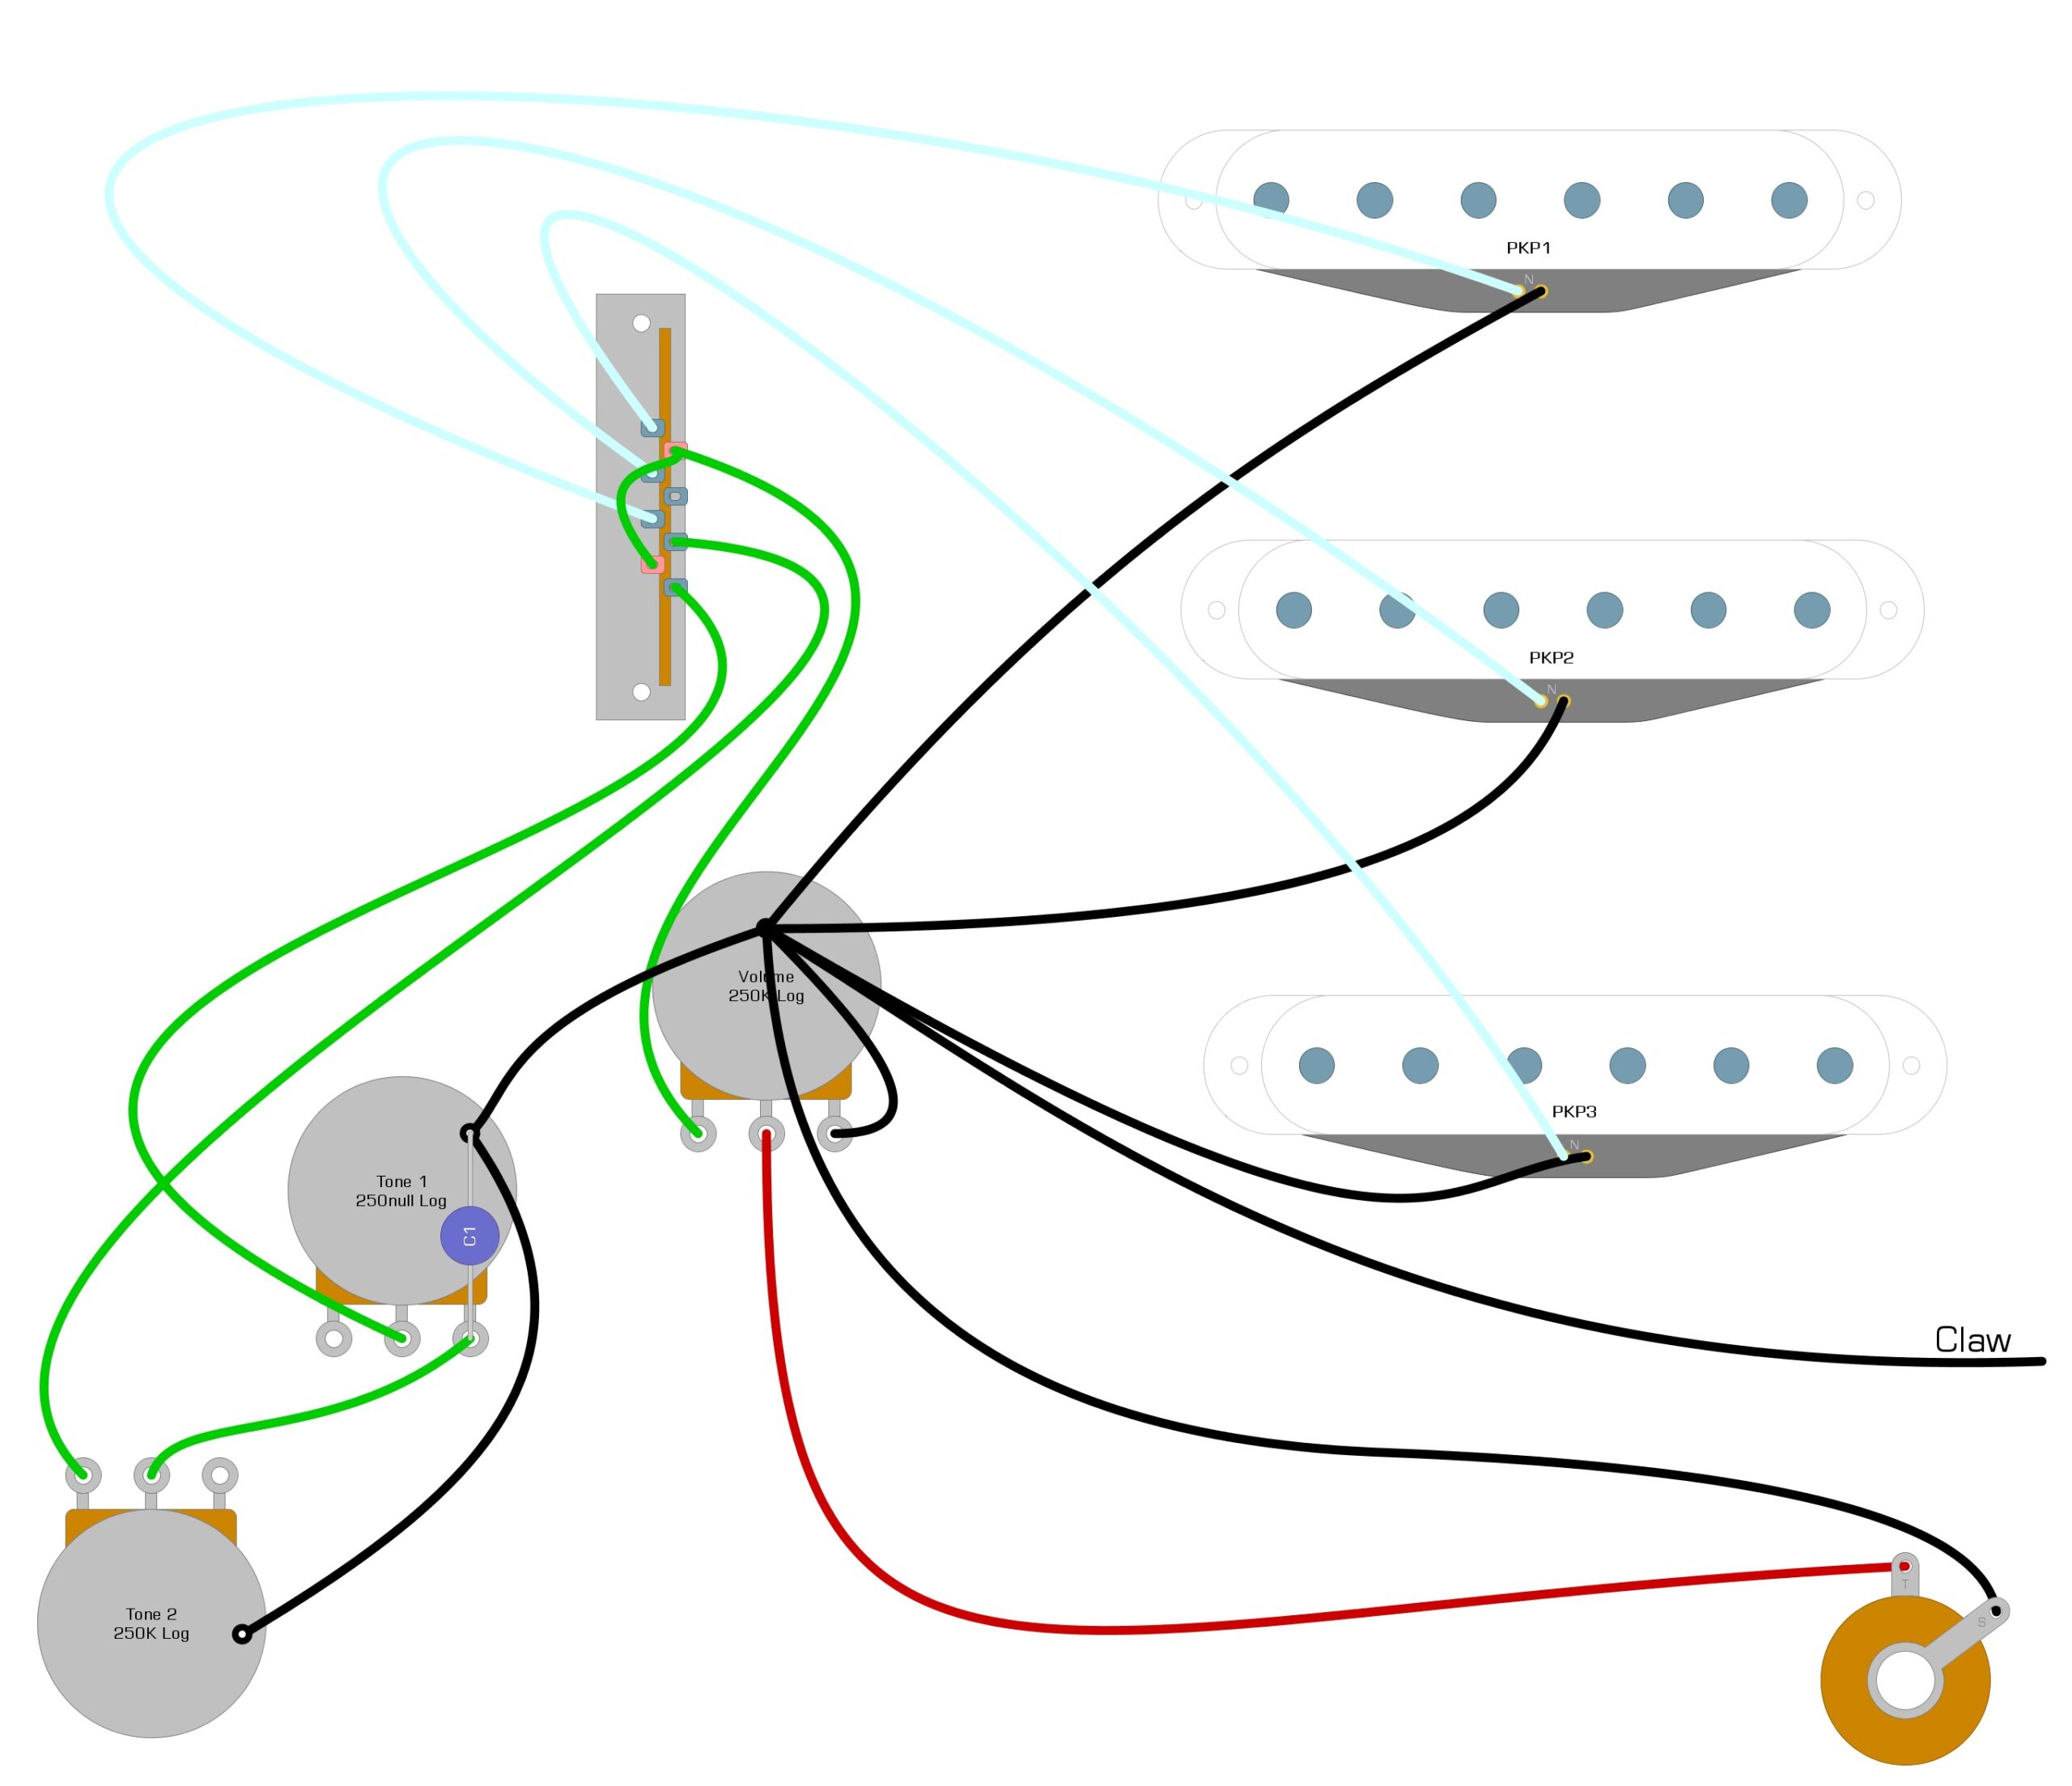
We always like to start with the Fender Stratocaster, because it contains three single-coil pickups, which are simple and extremely popular. Single-coil pickups have one coil and two wires, Hot and Ground. The same is true for all single-coil pickups, not in a Fender Stratocaster.
Rio Grande makes several models of single-coil pickup that will work well in a Strat, including the Vintage Tallboy, Halfbreed, Stelly, and the Dirty Harry. Rio Grande keeps the standard white is Hot, and black is Ground.
Example 1 is a diagram of a common way to install Rio Grande single-coil pickups in a Fender Strat.
Example 1
Vintage Telecaster Wiring
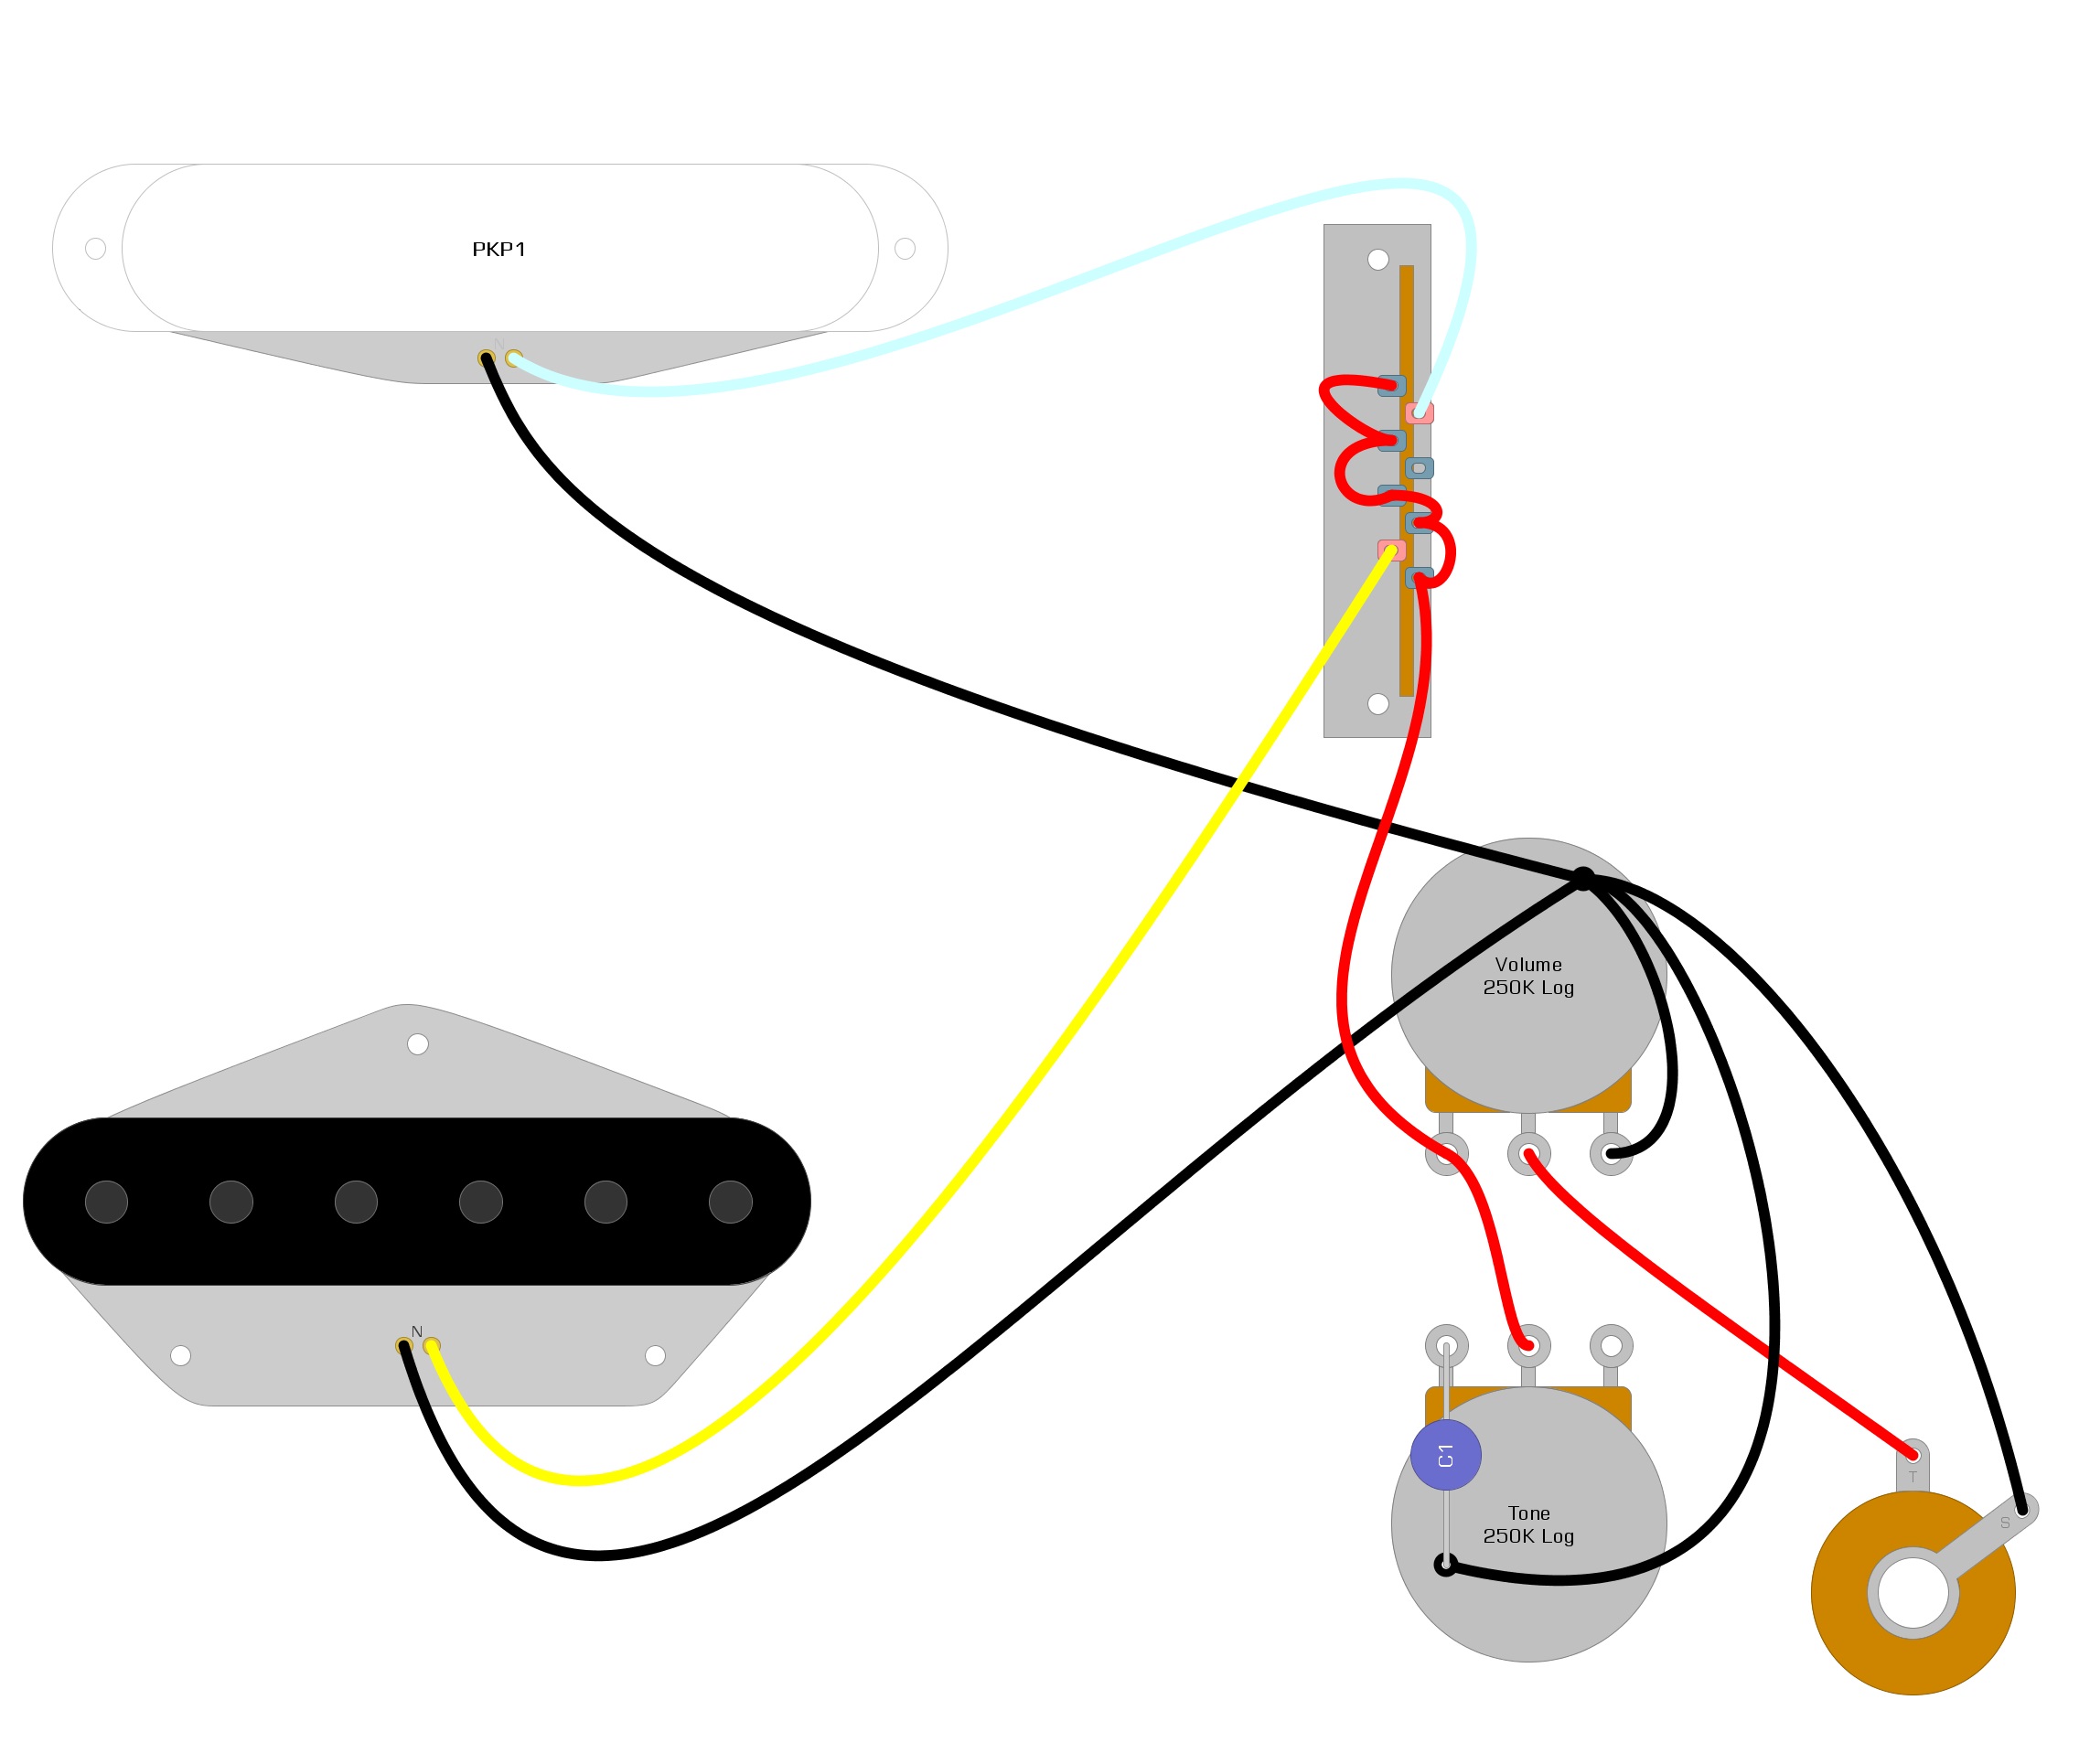
The Fender Telecaster uses single-coil pickups like the Strat, but the neck pickup is slightly smaller, and the bridge pickup uses a special base.
Rio Grande makes several models of Telecaster pickups, including the Charlie Christian, Shorthorn Classic, and the Big Bottom 72. You can purchase them individually or as part of a set, and they use the same wiring scheme as the single-coils in Stratocasters: white is Hot, and black is Ground.
Example 2 is a diagram of a popular way to install pickups in a Fender Telecaster.
Example 2
Vintage P90 Wiring
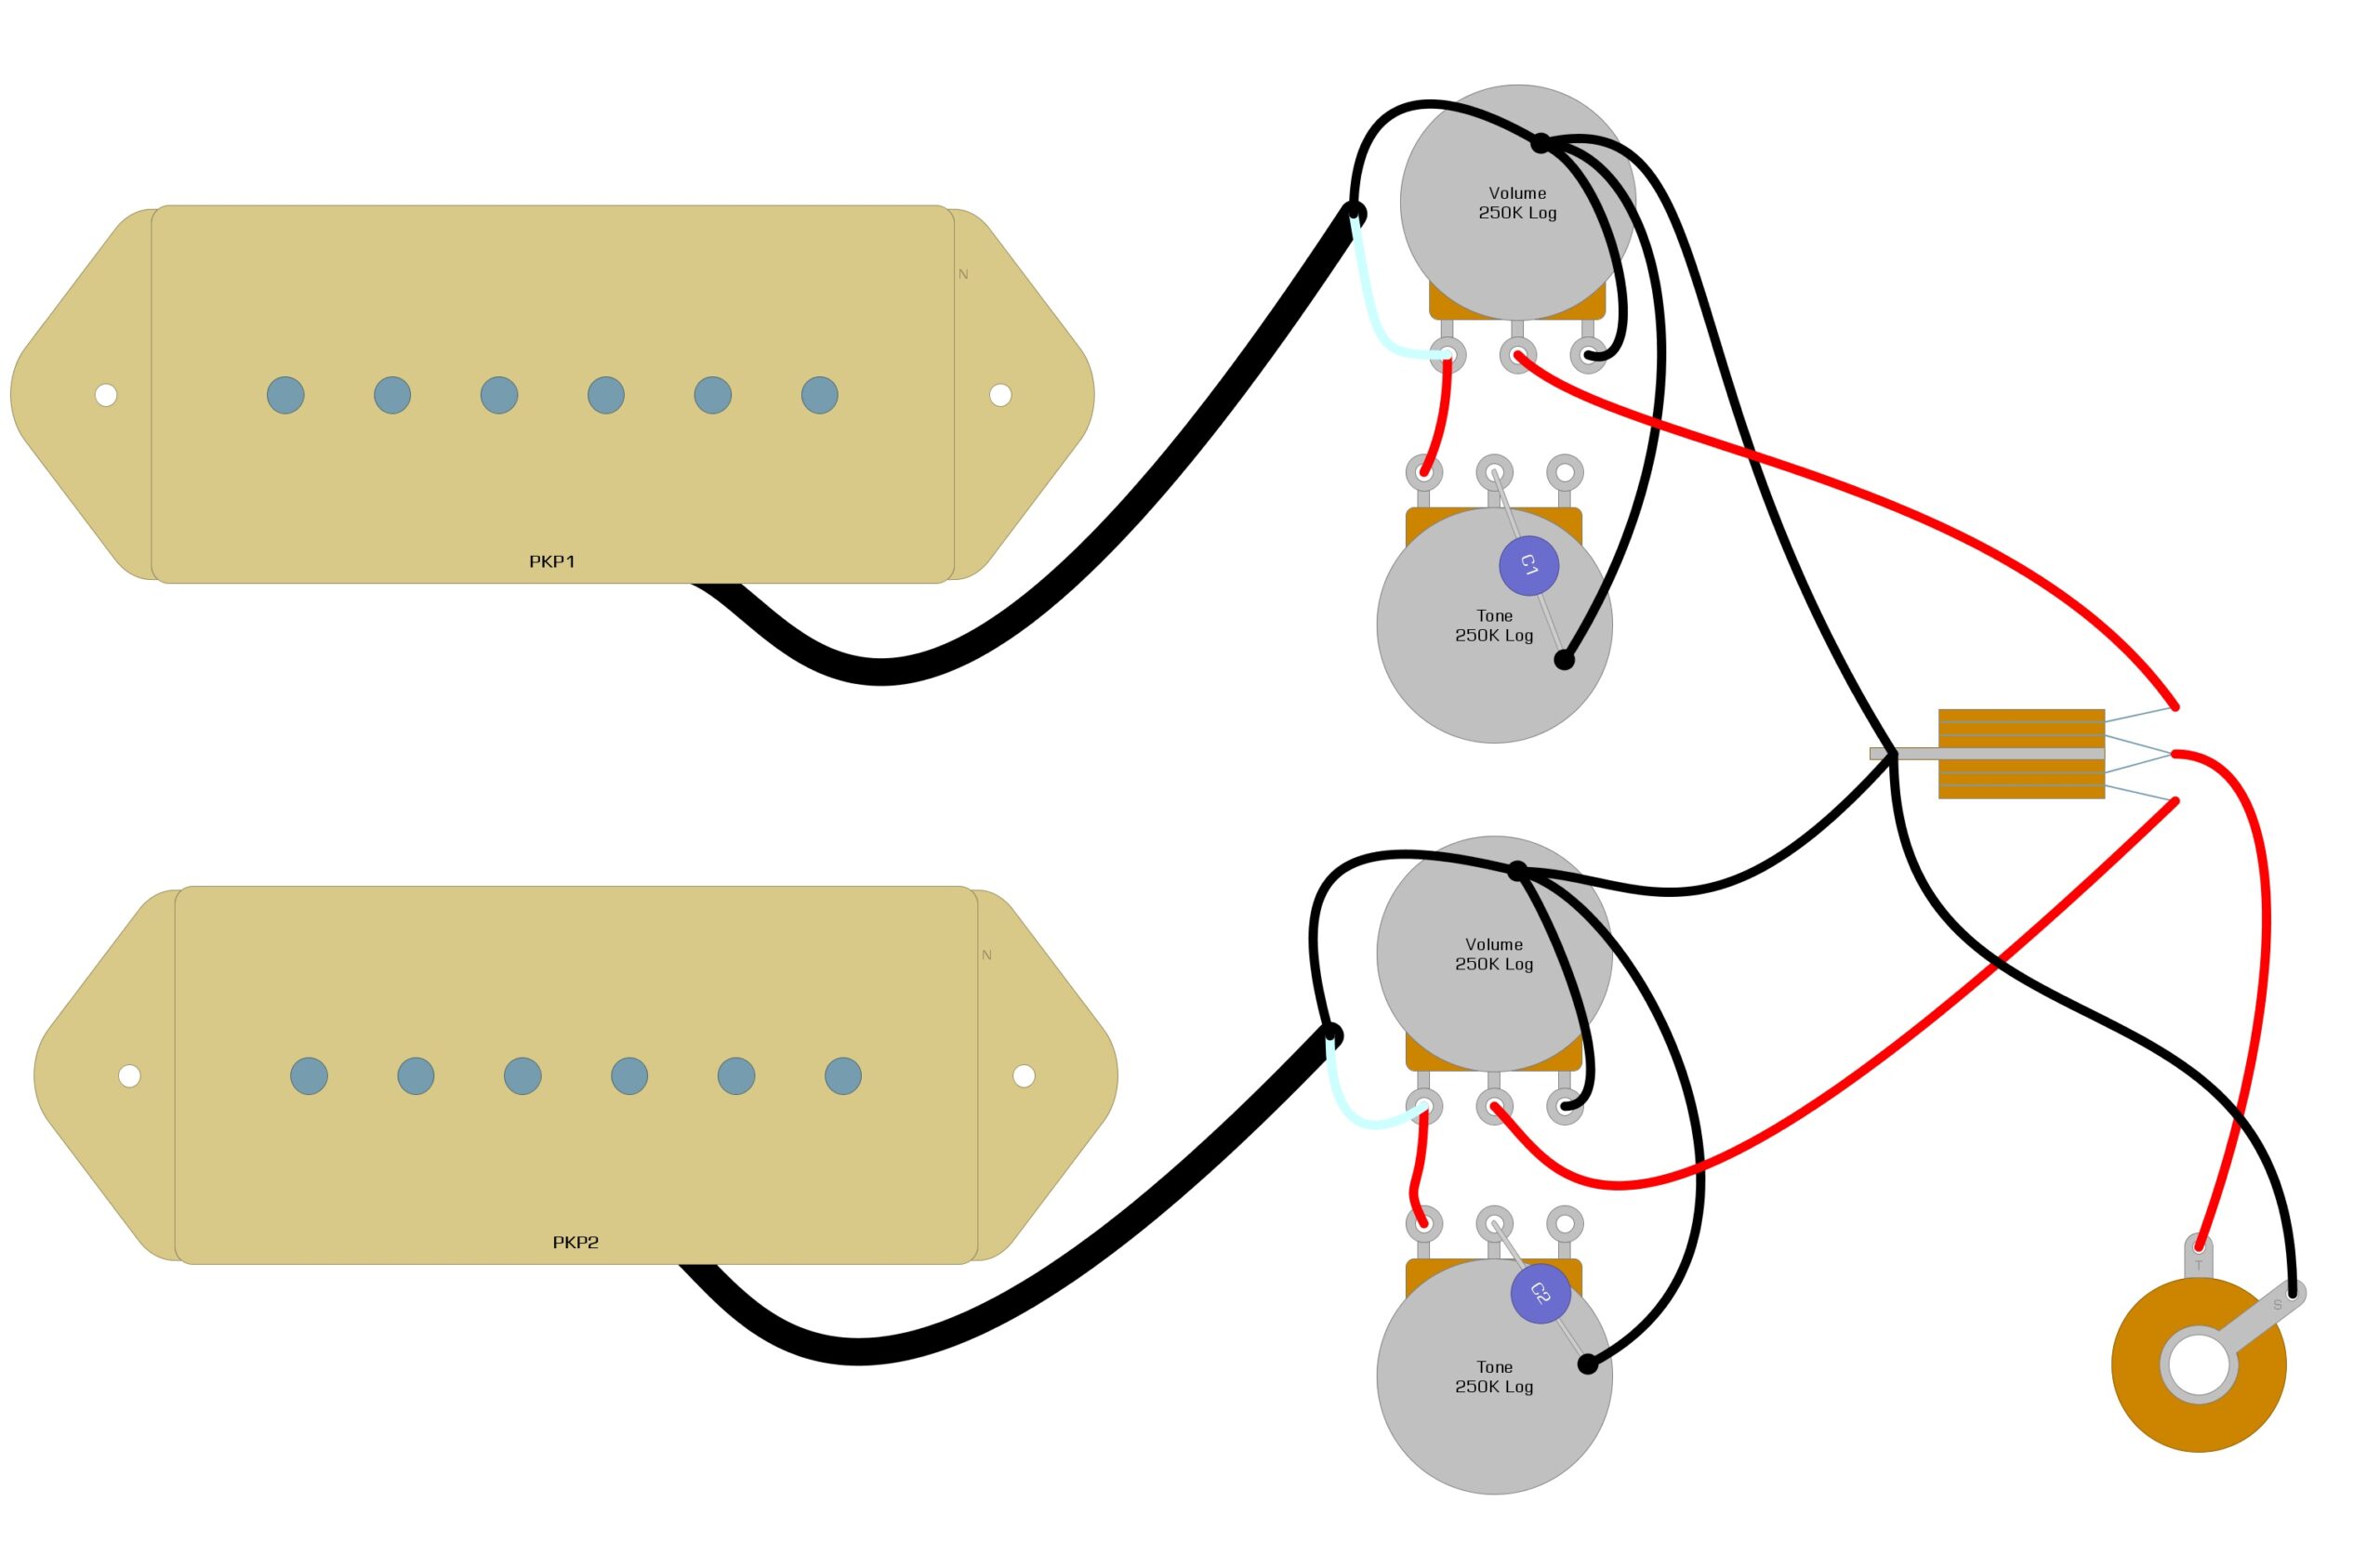
P90s are the single-coil pickups that Gibson uses, and they have grown in popularity since their introduction. They are known for having a bright but thick tone that many players love. P90s use a braided wire scheme, which means a single-colored wire is inside a braided metal wire sleeve. In this scheme, the colored wire is Hot, while the braided metal sleeve is the Ground.
Rio Grande has plenty of P90 models, including the Bluesbar, the Jazzbar, and the Lowbar. Example 3 is a diagram of a popular way to install the P90 into a Gibson Les Paul.
Example 3
Humbucker Wiring (Braided Wire)
The braided wire humbucker uses the same wiring scheme as the P90 and is very common in vintage guitars. Manufacturers still make them today, and Rio Grande makes several models, including the Barbeque, Genuine Texas, and the Buffalo. You can also special order many pickups with the braided wire.
Example 4 is a diagram of a popular way to install Rio Grande humbug braided humbuckers in a Gibson Les Paul.
Example 4

Humbucker Wiring (4-Wires)
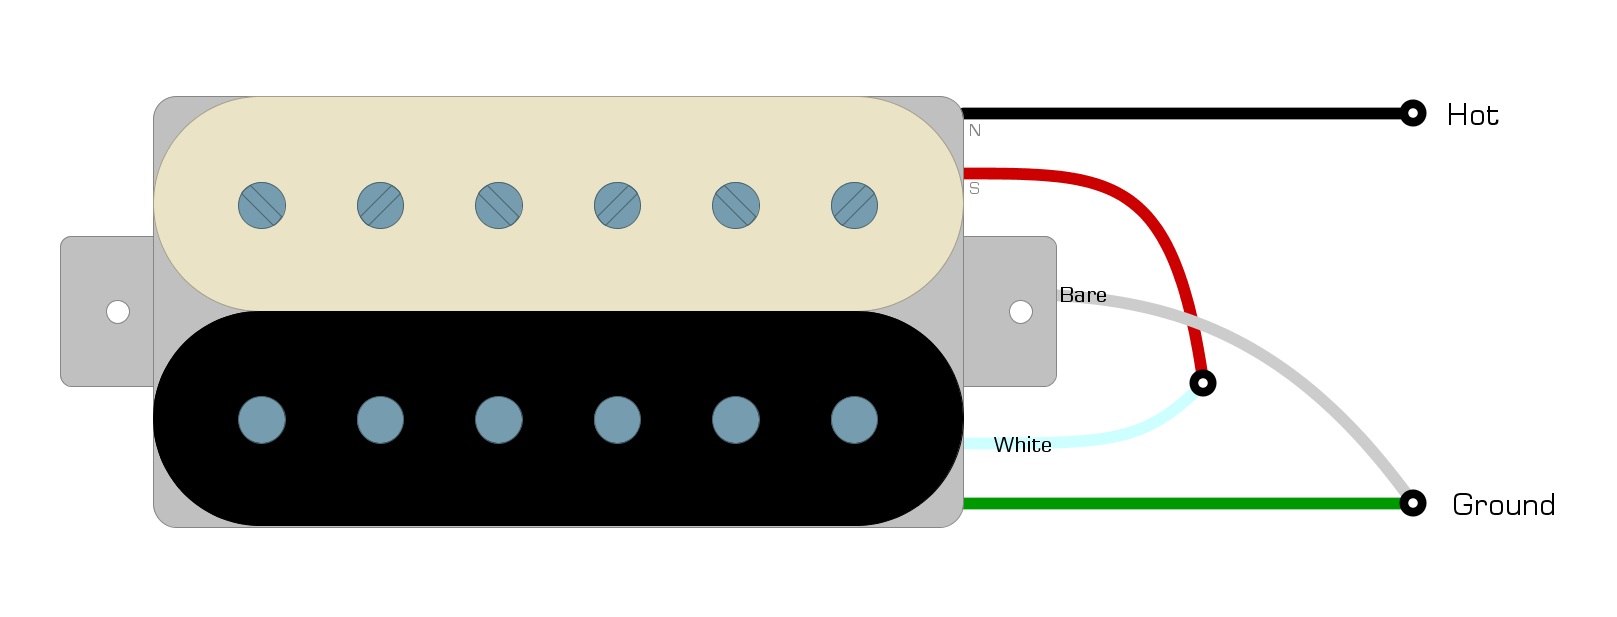
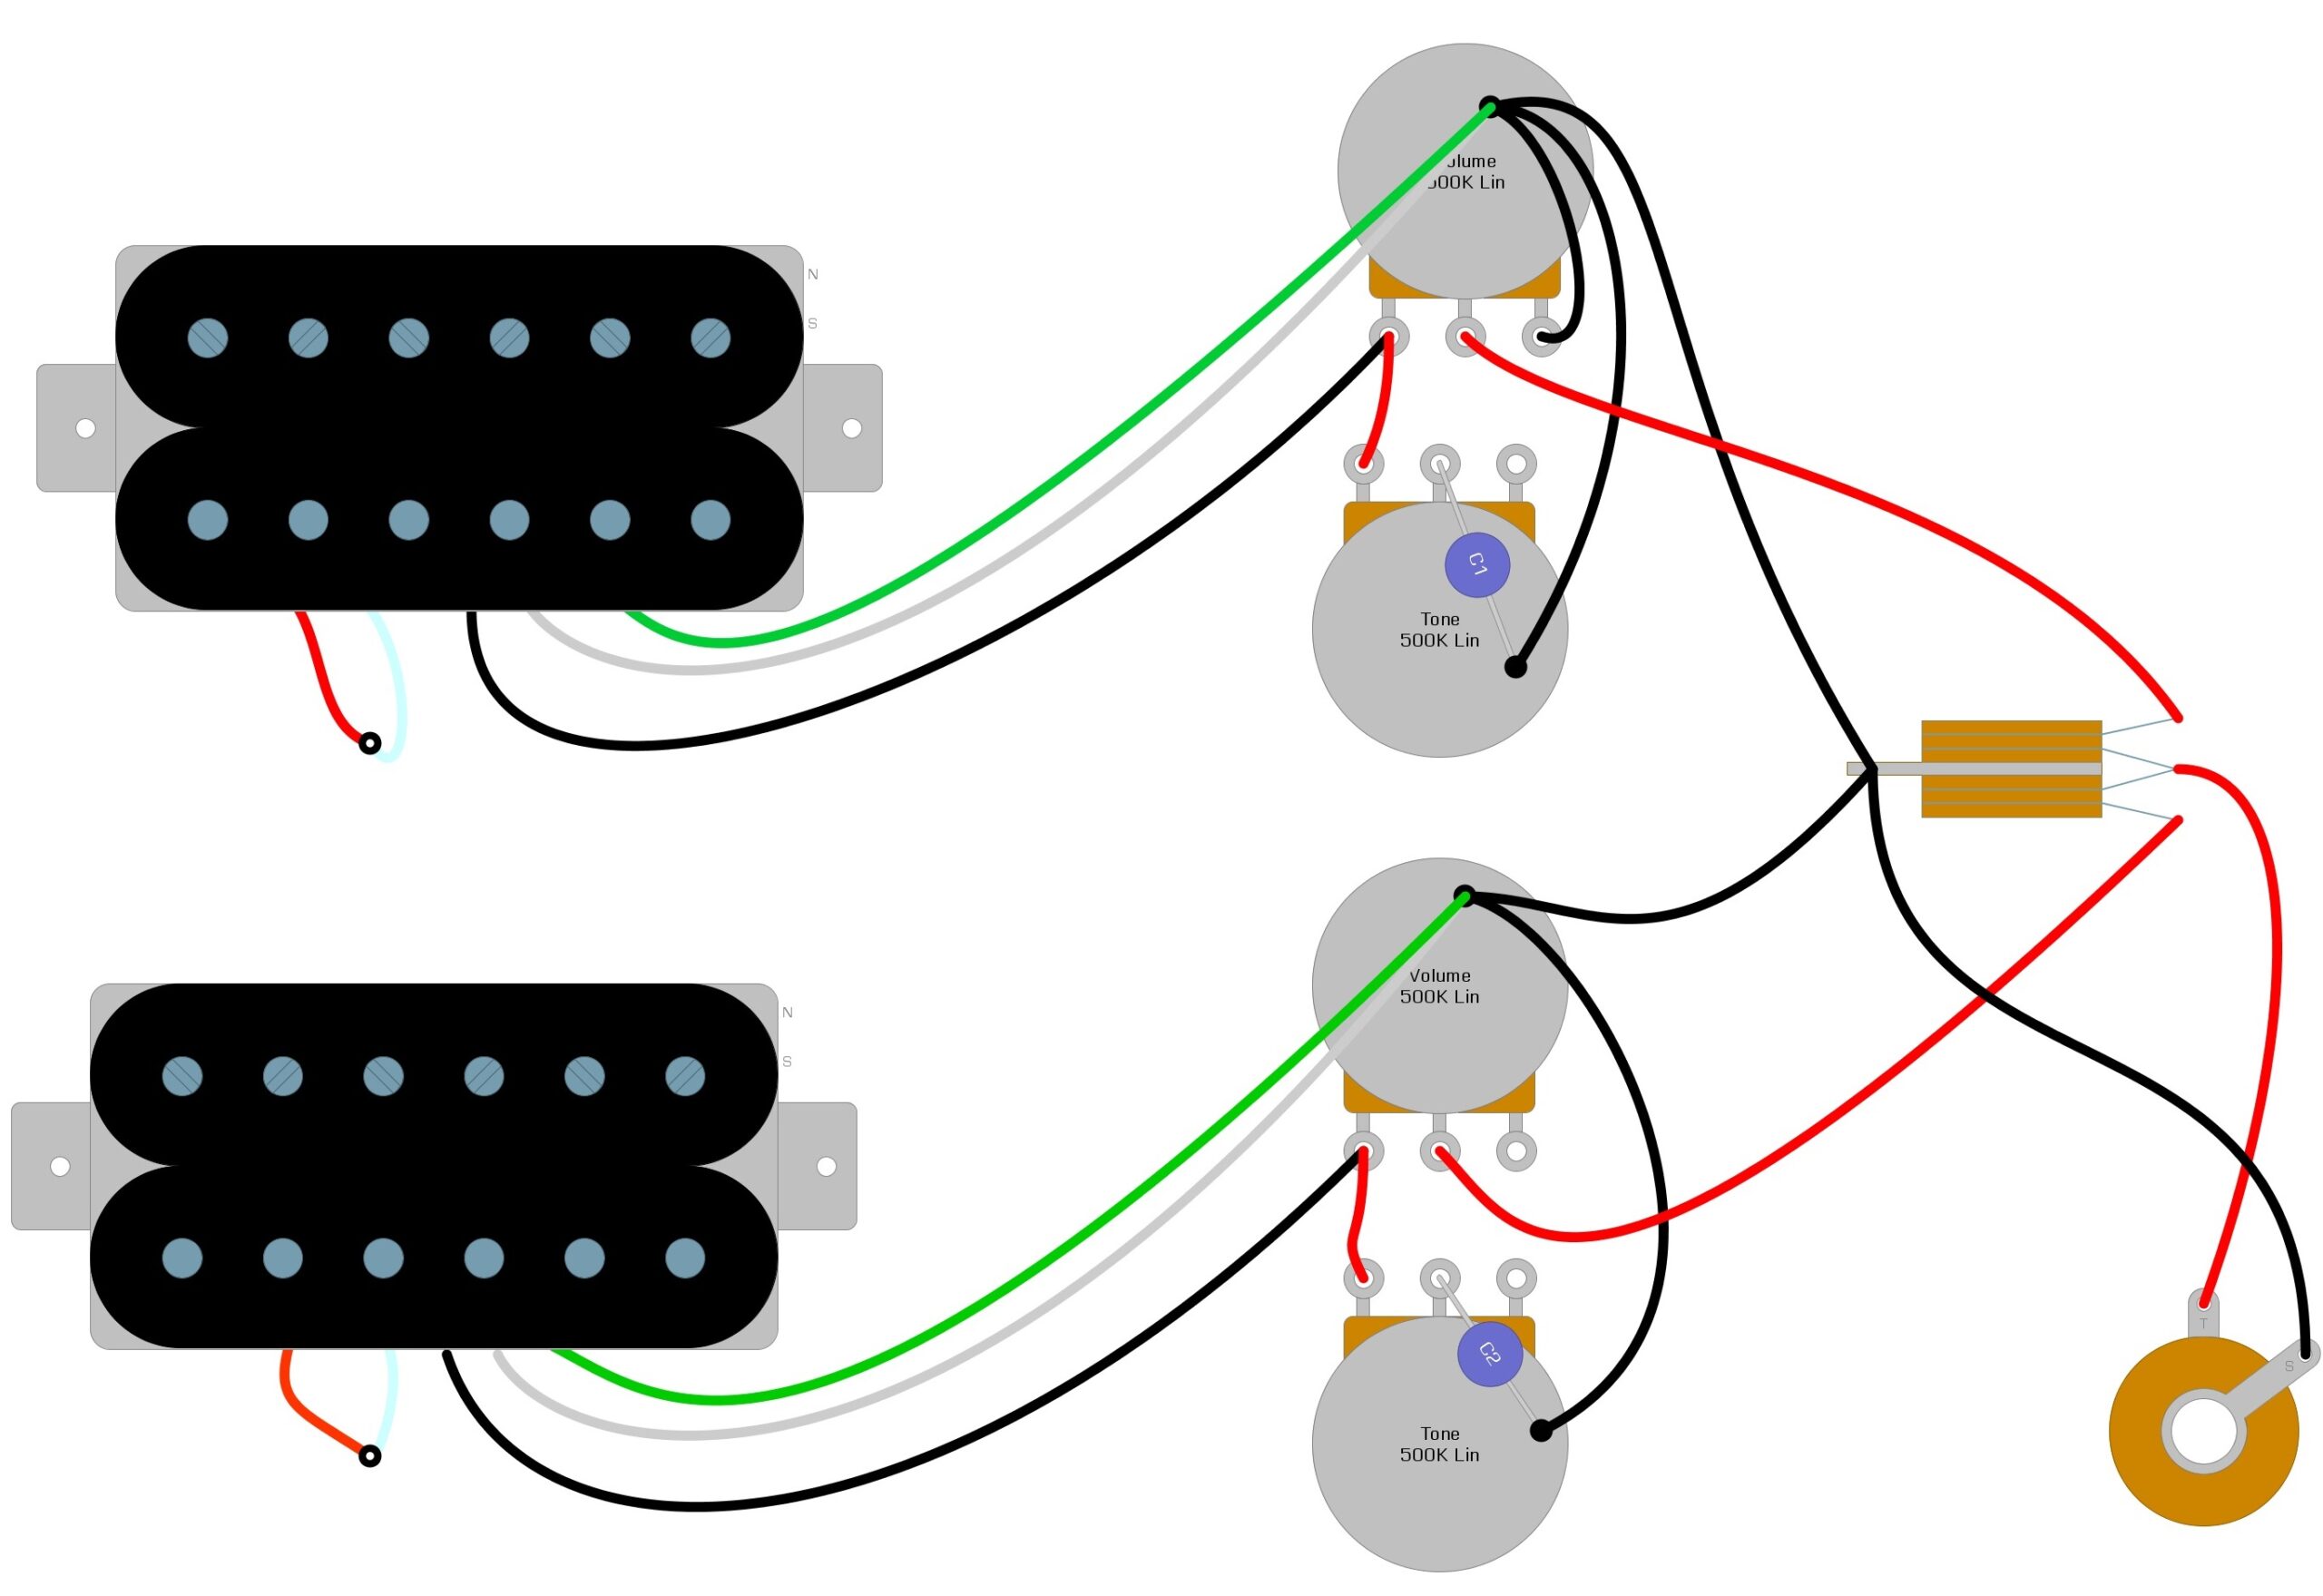
The modern four-wire humbucker actually has five wires. Each coil has two colored wires, and there is one bare wire that grounds the pickup chassis. When installing four-wire humbuckers, you’ll need to make the connections to get both coils working together manually, so you’ll need the wiring code.
Rio Grande Wiring Code
- Black = Hot
- White + Red = soldered together and taped off
- Green + Bare = soldered together; Ground
Example 5 is a diagram of the Rio Grande wiring code.
Example 5
Once you manually connect the two coils via the red and white wires, you’ll be able to install the pickup. Example 6 is a diagram of a common way to install a Rio Grande four-wire pickup into a Gibson Les Paul.
Example 6
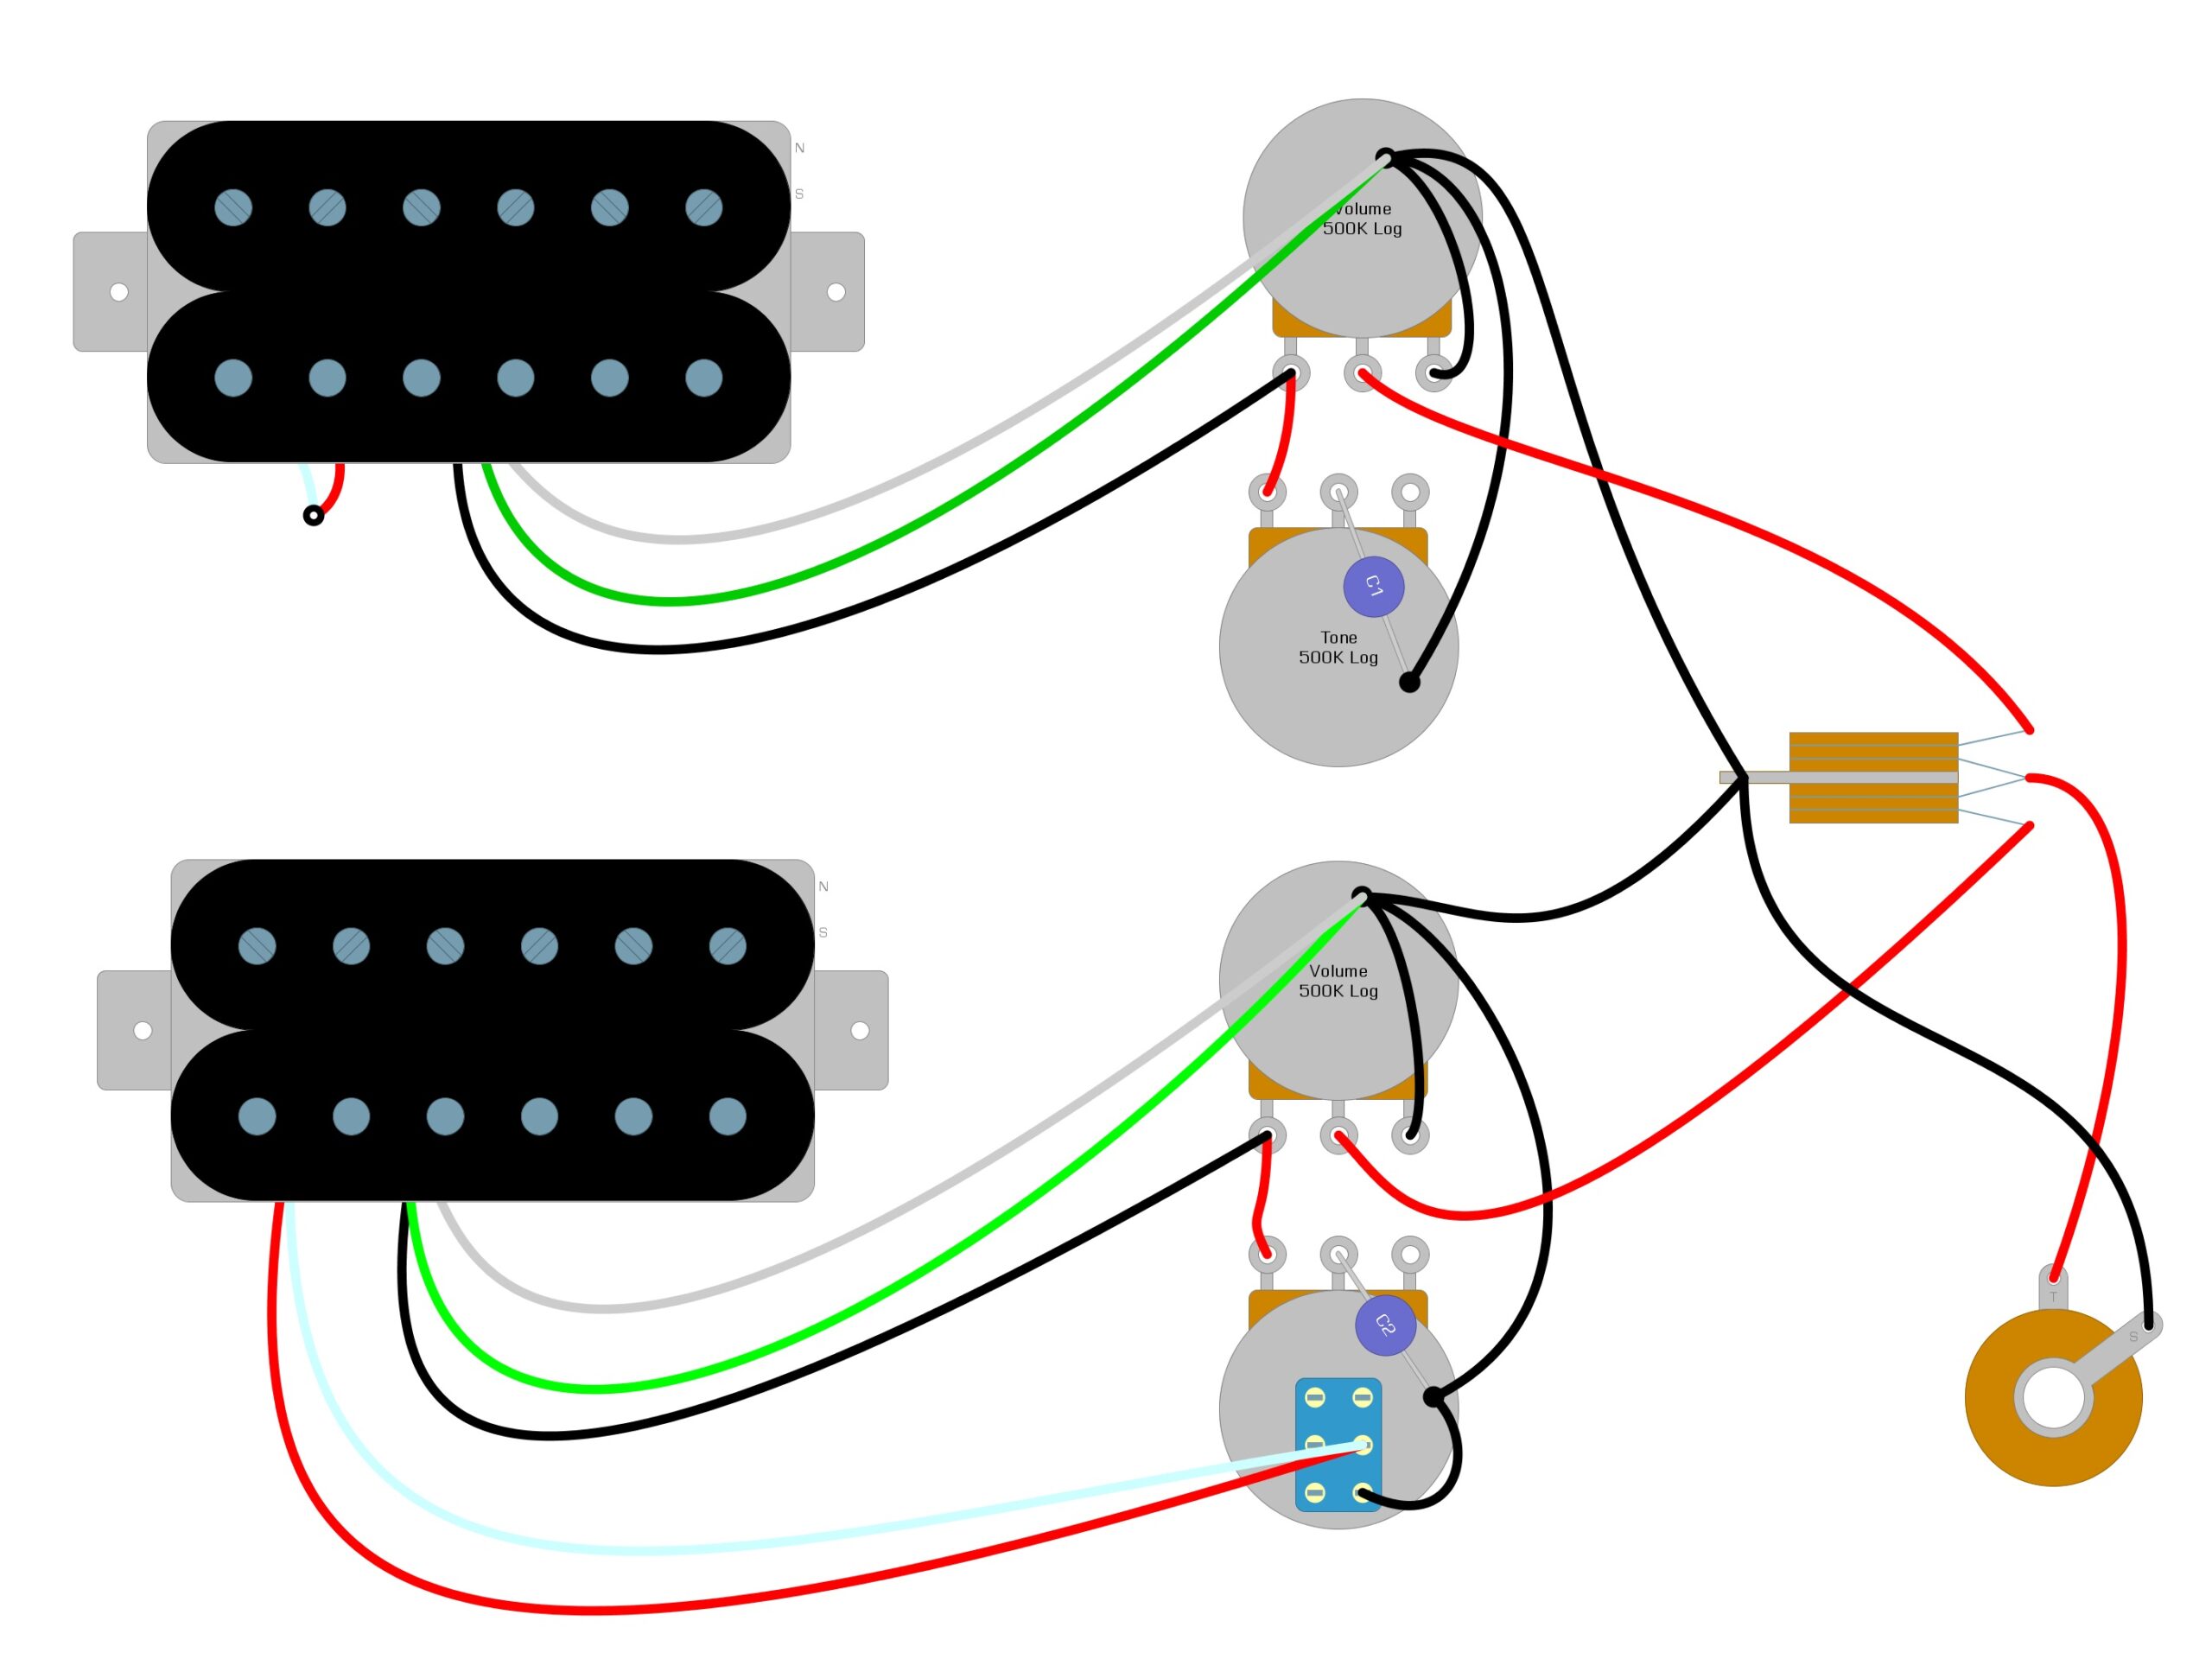
Humbucker Coil-Splitting (4-Wires)
It’s not necessarily part of the installation guide, but if you have installed the four-wire humbucker, you can go one step further and install a coil-split mod. This modification is very easy to accomplish, and it adds extra tones to your guitar. You will need to convert your tone control to a push-pull pot, but all of the wiring will stay the same.
Example 7 is a diagram of what a Gibson Les Paul might look like with one of the tone controls changed to a push-pull pot.
Example 7

With the push-pull in place, you can complete the modification by soldering the red and white wires to the switch part of the push-pull pot. You’ll then want to add a short wire from the switch to the back of the pot.
Example 8 is a diagram of what a Gibson Les Paul might look like with the coil-splitting modification completed.
Example 8
Summary
We hope you have enjoyed reading over this guide and have found it helpful. Changing pickups is not hard, and it always comes down to only two connections — Hot and Ground. The push-pull switch in our coil-splitting mod allows you to add an extra tone to your arsenal that you couldn’t have had otherwise. If you’ve found this article helpful, please feel free to share this on Facebook and Twitter. For more articles on guitar electronics, visit humbuckersoup.com.