
By Ed Malaker
Posted 09/13/2022
In this article, we’ll illustrate how to install DiMarzio Fortitude pickups. The DiMarzio Fortitude is known for being sharp and precise; it’s warm-sounding without being muddy and works well with alternate tunings. It has a slight boost at 160hz and a small decrease at 500hz. It’s the signature pickup of Gojira guitarist and lead vocalist Joe Duplantier.
Tools and Materials
You won’t need a lot of tools to install your pickup. A screwdriver, electrical tape, soldering iron, and a little solder should be all you need to get these pickups installed and working:
- Soldering iron
- Solder
- Electrical Tape
- Phillips Screwdriver
Getting Started
First, remove the pickup you’re replacing. To remove the pickup, use a Phillips screwdriver to unscrew it from the body. You will also need to remove the control cavity cover as well to have access to the electronics.
With the pickup free from the guitar, you can check the wire colors to see where they lead in the control cavity. Once you know which wires belong to the pickup, you can use your soldering iron to disconnect them. Be sure to make an accurate record of where they go, for future reference.
Next, you need to figure out the wiring code.
What’s a Wiring Code?
You’ve probably noticed that the Dimarzio Fortitude has four colored wires and one bare wire attached to it, and the one you just removed from your guitar may as well. It may be tempting to solder the green wire to where the green wire on your old pickup goes, but unless that pickup is a DiMarzio, there’s a good chance that it won’t work. That’s because the colors represent the beginning and end of each coil (four colored wires) and one bare shield wire. There is no standard, and each company has a unique “wiring code.” DiMarzio uses the following code for most of its four-conductor (color) humbucker pickups.
Dimarzio Fortitude Wiring Code
- Red = Hot
- Black + White = Soldered or twisted together and taped
- Green + Bare = Soldered or twisted together; Ground
Installing the Dimarzio Fortitude
Once you have the wiring code, the installation is easy and only requires doing the reverse of what you have already done. The Ground wire almost always goes to the back of the volume pot, so solder your green and bare wires in that location. The Hot wire usually goes to the switch or one of the lugs on the volume pot. Solder the red wire to whichever you unsoldered when you uninstalled the old pickup.
Complete Dimarzio Fortitude Wiring Diagram
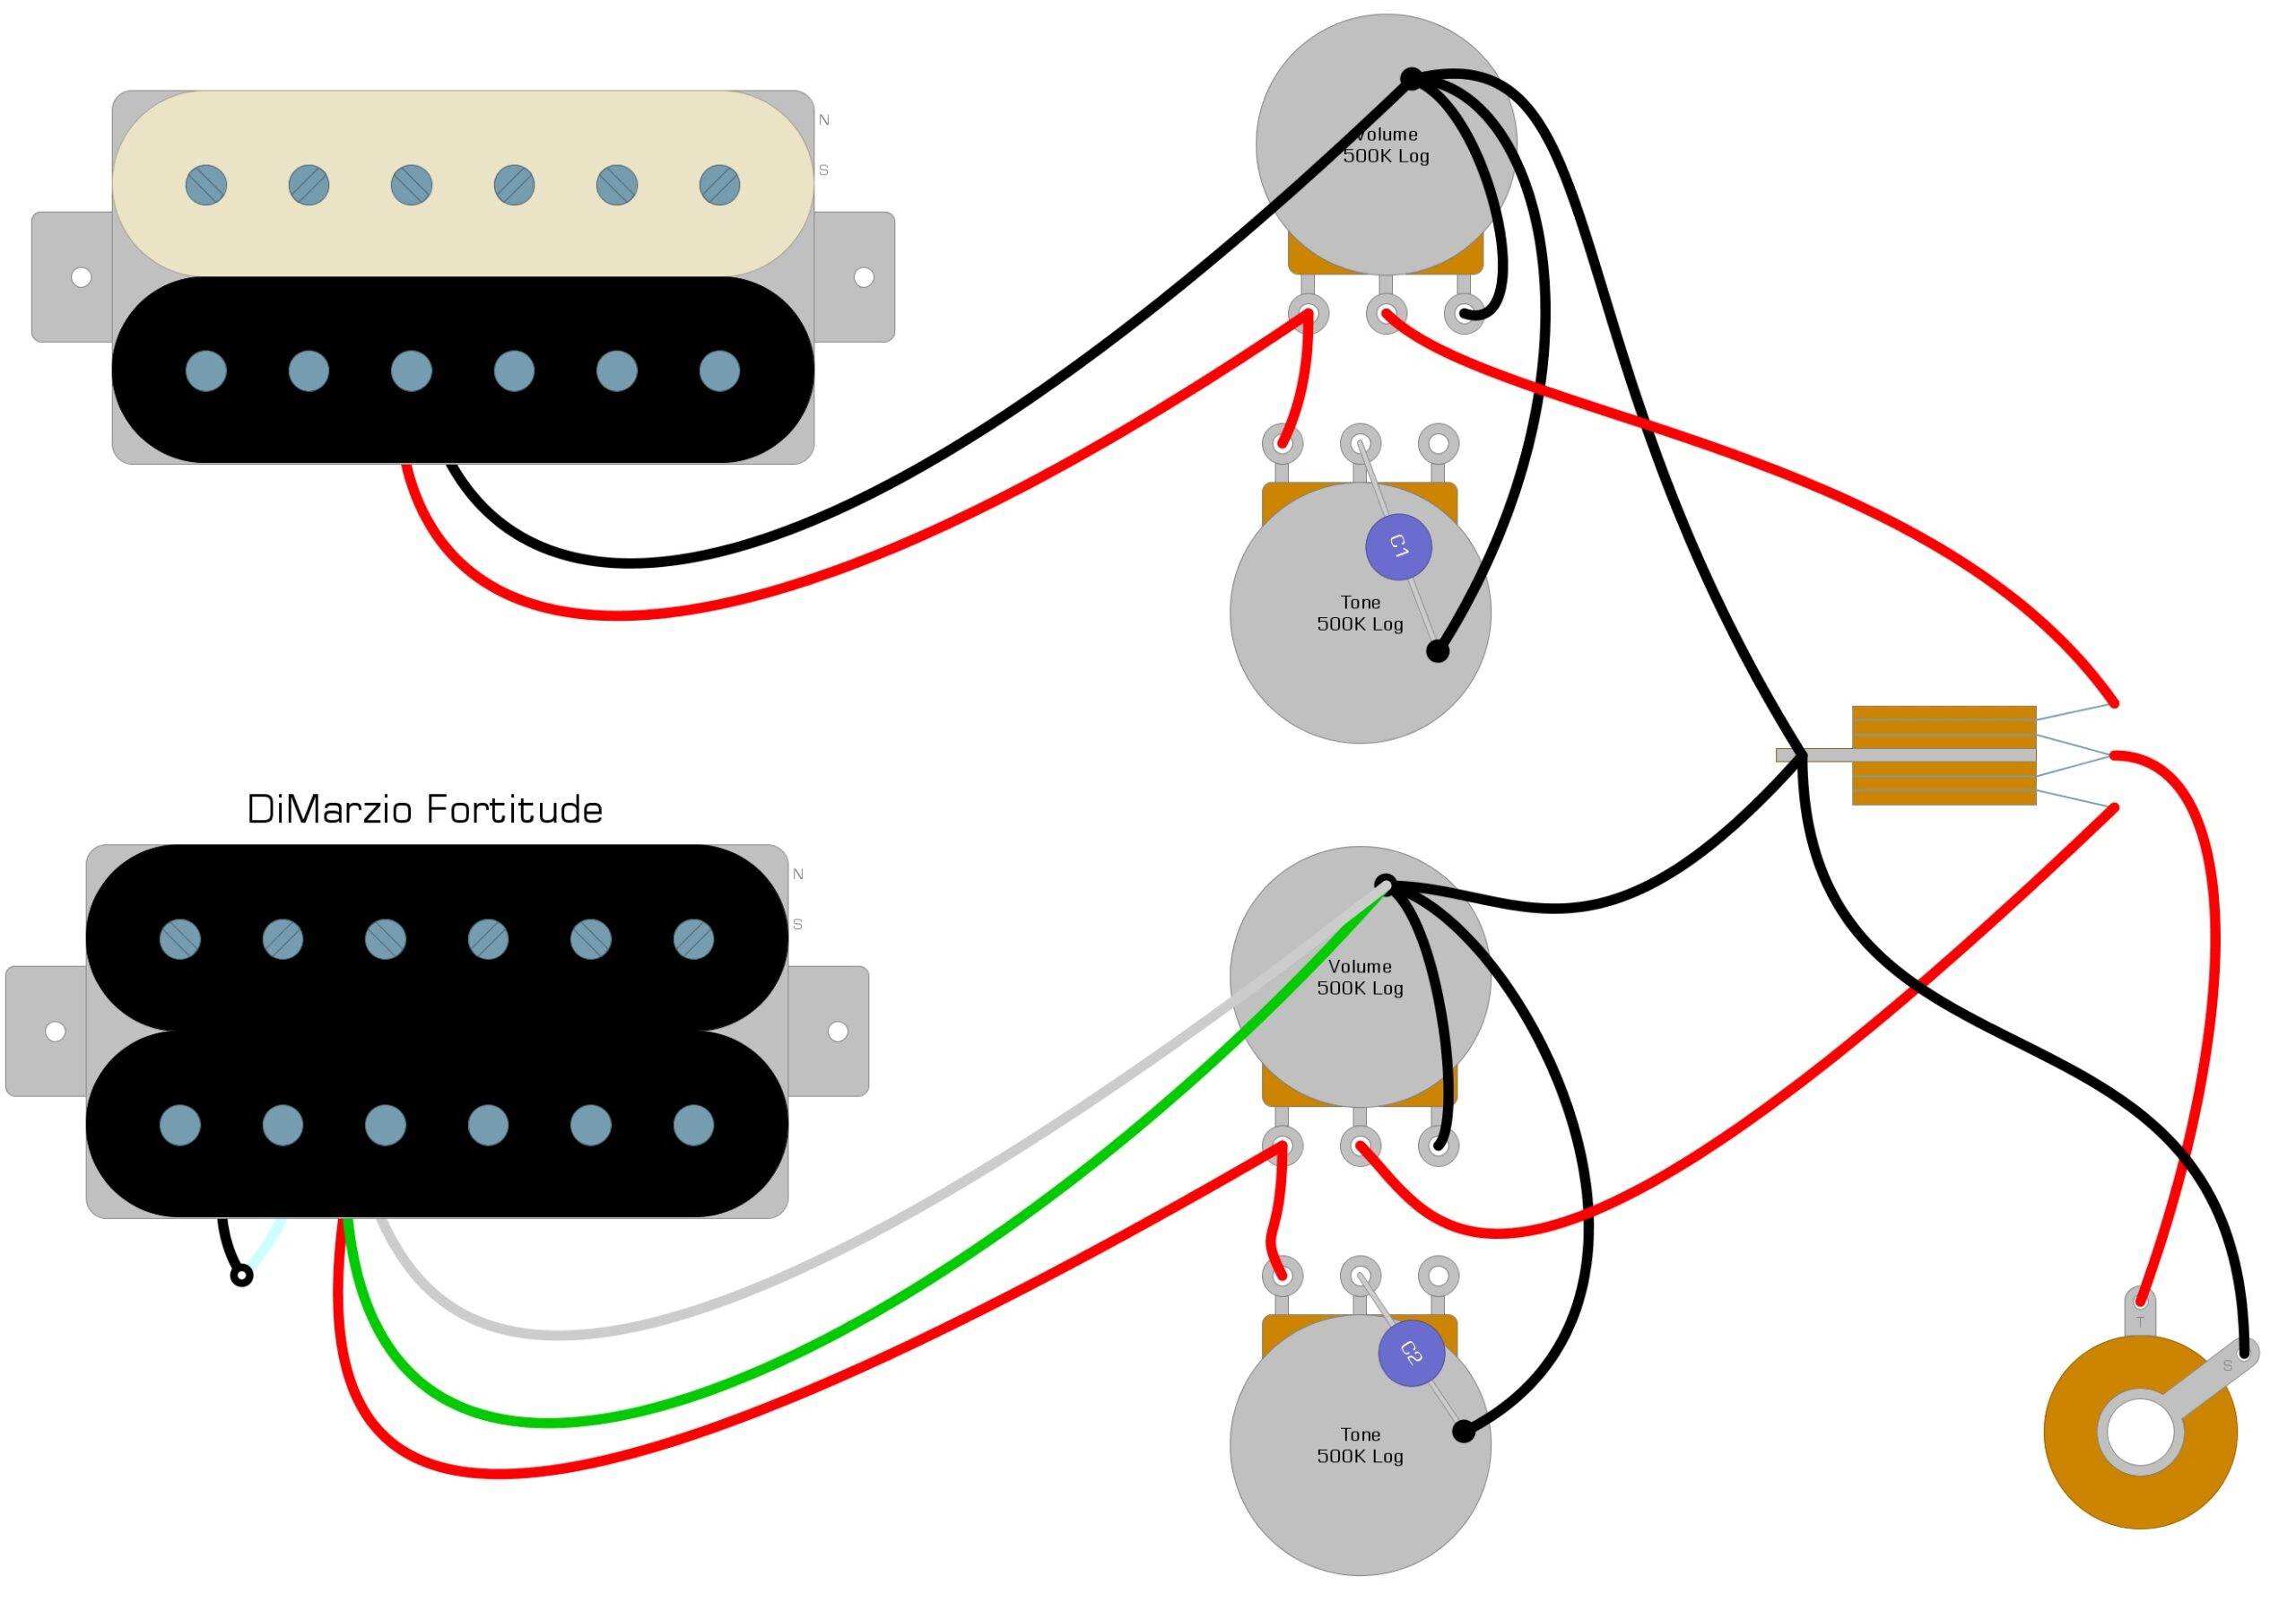
We have illustrated a common way to install these pickups in a Gibson Les Paul style guitar in Example 1.
Example 1
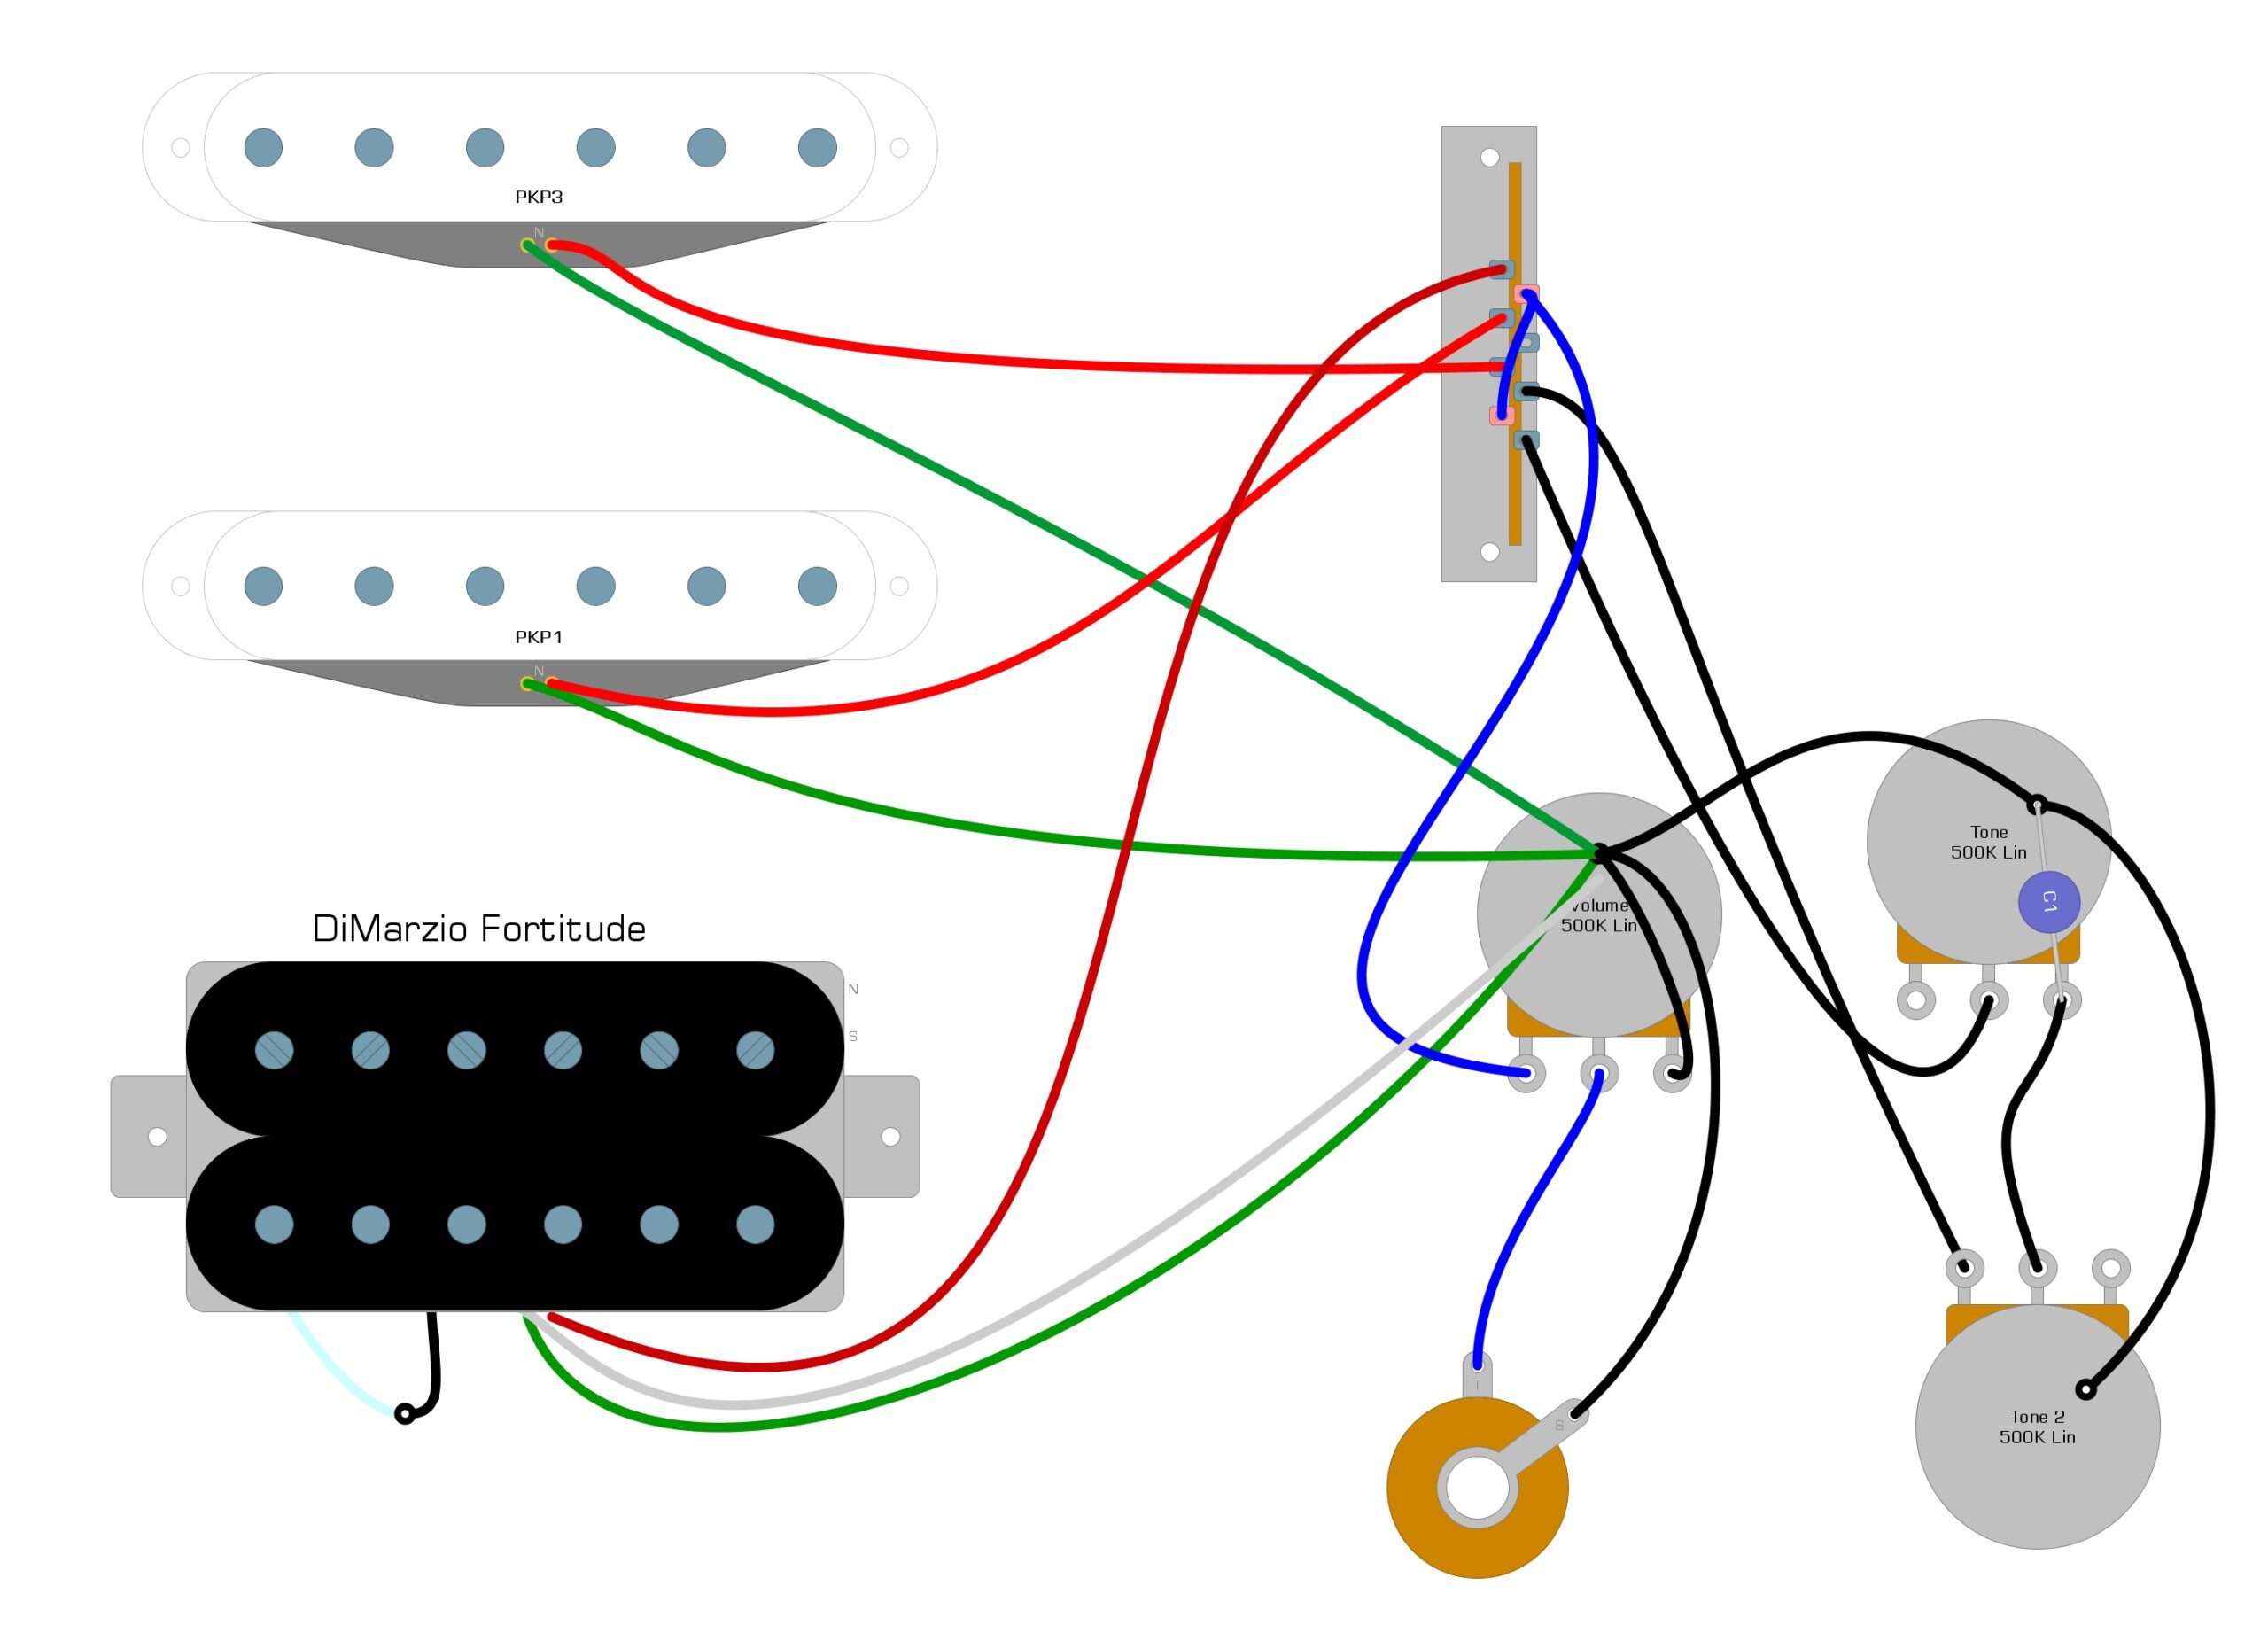
Here’s a common way to install these pickups in a super Strat-style guitar in Example 2
Example 2
Summary
Installing the Dimarzio Fortitude isn’t too difficult, and can go a long way toward improving your sound, especially if you’re using a budget guitar with stock pickups. Because the Dimarzio Fortitude has the four colored wires and has a high gain output, there are several other modifications that you can make to enhance your sound further, including coil-splitting and wiring the coils out of phase.
We hope you’ve enjoyed reading this guide and are pleased with the tones from your new pickup. If this guide has been helpful, please feel free to share this Dimarzio Fortitude wiring diagram on Facebook and Twitter. For more articles on guitar electronics, visit humbuckersoup.com.