
By Ed Malaker
Posted 10/09/2020
Have you been searching forums for a Gibson 61 pickup wiring diagram? If so, this guide is for you!
The pickup for the Gibson 61 is a humbucker that has one slightly overwound coil that creates a unique tone, compared to other humbuckers. These pickups are reverse Burstbusters, which you might be familiar with. They are also quite similar to the Gibson 59 Tribute and the Seymour Duncan Pearly Gates.
Gibson 61 pickups use an Alnico 5 magnet and supply a balanced tone with plenty of top end. The output is a little lower than many modern brands, but they can still drive an amp into overdrive, and they clean up nice when you roll off the volume.
Tools and Parts
Since you are replacing pickups, you are unlikely to need to purchase new parts, but since you’ll be working on the guitar, you may want to change any noisy pots and your output jack if it’s been a while since you’ve done so. You’ll need 500k pots if you are going to replace them. For the pickup installation, you’ll need:
- Soldering iron
- Solder
- Philips Screwdriver
- Wire cutters
- Pliers
Gibson 61 Pickup Wiring Code
The wiring code refers to the wire colors on your Gibson 61 humbucker. Each manufacturer uses unique wire colors to designate the beginning and end of each coil. The standard wiring for humbuckers is to connect one coil to another to create one long coil. The two wires usually twisted together on humbuckers is the connection between the two coils.
If you didn’t know the wiring code, you would need to do some research or use a multimeter to figure it out. Luckily, we have the code below.
Wiring Code
- Red = HOT
- Green + White = Soldered together and taped off
- Black + Bare = Soldered together; Ground
Example 1 illustrates the Gibson 61 wiring code.
Example 1
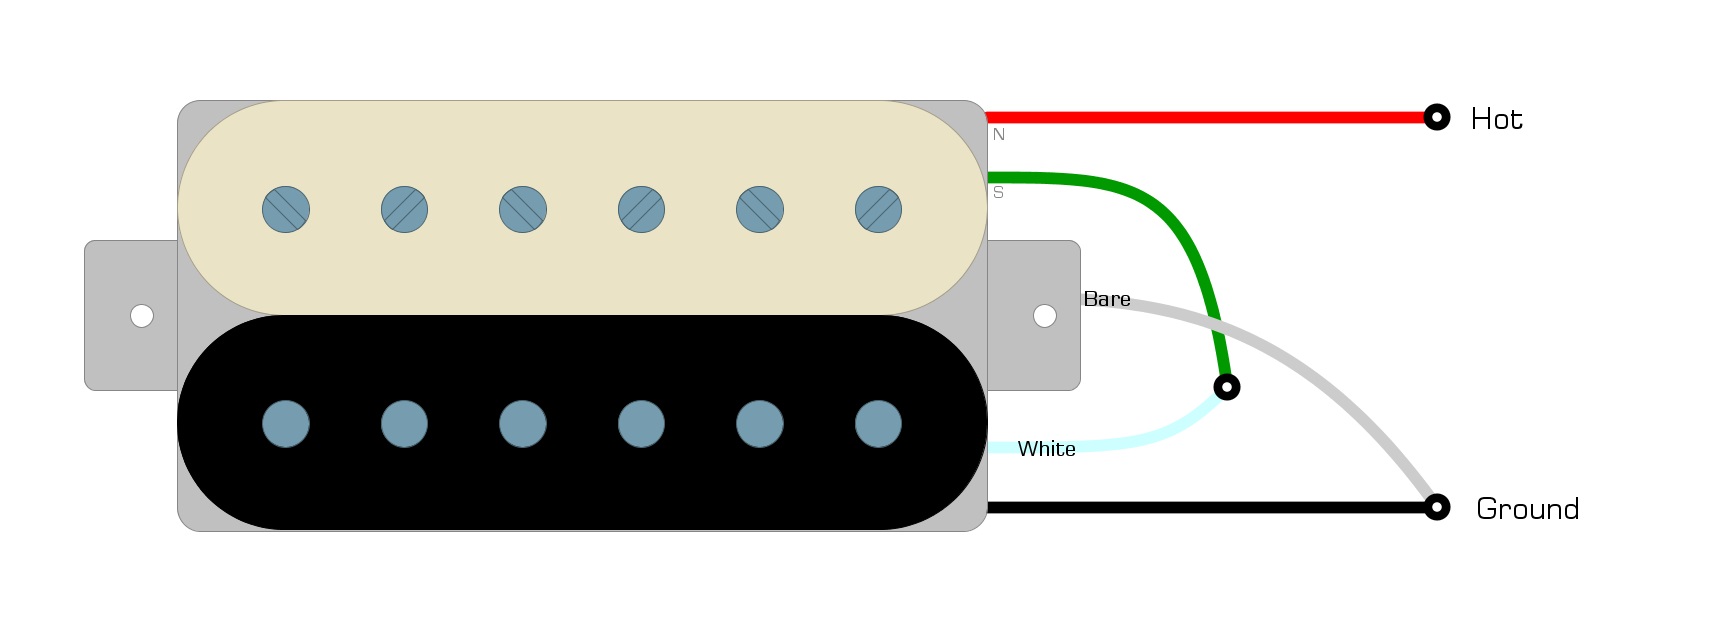
Gibson 61 Wiring
In most cases, there is a Hot wire connected to a switch or one of the lugs on a volume control. Two colors are twisted together and taped off, and the last color is soldered to the bare wire to become Ground. We solder the Ground to the back of the volume pot.
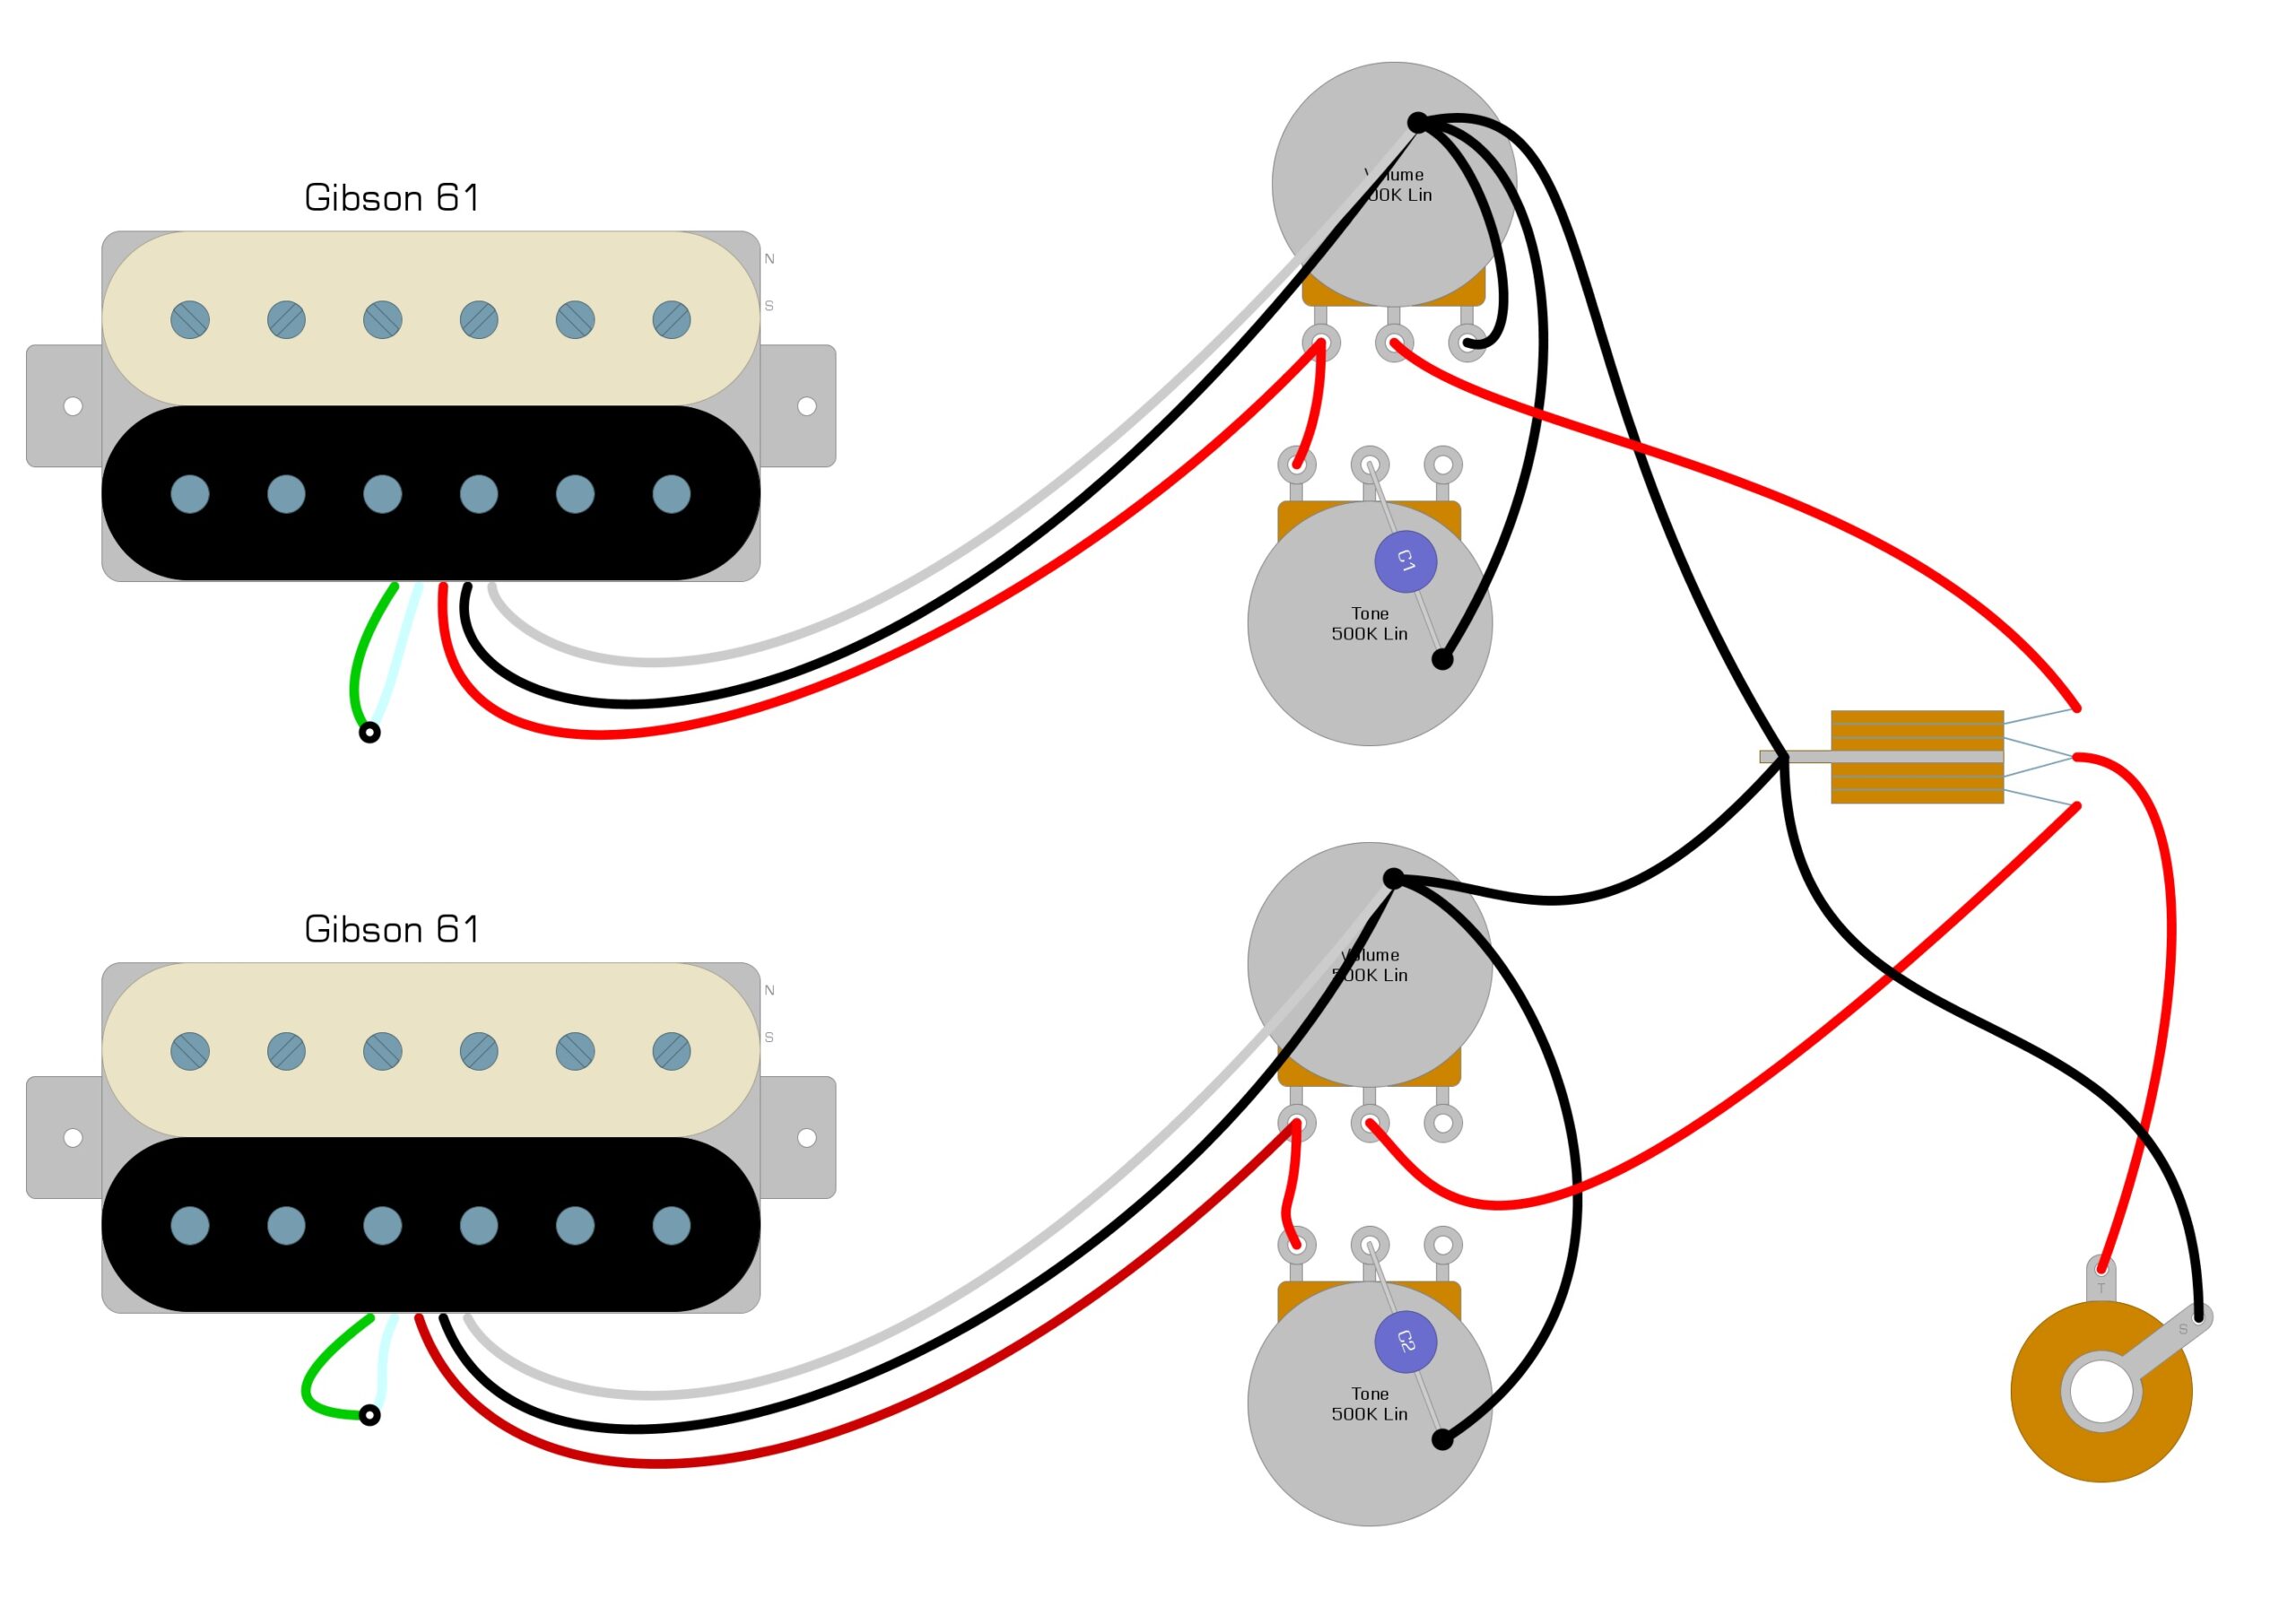
Gibson Les Paul-Style Installation
In Example 2, we illustrate how to install this pickup in a guitar similar to a Gibson Les Paul.
Example 2
Super Strat-Style Installation
In Example 3, we illustrate the Gibson 61 wiring for a Super Strat-style guitar.
Example 3

Summary
As you can see from these diagrams, changing the pickups in your guitar isn’t very difficult. Most of the confusion probably lies in the five multicolored wires attached to humbuckers. A few soldering connections and the project is complete. The Gibson 61s are sure to improve the tone of any guitar, and there are still a few modifications you can make, such as the pickup split, to personalize your sound even further. Many of the modifications are no harder than installing these pickups.
If you have enjoyed this short guide, please feel free to share it on Facebook and Twitter. For more articles on guitar electronics, visit humbuckersoup.com.


