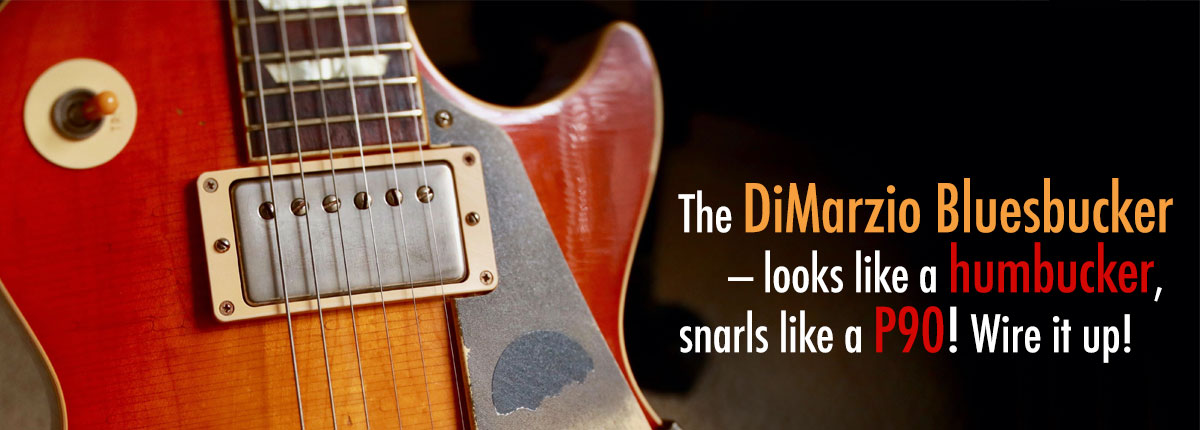
By Ed Malaker
Posted 10/06/2020
In this article, we’ll illustrate a DiMarzio Bluesbucker wiring diagram and guide you through an installation of this unique humbucker. The Bluesbucker sounds like a P90, so you get the vintage tone in a silent humbucker design. It uses technology that helps the pickup see a narrower string window than standard humbuckers, which makes it a little more responsive to your playing.
How is the Bluesbucker Unique?
The Bluesbucker is unique among humbuckers in the way that it works. Most humbuckers have two coils that pick up the string vibrations, but the Bluesbucker uses only one coil to pick up the sound. The second coil is merely to cancel noise like a standard humbucker.
Another feature unique to the DiMarzio Bluesbucker is that you can change the direction of the pickup to fine-tune it. The side with the six adjustable pole pieces is the active side, and if this side is closer to the bridge, the tone will be slightly brighter. Face it toward the nut, and it becomes somewhat darker.
Tools Needed
The installation of your pickup is easy to complete and only takes a few minutes with minimum tools and supplies. You will need a Phillips screwdriver to access the electronics, uninstall the old pickup, and install the new one. You will also need some electrical tape, a soldering iron, and a small amount of solder to make the required connections.
- Soldering iron
- Solder
- Phillips screwdriver
- Electrical tape
Uninstalling the Old Pickup
We recommend taking notes on how you uninstall your stock pickup because you will likely be installing the DiMarzio Bluesbucker the same way. You will need to remove the strings to get the pickup out of the guitar. Humbuckers usually have four screws in the corners that free the pickup from the guitar.
Once the humbucker is free, you can see what wires you need to look for in the electronics cavity. The electronics cavity usually has a cover on it that you remove to access the wires. You might also need to remove the pickguard to access the wires. If the pickup you are removing is a four-wire humbucker, you should see two wires soldered together and taped, one wire going to the back of the Volume pot, and one wire going to either the switch or to a lug on the Volume control.
Carefully desolder the wires from the Volume pot and switch and remove the pickup from the guitar completely.
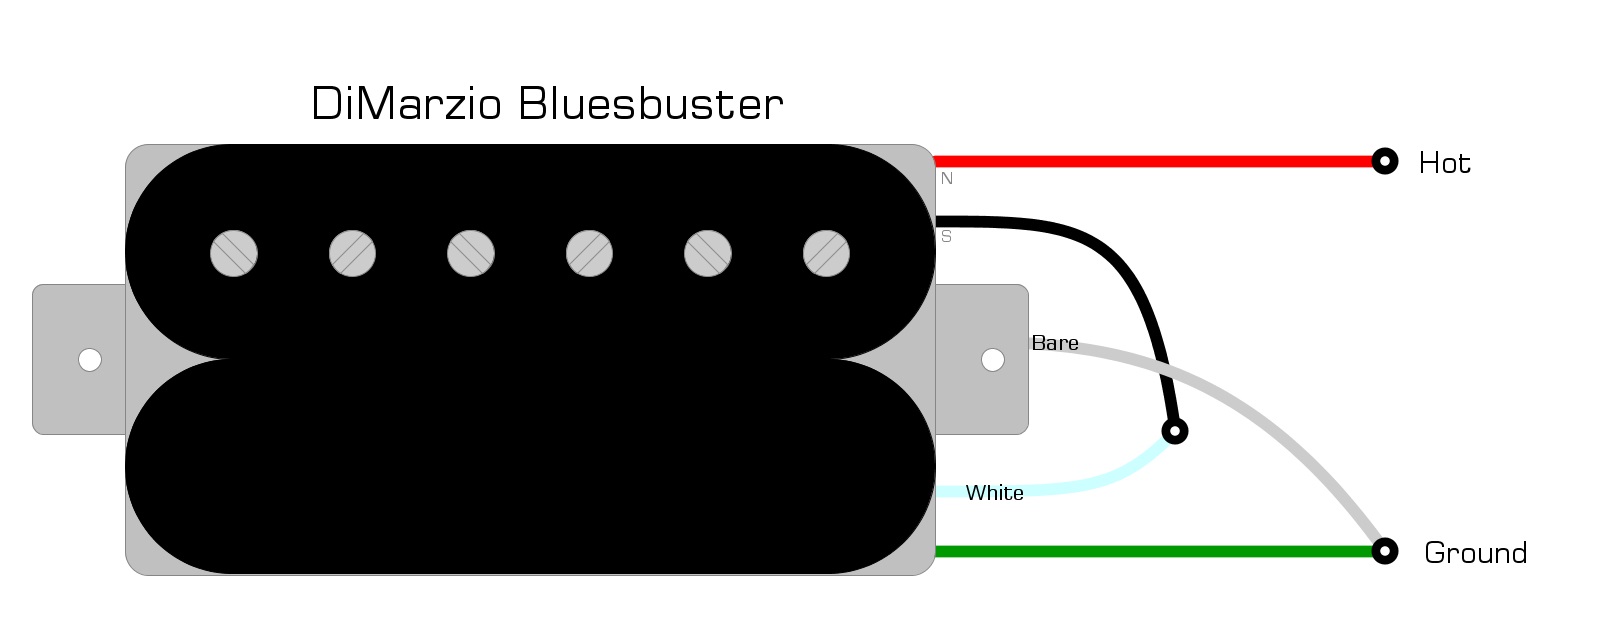
Wiring Code
You may have noticed that your humbucker has four colored wires and one bare wire. The colors represent the beginning and end of each of the two coils, and the bare wire is a Ground for the pickup chassis. DiMarzio uses red and black for one coil and white and green for the other, but other brands will use a different color scheme or Wiring Code.
The DiMarzio uses red and black on the active coil (screw coil), and white and green on the silent (stud coil). The DiMarzio Bluesbucker wiring code is as follows.
DiMarzio Bluesbucker Wiring Code
- Red = Hot
- Black + White = Soldered together and taped
- Green + Bare = Soldered together; Ground
We have illustrated the DiMarzio Bluesbucker wiring code in Example 1.
Example 1
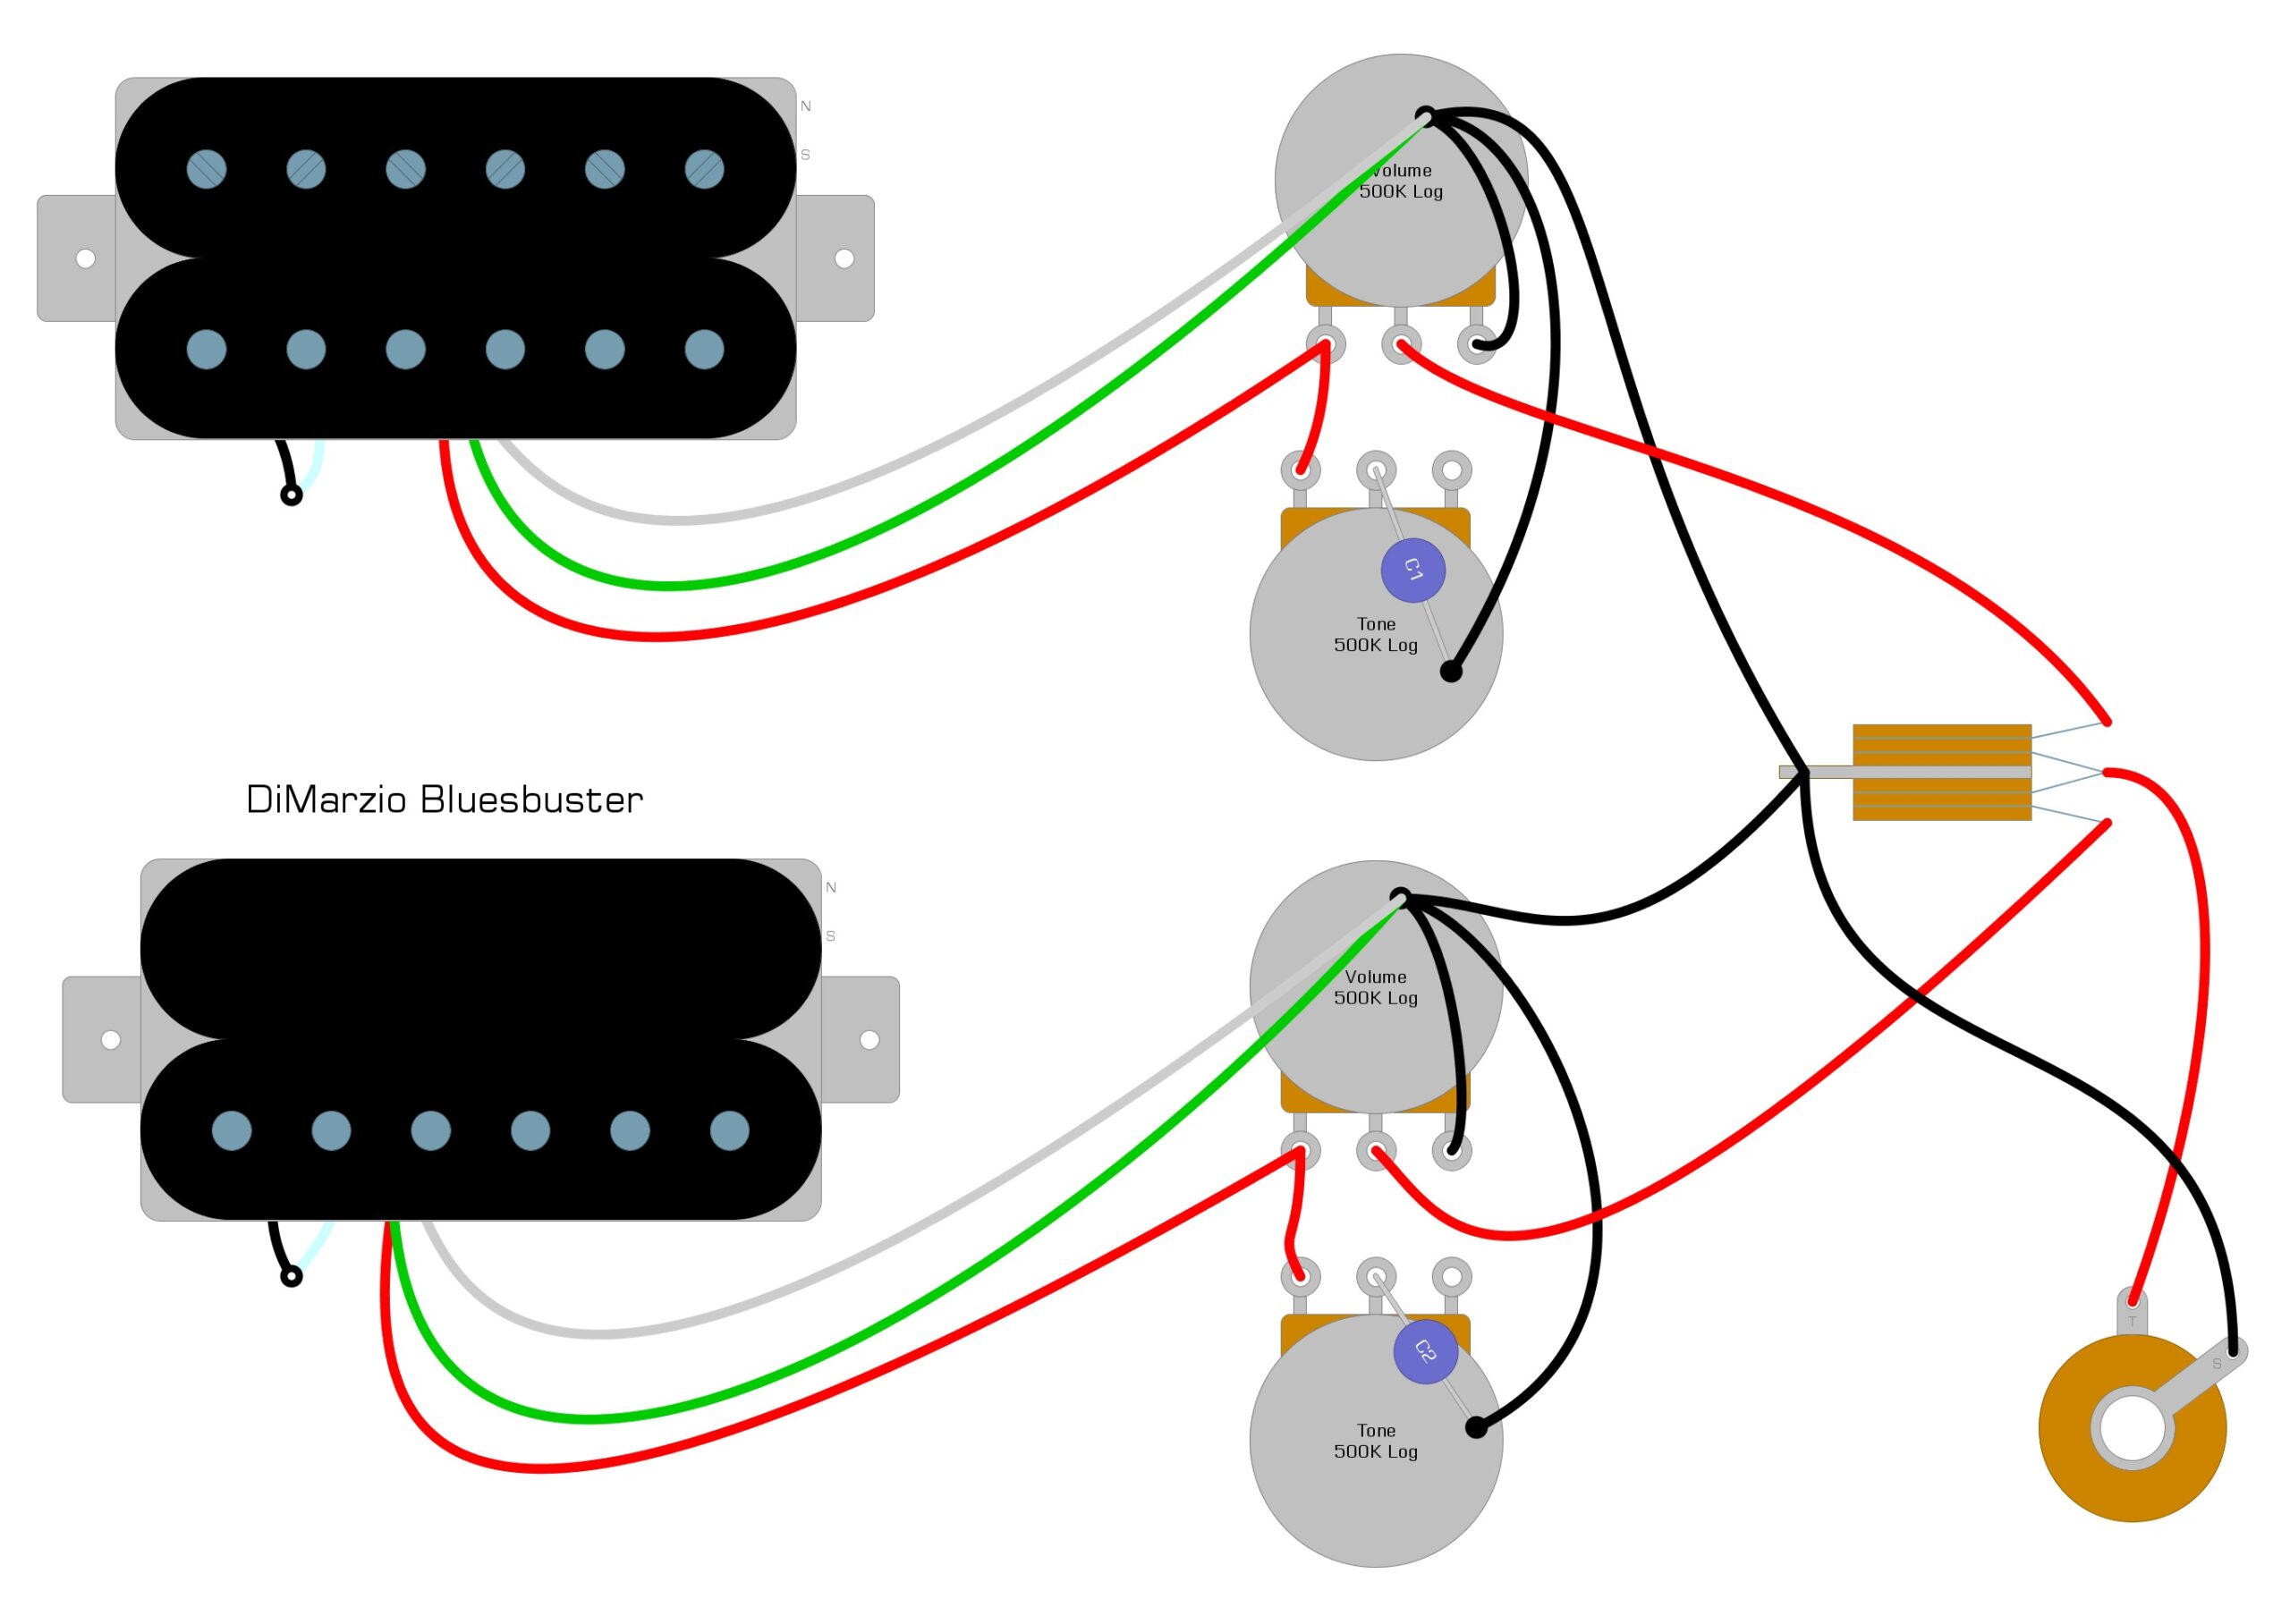
Installing the DiMarzio Bluesbucker
To install the DiMarzio Bluesbucker, first, solder the white and black wires together and tape them off with some electrical tape. Make sure there are no exposed wires that might touch one another. Solder the green and bare wires together as well and feed all the wires through to the electronics cavity so you can solder them before screwing the pickup into the guitar.
With the pickup in place, carefully solder the green and bare wires to the back of the Volume pot. Solder the red Hot wire to the switch or Volume pot lug, where you removed it when uninstalling the stock pickup.
We illustrate a common way to install the pickup in a Gibson Les Paul-style guitar in Example 2.
Example 2
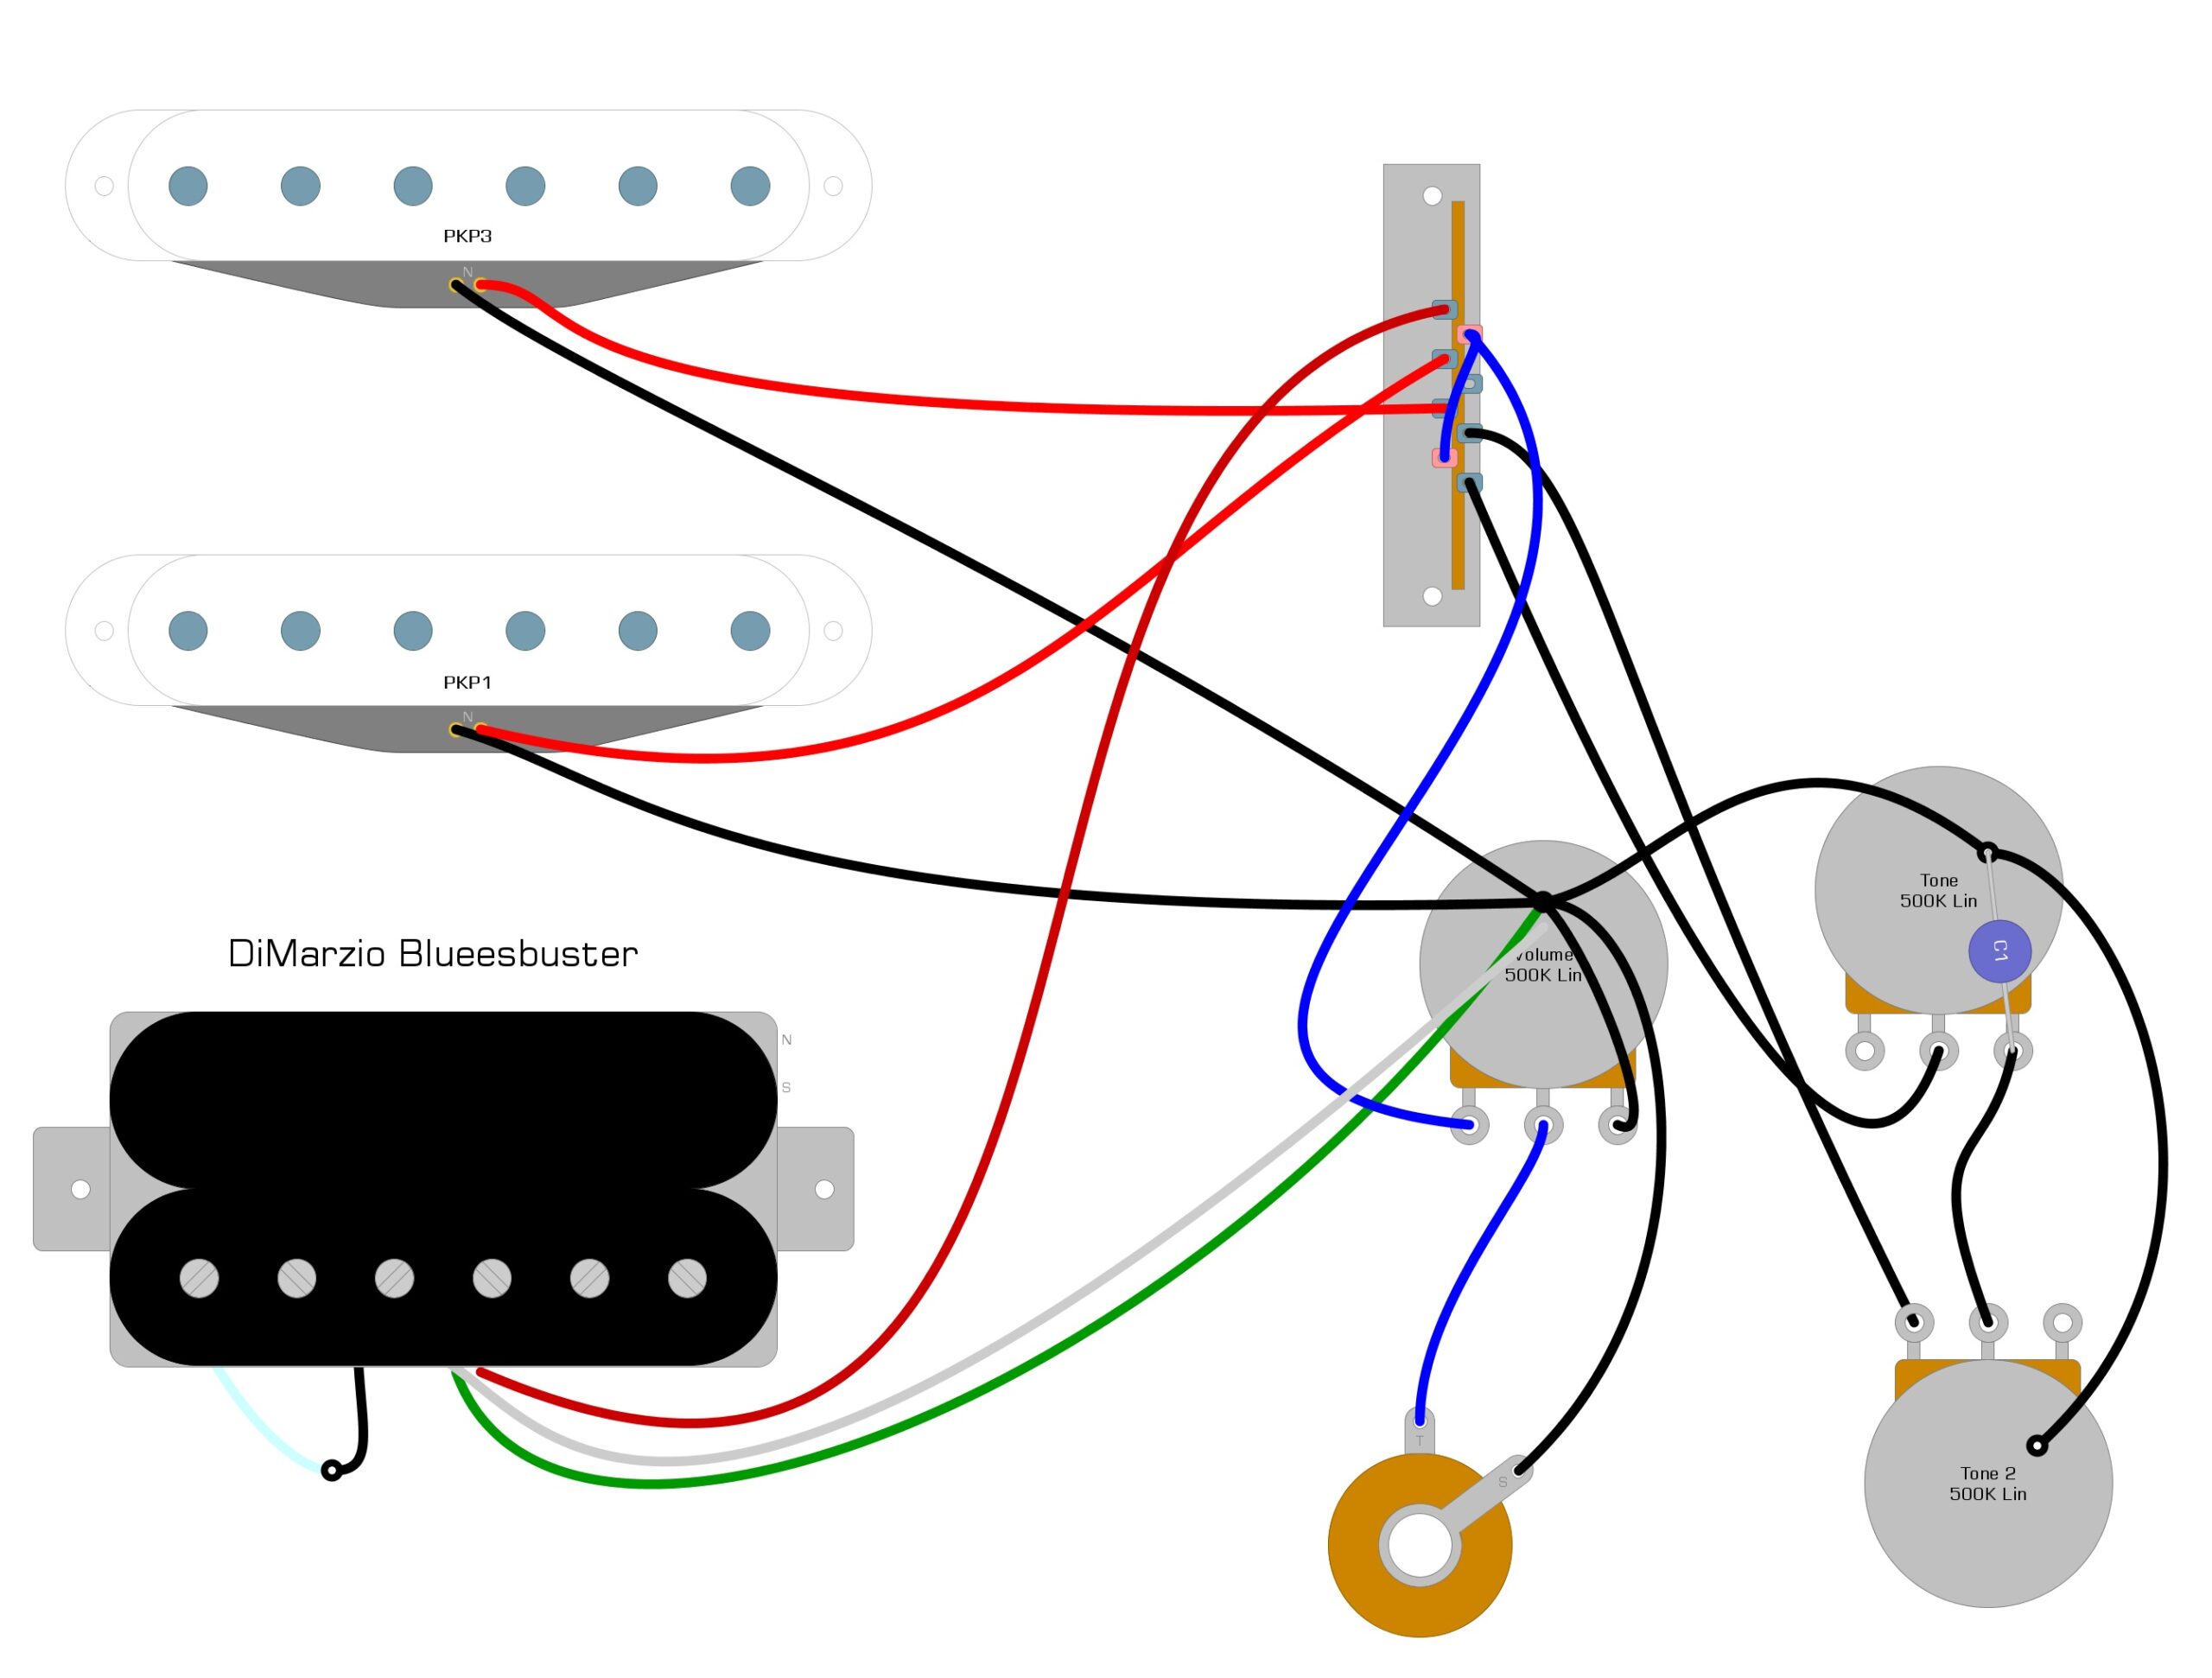
We illustrate a common way to install a DiMarzio Bluesbucker in a Super Strat-style guitar in Example 3.
Example 3
Summary
Installing new pickups in your guitar isn’t too hard and only requires a few solder connections. Often, figuring out the wiring code is the most difficult part of installing an unknown humbucker, but since we know it’s a DiMarzio Bluesbucker, the installation is very straightforward. Since this humbucker has four colored wires, we can also modify it to unlock more tones. Next time we’ll discuss the coil-splitting mod to see how it works with this unique pickup.
If you’ve found this guide helpful, please feel free to share this article on Facebook and Twitter. For more articles on guitar electronics, visit humbuckersoup.com.


