By Ed Malaker
Posted 07/06/2019
DiMarzio Titan Coil-Splitting
Coil-splitting is when you use a switch to shut off one of the two coils in a humbucker pickup. We split a humbucker because it gives us the ability to expand our tonal pallet, and allows us to achieve single-coil tones from a double coil pickup. Here, we’re going to show you how to coil-split a DiMarzio Titan.
Getting Started
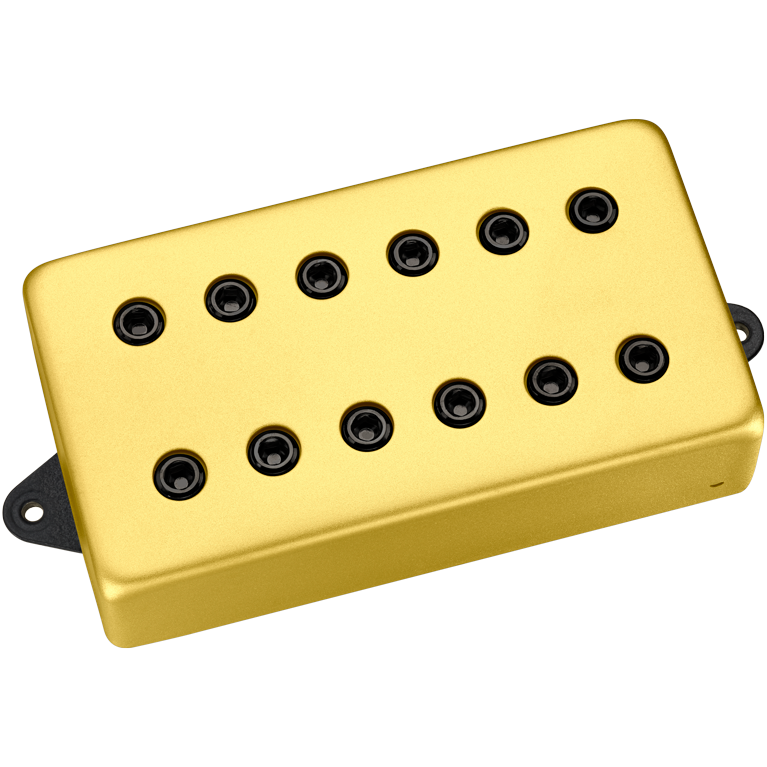
This kind of modification can be accomplished using any humbucker pickup that has four colored wires and one bare wire. In this article, however, we’ll be talking specifically about the Dimarzio Titan. The Titan is a high output, four conductor humbucker that also features a ceramic magnet. Known for its midrange punch, it is ideally suited for the splitting modification because of its high gain. This will help the pickup retain some volume when it is split.
The Switch
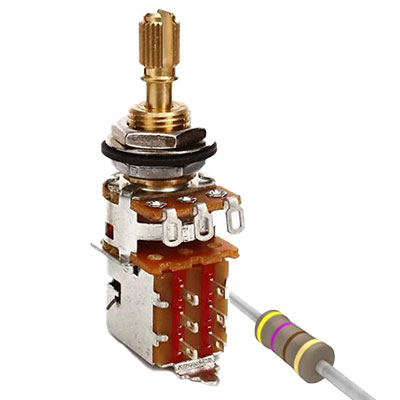
We’ll need a switch for this modification, and for this article, we’ll use a push-pull pot. You can, of course, use a toggle or whatever kind you prefer. A toggle switch would be wired the same way, but you’d just have the added challenge of how and where to install it on your guitar. A push-pull pot is just a regular Volume or Tone control, but it has a switch built into it. The switch is toggled by pulling the shaft of the pot in or out.
We’ll use the push-pull pot because we can revert to the original design with no permanent damage. The downside is that the switching mechanism requires more space below the pot and some guitars may not have enough. You will want to check your guitar before doing any soldering.
Installing the Pickup
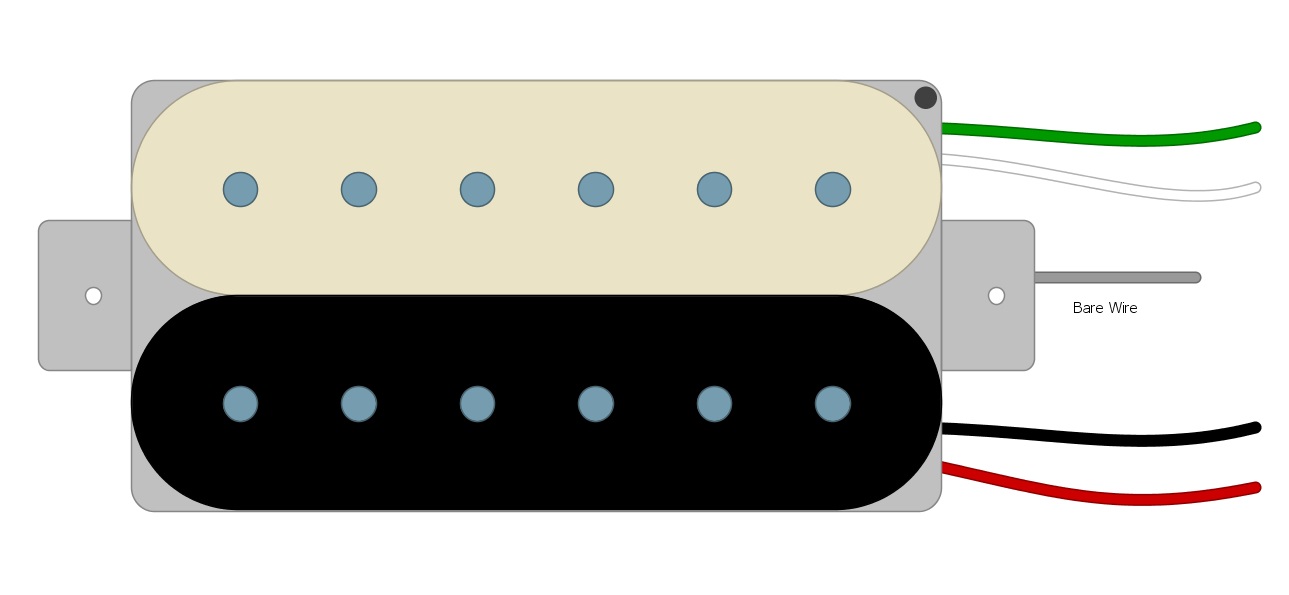
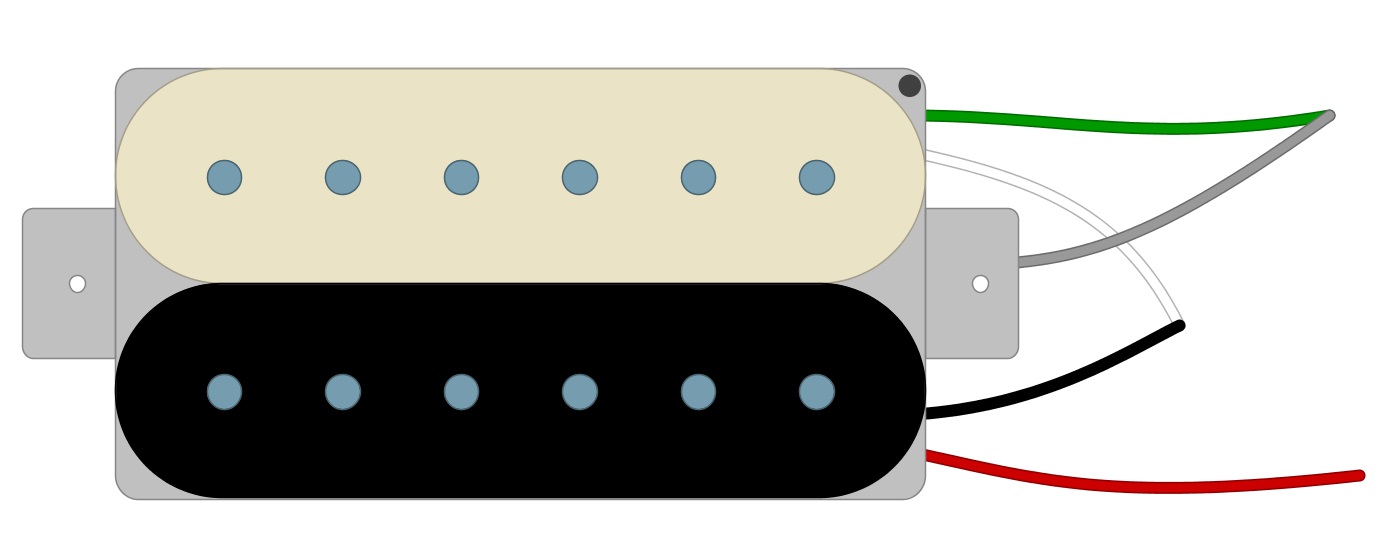
To do this mod with a pickup other than the Dimarzio Titan, you’ll first need to figure out which of the colored wires go to each coil. This time around, we’re going to stick to the Titan pickup. The Green and White wires go to one of the coil, the Red and Black to the other. The bare wire is a shield wire that always goes to Ground (Fig 1).
Fig 1
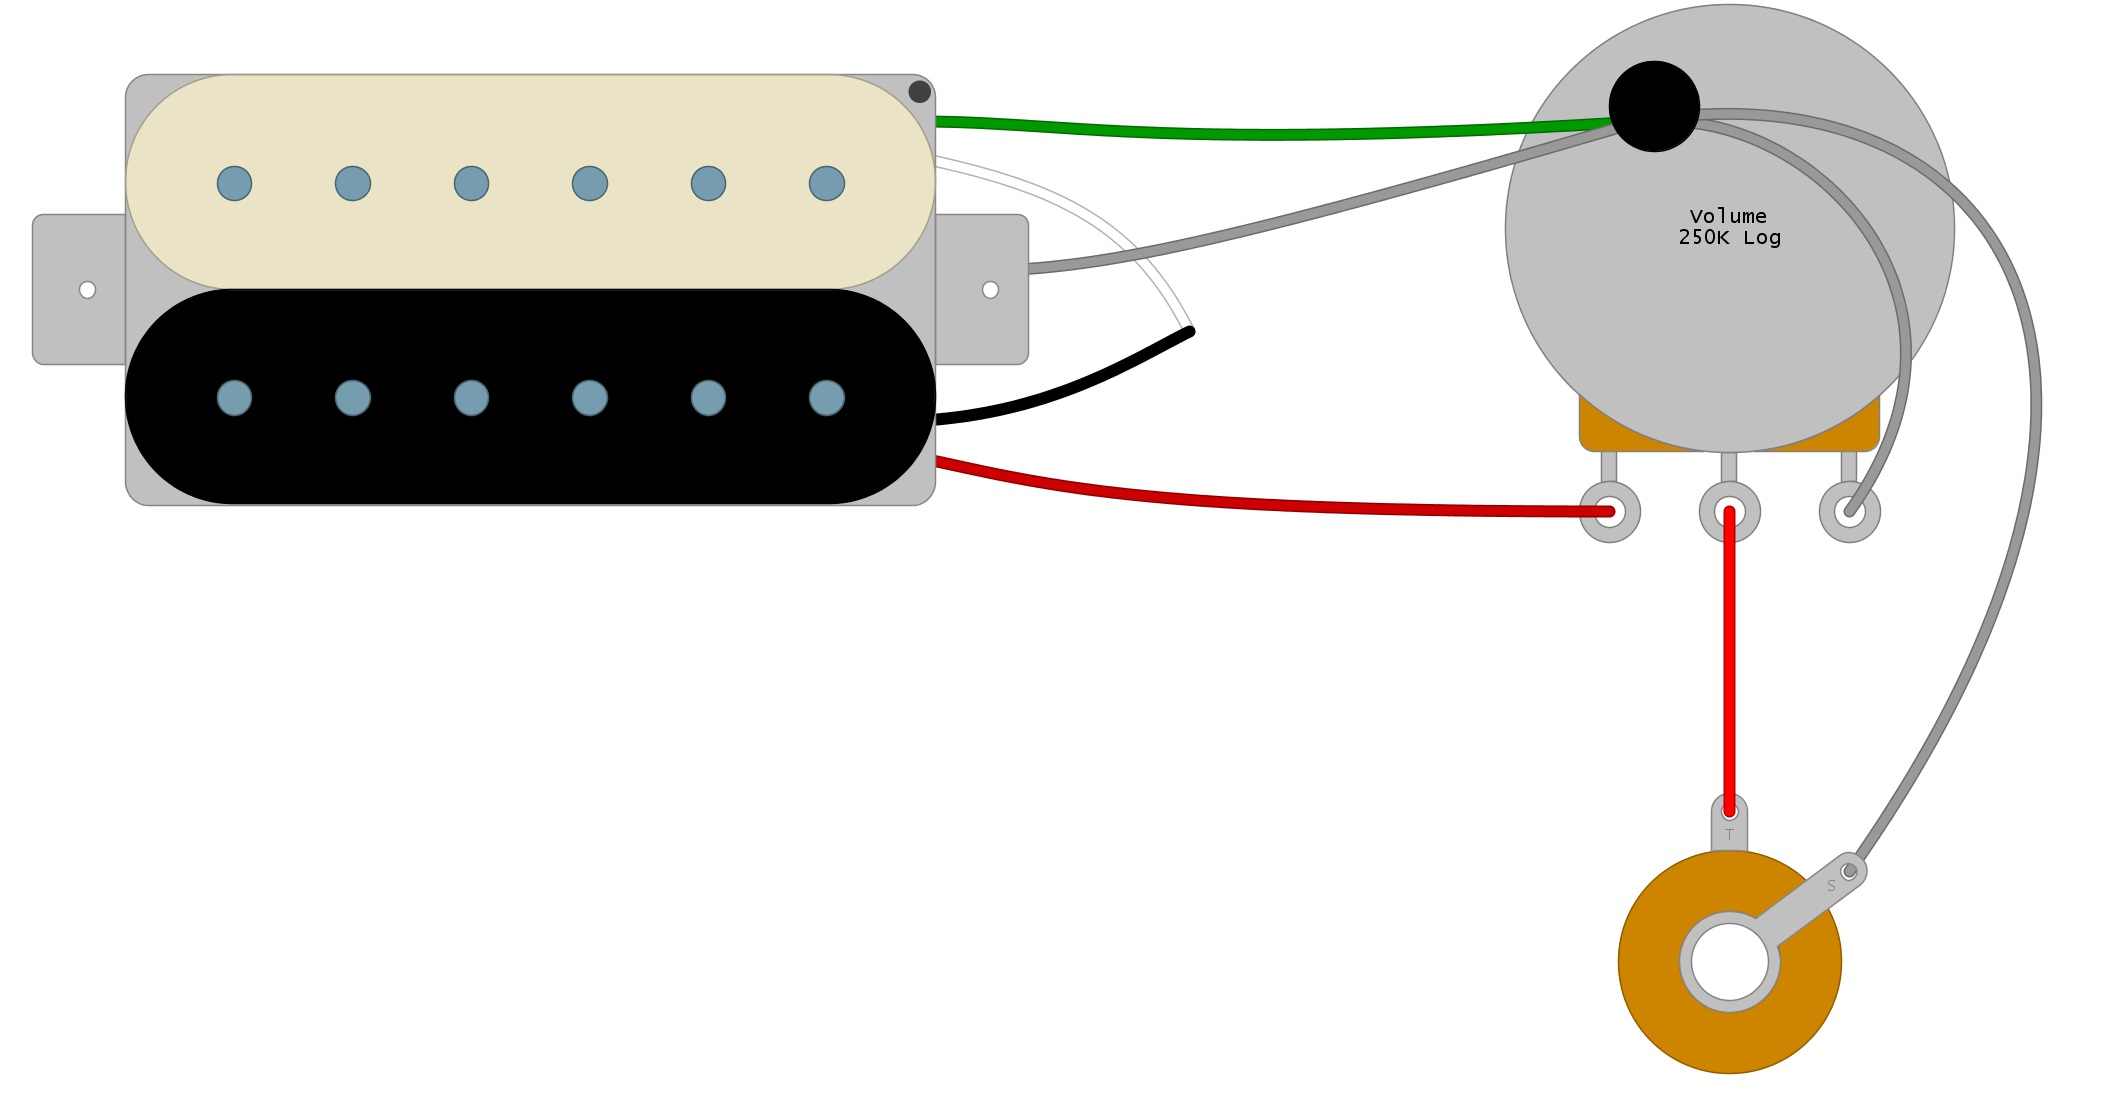
The standard way to wire the Titan for regular operation is to solder the White and Black wires together. We then use the Red wire as the Hot and the Green as the Ground to install the pickup into your guitar. The Bare wire and Green are often soldered together. We begin our pickup splitting mod by doing the same (Fig 2).
Fig 2
The next thing we do is install the pickup. In this guide, we’ll wire it as if it’s the only pickup. We’re only concerned with the Volume control and the Output jack (Fig 3).
Fig 3
Splitting The Pickup
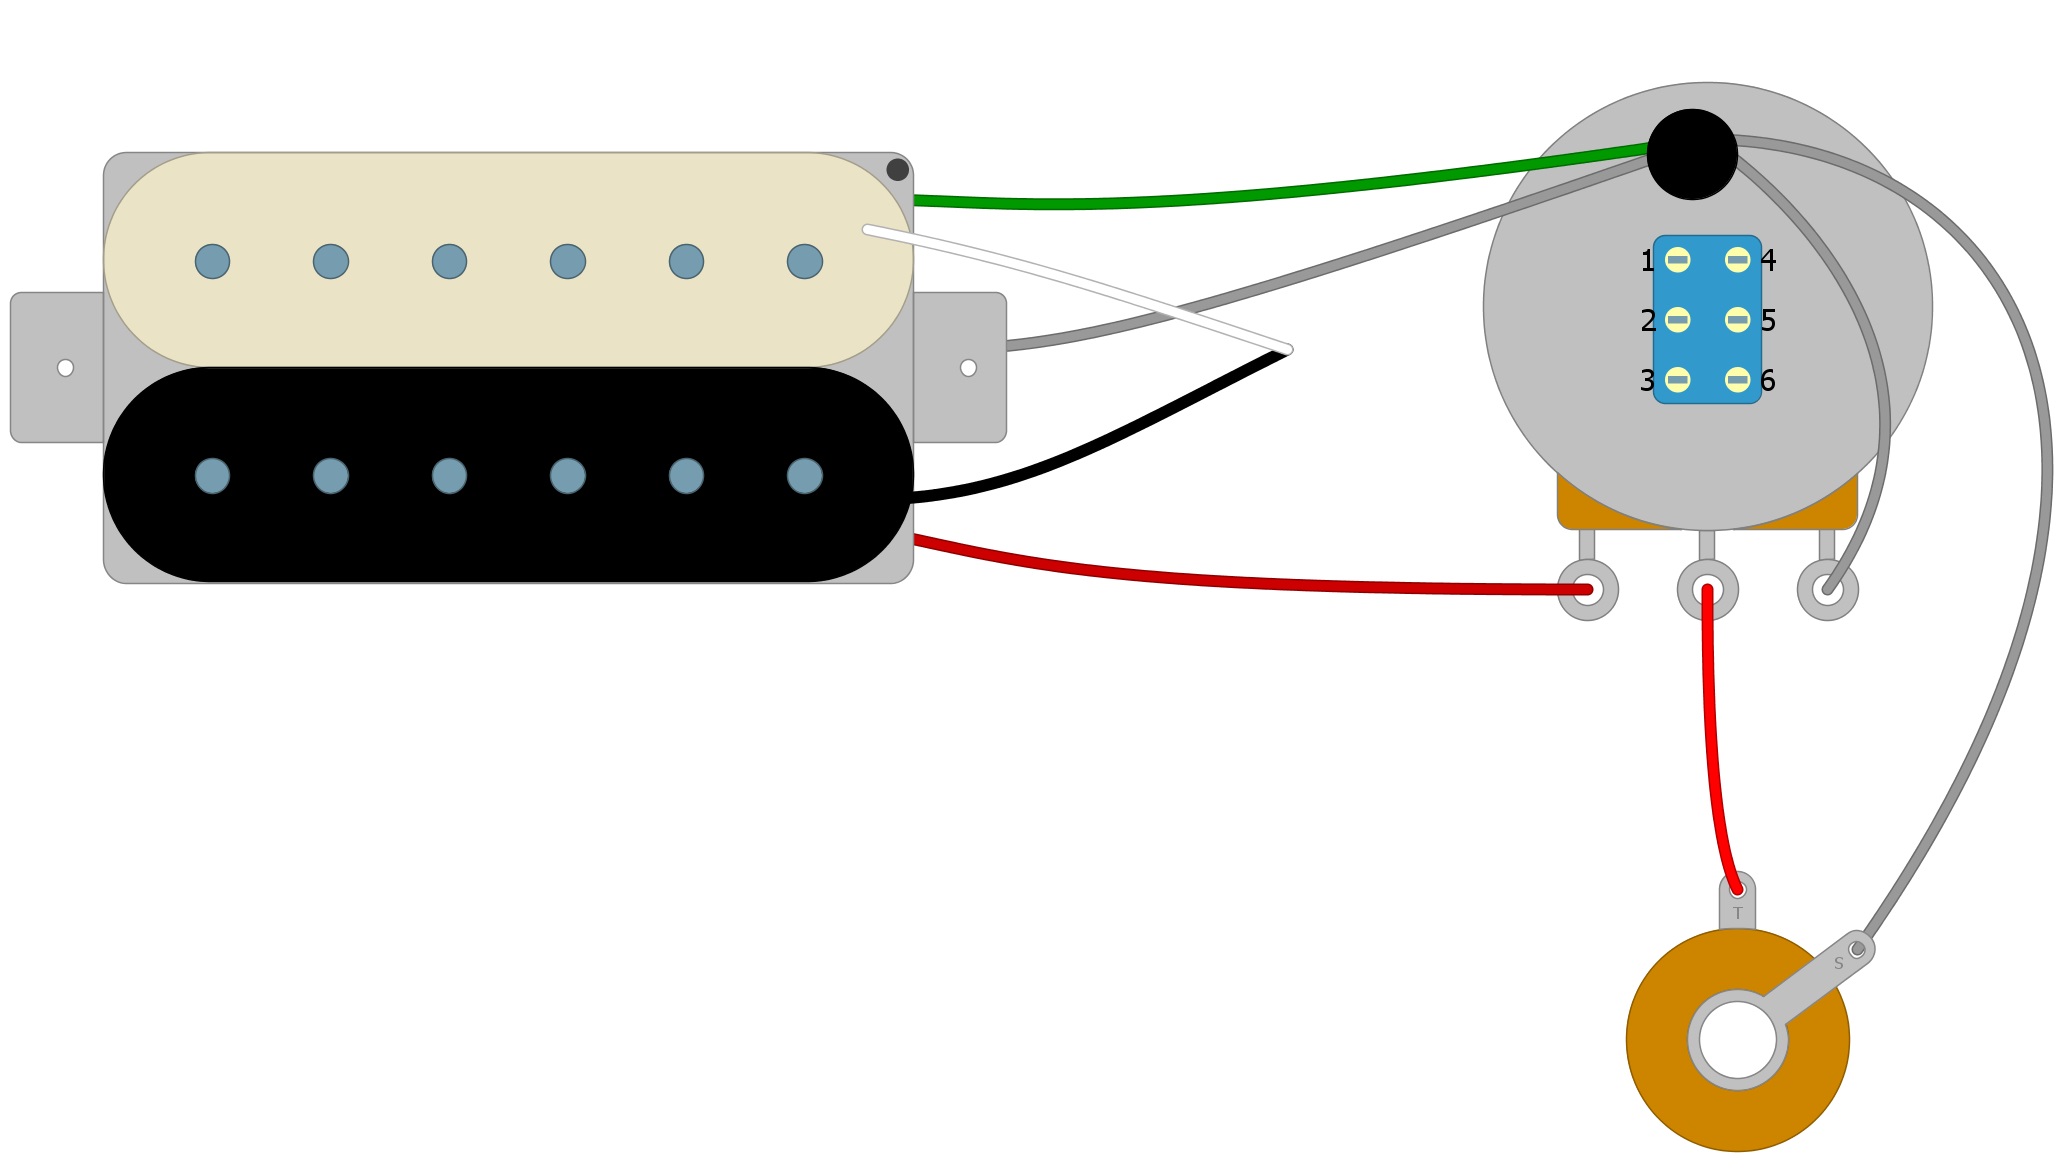
First, change the standard Volume pot to a Push-Pull. The Push-Pull pot will have more connection tabs on it, but you should be able to see the same three that were on the original. Wire these three tabs the same way as the original pot was wired (Fig 4).
Fig 4

Now we will look at the additional tabs on the Push-Pull pot and number them one to six (Fig 5).
Fig 5
Take the Black and White wires that we soldered together in Fig 2 and solder them to Tab 5 on the Push-Pull pot (Fig 6).
Fig 6
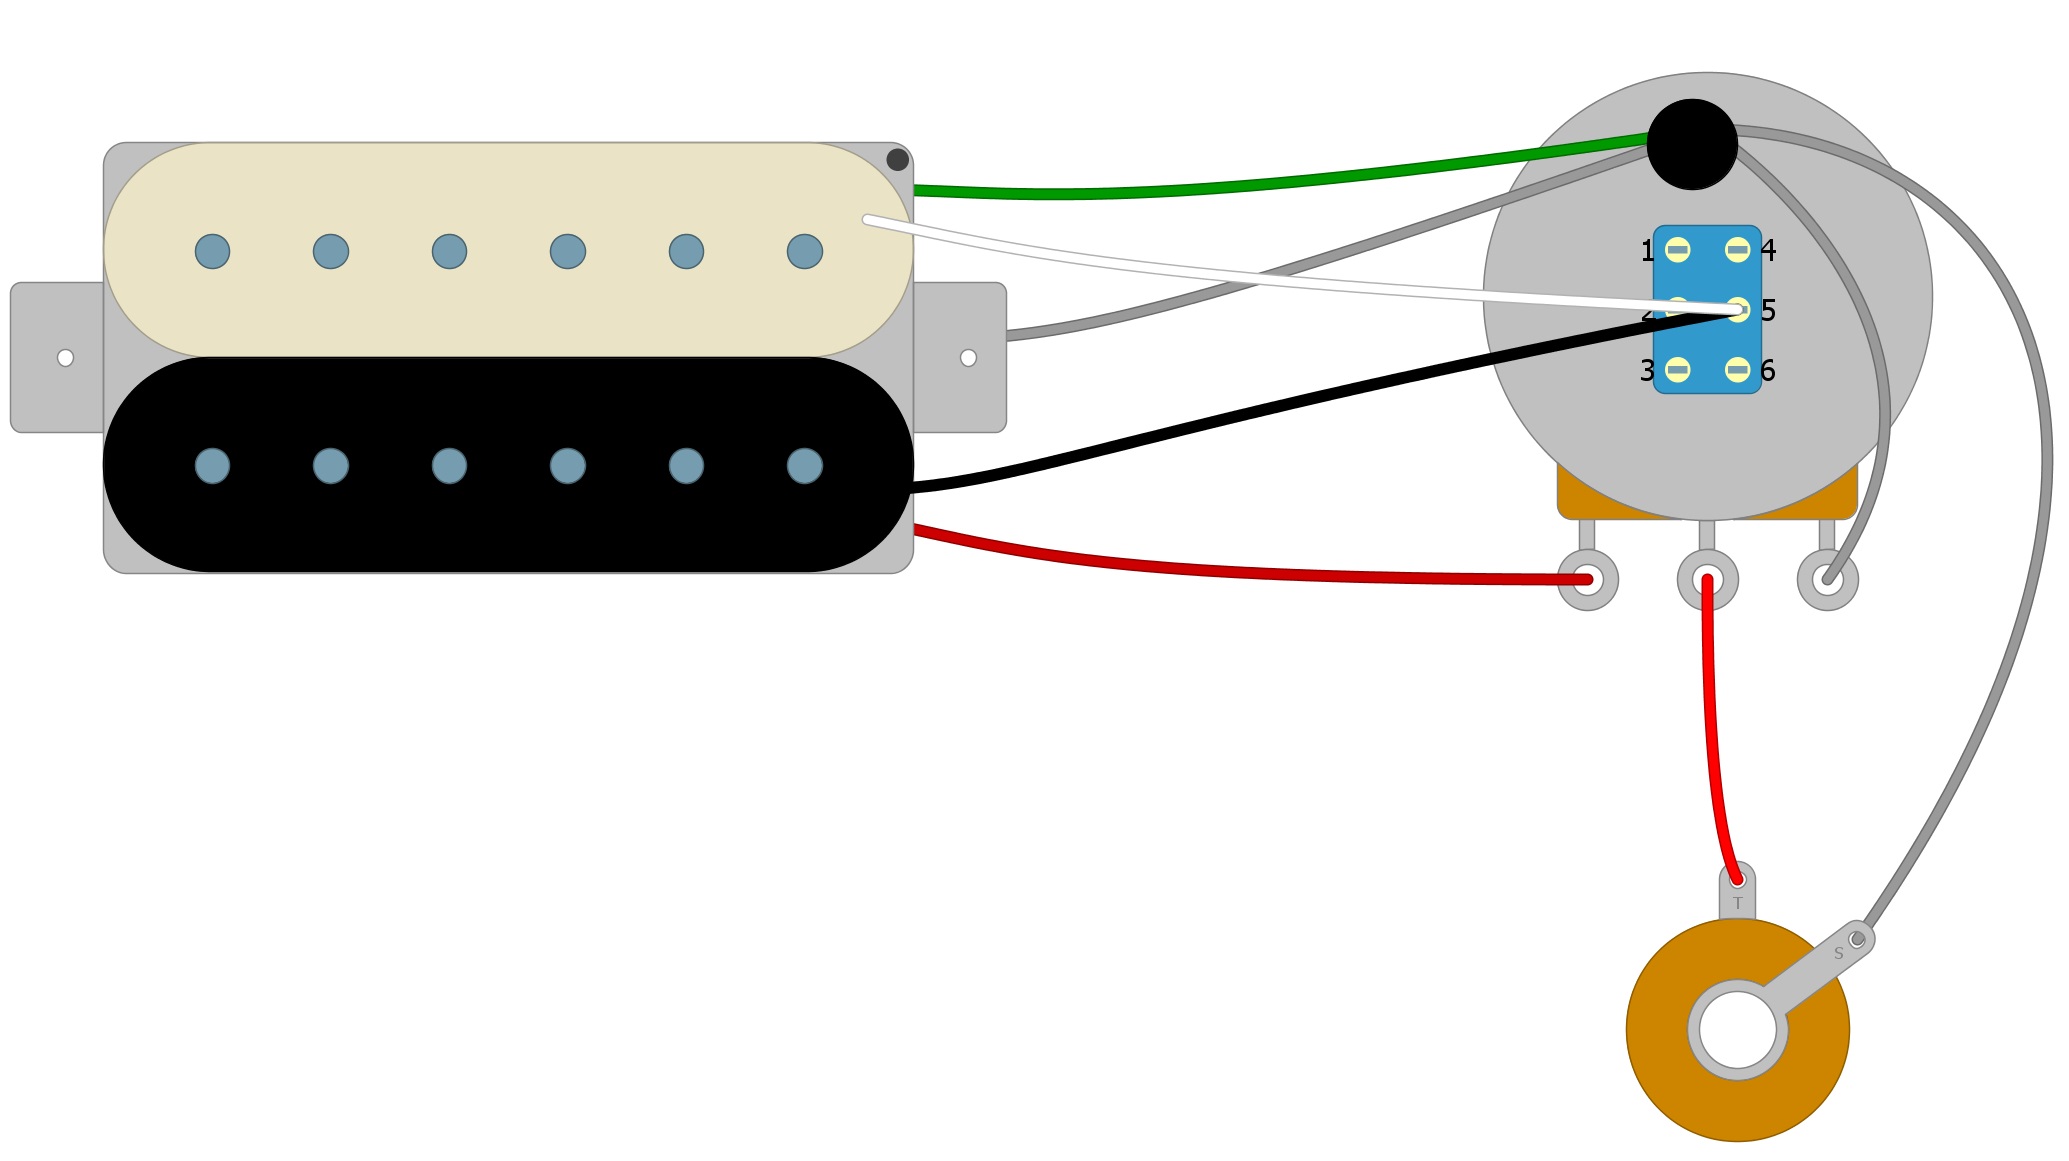
Solder a wire from Tab 6 to Ground (Fig 7).
Fig 7
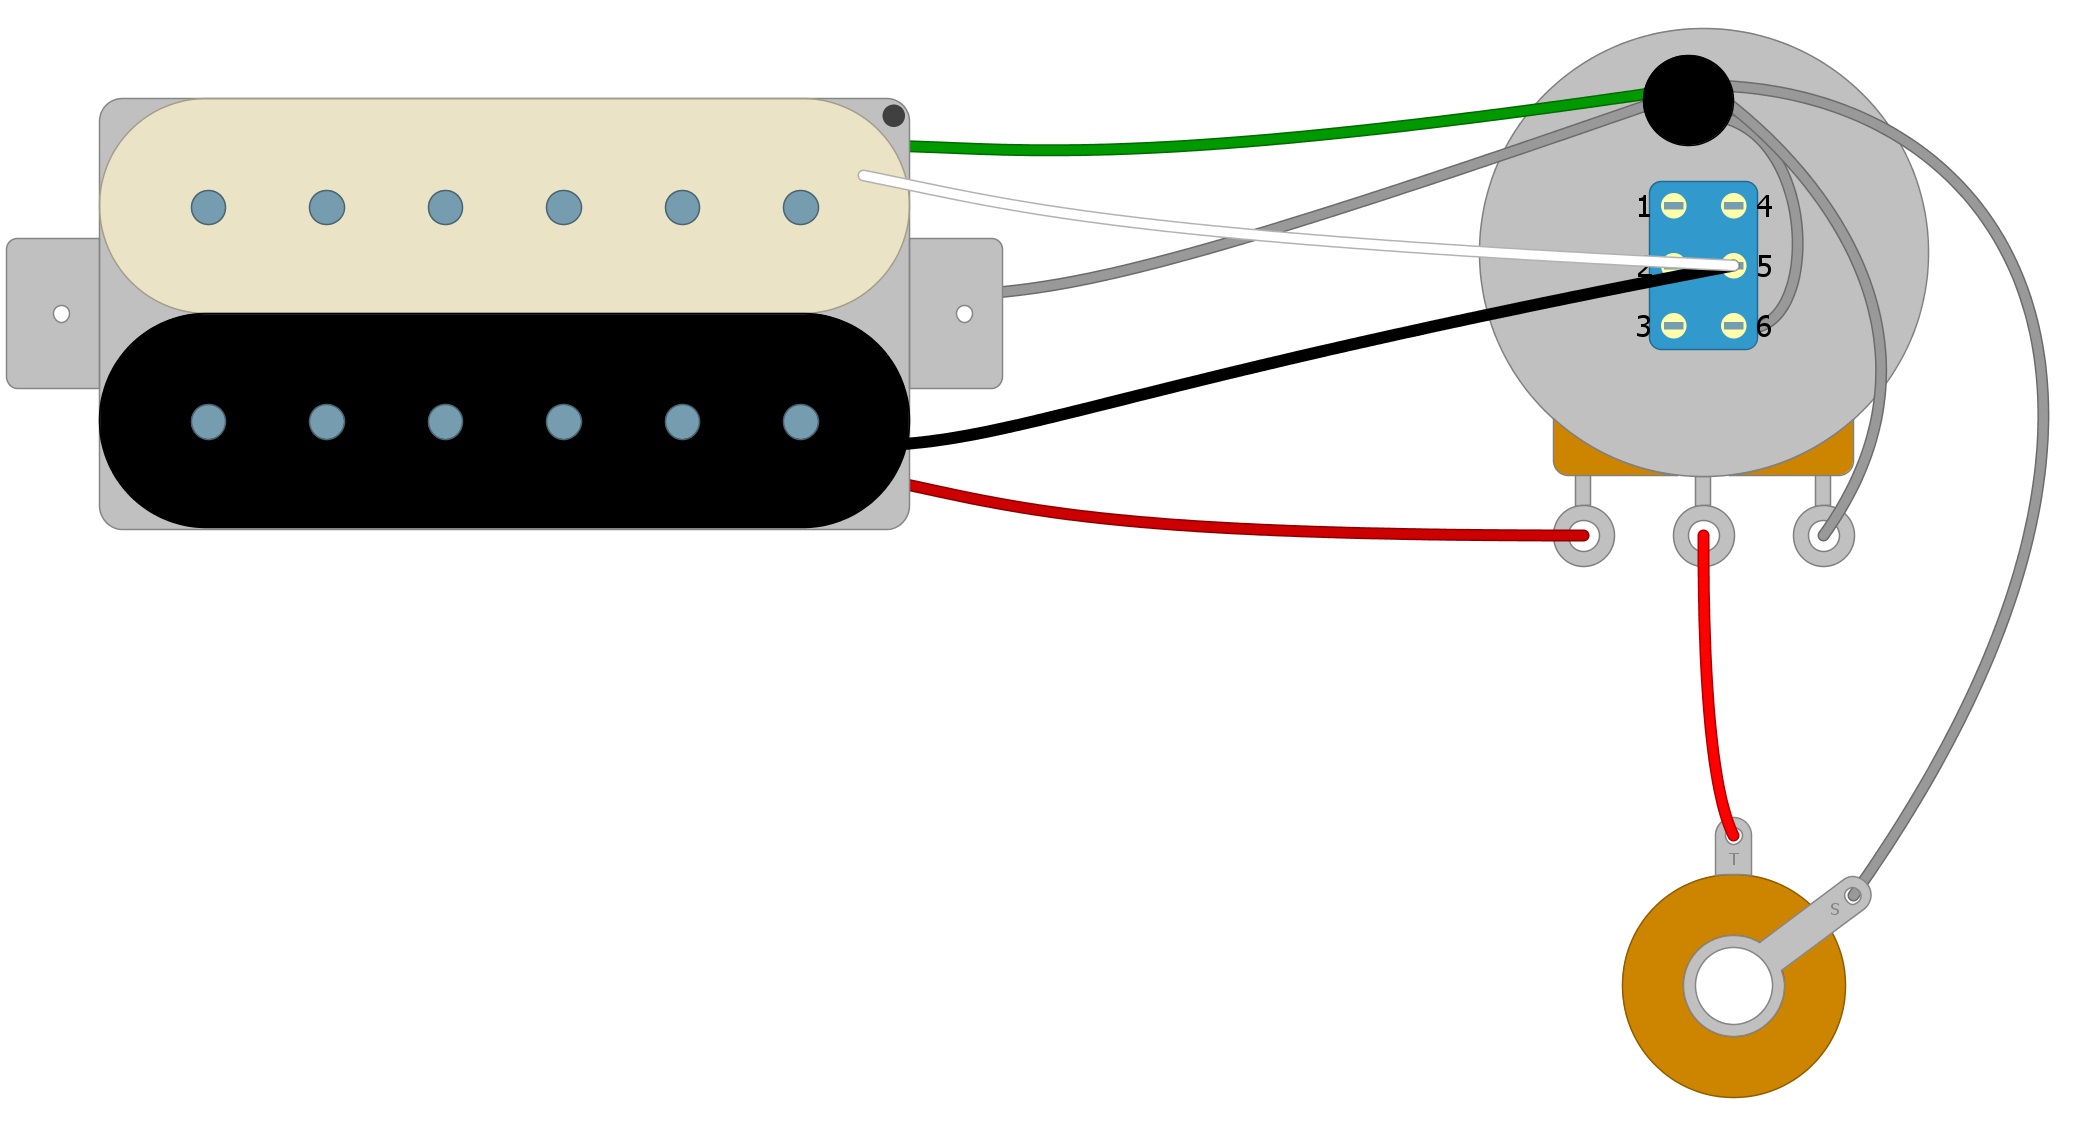
That’s the entire process of splitting the DiMarzio Titan. If the coil is splitting when the Volume knob is pushed in instead of pulled out, move the Ground wire from Tab 6 to Tab 4.
Summary
In this circuit, when the Volume knob is pushed in, your guitar signal travels through the first coil starting at the Red wire and continues through the second coil exiting the Green wire. When the Volume knob is pulled out, your guitar signal travels through the first coil string, starting at the Red wire, but exits through the new ground wire that you installed coming from the switch (so it never goes through the second coil).
You can split any four wire humbucker pickup. The only difference will be the color of the wires that go to each coil, because there is no standard color scheme between pickup manufacturers. You will need to look them up or test them yourself to find which wires go to each coil.
If you’ve found this article helpful, please feel free to share this with your friends on Facebook and Twitter. For more articles on guitar electronics, visit humbuckersoup.com.