By Ed Malaker
Posted 06/08/2019
By Ed Malaker
Posted 06/08/2019
What is Coil Splitting?
Coil-splitting is wiring a humbucker pickup to a switch that shuts off one of its two coils. We do this because it gives us the ability to expand our sonic range and get single-coil tones from our two-coil pickup.
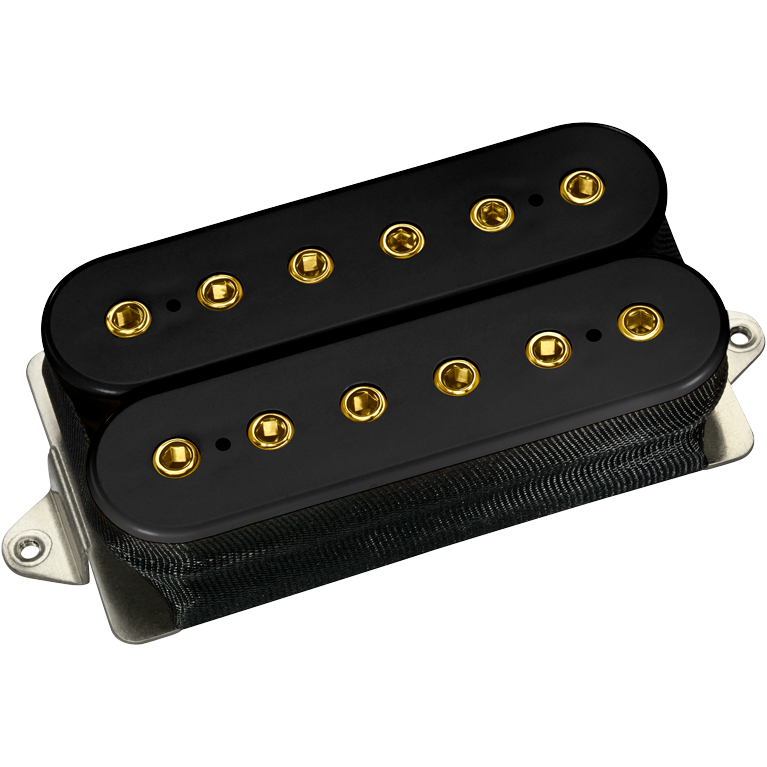
DiMarzio IGNO Coil-Splitting
The coil-splitting modification is easy to do with any four-conductor humbucker pickup. Four-conductor humbuckers have a wire coming from them that has four colored wires and one bare wire inside.
The DiMarzio IGNO pickup is a four-conductor humbucker, and it is well suited to coil-splitting because of its naturally high output. It also features a staggered coil winding, which reduces capacitance and preserves high frequencies and Alnico 8 magnets.
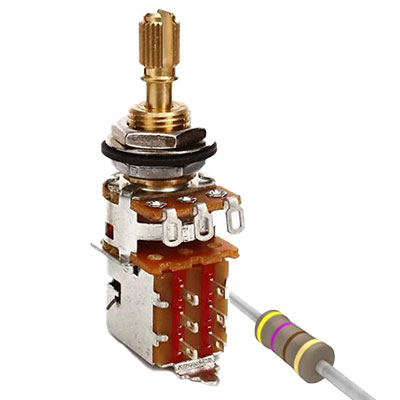
The Switch
The only other component that we will need for this modification is the switch. If you have a plastic pickguard with lots of room underneath for wires, you might consider using a mini-toggle switch, but for most of us, the best solution is to use a push-pull pot.
This post will explain how to coil-split a DiMarzio IGNO pickup using a push-pull pot, but using a mini-toggle switch is the same. A push-pull pot is a potentiometer that looks similar and acts the same as any other potentiometer such as your Volume or Tone control, but it has a switch built into it. You activate the switch by pulling the shaft of the pot out or pushing it in.
We will use the push-pull pot because we can replace our current Volume or Tone control. If we don’t like it, we can go back to the original design with no permanent damage. The downside to the push-pull pot is that the switching mechanism requires more space below the pot and many guitars don’t have the room for it to fit. You will want to check your guitar before doing any soldering.
Installing the Pickup
Usually, the first thing that you would need to do is find out which wires go to each coil in your humbucker, but we already know the wiring code for this pickup. The Green and White wires go to one of the coils, while the Red and Black wires go to the other. The bare wire is a shield wire that always goes to Ground (Fig 1).
Fig 1
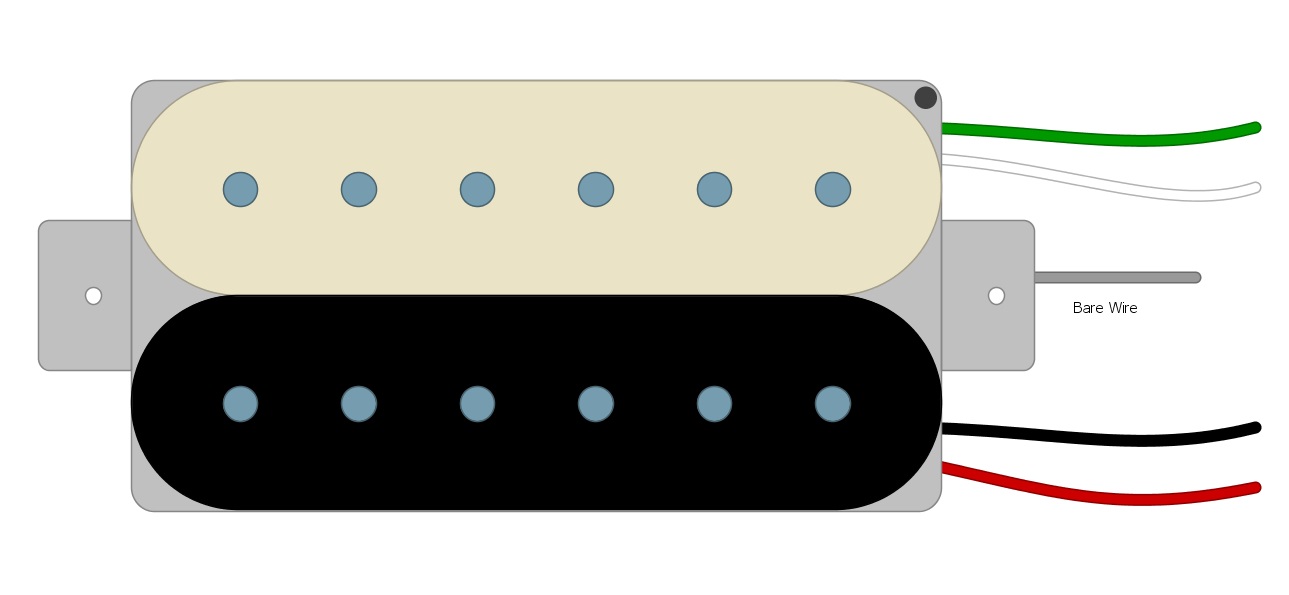
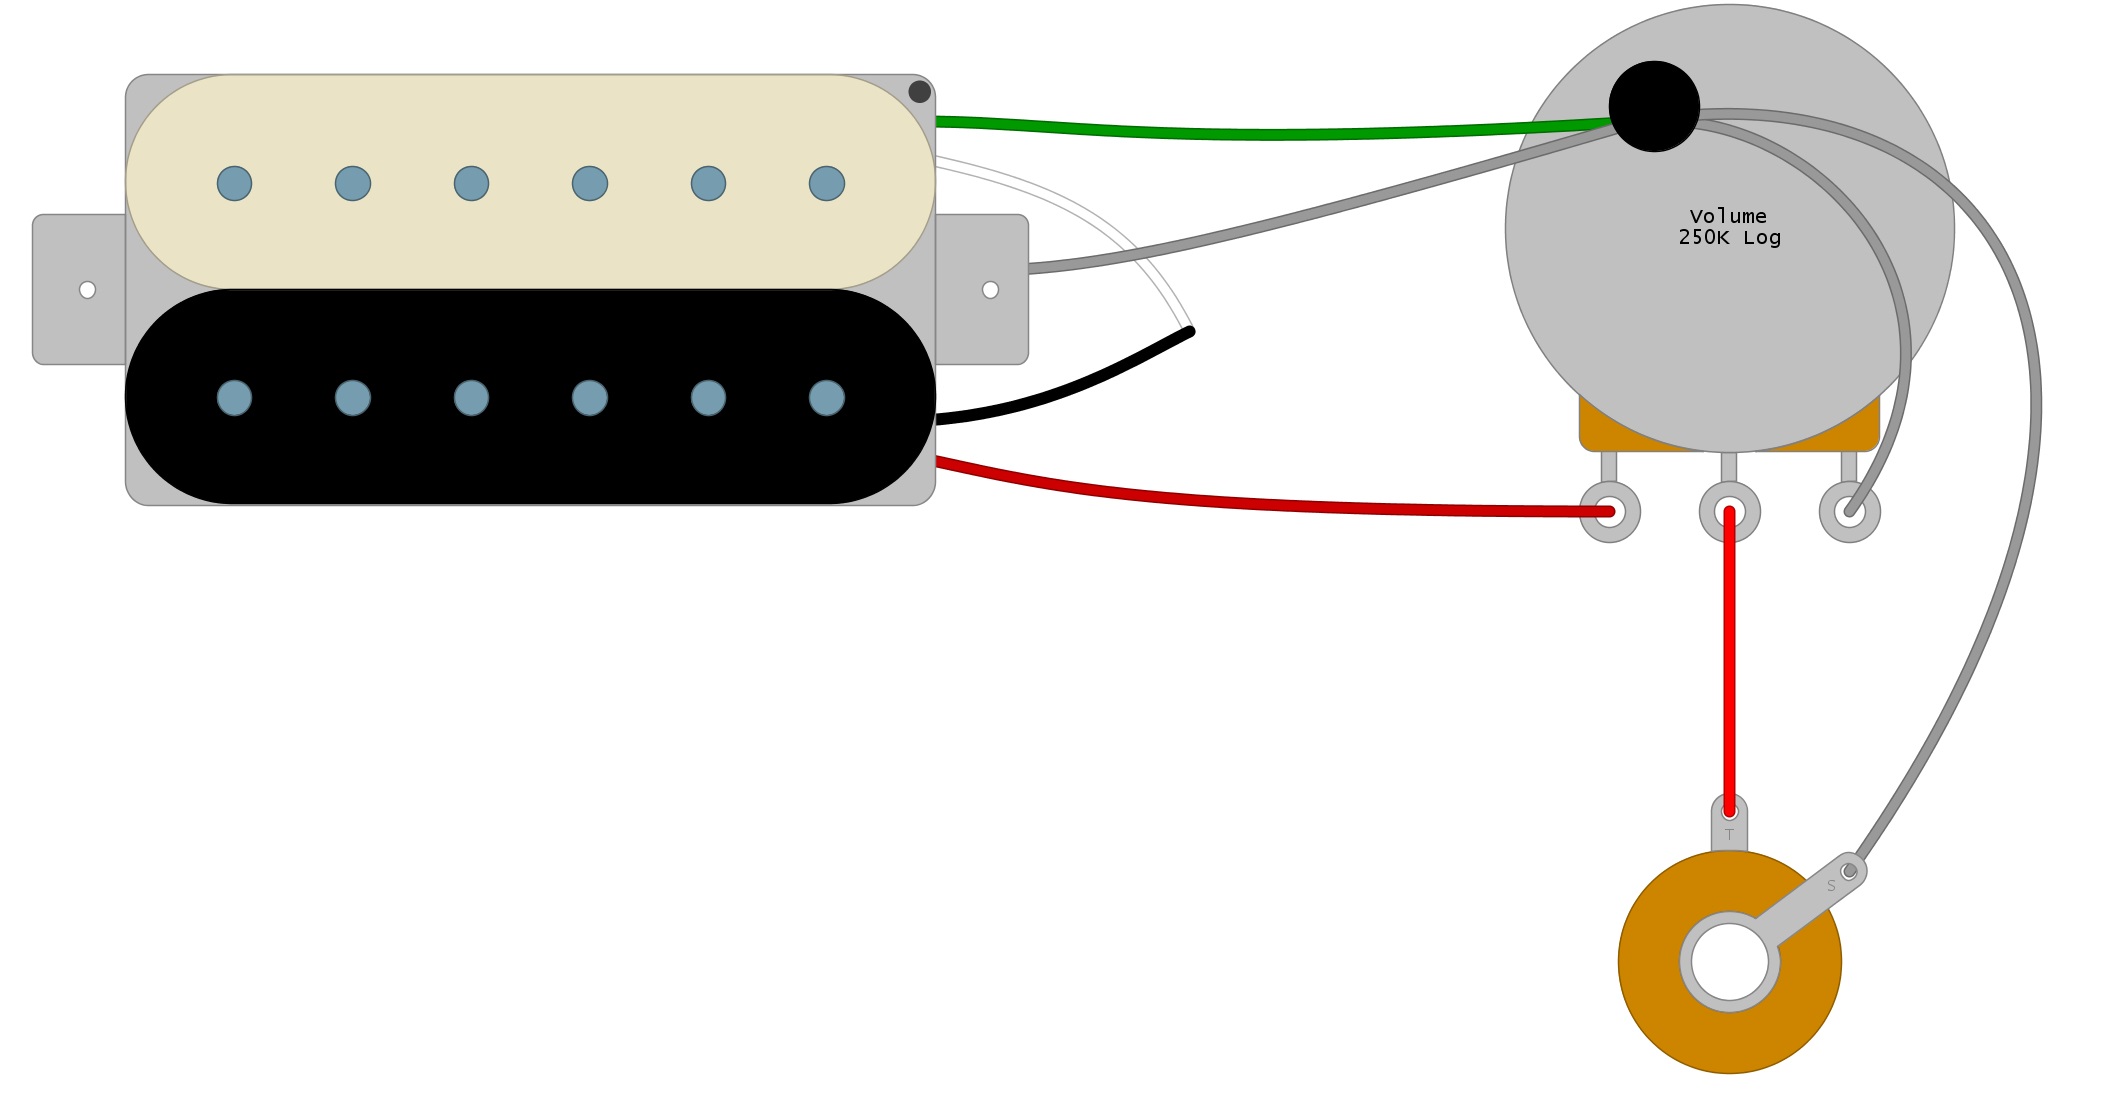
The standard way to wire the IGNO for regular operation is to connect the White and Black wires and then use the Red one as the Hot and the Green as the Ground, when installing the pickup into your guitar. The Bare wire is often connected to Green and soldered to Ground.
We begin here by doing the same (Fig 2).
Fig 2
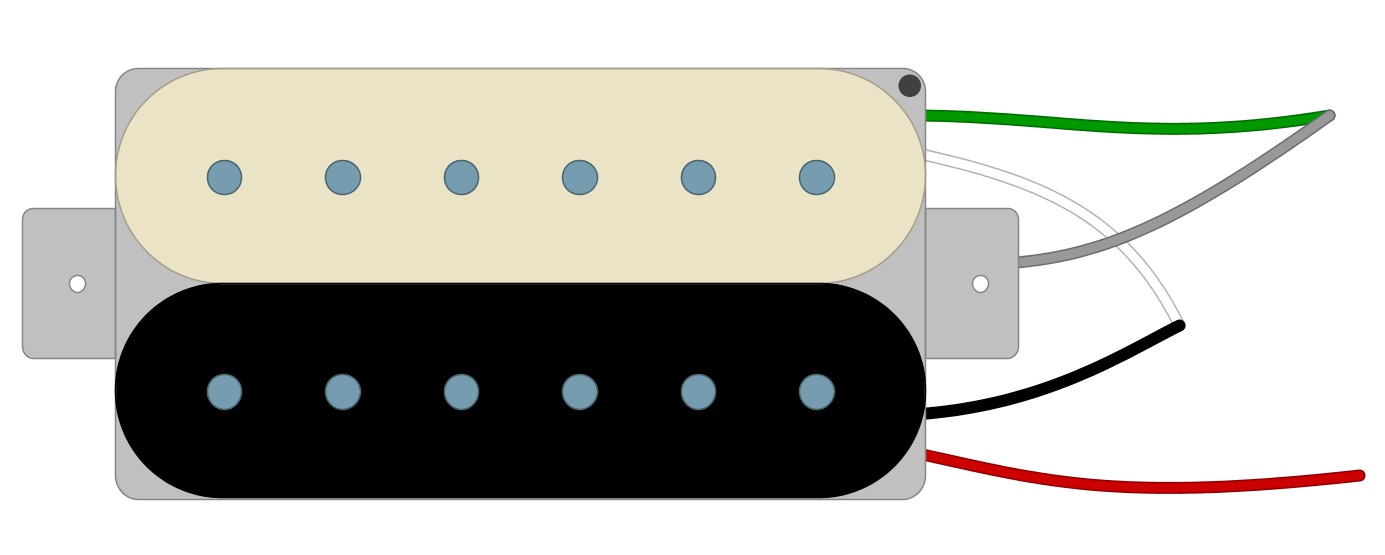
The next thing we do is install the pickup. If this is the only one, we solder it right to the Volume pot.
We’ll continue to do the same (Fig 3).
Fig 3
Splitting The Pickup
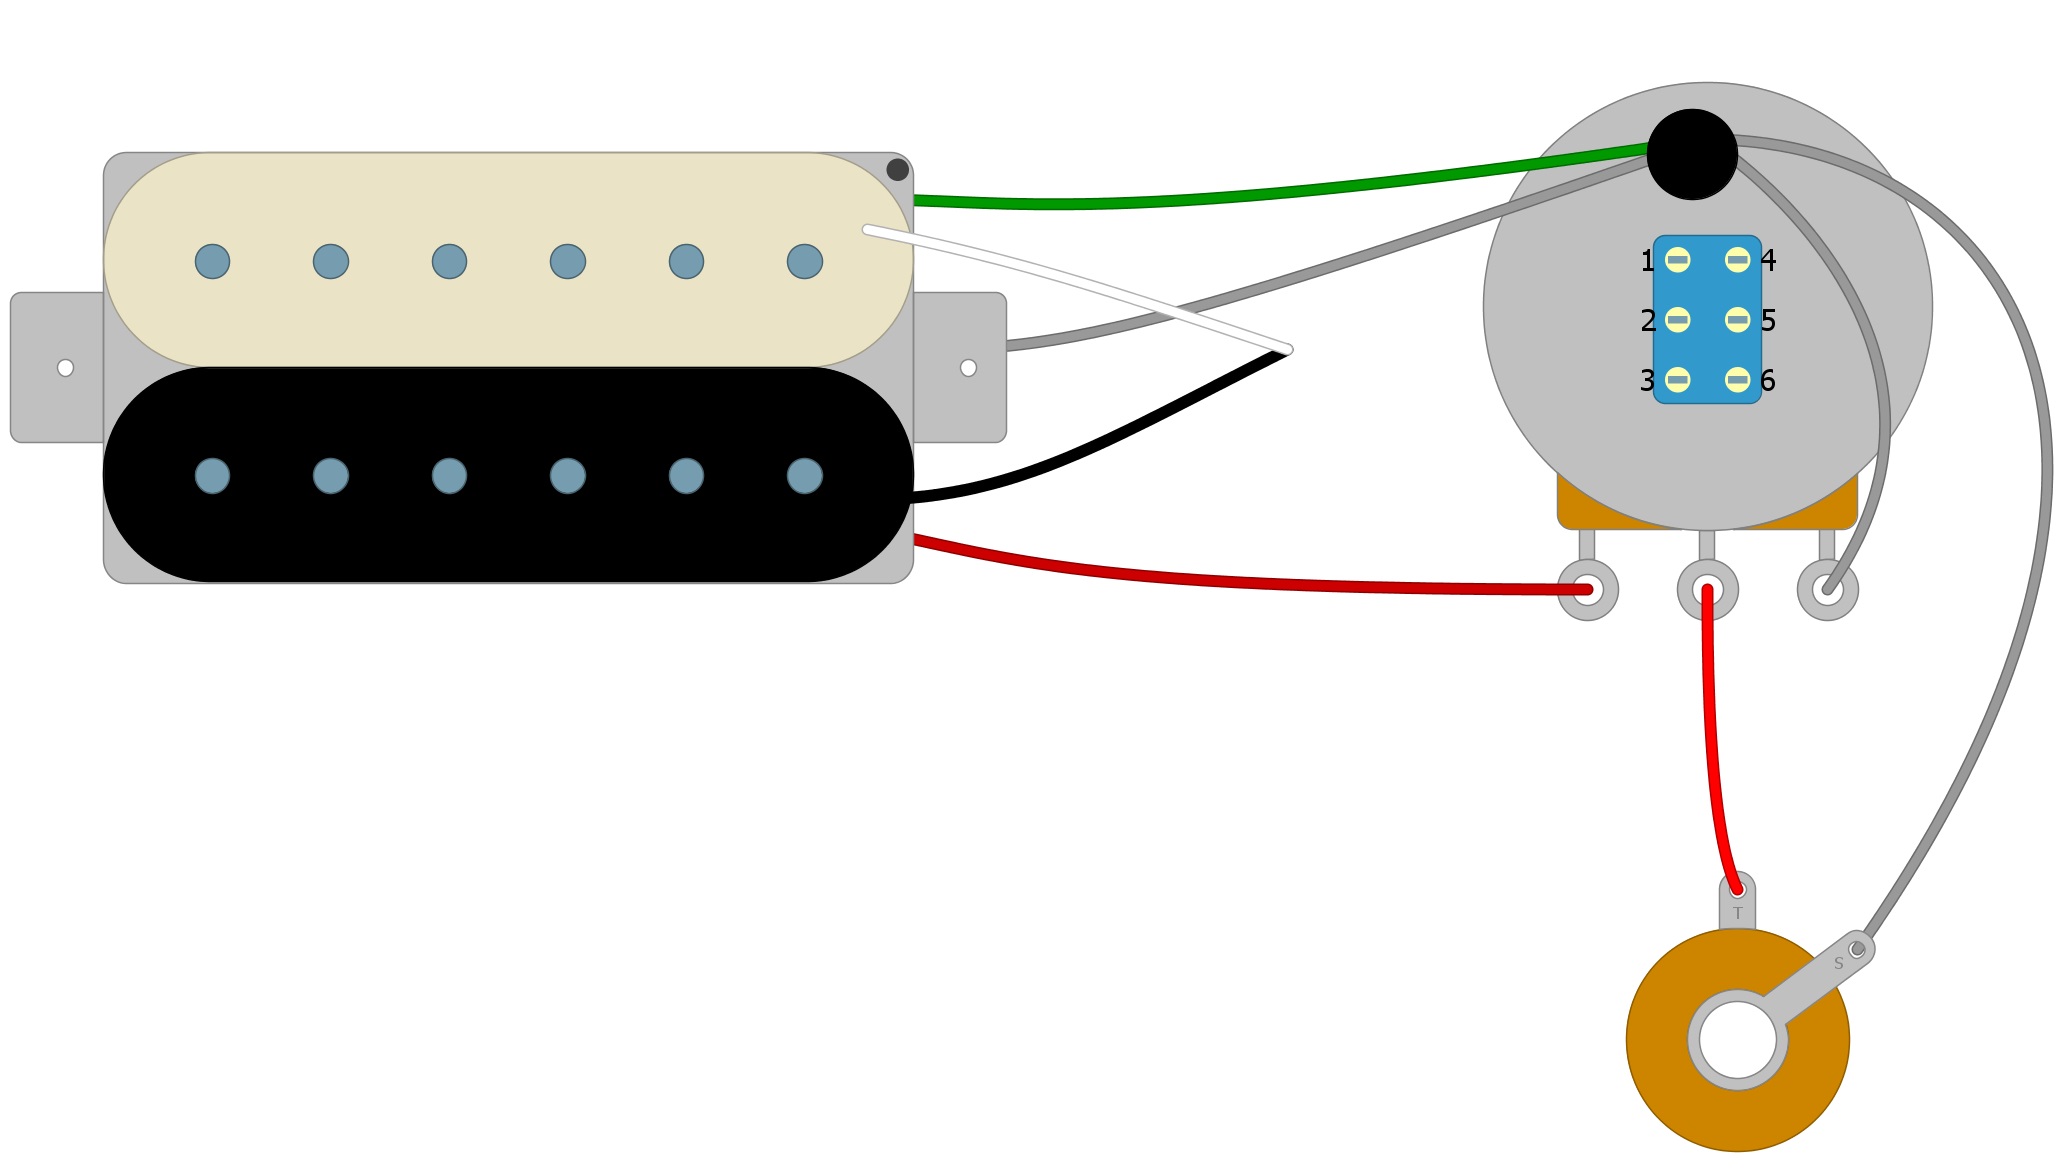
To split the pickup, we first change the Volume pot to a push-pull Volume pot. The push-pull pot will have more connection tabs on it, but you should be able to see the same three that were on the original.
Now wire the push-pull potentiometer in the same way as the original pot (Fig 4).
Fig 4

Everything should work fine and the only thing left is to add splitting.
Let’s number the new tabs on the push-pull pot, one to six (Fig 5).
Fig 5
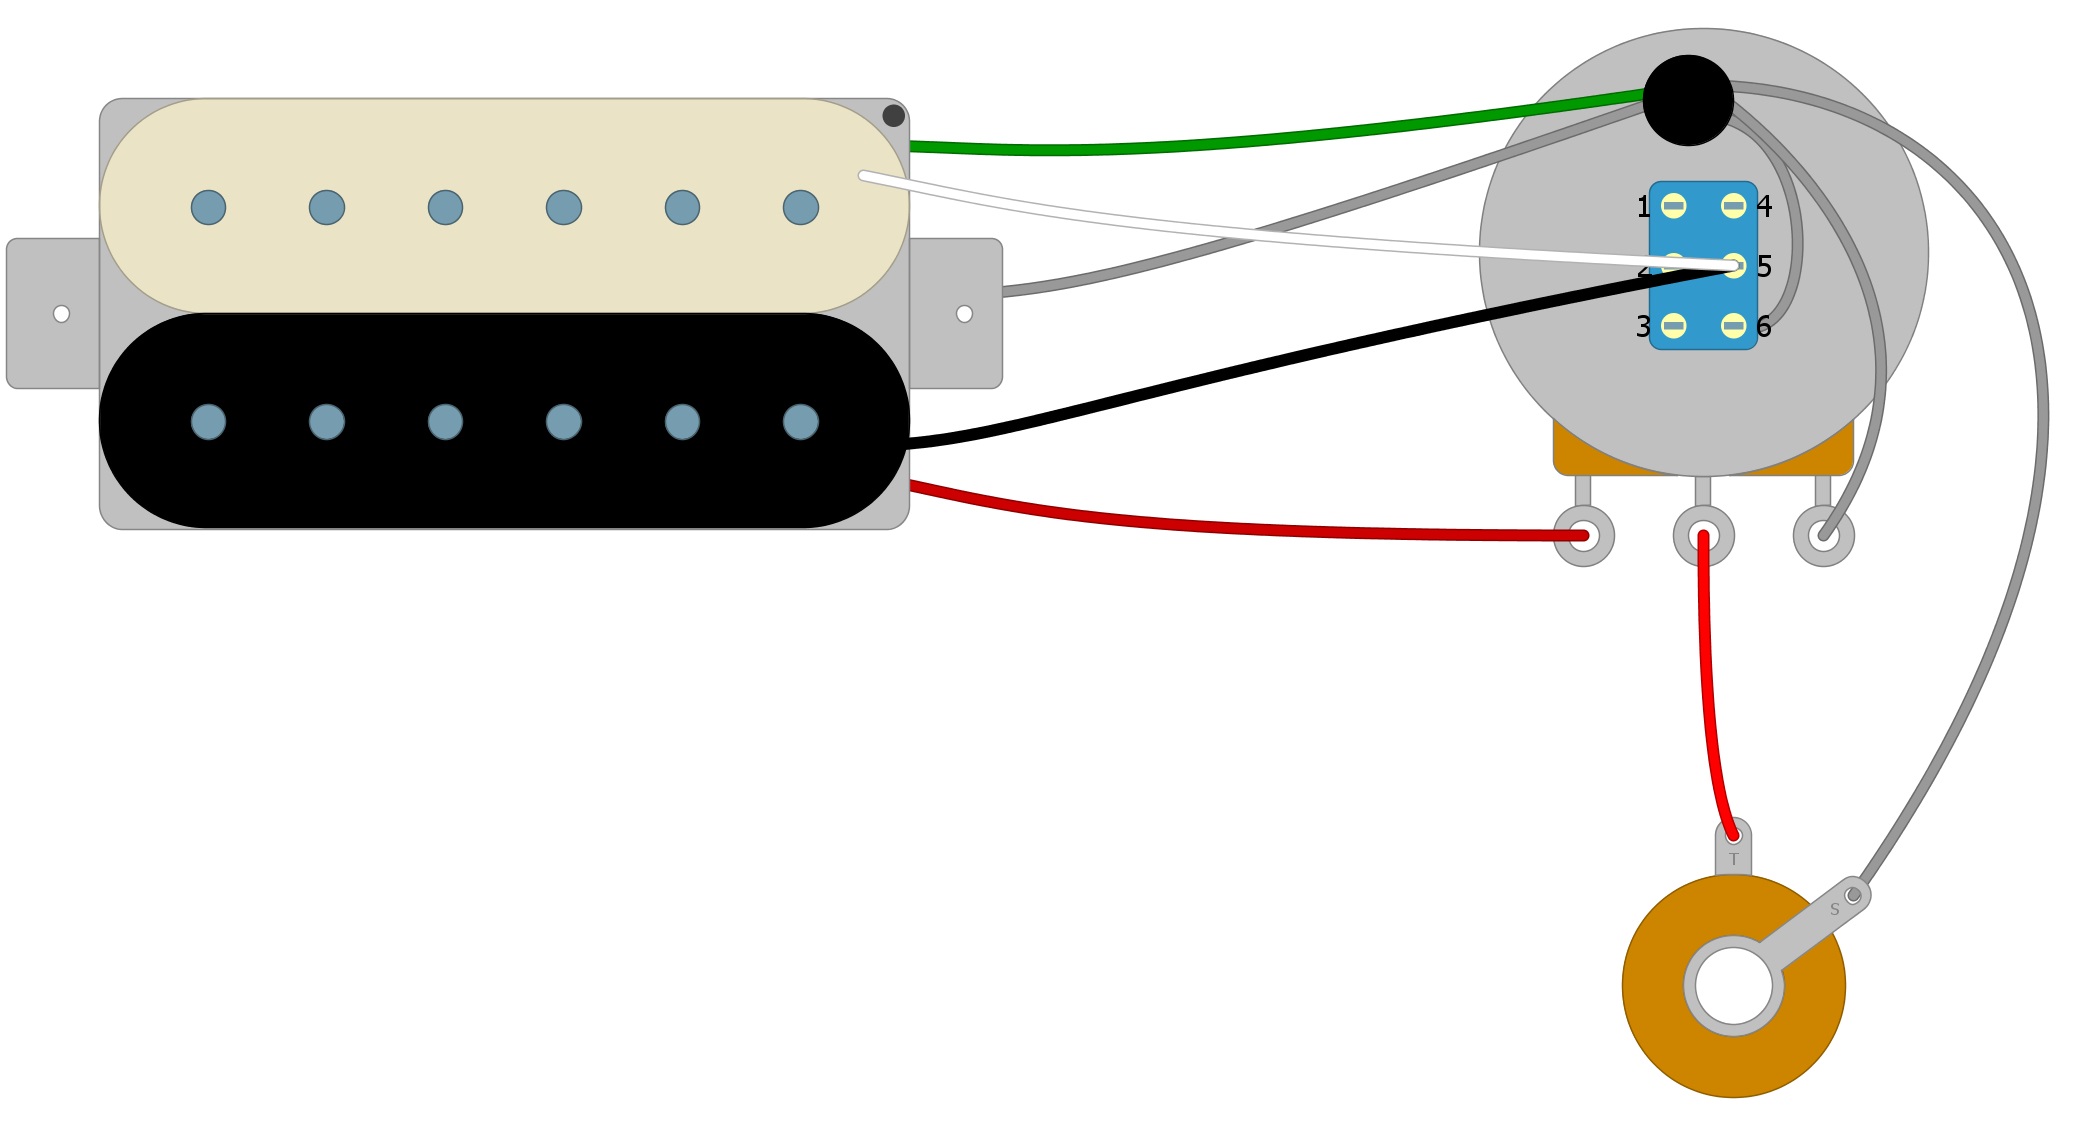
Now solder the Black and White wires that we previously attached to Tab 5 (Fig 6).
Fig 6

Solder a wire from Tab 6 to Ground (Fig 7).
Fig 7
 If you’ve found this article helpful, please feel free to share this with your friends on Facebook and Twitter. For more articles on guitar electronics, visit humbuckersoup.com.