By Ed Malaker
Posted 03/23/2025
Let’s take a look at the DiMarzio EJ Custom coil-splitting diagram. If you’re not familiar, coil-splitting a humbucker deactivates one of the coils and gives you access to the sound of a single-coil at the push of a switch. The Dimarzio EJ Custom is an Eric Johnson signature model designed to his specifications. It has a bright sound, similar to single-coils, but with more bass which adds body to the overall tone. It uses an Alnico 5 magnet and has an output of 7.8k.
What is Coil-Splitting?
Coil-splitting is a modification we can perform on a humbucker with four wires. The mod shuts off one of the two coils in its construction. The result is a thinner, brighter sound that resembles a single-coil pickup. The tradeoff is that you lose a considerable amount of output gain, and you lose the humbucking qualities, which will allow noise to enter the signal. Fortunately, we use a switch, usually a push-pull pot, to enable us to turn the mod on and off at will.
Before You Begin
This article assumes that you already have at least one DiMarzio EJ Custom installed in your guitar, and it works correctly. If you need help installing your pickup, please check out our article titled DiMarzio EJ Custom Wiring for step-by-step instructions.
Tools Required
You won’t need a lot of tools to complete this modification. A screwdriver to access the wiring, a soldering iron, and a small amount of solder to make the connections will be required. You will also need a small amount of wire — no more than an inch or two — and the switch. We recommend a push-pull pot, but you can certainly use a mini-toggle switch as well. Our diagram and instructions will work for either approach.
Make sure you have everything here:
- Phillips screwdriver
- Soldering iron
- Solder
- Short wire
- Push-pull pot, or mini-toggle
Getting Started
First, you’ll need to access the wiring inside the control cavity and make sure you can get to the DiMarzio EJ Custom black and white wires, which should be twisted together and taped off. If the wires are not present in the cavity, you may need to look under the pickup and feed them inside.
The Push-Pull Pot
To install the push-pull pot, you must first decide where you will install it. You can switch out Volume or Tone controls, but we recommend the Tone control because there are fewer wires to switch. You will need to take note of where everything goes and then uninstall the standard Tone control and place the push-pull in the same spot. Solder the wires the same way, ignoring the extra switch section for now.
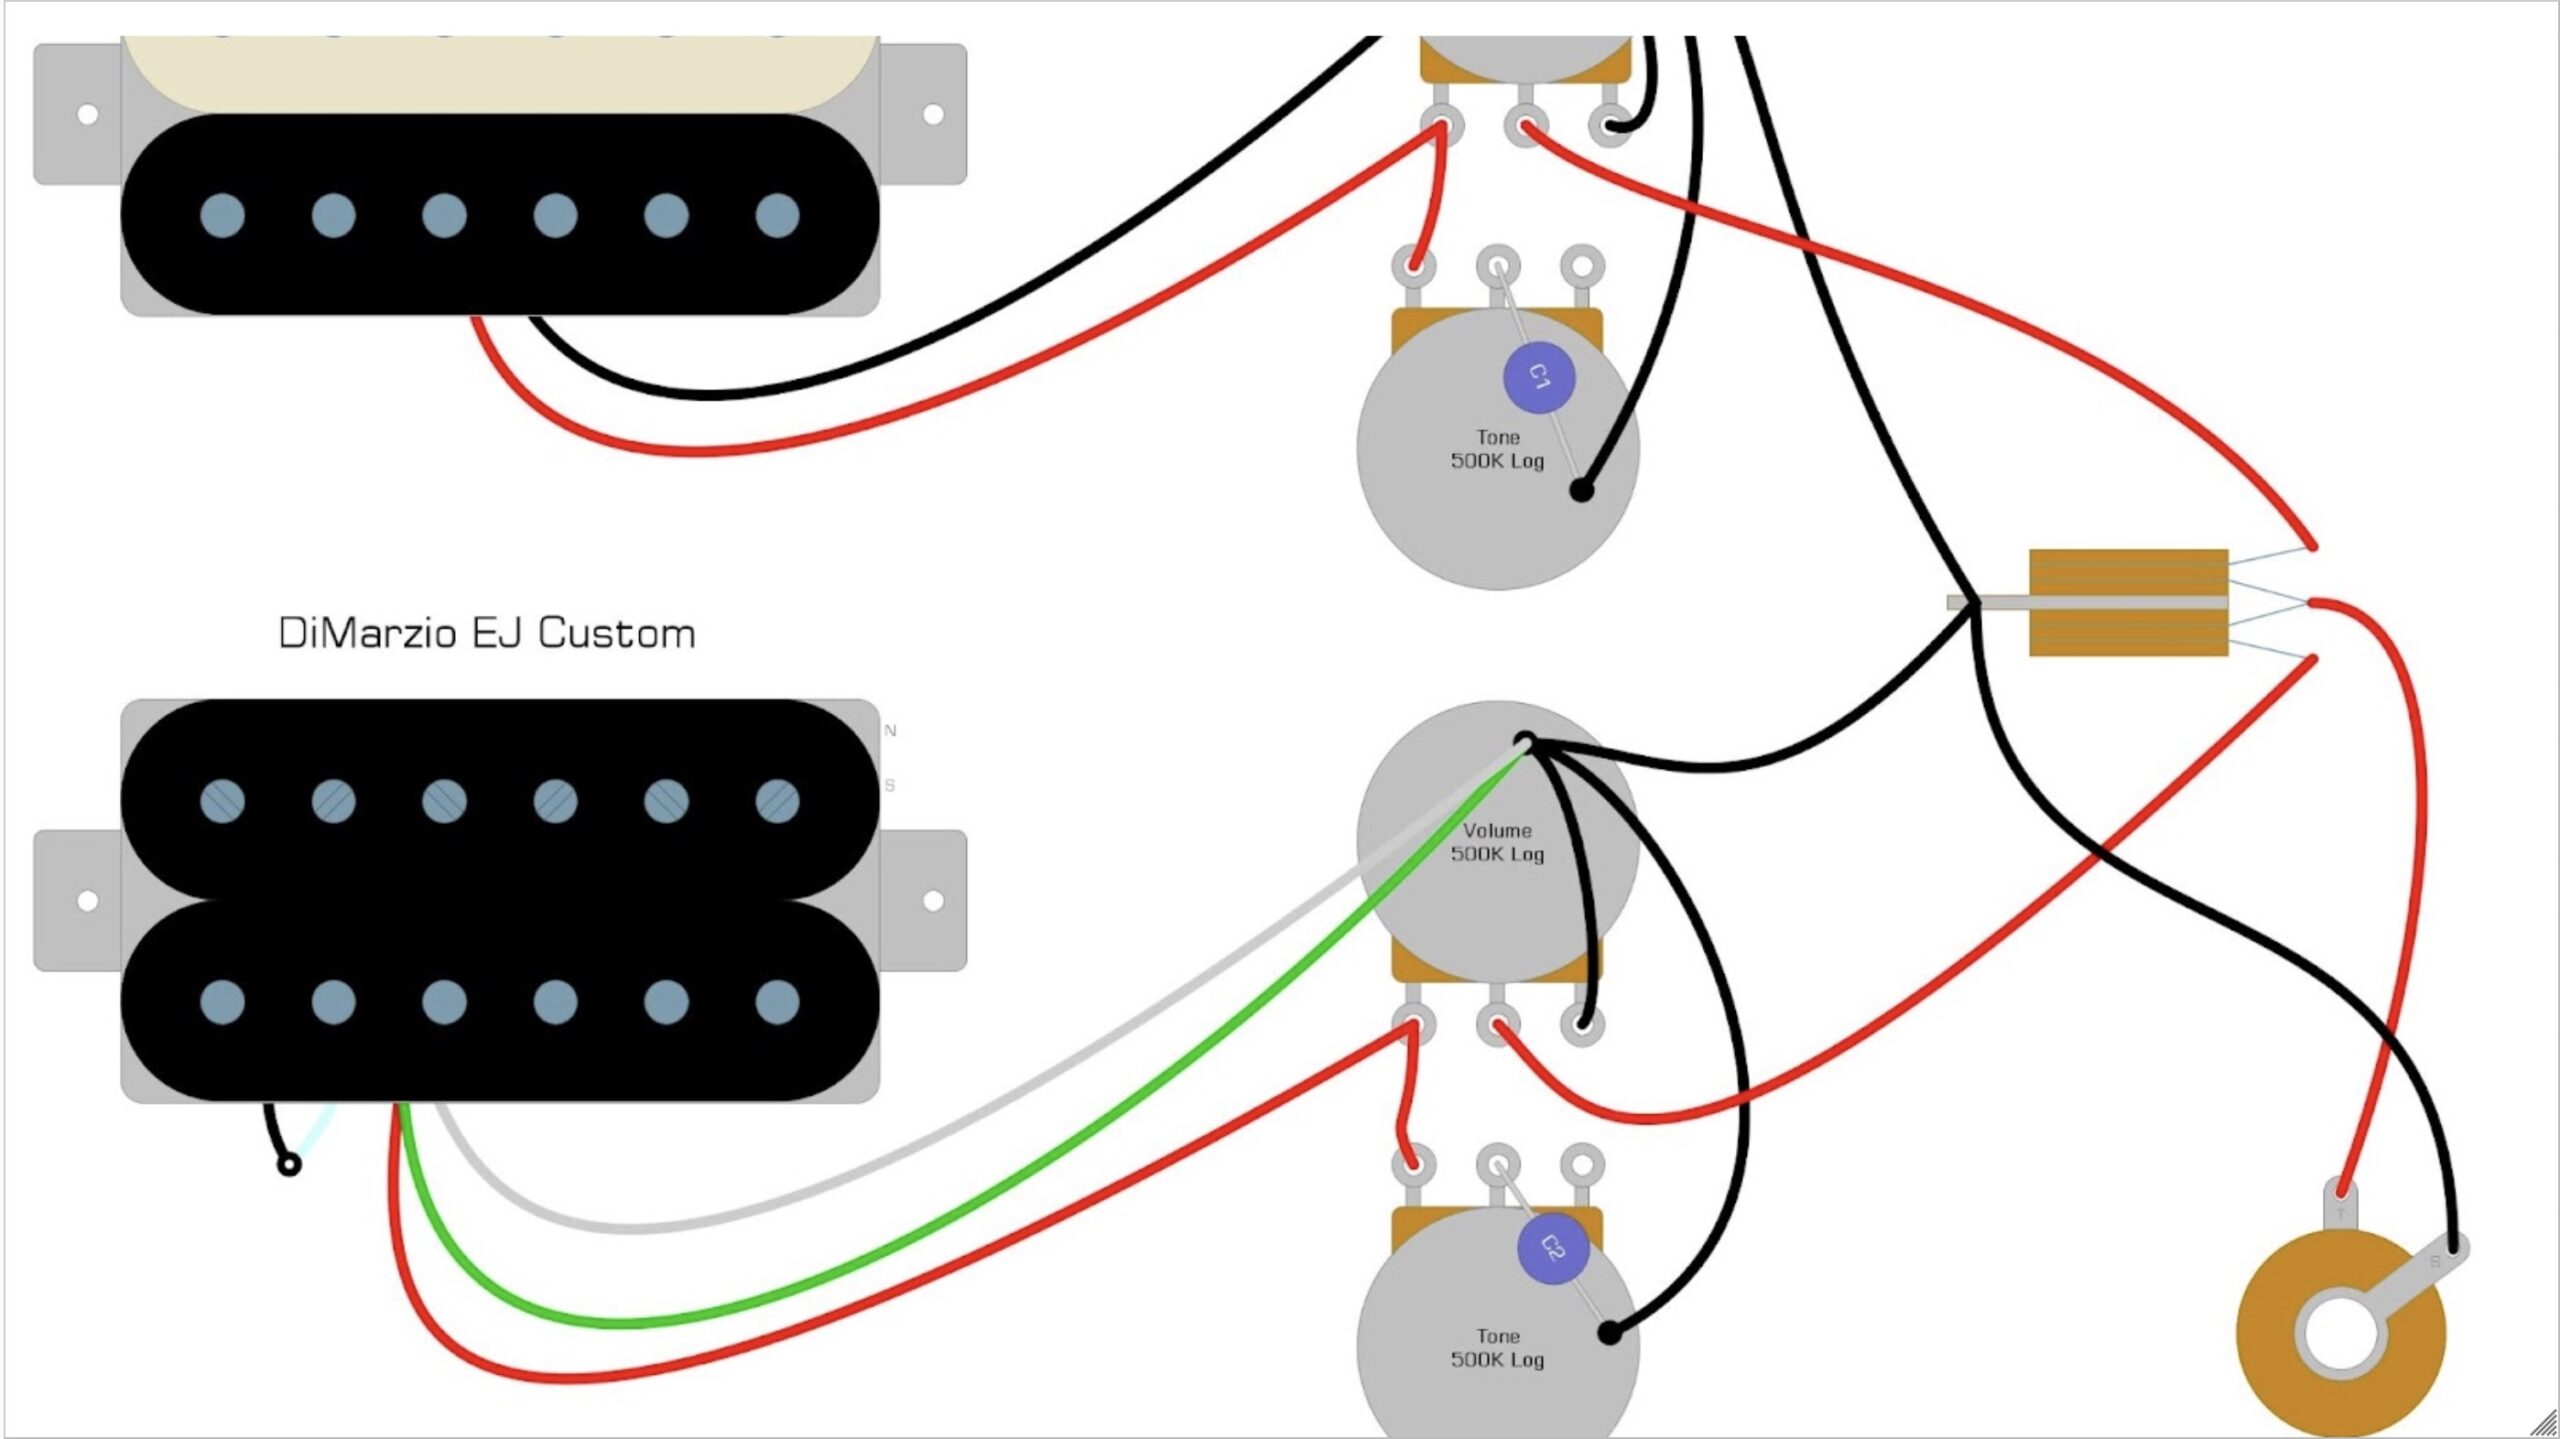
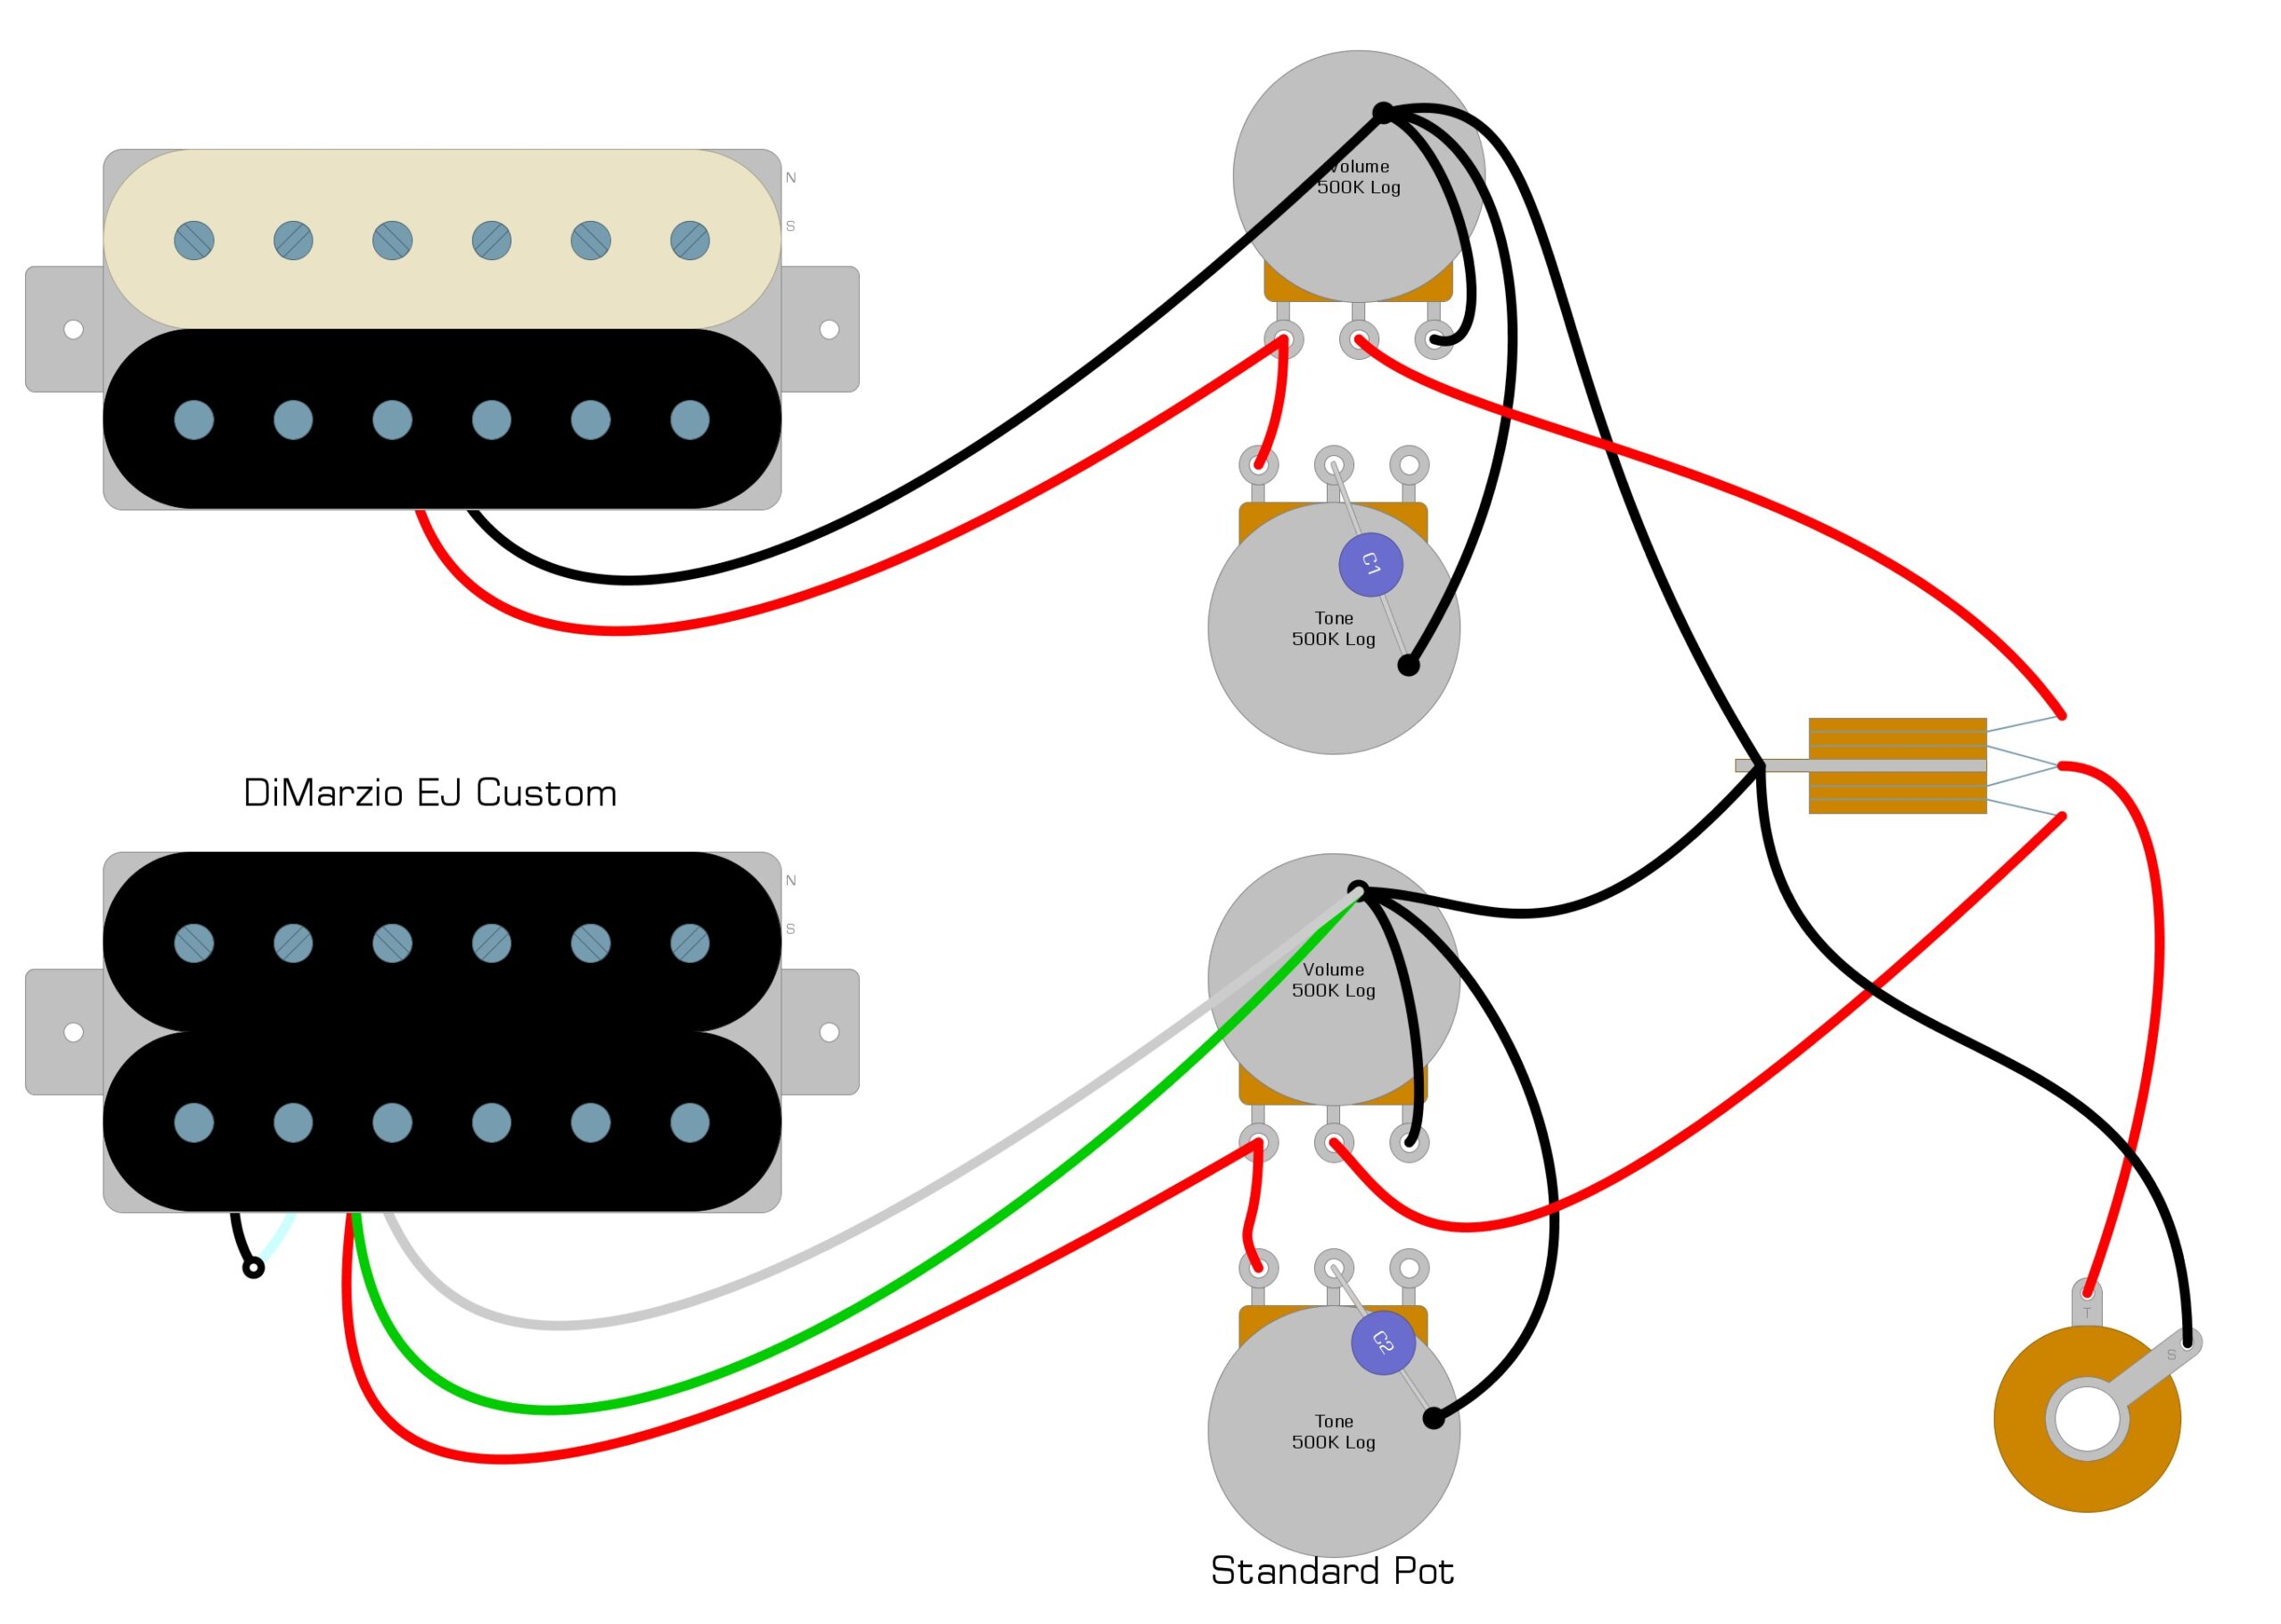
In Example 1, we illustrate a common way to wire a DiMarzio EJ Custom in a Gibson Les Paul-style guitar with a standard Tone control.
Example 1
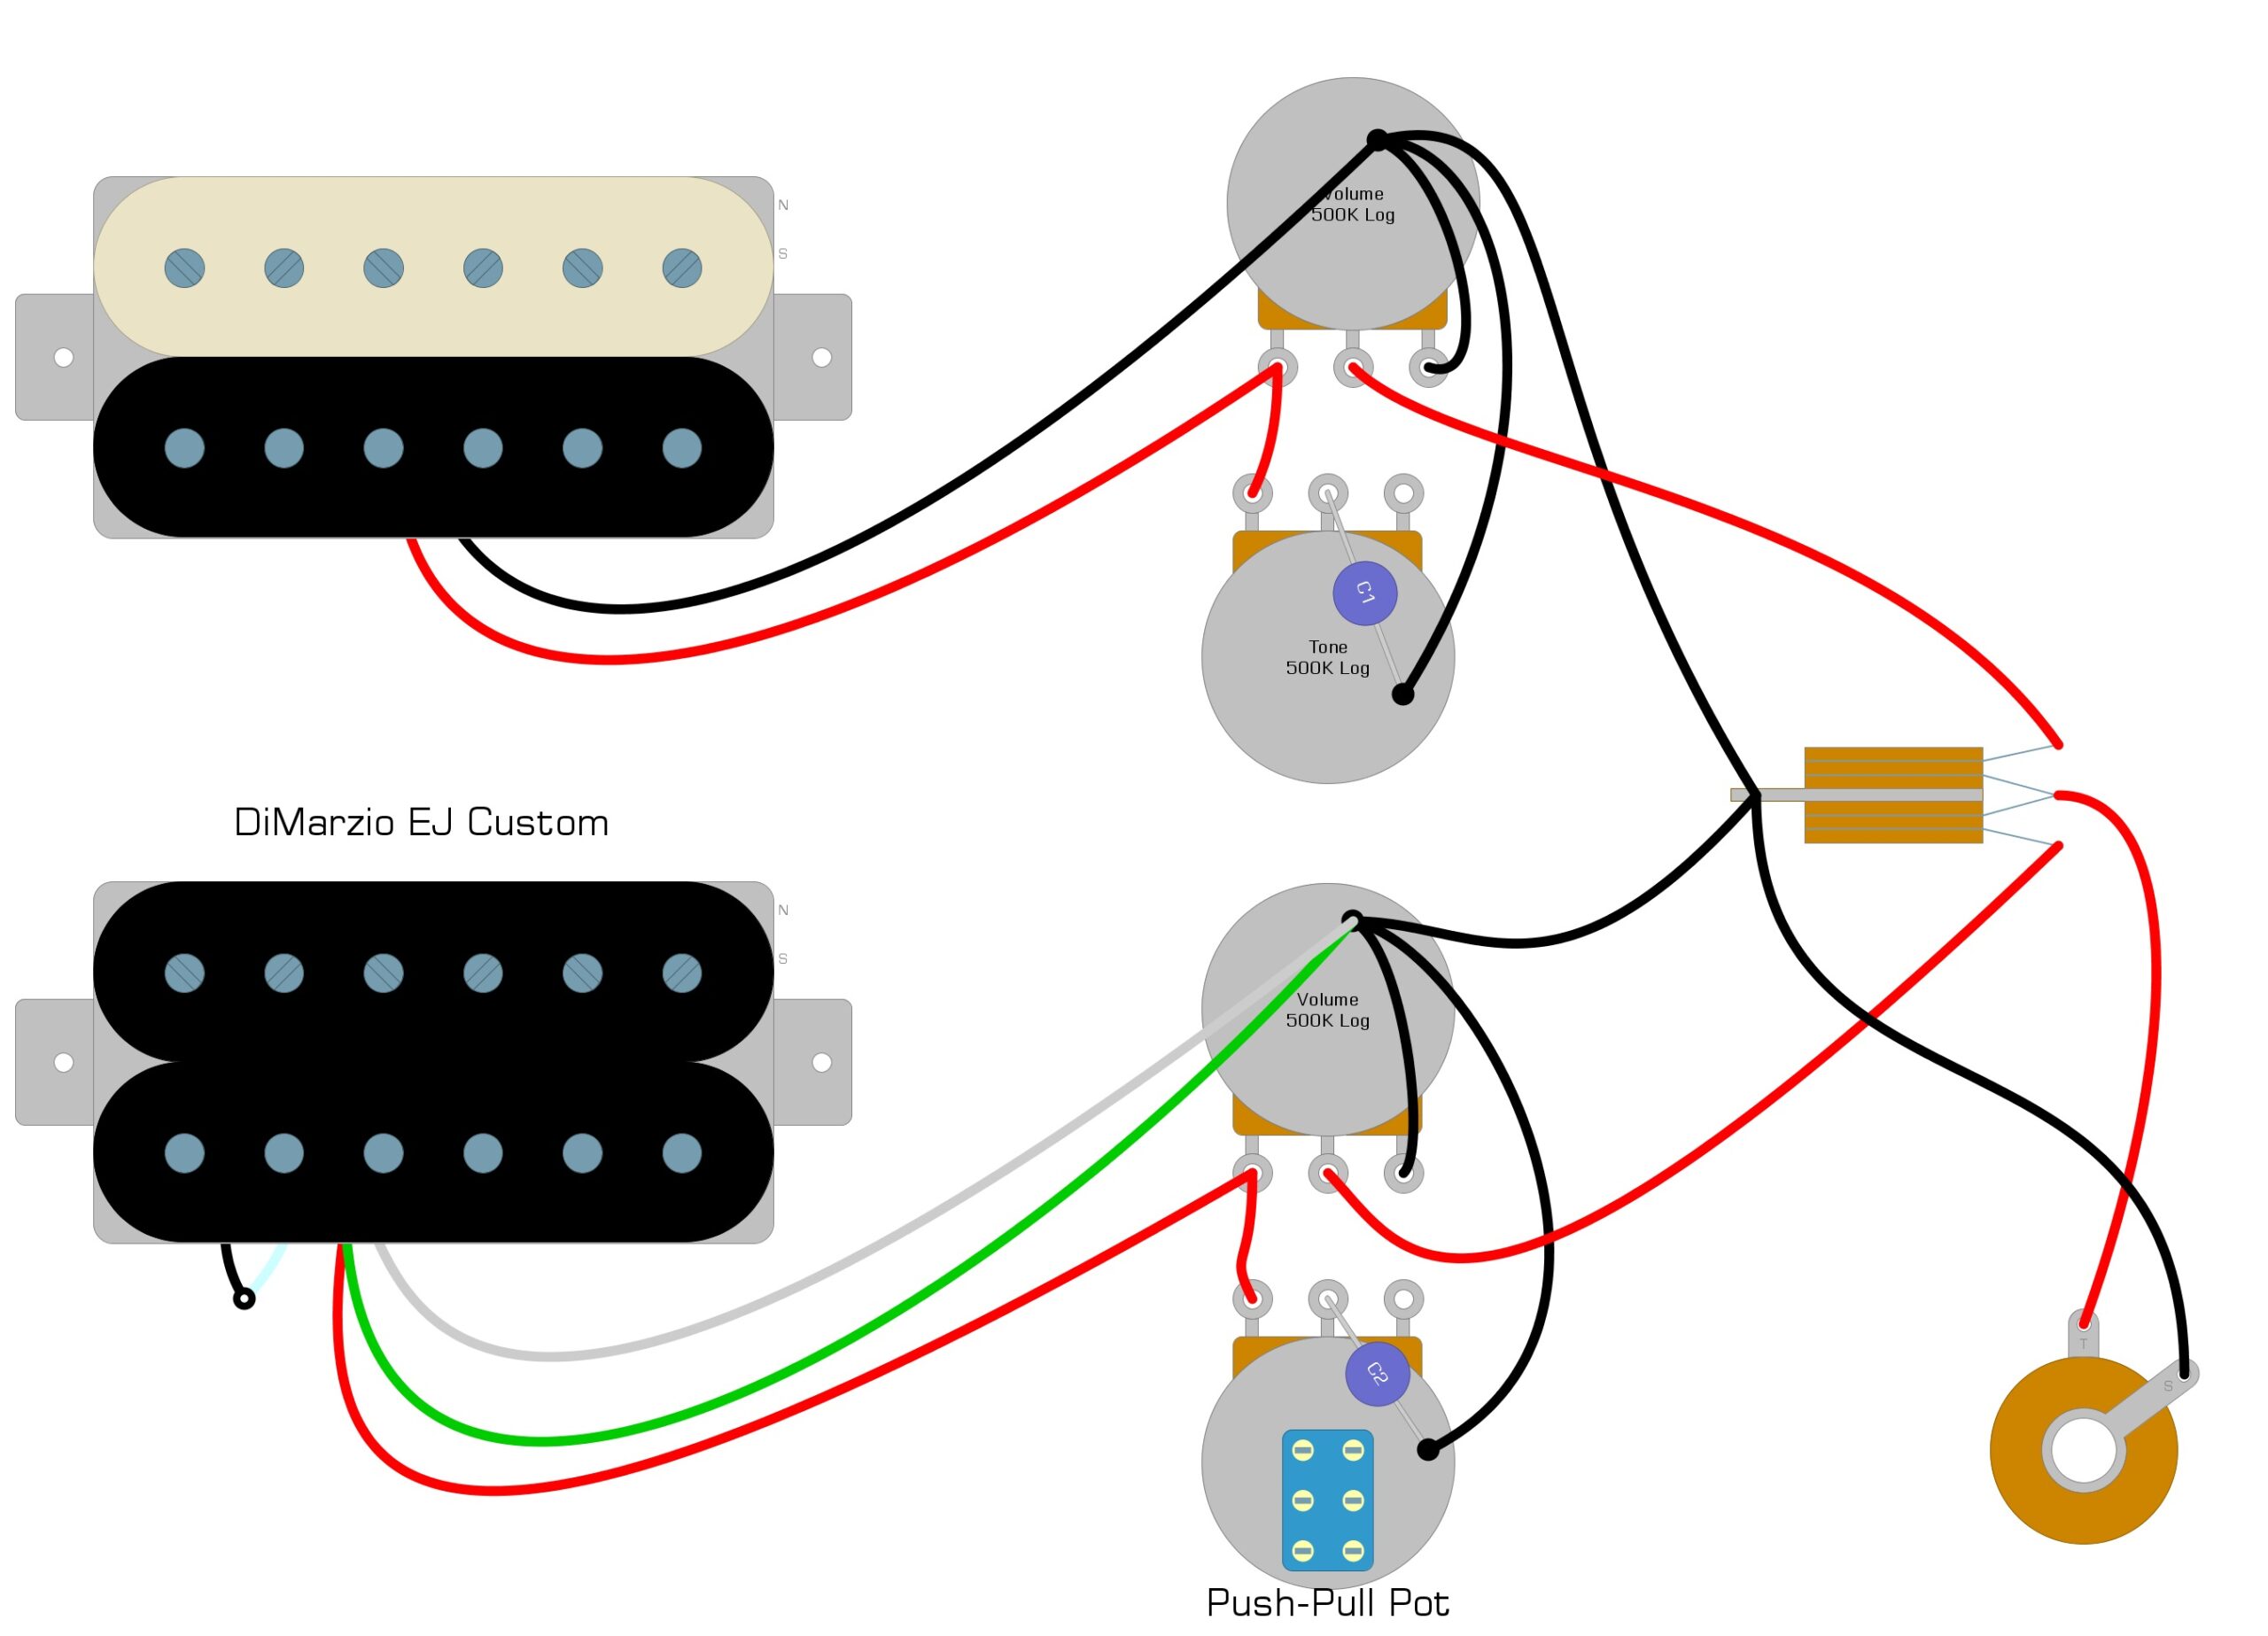
In Example 2, we illustrate the same wiring diagram, but with a push-pull pot in place of the standard pot.
Example 2
DiMarzio EJ Custom Coil-Splitting
With the push-pull pot installed, you’ll need to solder the white and black wires from the pickup to a middle lug on the push-pull pot. We have illustrated this connection in Example 3.
Example 3
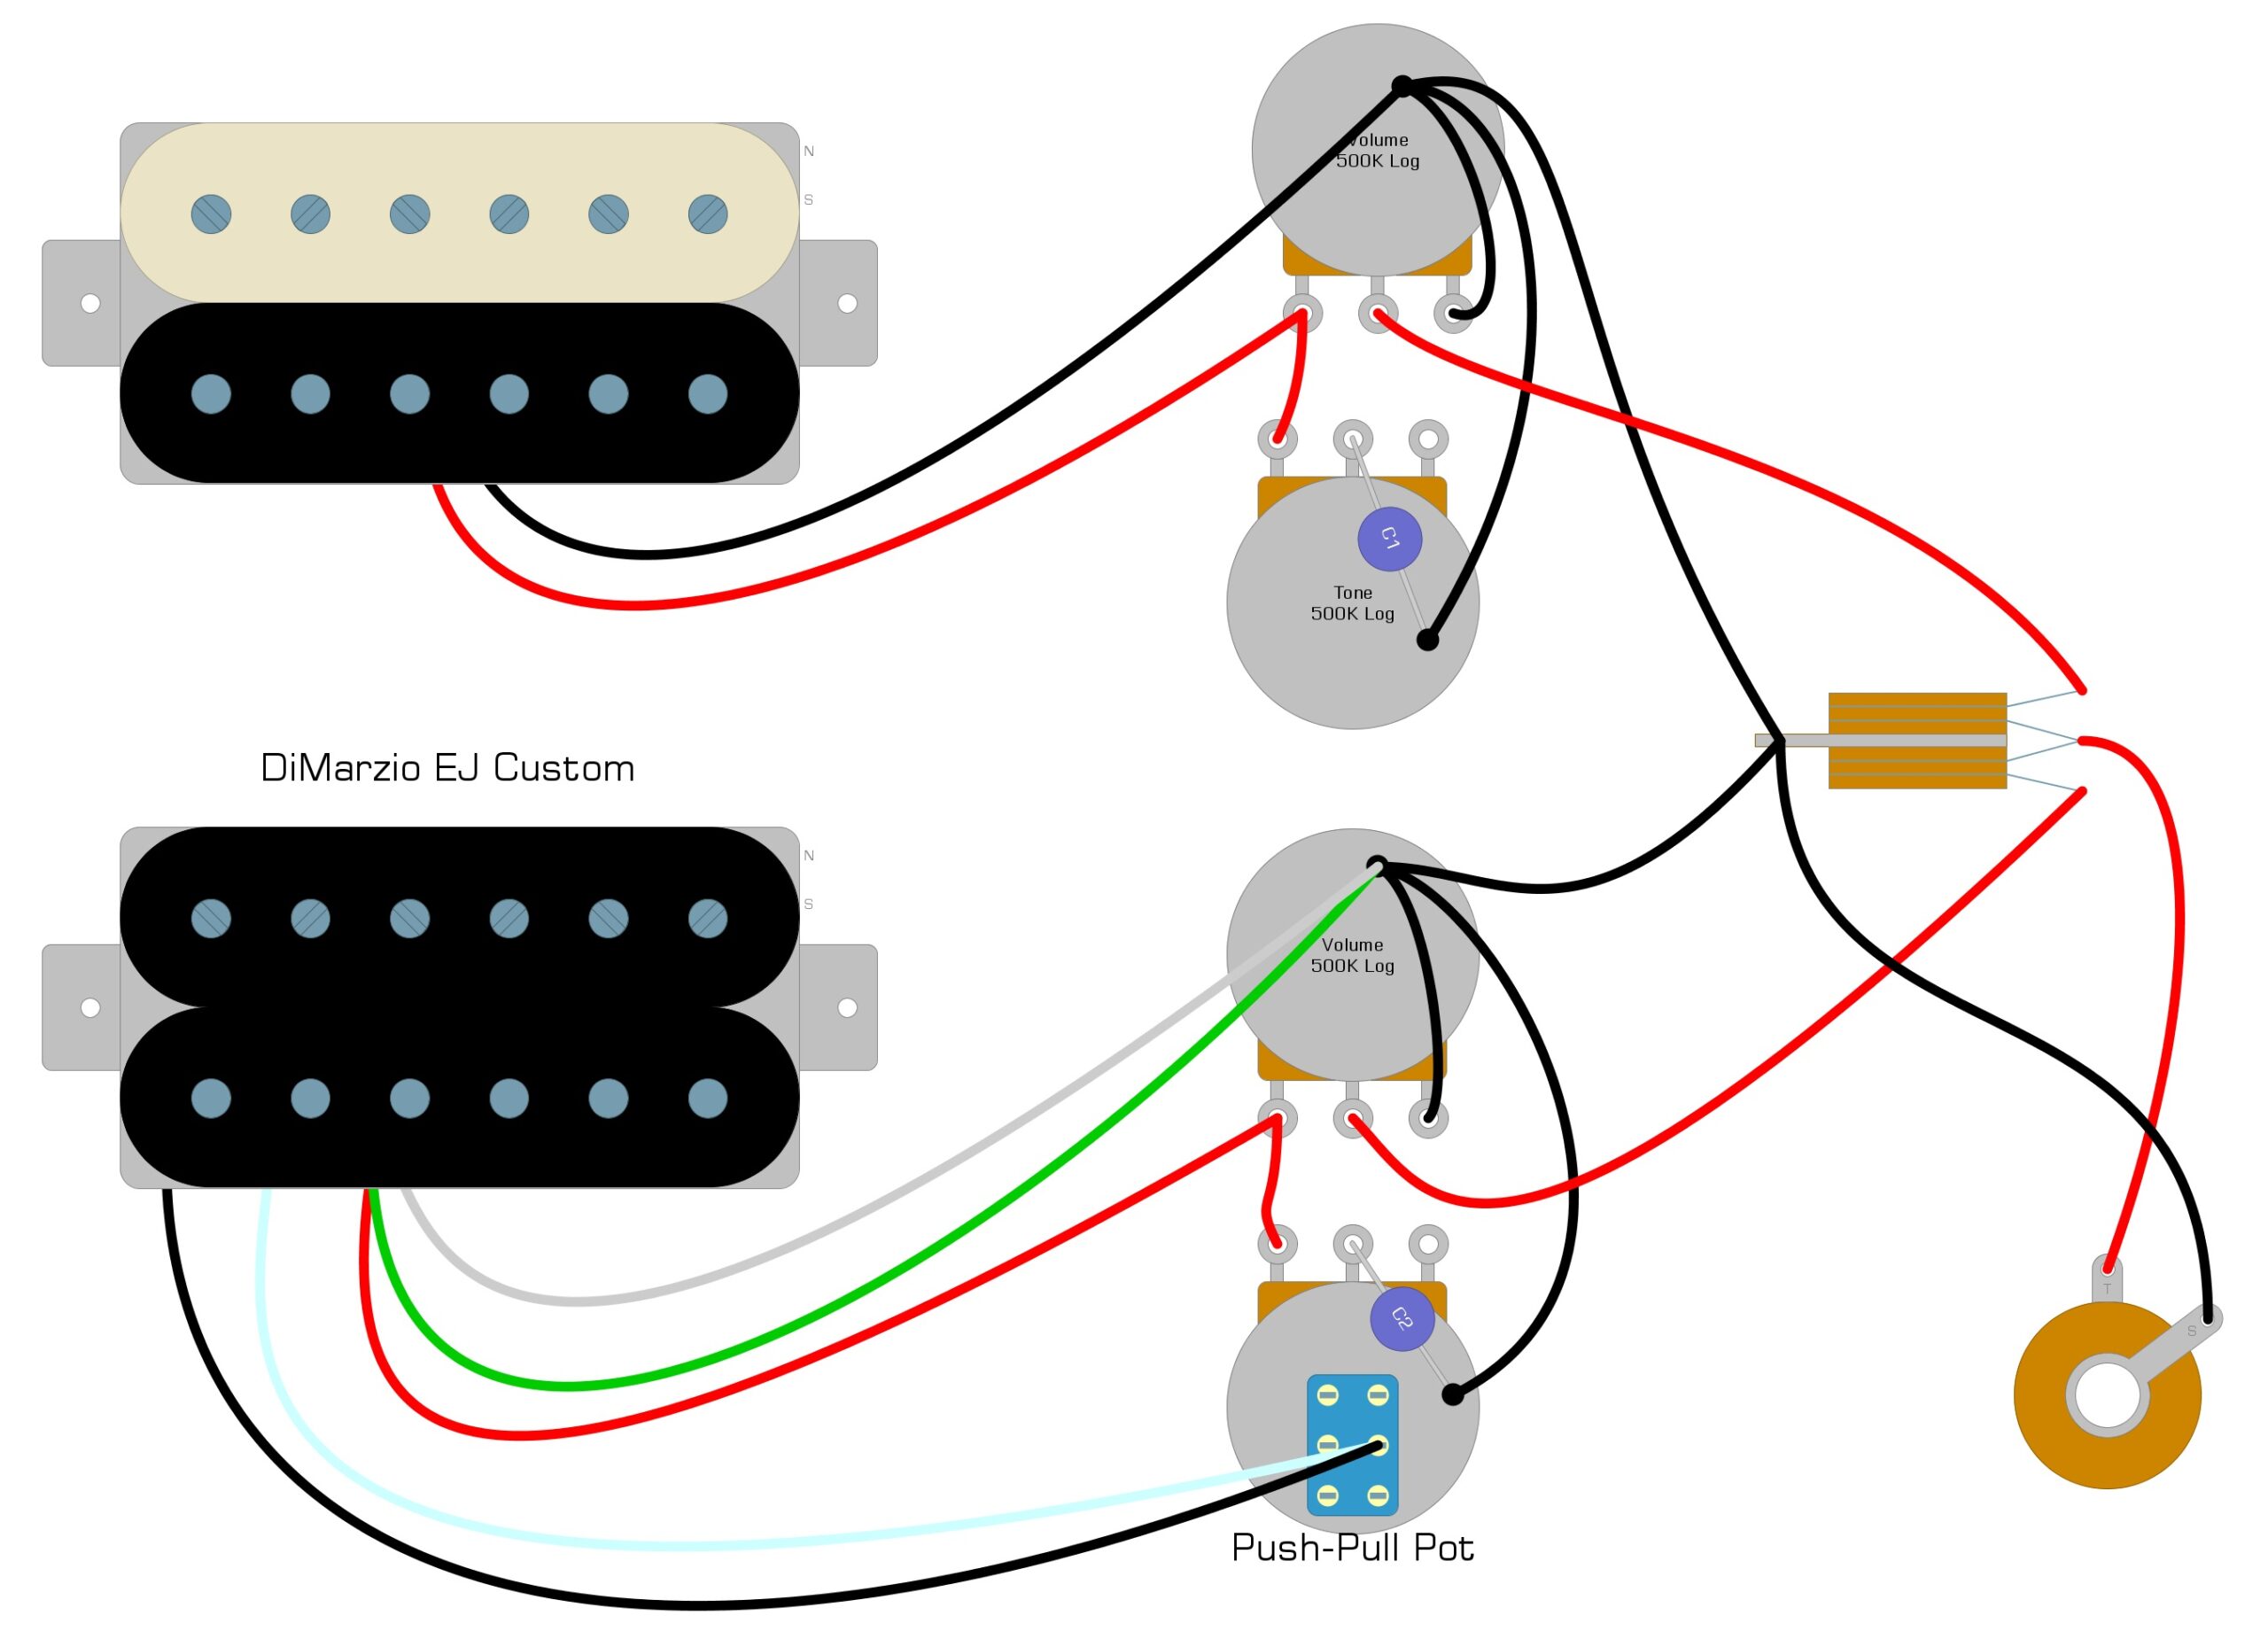
Lastly, connect a short wire from the bottom lug of the push-pull pot to the back of the tone control. We have illustrated this connection in Example 4.
Example 4

How It Works
This modification takes advantage of the four wires connected to the DiMarzio EJ Custom. Each coil has two wires that designate the beginning and end of the coil. Normally, the first coil runs into the second, as you can see with the white and black wires. The signal is leaving one coil and entering the next.
Since we’ve connected the black and white wires to the push-pull pot, when we pull it out the signal moving through the white and black wires can follow the short wire to Ground. Since electricity, like water, always follows the path of least resistance, all the signal leaving the first coil goes to Ground because the second coil is a type of resistor. We call it a split pickup since no signal passes through the second coil. When you push the push-pull pot back in, the signal does not have access to the short Ground wire, so it must once again pass through the second coil, resulting in the normal humbucker sound.
Summary
The coil-split modification is an easy modification and a great way to start learning how to enhance your tone and improve your guitar. It gives you access to a new sound and is completely reversible.
If you’ve enjoyed reading this guide to DiMarzio EJ Custom coil splitting and have found it helpful, please feel free to share this on Facebook and Twitter. For more articles on guitar electronics, visit humbuckersoup.com.