By Ed Malaker
Posted 04/17/2025
In this article, we’ll cover how to coil-split a DiMarzio Chopper Telecaster bridge pickup. Many players switch out their stock Telecaster pickup for a mini-humbucker to cut down on the noise that a single-coil pickup produces.
There are many suitable brands of mini-humbuckers available, but the DiMarzio Chopper is designed specifically for the Fender Telecaster, and it keeps in mind the unique tilt of the pickup while retaining some twang.
After you’ve changed over to a humbucker, it’s common to long for that single-coil sound on a Telecaster. The coil-splitting modification is a perfect way to give you the option of having that sound back without changing your pickups. This guide will help walk you through the process of coil-splitting a DiMarzio Chopper pickup.
Before We Get Started
This article assumes that you already have the DiMarzio Chopper installed in the bridge position of your Fender Telecaster, and it’s working correctly. If you need help installing the Chopper into your Telecaster, we recommend checking out our article titled DiMarzio The Chopper Tele Bridge Wiring Diagram to help you get started.
What is Coil-Splitting?
When you coil-split a humbucker, you use a ground wire to short out the second coil, which leaves only one coil that makes sound. Coil-splitting results in a much thinner sound with less gain, because you are not receiving the full power from the pickup. You will also get the excess noise back that is present in single-coil pickups.
For this modification, you can use either a push-pull pot or a mini-toggle switch to turn it on and off at will. We recommend the push-pull because it is completely reversible, while the mini-toggle switch will require a permanent hole.
Tools and Materials Required
You won’t need many tools to complete the coil-splitting modification. A short piece of wire, a soldering iron, and a small amount of solder will take care of the work. A screwdriver will give you access to the control cavity and bridge plate pickup, if you need it. You will also need a switch — either a push-pull or a mini-toggle. You may also need some tape, wire cutters, and pliers, but probably not.
Make sure you have everything here:
- A short length of wire
- Push-pull pot or mini-toggle switch
- Soldering Iron
- Solder
- Tape
- Wire cutters
- Pliers
The Wiring Code
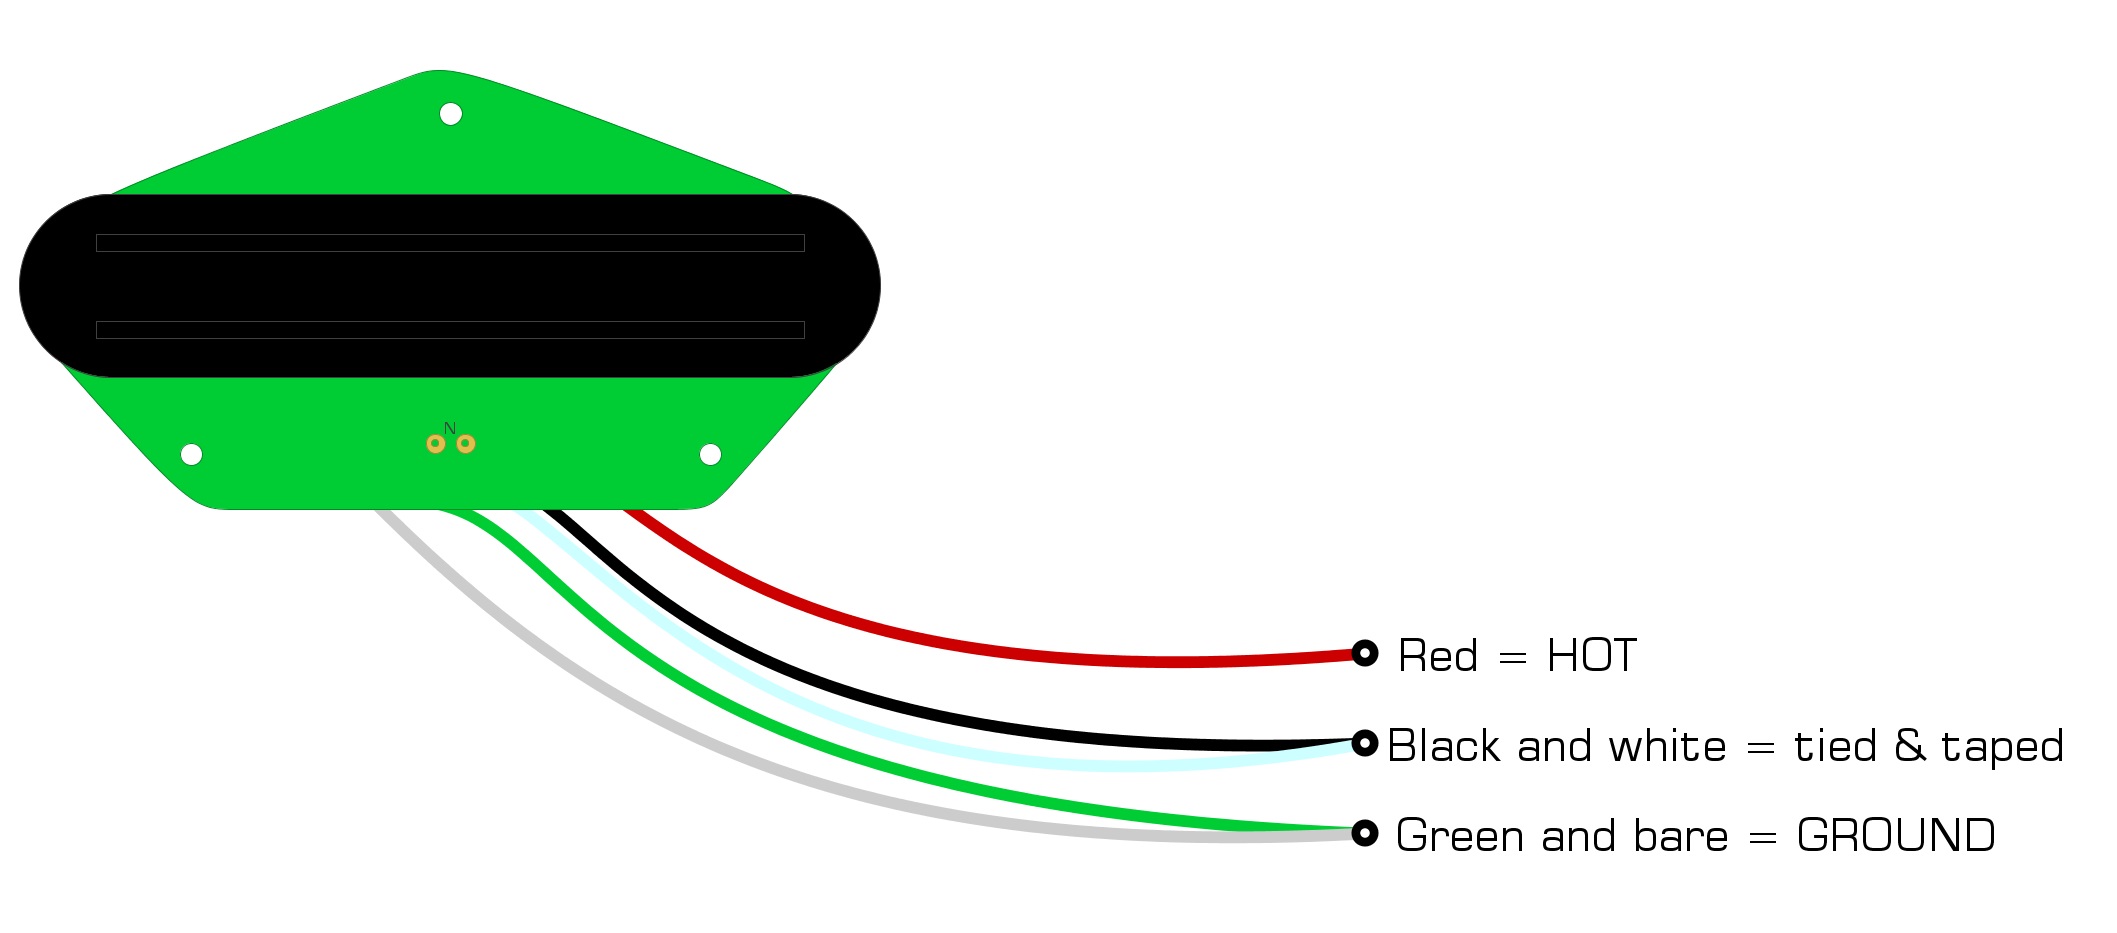
Humbuckers have four colored wires and a bare wire. The wiring code lets you know how to install the pickup in your guitar by letting you know which wire is Hot, which is Ground, and which are twisted together and taped off.
If you need a reminder, here’s the wiring code for the Dimarzio Chopper.
- Red = Hot
- White and Black = tied together and taped off
- Green = tied together; Ground
We’ve illustrated this wiring code in Example 1.
Example 1
Getting Started
First, remove the control cover on your Telecaster to see if you can see the white and black wires. If not, you will need to remove the bridge plate so you can access them and feed them into the control cavity.
If you’re going with the mini-toggle switch, you will need to drill a hole in your pickguard to install it.
Going with the push-pull pot will simply require you to convert one of your potentiometers into a push-pull pot. We recommend the Tone control because there are fewer connections to change.
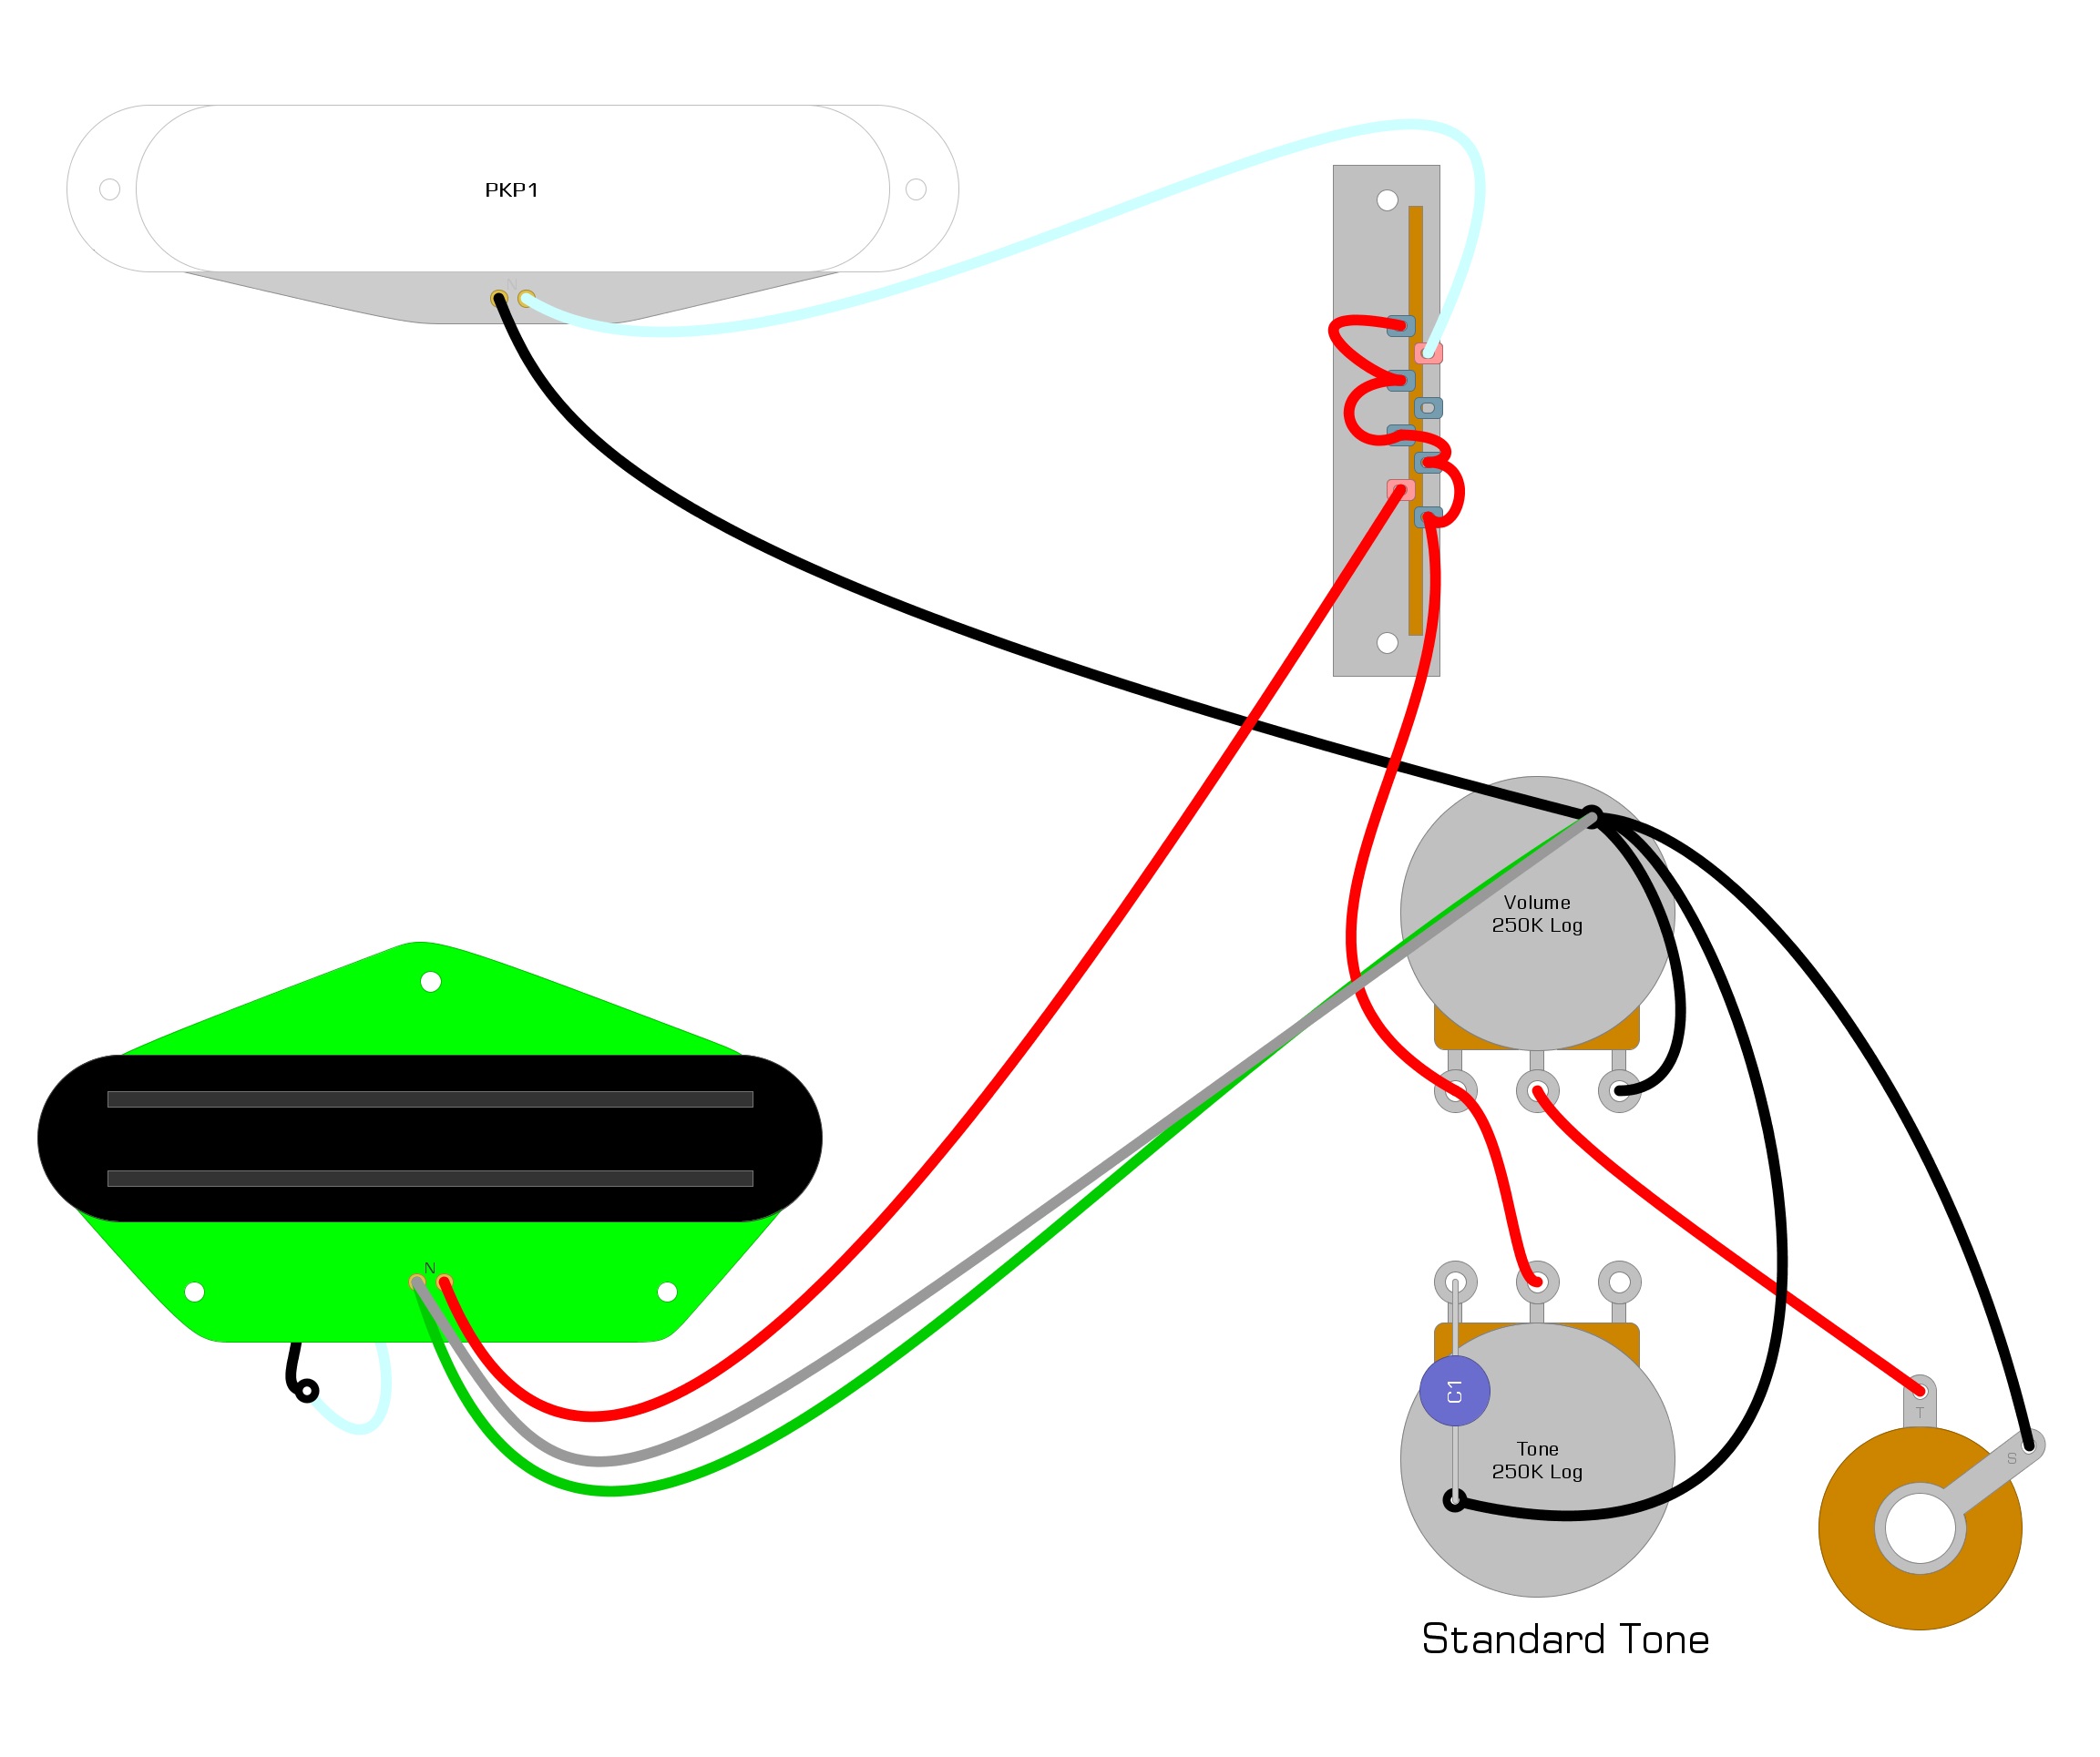
We illustrate a standard Telecaster wiring diagram with regular Tone control in Example 2.
Example 2
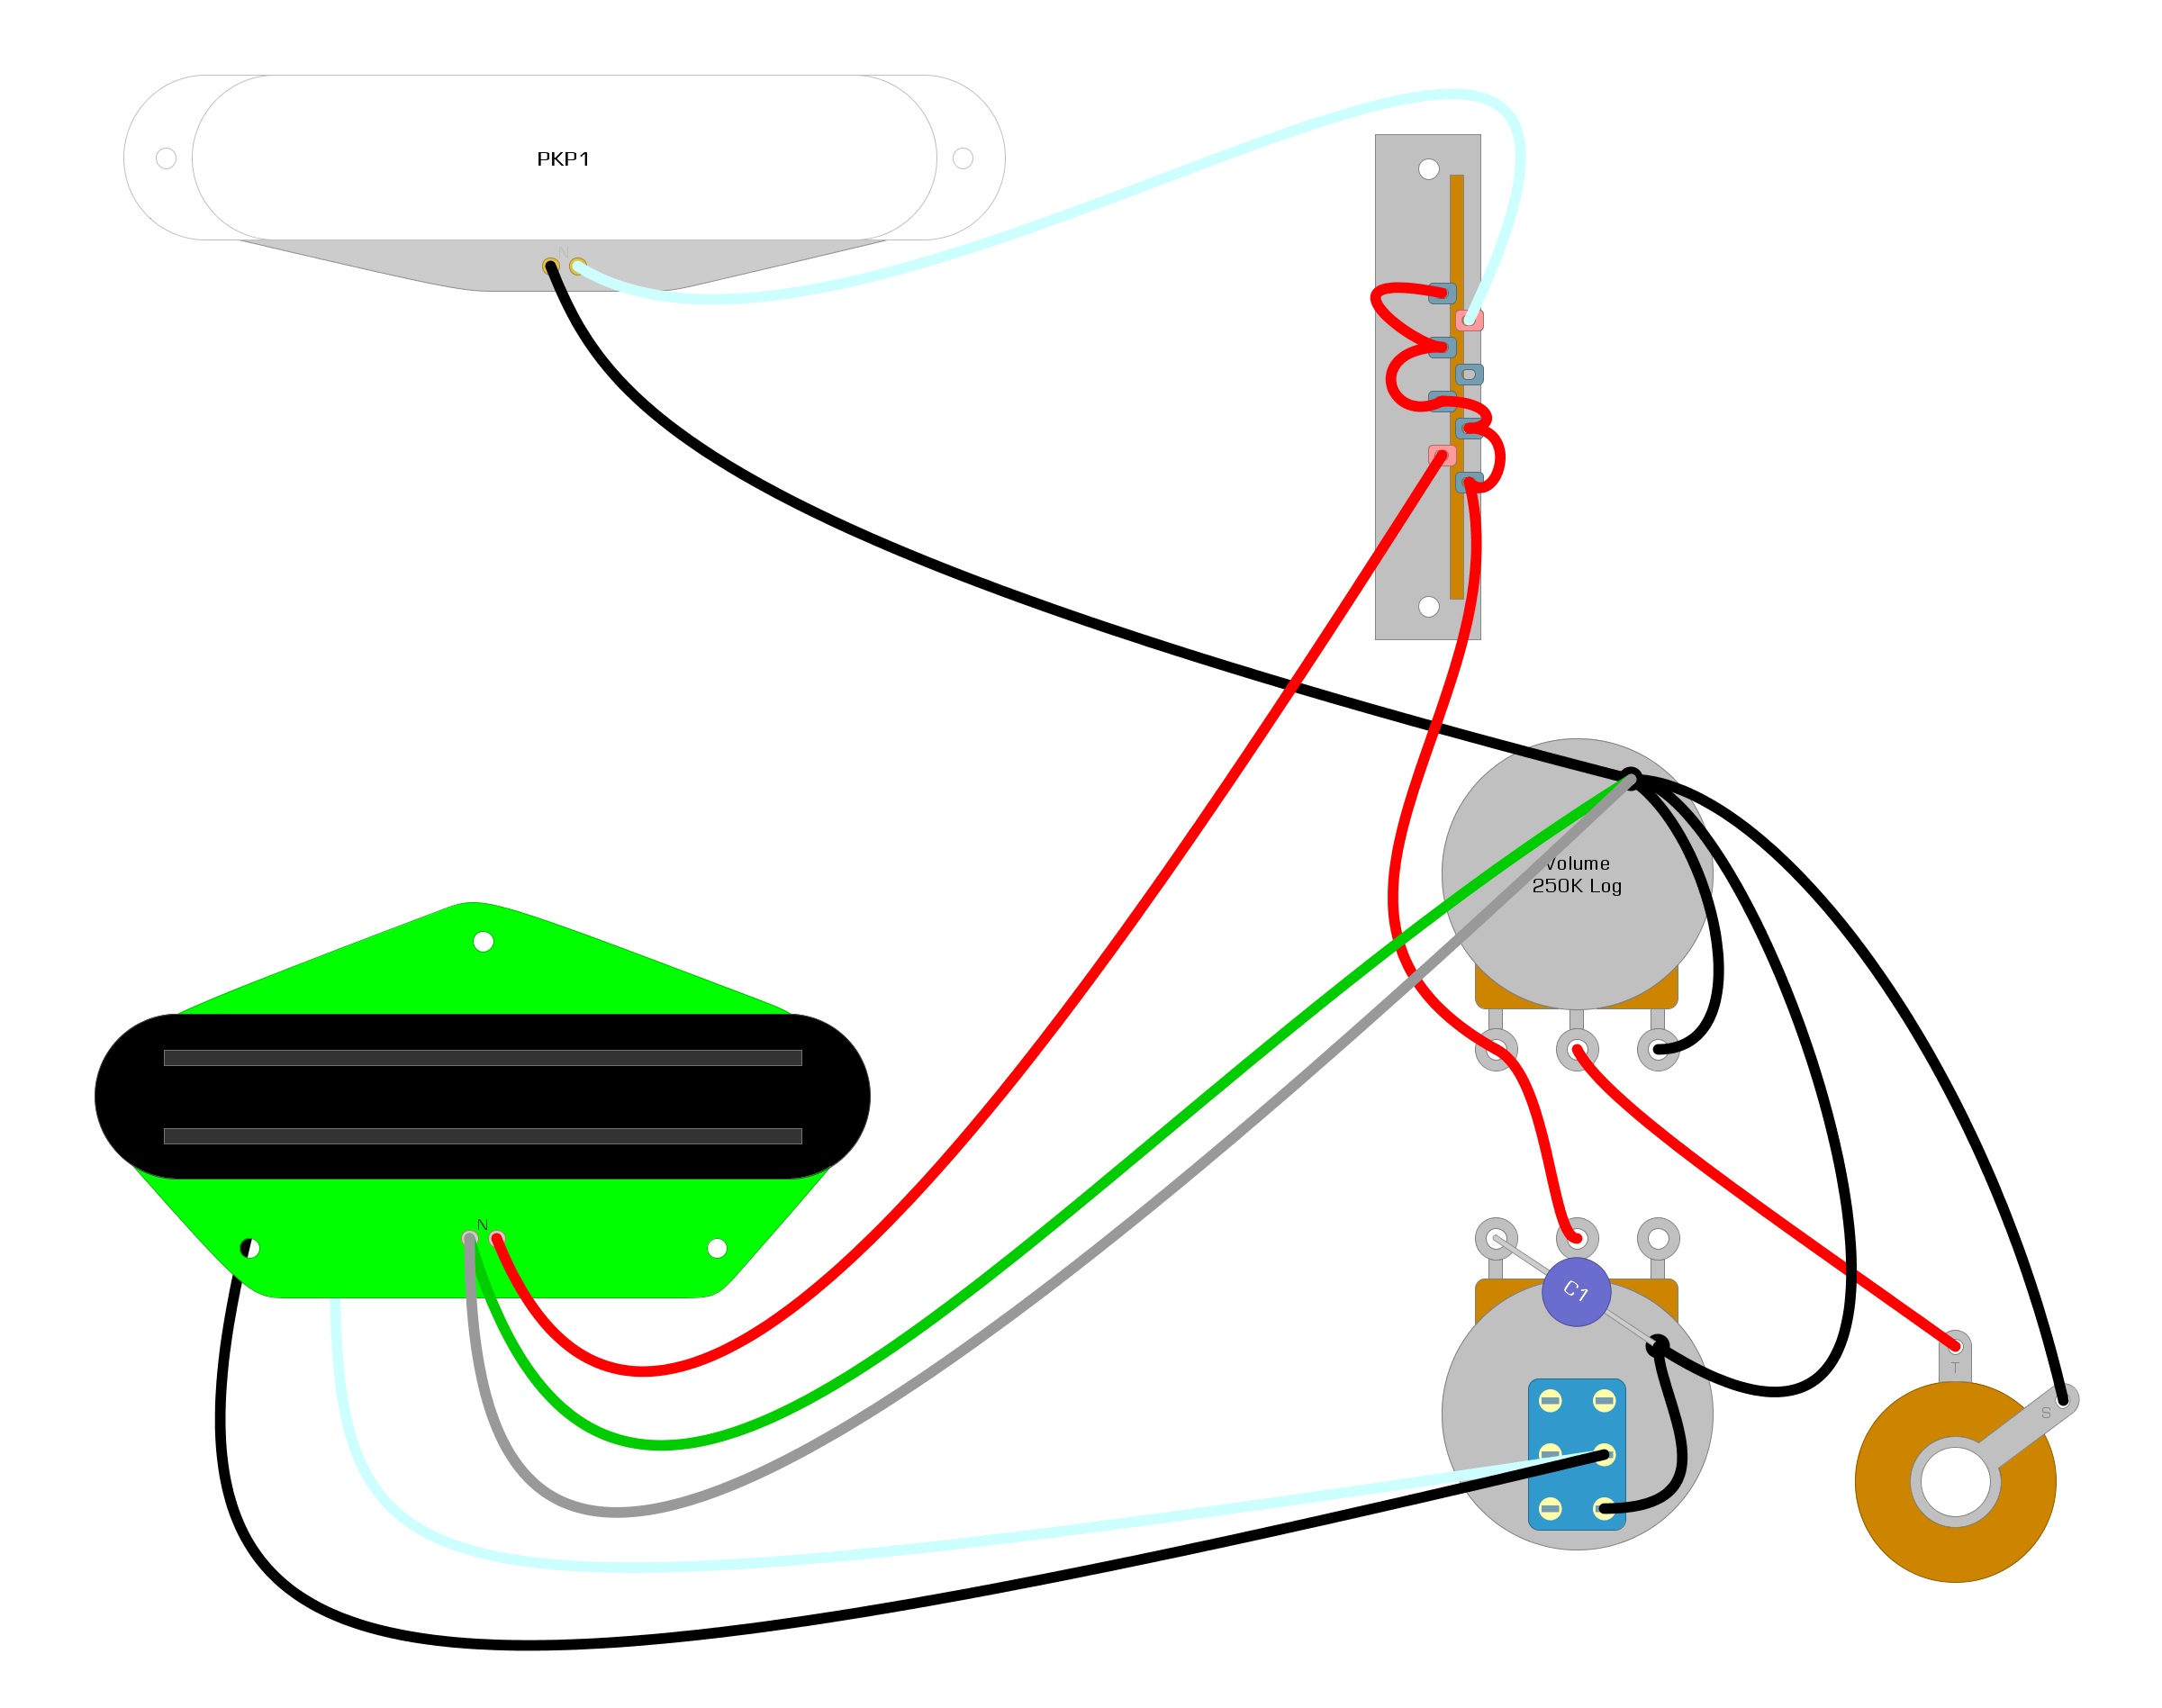
We illustrate what this same diagram might look like using a push-pull pot in Example 3.
Example 3

Coil-Splitting the Pickup
To split the pickup, you only need to solder the black and white wires to the switch part of the push-pull pot. Then solder a short wire from the switch to the back of the tone control to complete the modification. We’ve illustrated the complete diagram in Example 4
Example 4
If you went with the mini-toggle switch, solder the same way we do in Example 4. The black and white wires should connect to a lug on the switch.
With the modification in place, you can engage it by pulling out the tone control. Pushing it back in will take the modification offline.
Summary
As you can see, this is an extremely easy modification to complete, and in many ways, it’s easier than installing the pickups. The most difficult part will be converting to the push-pull pot or installing the mini-toggle switch.
We hope that you have enjoyed reading over this short guide and were successful in installing this modification. If you found it helpful, please feel free to share this article on Facebook and Twitter. For more articles on guitar electronics, visit humbuckersoup.com.