
By Ed Malaker
Posted 11/06/2020
In this article, we’ll discuss wiring Kent Armstrong humbucker pickups to one volume, one tone, and one DPDT toggle switch. The Kent Armstrong brand features many different models of fantastic-sounding pickups for electric and acoustic guitars. The humbuckers utilize a unique design, which allows them to achieve highly sought-after tones.
Step 1: Wiring Code
To get started wiring these pickups, we’re going to need the pickup’s wiring code. Kent Armstrong uses a few different wiring codes, but the majority should fall into one of the four we have listed below. One of these codes should be the correct colors for your humbucker. If none of these colors match the colors of your humbucker, you will need to check your documentation or use a digital volt-meter to get the code of your model.
Wiring Code A
- Green = Hot
- Red and white = Twisted together
- Black and shield (bare) = Twisted together; Ground
Wiring Code B
- Black = Hot
- Twisted braided shield = Ground
Wiring Code C
- Red = Hot
- White and shield twisted together = Ground
Wiring Code D
- No wires, only two terminals
- Either terminal Hot
- Either terminal Ground
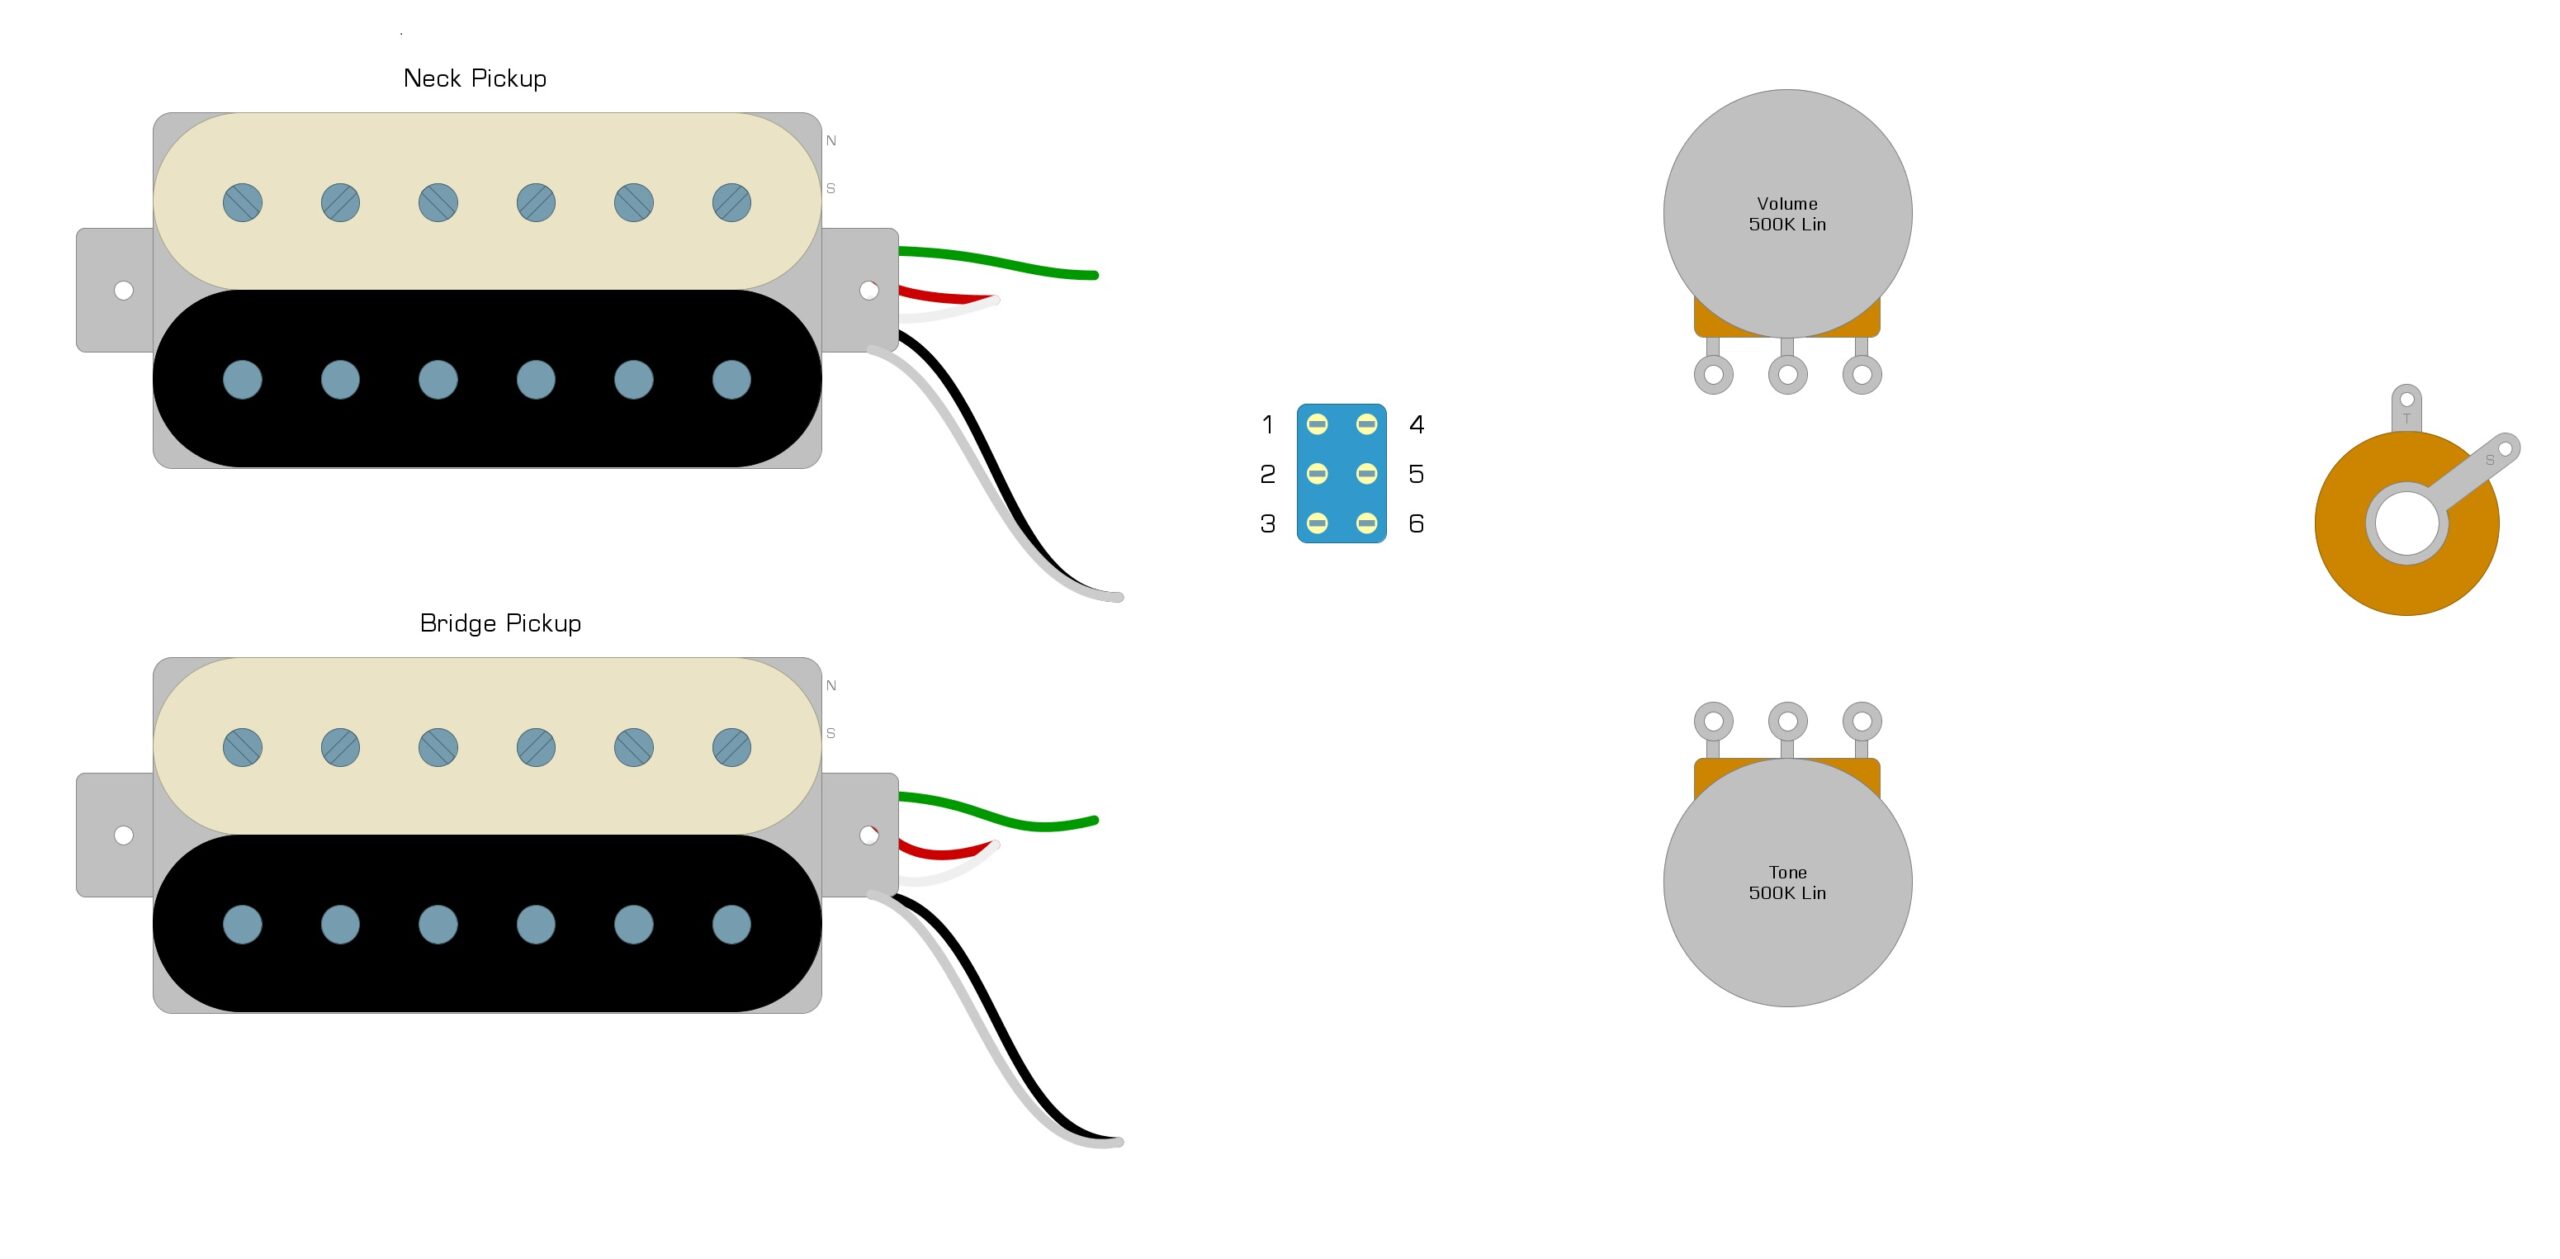
We are going to use wiring code A in this example, and it should look like Figure 1. If you have one of the others or a completely different one, all that matters is the Hot and Ground go to the same place as the Hot and Ground in these examples.
Fig 1
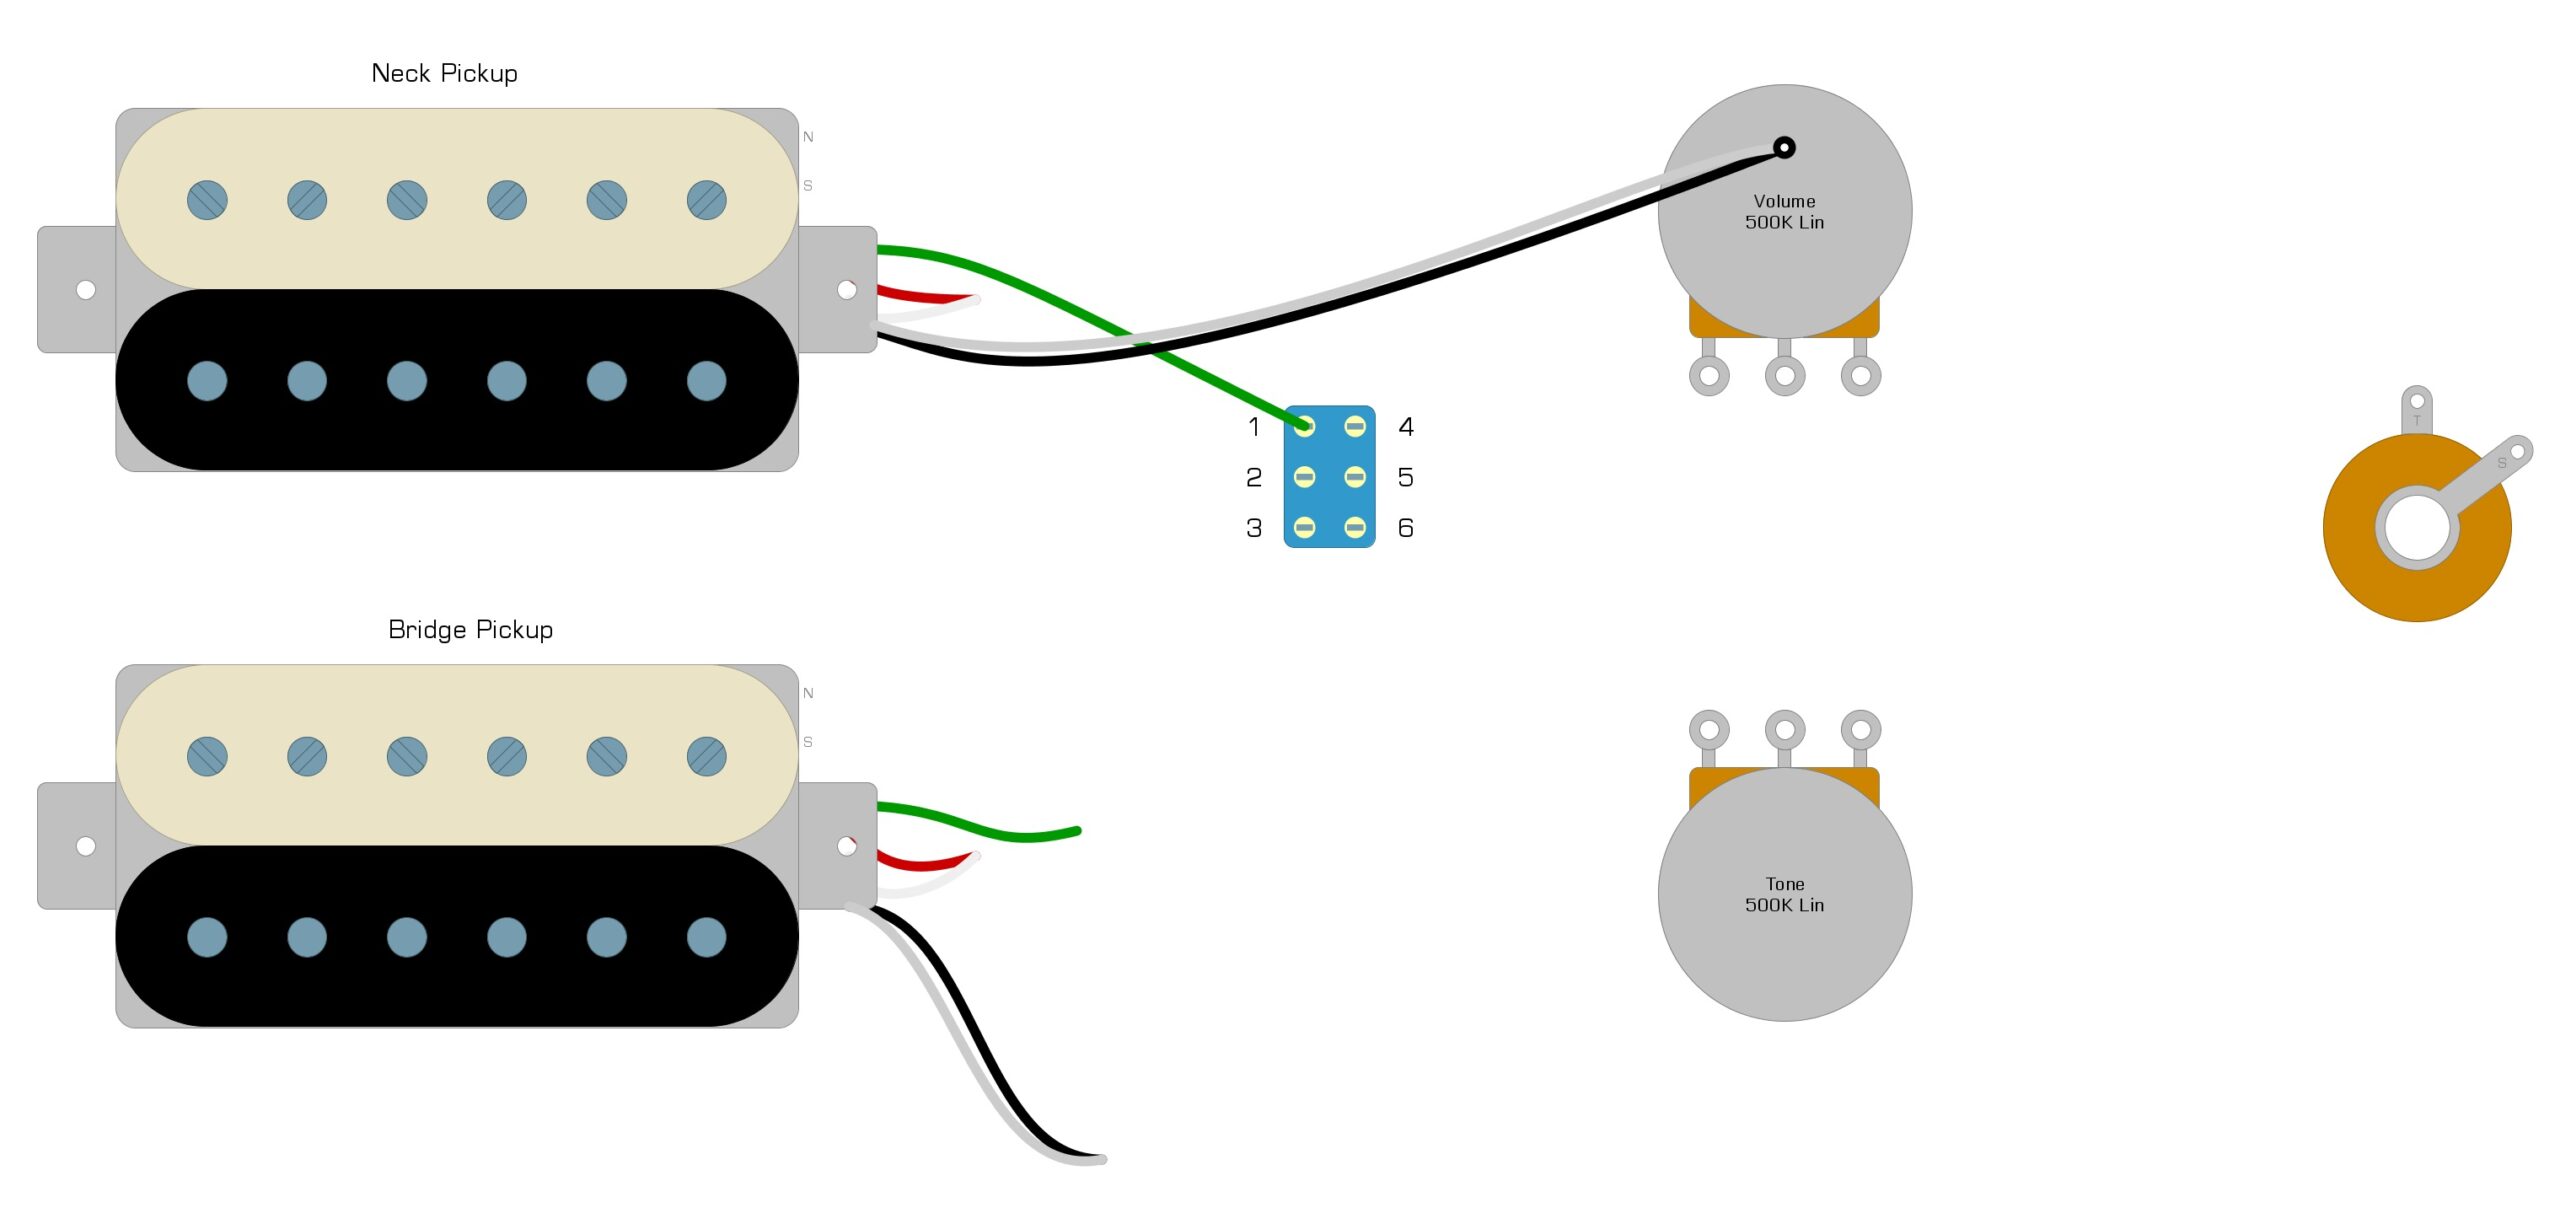
Step 2: Neck Pickup
To install the neck pickup, we solder the Hot to Lug 1 of your toggle switch, and we solder the Ground to the back of your Volume pot, as shown in Figure 2.
Fig 2
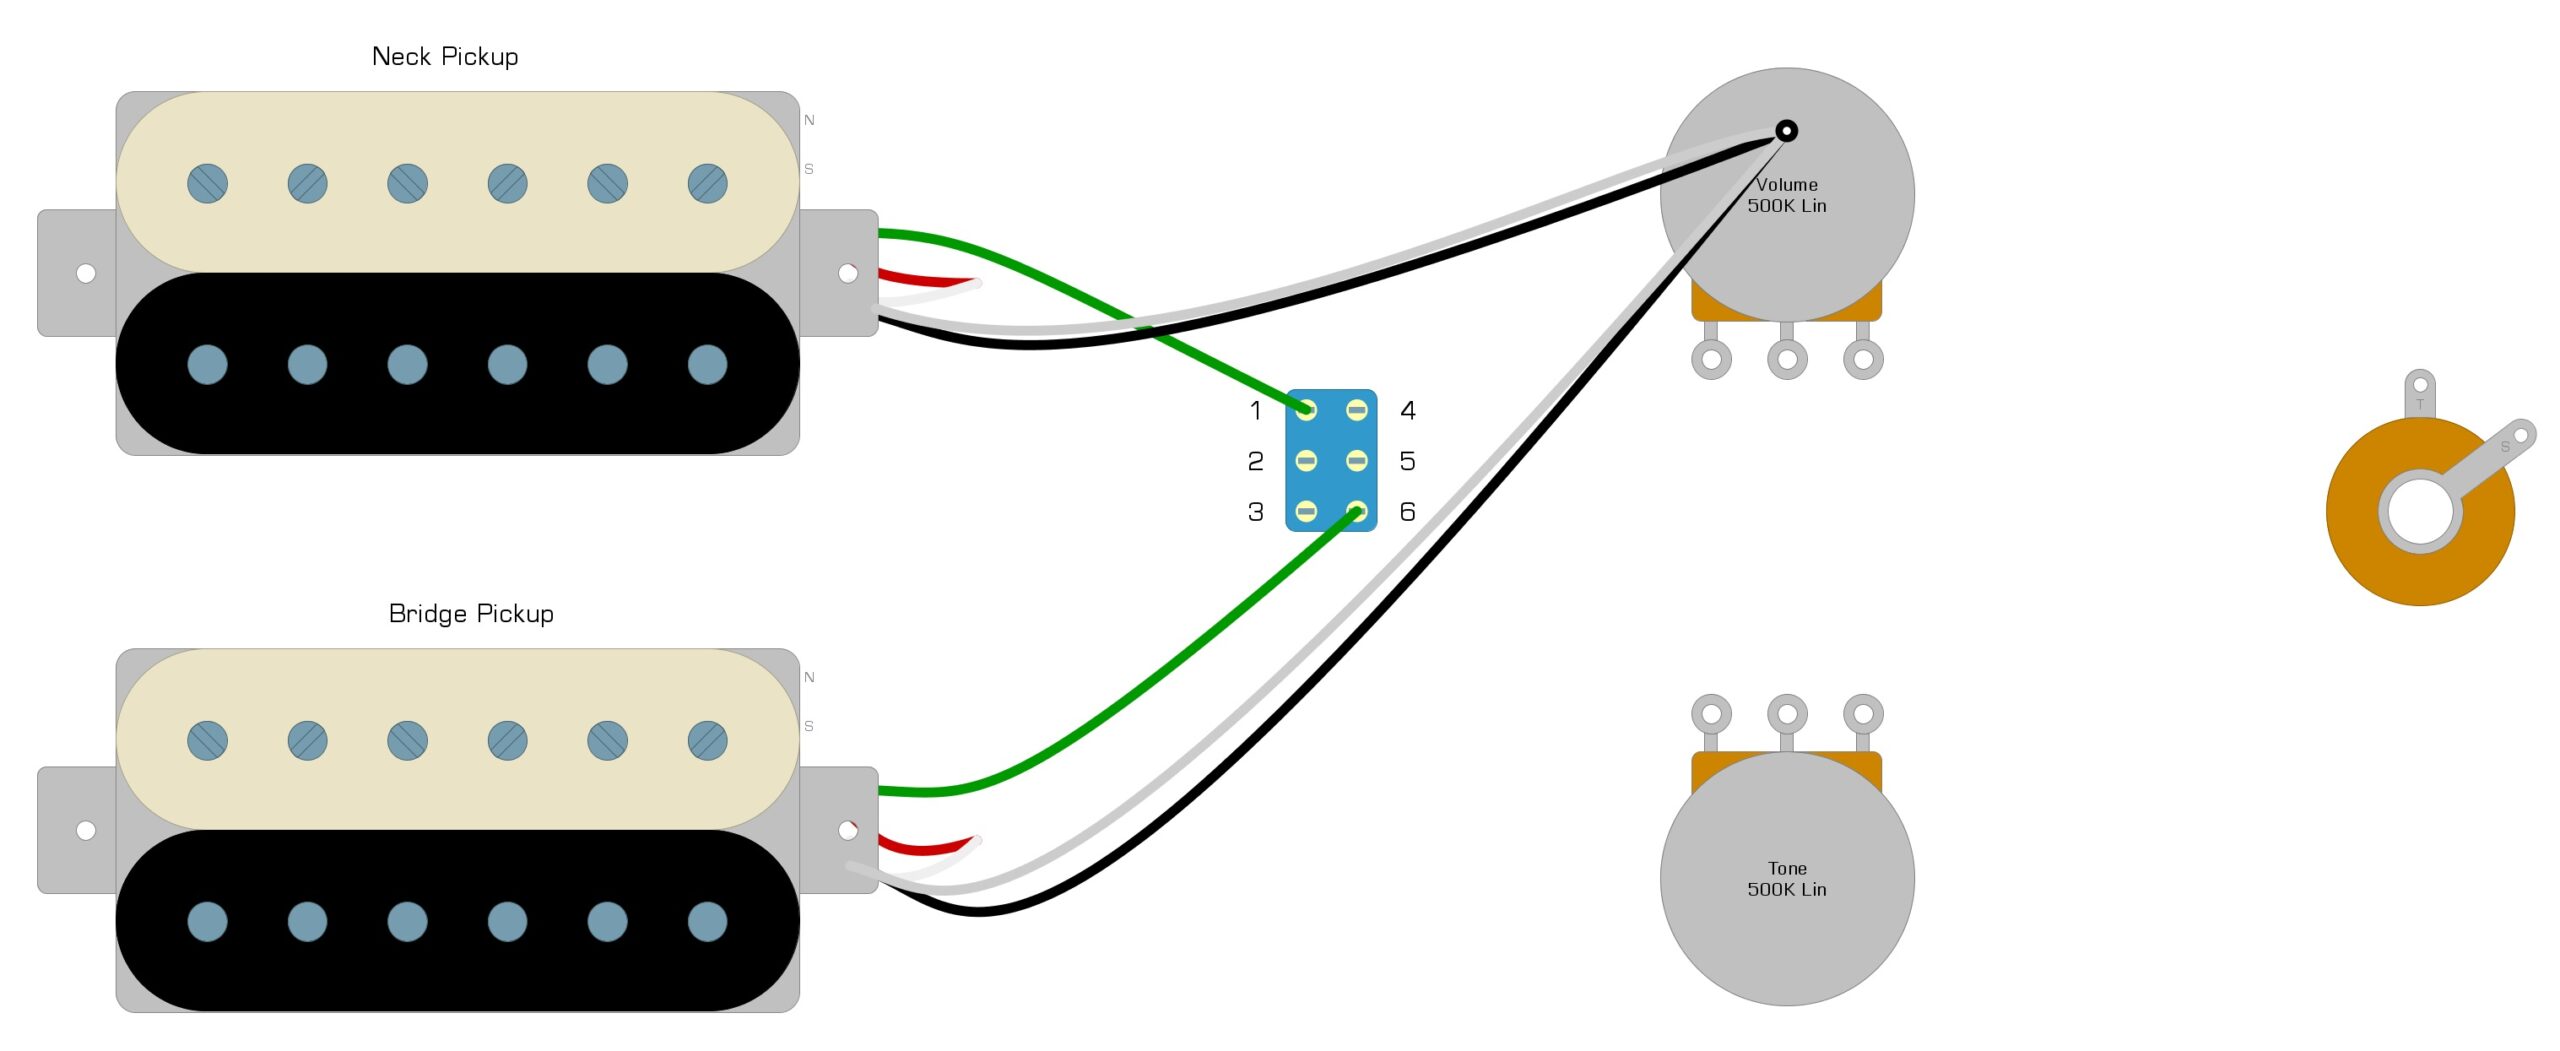
Step 3: Bridge Pickup
To install the Bridge pickup, we solder the Hot to Lug 6 of your toggle switch. We solder the Ground to the back of the Volume pot, as shown in Figure 3.
Fig 3
Quick Note About the Toggle Switch
This toggle switch with six lugs is going to be one of three types:
On/On
This type of toggle has two positions: up and down. With this type of switch, you will only be able to use the neck pickup OR the bridge. There is no middle position to use both.
On/Off/On
This type of switch is similar to the last, but it features a middle position. With this type of switch, you will still only have access to the neck OR the bridge. The center position will turn them both off.
On/On/On
This type of switch is similar to the last, but the middle position gives you access to both pickups. On/On/On is the only switch that will let you use both pickups in the middle position.
Any of these switches will work, but if you don’t have an On/On/On, you will probably want to get one for the blended tone.
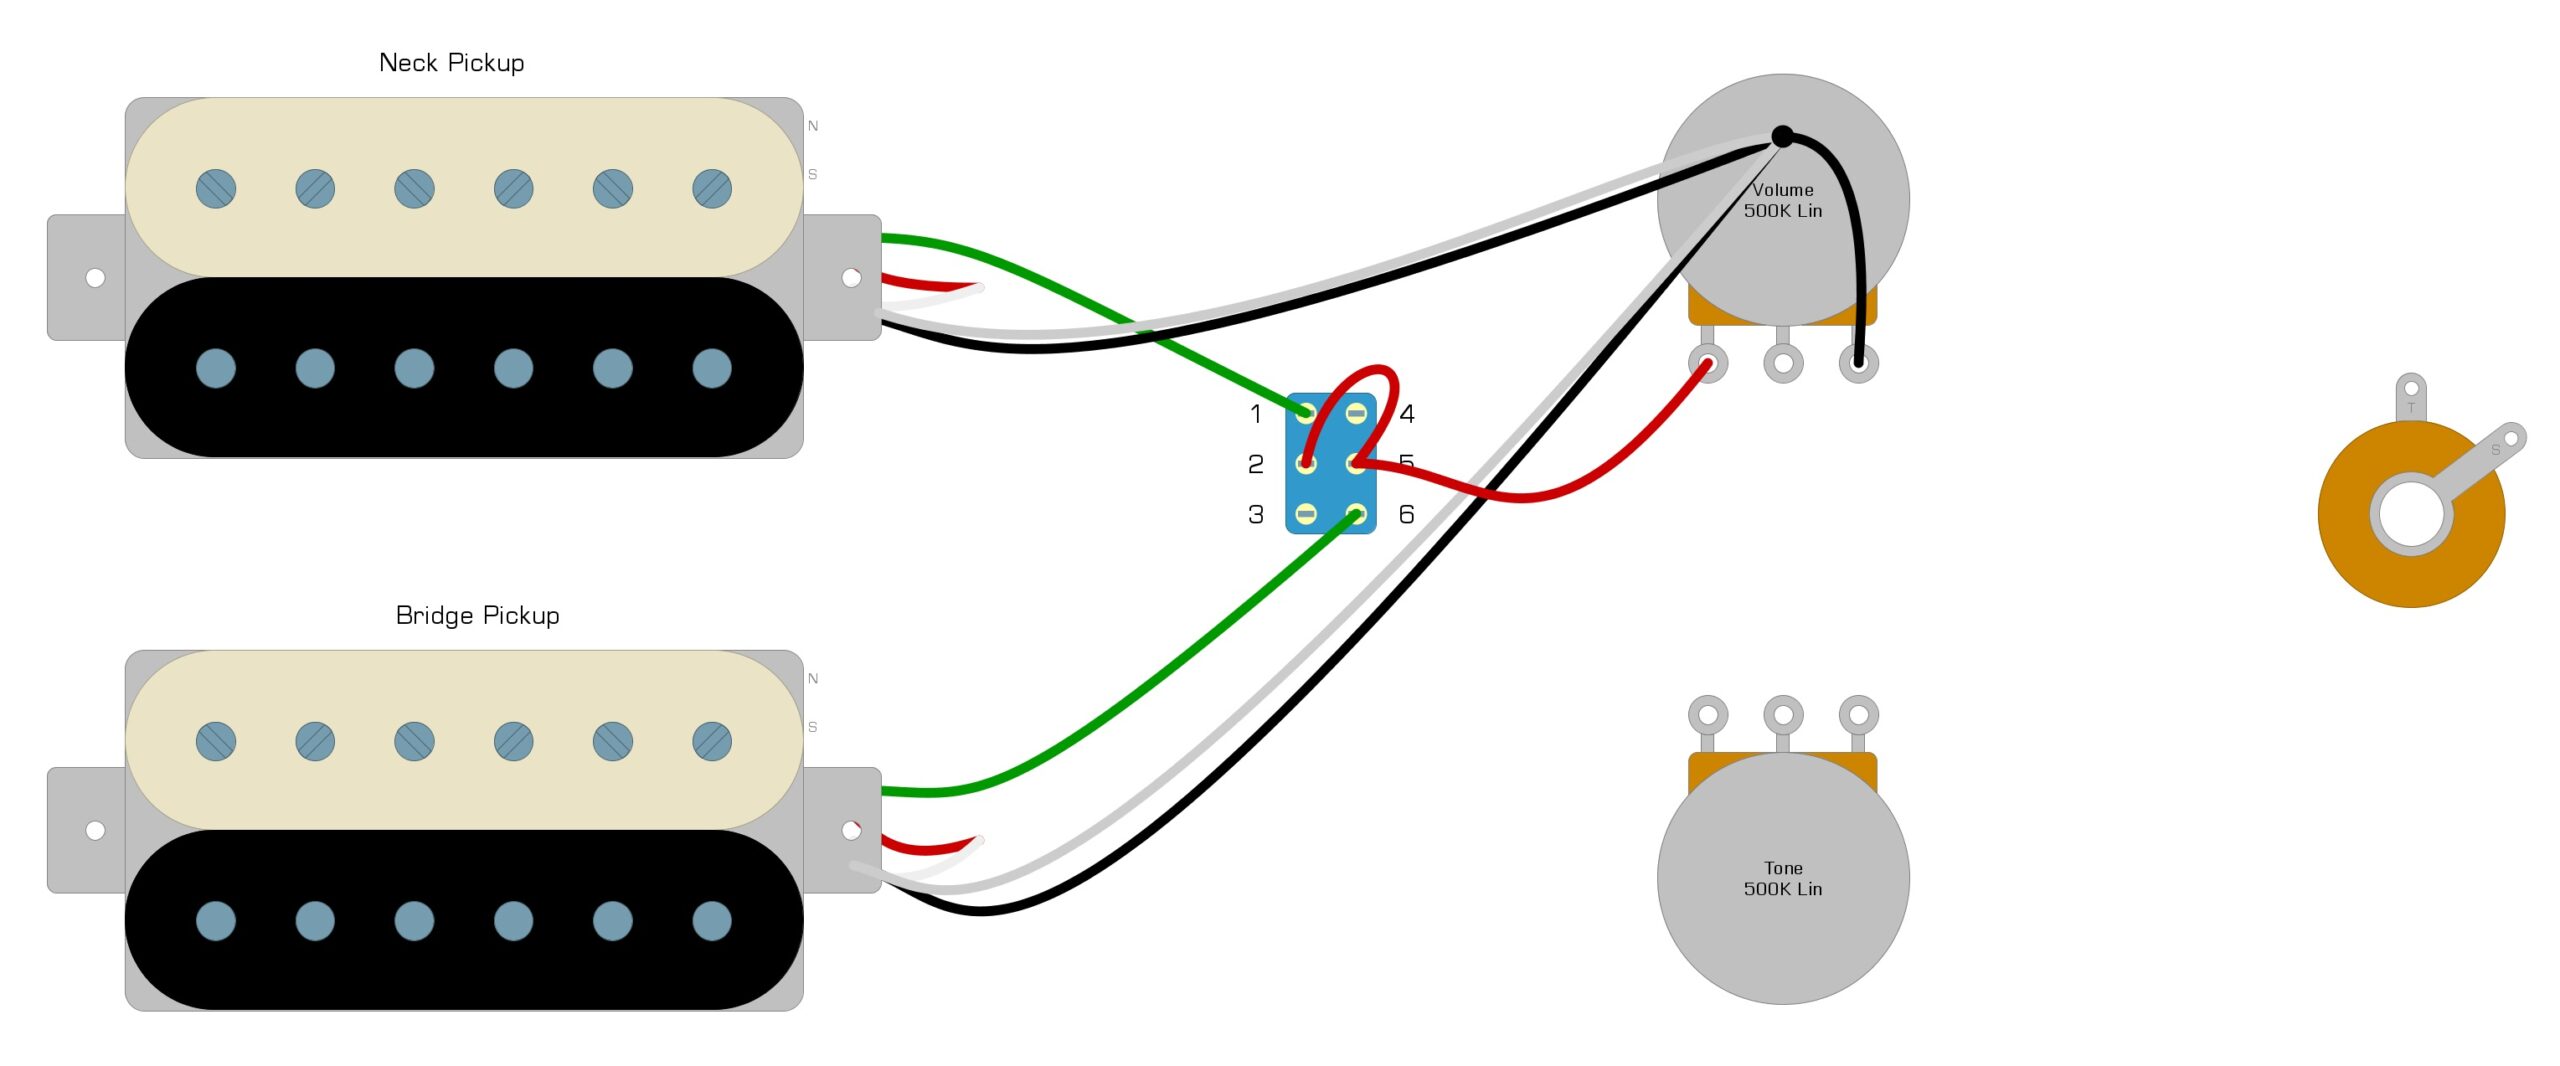
Step 4: Switch
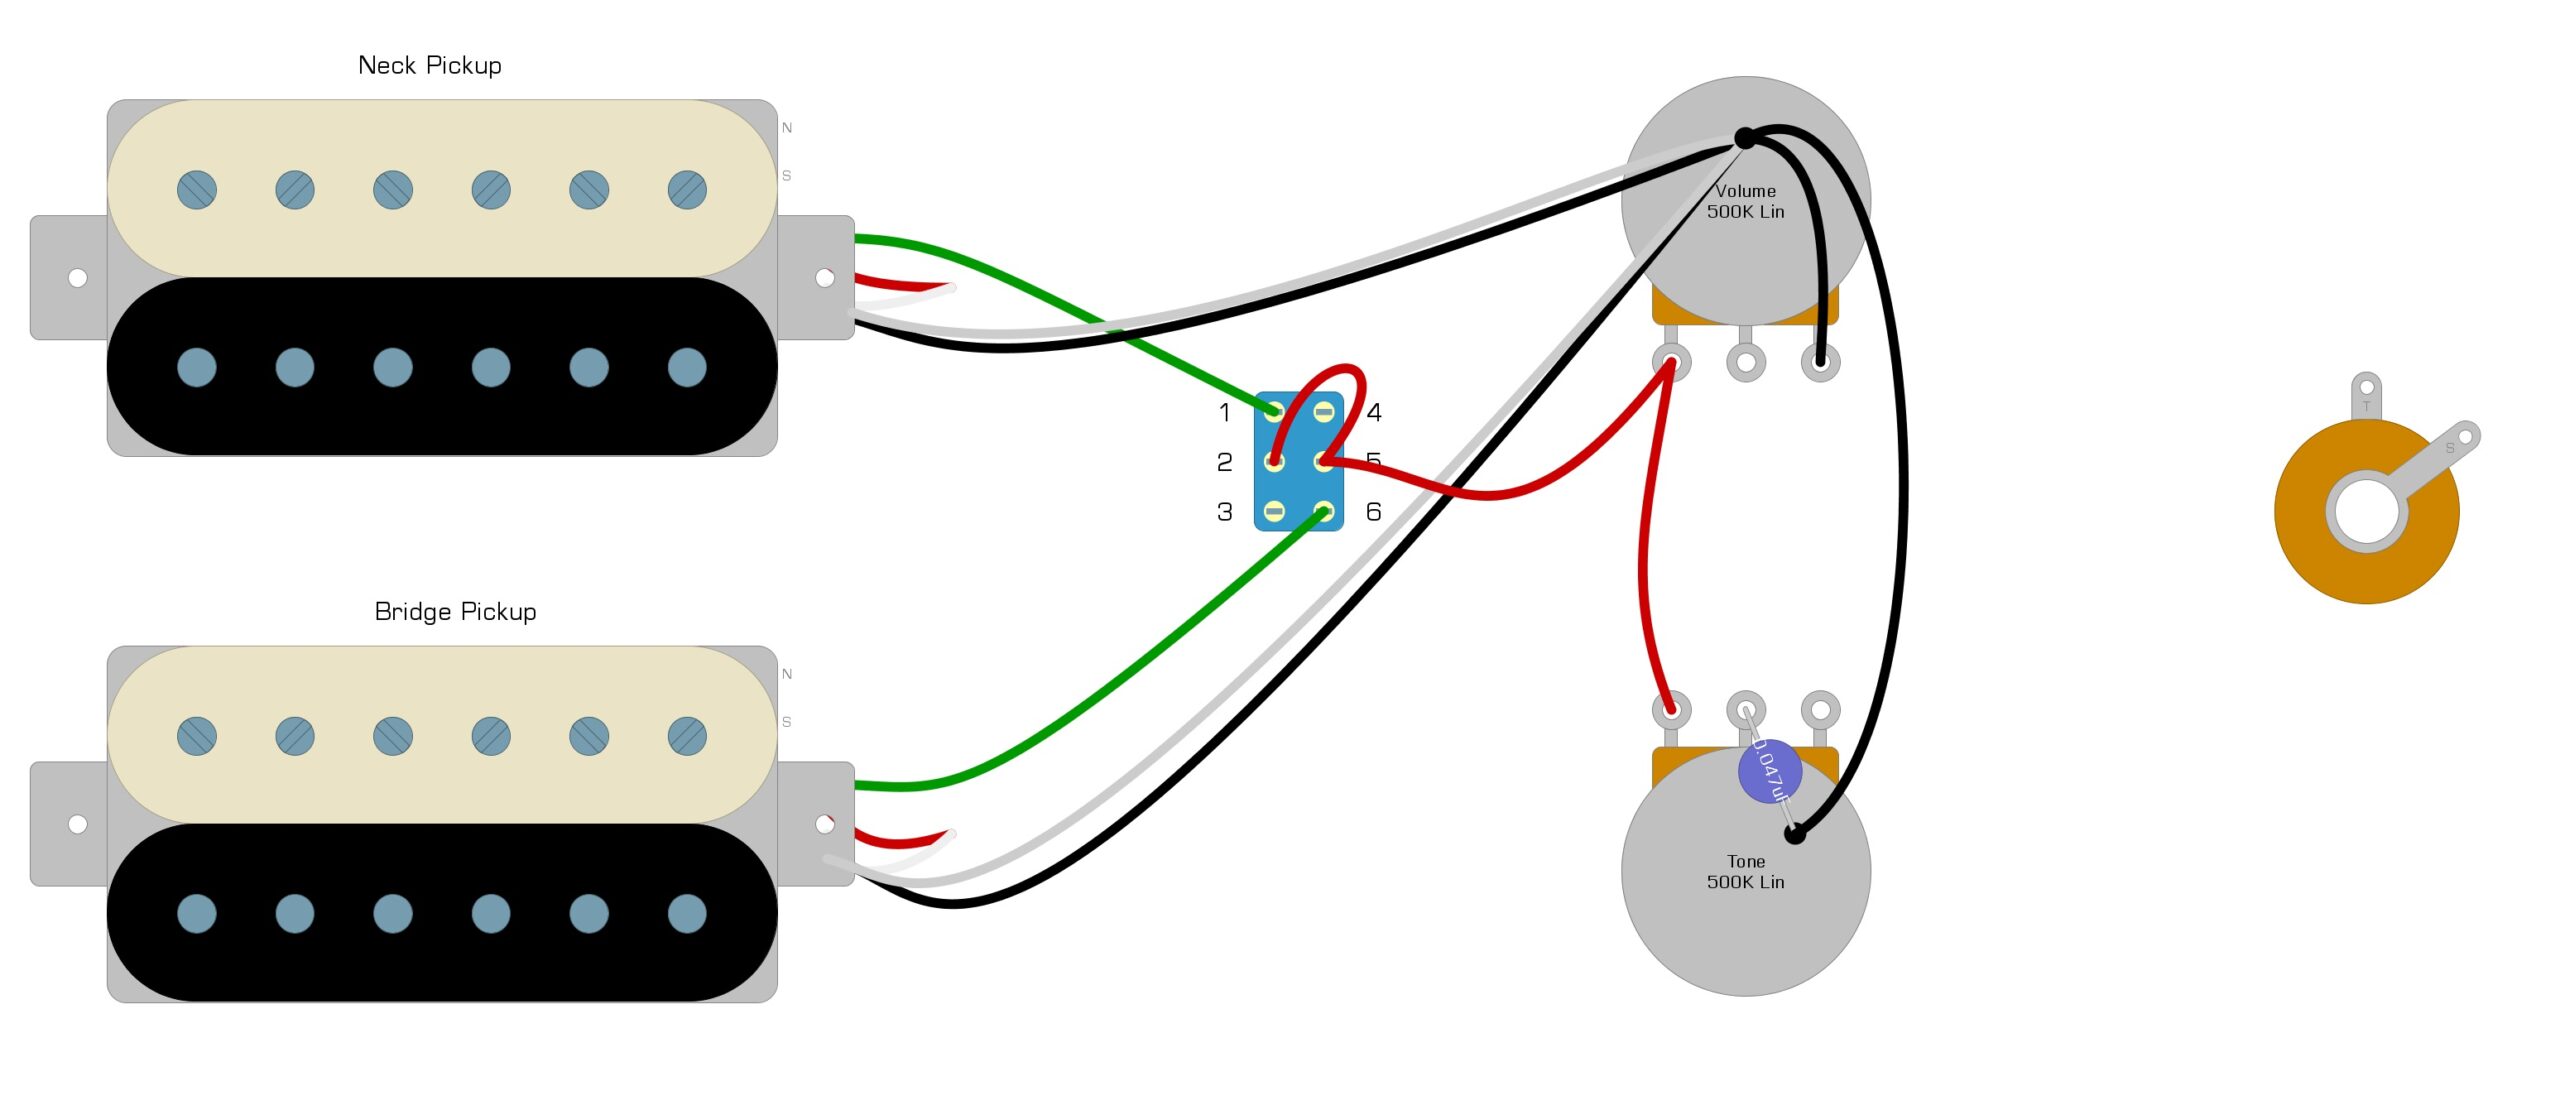
Once we have finished wiring the pickup to the toggle switch, we will connect it to the Volume control. To do that, we need to add three wires: a jumper wire between Lugs 2 and 4 on the switch, and a wire from Lug 4 on the switch to Lug 1 of the Volume control. We will also Ground the Volume by adding a wire from Lug 3 of the Volume to the back of the pot. Some people bend Lug 3 and solder it directly to the back of the pot. When complete, it should look like Figure 4.
Fig 4
Step 5: Tone Control
Let’s add the Tone control to our circuit by adding the two wires and a capacitor that we see in Figure 5. One wire brings the signal from Lug 1 of the Volume control to the Tone pot, and then it gets filtered through the capacitor to Ground.
Fig 5
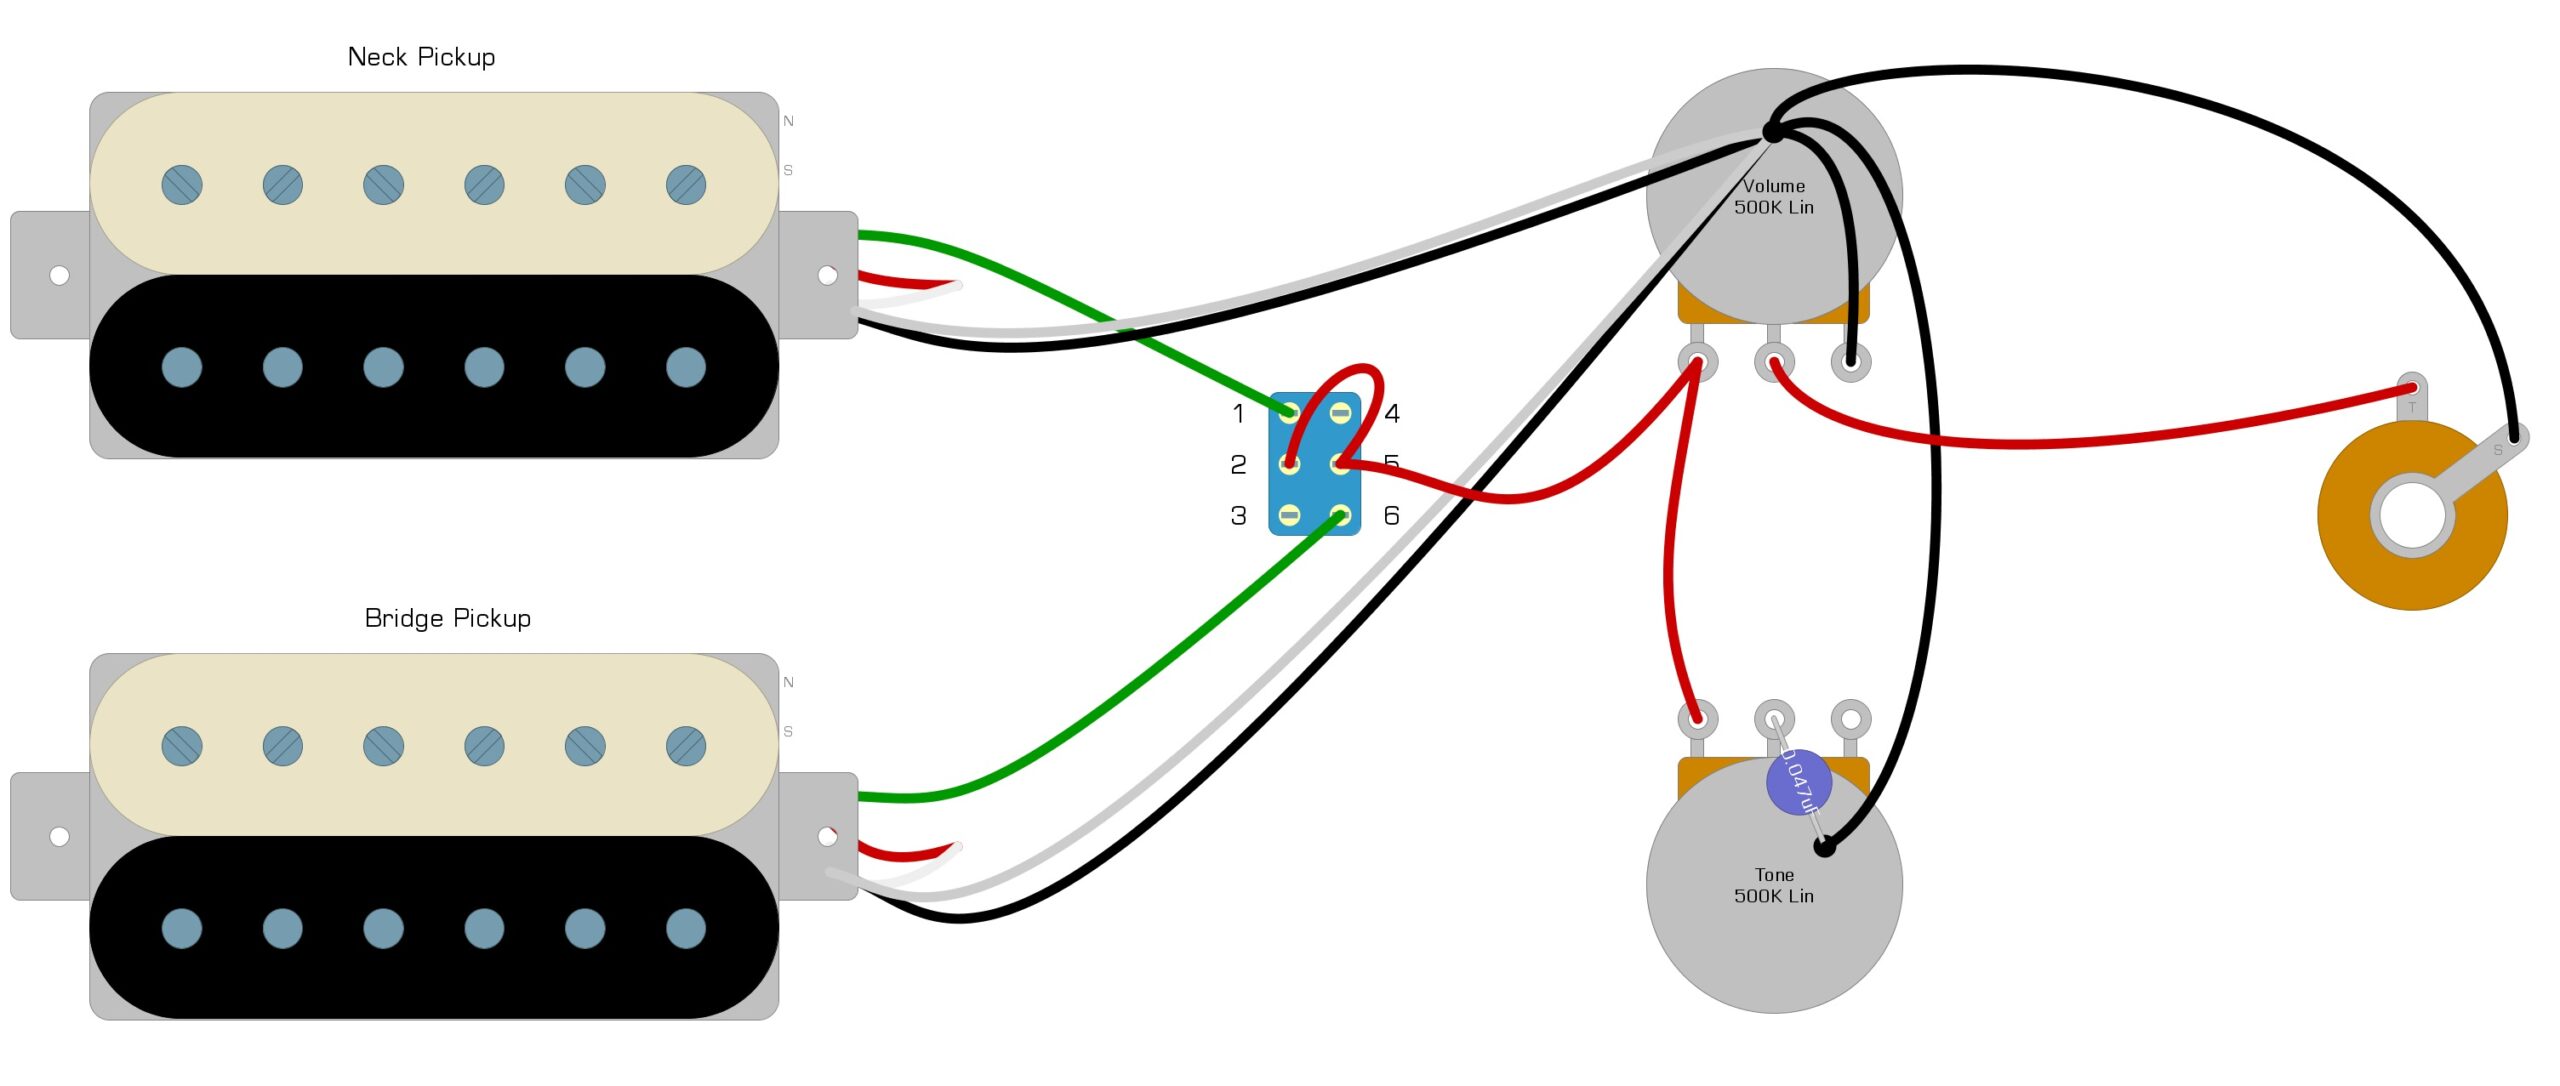
Step 6: Output Jack
The final step is to add the Output jack. We install the Output jack by adding a wire between Lug 2 of the Volume pot to the tip of the Output jack, and another wire between the sleeve of the Output jack to the back of the Volume pot. When completed, it should look like Figure 6.
Fig 6
Conclusion
That should about cover wiring Kent Armstrong humbucker pickups. If you’re using an on/on/on switch and it’s not working correctly, try soldering the neck to Lug 4 instead of Lug 1, and solder the bridge to Lug 3 instead. You can also substitute this DPDT switch for the Gibson Les Paul style toggle switch, which features a more straightforward design. If you have any other problems or questions about wiring any pickups, we would be glad to answer them. For more articles on guitar electronics, visit humbuckersoup.com.


