By Ed Malaker
Posted 05/25/2018
Let’s talk about setting up 5-way switch wiring in a Fender Stratocaster. Even though this guide is specific to the Fender Stratocaster, the switch and wiring will work the same way in any guitar with one Volume and two Tone controls.
If you’re changing your Strat switch, it might also be a great time to check out the other components in your guitar, to see if they’re also due for an update. Be sure that you have high-quality pots with the right values, and check the value of any capacitors. Check your Output Jack as well, as this is another very common part to wear out.
For soldering work on a guitar, you want to use a Soldering Iron/Pen between 40 and 60 watts. Anything less than 40 watts will take too long to heat the parts enough for soldering. Anything more than 60 watts might burn up the components and ruin them. Never use a Soldering Gun when working on a guitar because it has a powerful transformer inside that can permanently damage your pickups. Never blow on melted solder because it can create a bad connection.
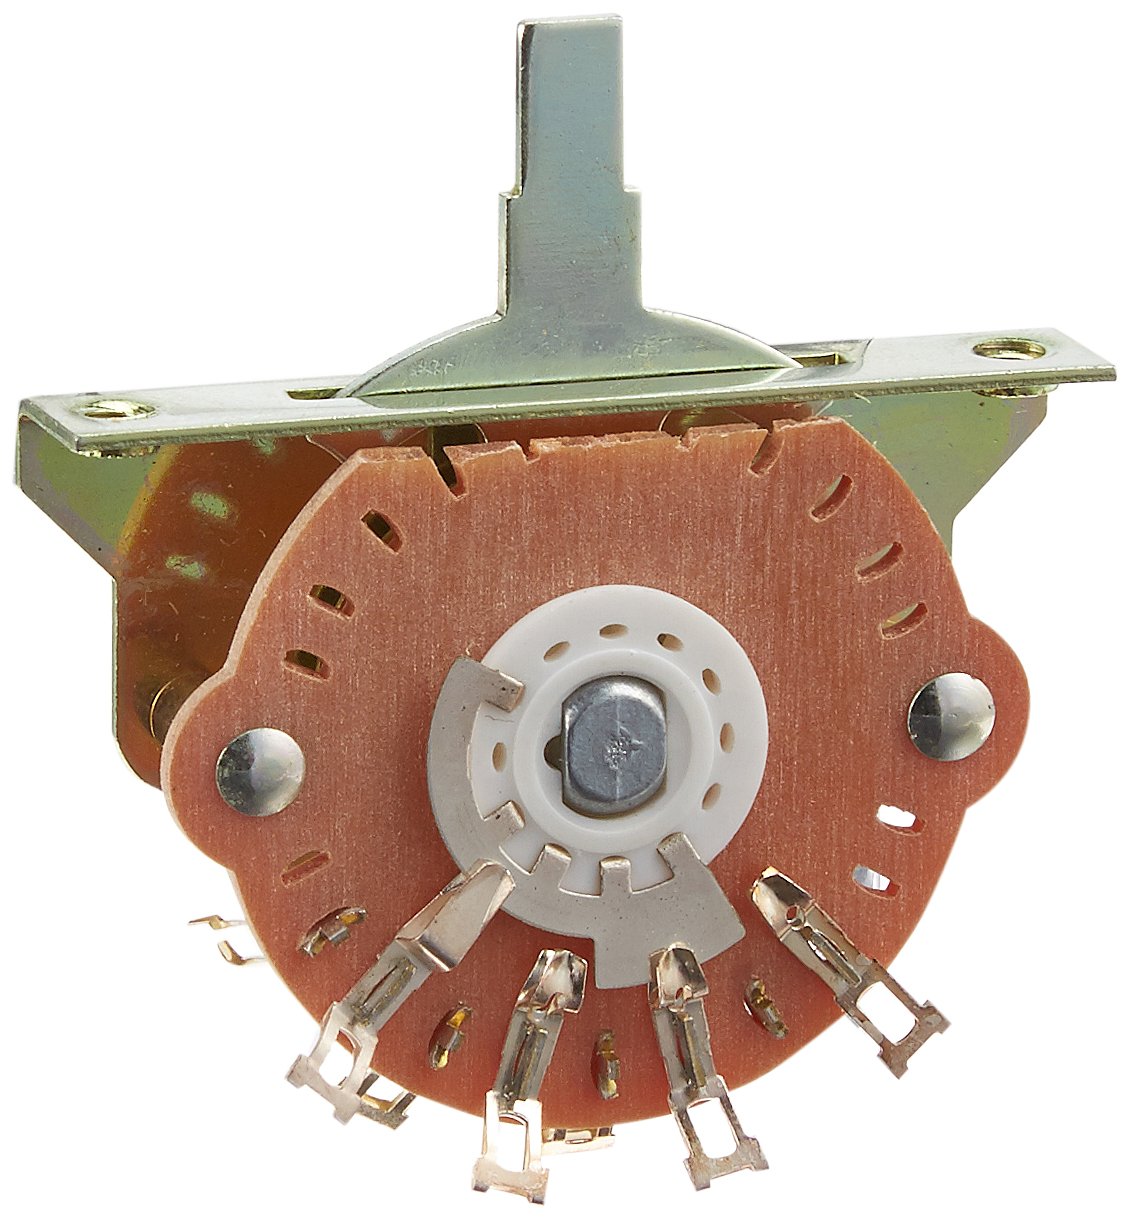
For your 5-Way Switch wiring project, you want to get the best quality switch that you can. The switch is one of the first components to wear out and that leads to noise and failure. There are many kinds of switches, but this guide uses a two-stage, four-tab, 5-Way Switch. It’s called a two-stage switch because, on the bottom, where you solder your connections, there are two rows of four tabs. There is a common tab on opposite ends of each stage and then three stand-alone tabs that allow for numbering, which makes it easier.
Stage-1: C 1 2 3
Stage-2: 1 2 3 C
Getting Started
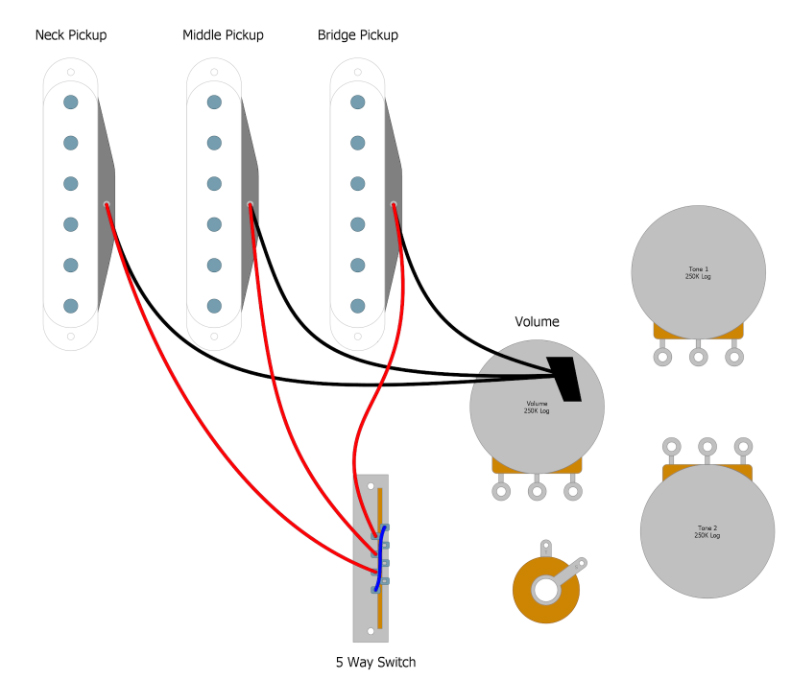
The first thing we will need to do is solder the three pickups to the 5-Way Switch and the Volume control (Fig 1). Start by soldering a wire from the C in Stage 1 of the 5-Way Switch to the C in Stage 2. Next, solder the Hot wire of the Bridge pickup to Stage 2, Tab 1 of the 5-Way Switch, then solder the Ground wire to the back of the Volume control.
Now, solder the Hot wire of the Middle pickup to Stage 2, Tab 2 of the 5-Way Switch, then solder the Ground wire to the back of the Volume control.
Next, solder the Hot wire of the Neck pickup to Stage 2, Tab 3 of the 5-Way Switch.
Then connect the Ground wire to the back of the Volume control with a solder.
Fig 1

Next Steps
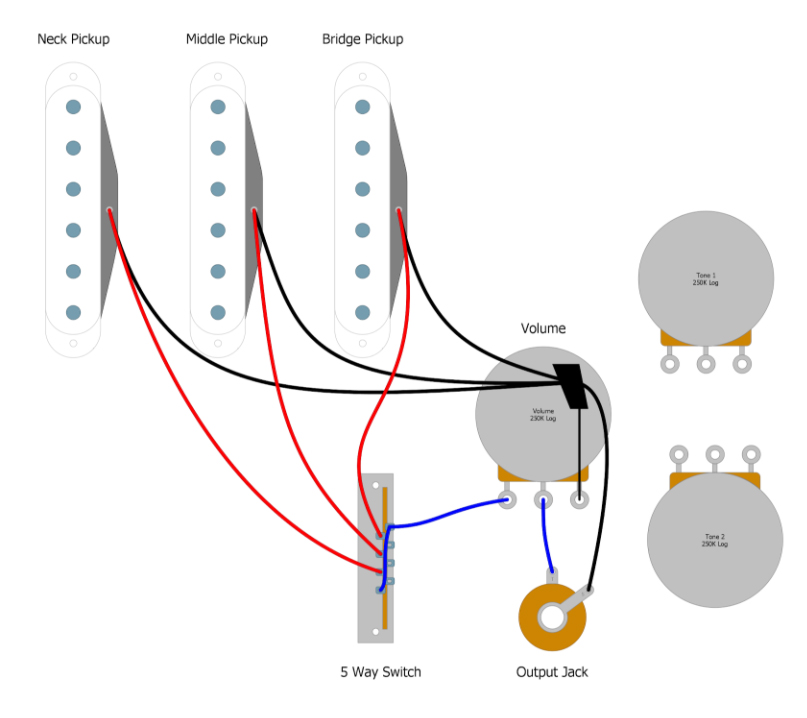
Now we can wire the rest of the Volume circuit (Fig 2). If you hold the Potentiometer upside down, with the three tabs pointing down, you can number them 1, 2, and 3.
First, solder a wire from Stage 1 C of the 5-Way Switch to Tab 1 of the Volume pot.
Next, solder a wire from Tab 2 of the Volume pot to the Tip Tab of the Output Jack, and solder a wire from Tab 3 of the Volume pot to the back of the Volume pot.
Finally, solder a wire from the Sleeve of the Output Jack to the back of the Volume control. This completes the Volume part of the circuit.
Fig 2

Adding Tone Controls
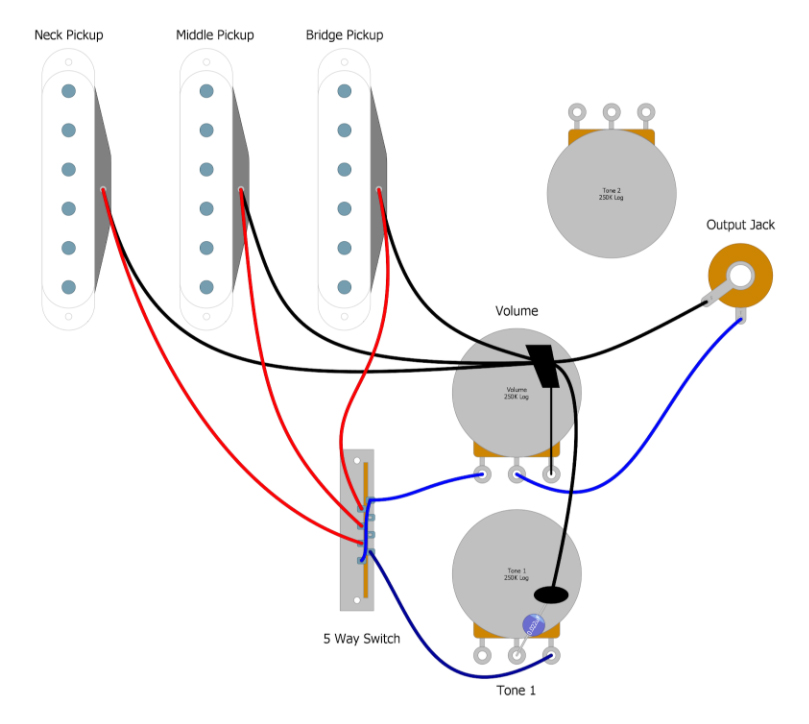
Now we add the Tone controls. To add Tone Control 1 (Fig 3), solder a wire from Stage 1, Tab 3 of the 5-Way Switch to Tab 3 of Tone Control 1.
Solder the capacitor from Tab 2 of Tone Control 1 to the back of Tone Control 1.
Solder a wire from the back of Tone Control 1 to the back of the Volume Control.
Fig 3
Finishing the 5 Way Switch
To add Tone Control 2 (Fig 4), solder a wire from Stage 1, Tab 2 of the 5 Way Switch to Tab 3 of Tone Control 2. Solder a wire from Tab 2 of Tone Control 2 to Tab 2 of Tone Control 1.
Now, solder a wire from the back of Tone Control 2 to the back of Tone Control 1.
Lastly, solder the large ground wire from the guitar’s spring claw to the back of the Volume control, and you are FINISHED!
Fig 4