By Ed Malaker
Posted 01/25/2022
One of the easiest modifications you can perform on your guitar is splitting your humbucker pickup. Today, we’re going to show you Seymour Duncan Custom Custom coil splitting, in just a few easy steps. The Custom Custom is a high-output pickup that’s well suited for the coil-splitting modification, and it should result in an extra usable tone that you can access at any time. It works well to give you that extra push to help you stand out in a solo, or provide a twangy rhythm tone.
We’ll walk you through a few simple steps that will allow you to complete the Seymour Duncan Custom Custom coil splitting modification, with the assistance of the diagrams below.
What is Coil Splitting?
It’s a term we use to name what is essentially shorting out one of the two coils inside the pickup, using a ground wire and a switch, along with the two wires that are tied together and taped off, when you install most humbuckers. Coil splitting will not result in any physical damage to your humbucker. If you do not have a humbucker with four colored wires and one bare wire, you will not be able to complete this modification.
Before You Begin
This guide assumes you already own a Seymour Duncan Custom Custom humbucker and have it installed in your guitar. If you need help installing these pickups, we recommend our guide titled Seymour Duncan Custom Custom Wiring Diagram.
Tools and Materials
The most costly and time-consuming part of this Seymour Duncan Custom Custom coil splitting modification is the switch. You need a switch to turn the modification on and off once installed, and we recommend using a push-pull pot, but you can also use a mini-toggle switch. We like the push-pull pot because if you don’t like this modification, you can uninstall it. Besides the switch, you’ll need a soldering iron and some solder, along with a short piece of wire. A Phillips screwdriver, pliers, wire cutters, and electrical tape are always good to have on standby.
Double-check you have all of these handy:
- Push-pull or mini-toggle switch
- Soldering iron
- Solder
- A short piece of wire
- Wire cutters
- Screwdriver
- Pliers
- Electrical tape
Getting Started
The first step in our Seymour Duncan Custom Custom coil splitting mod is to gain access to the red and white wires that are tied together and taped. We’ll need these wires for our modification.
If you have chosen to go with the mini-toggle switch, you’ll need to install that in your pickguard now.
If you went with the push-pull pot, you’ll need to switch out one of the pots in your guitar. We recommend the Tone control because the Volume control has too many wires connected to it. The push-pull pot has all of the elements that standard Tone control has, so don’t worry about the extra components in this step.
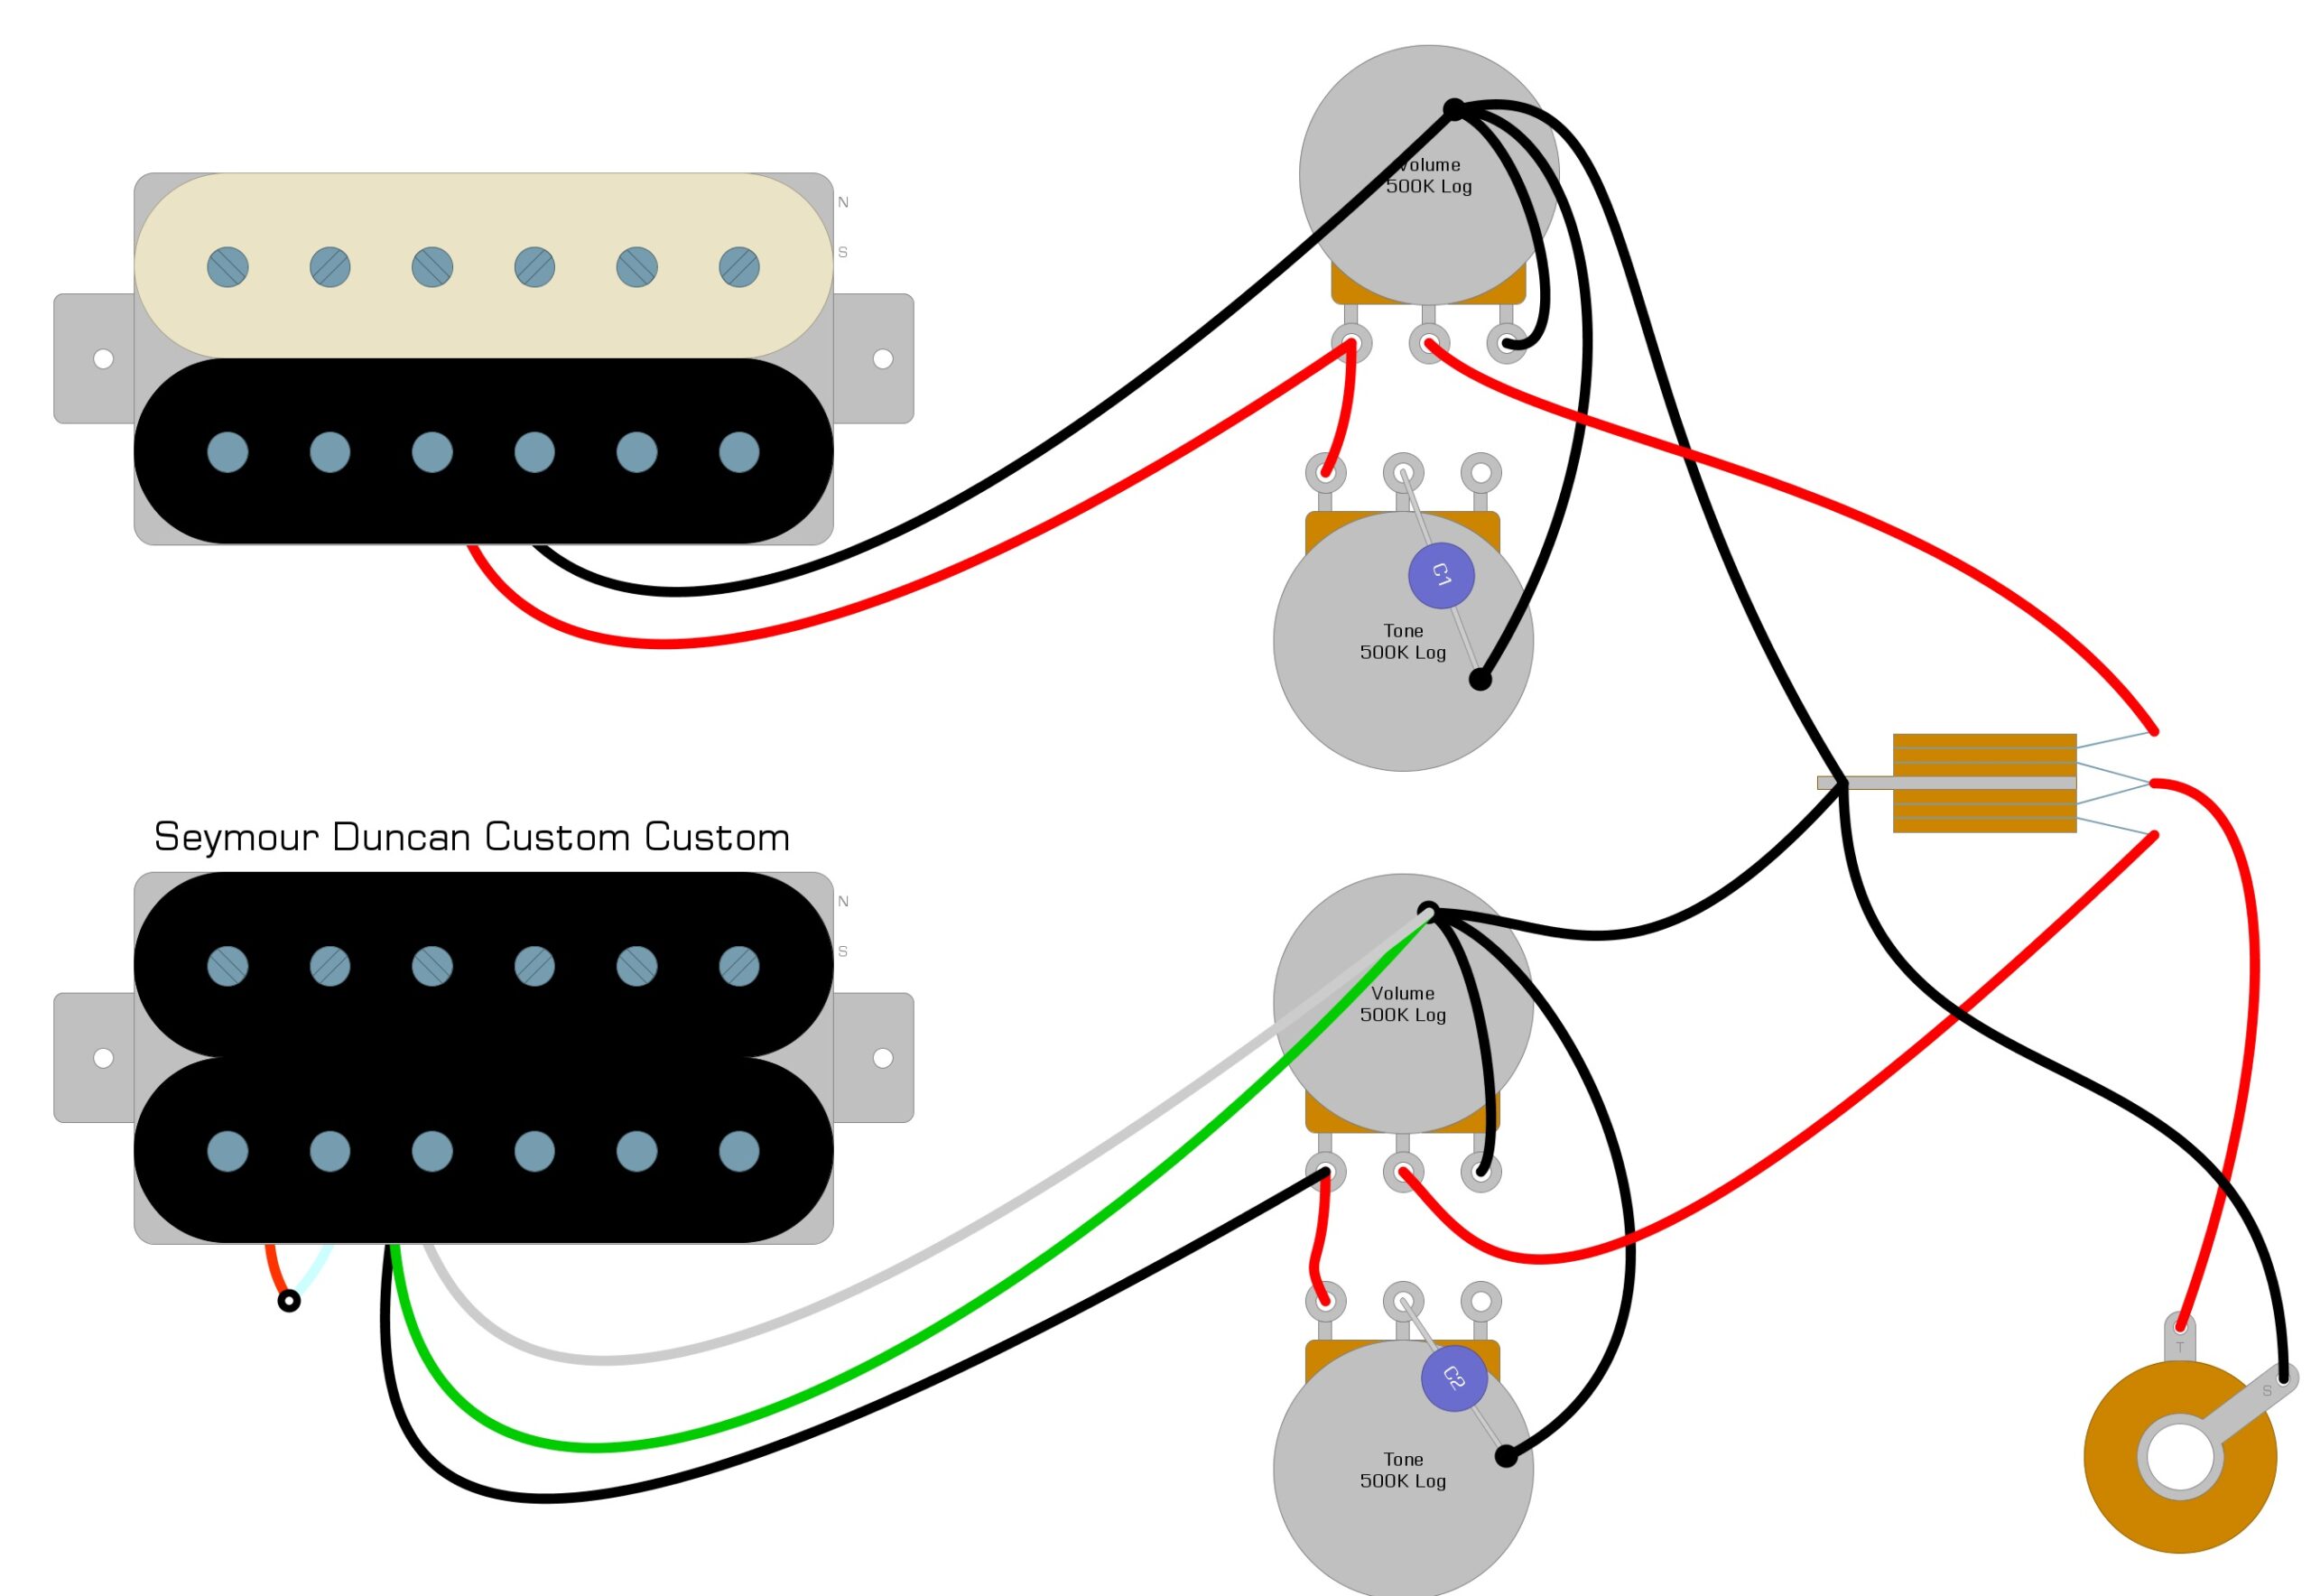
In Example 1, we illustrate what a wiring diagram with a standard tone control might look like in a Les Paul-style guitar.
Example 1
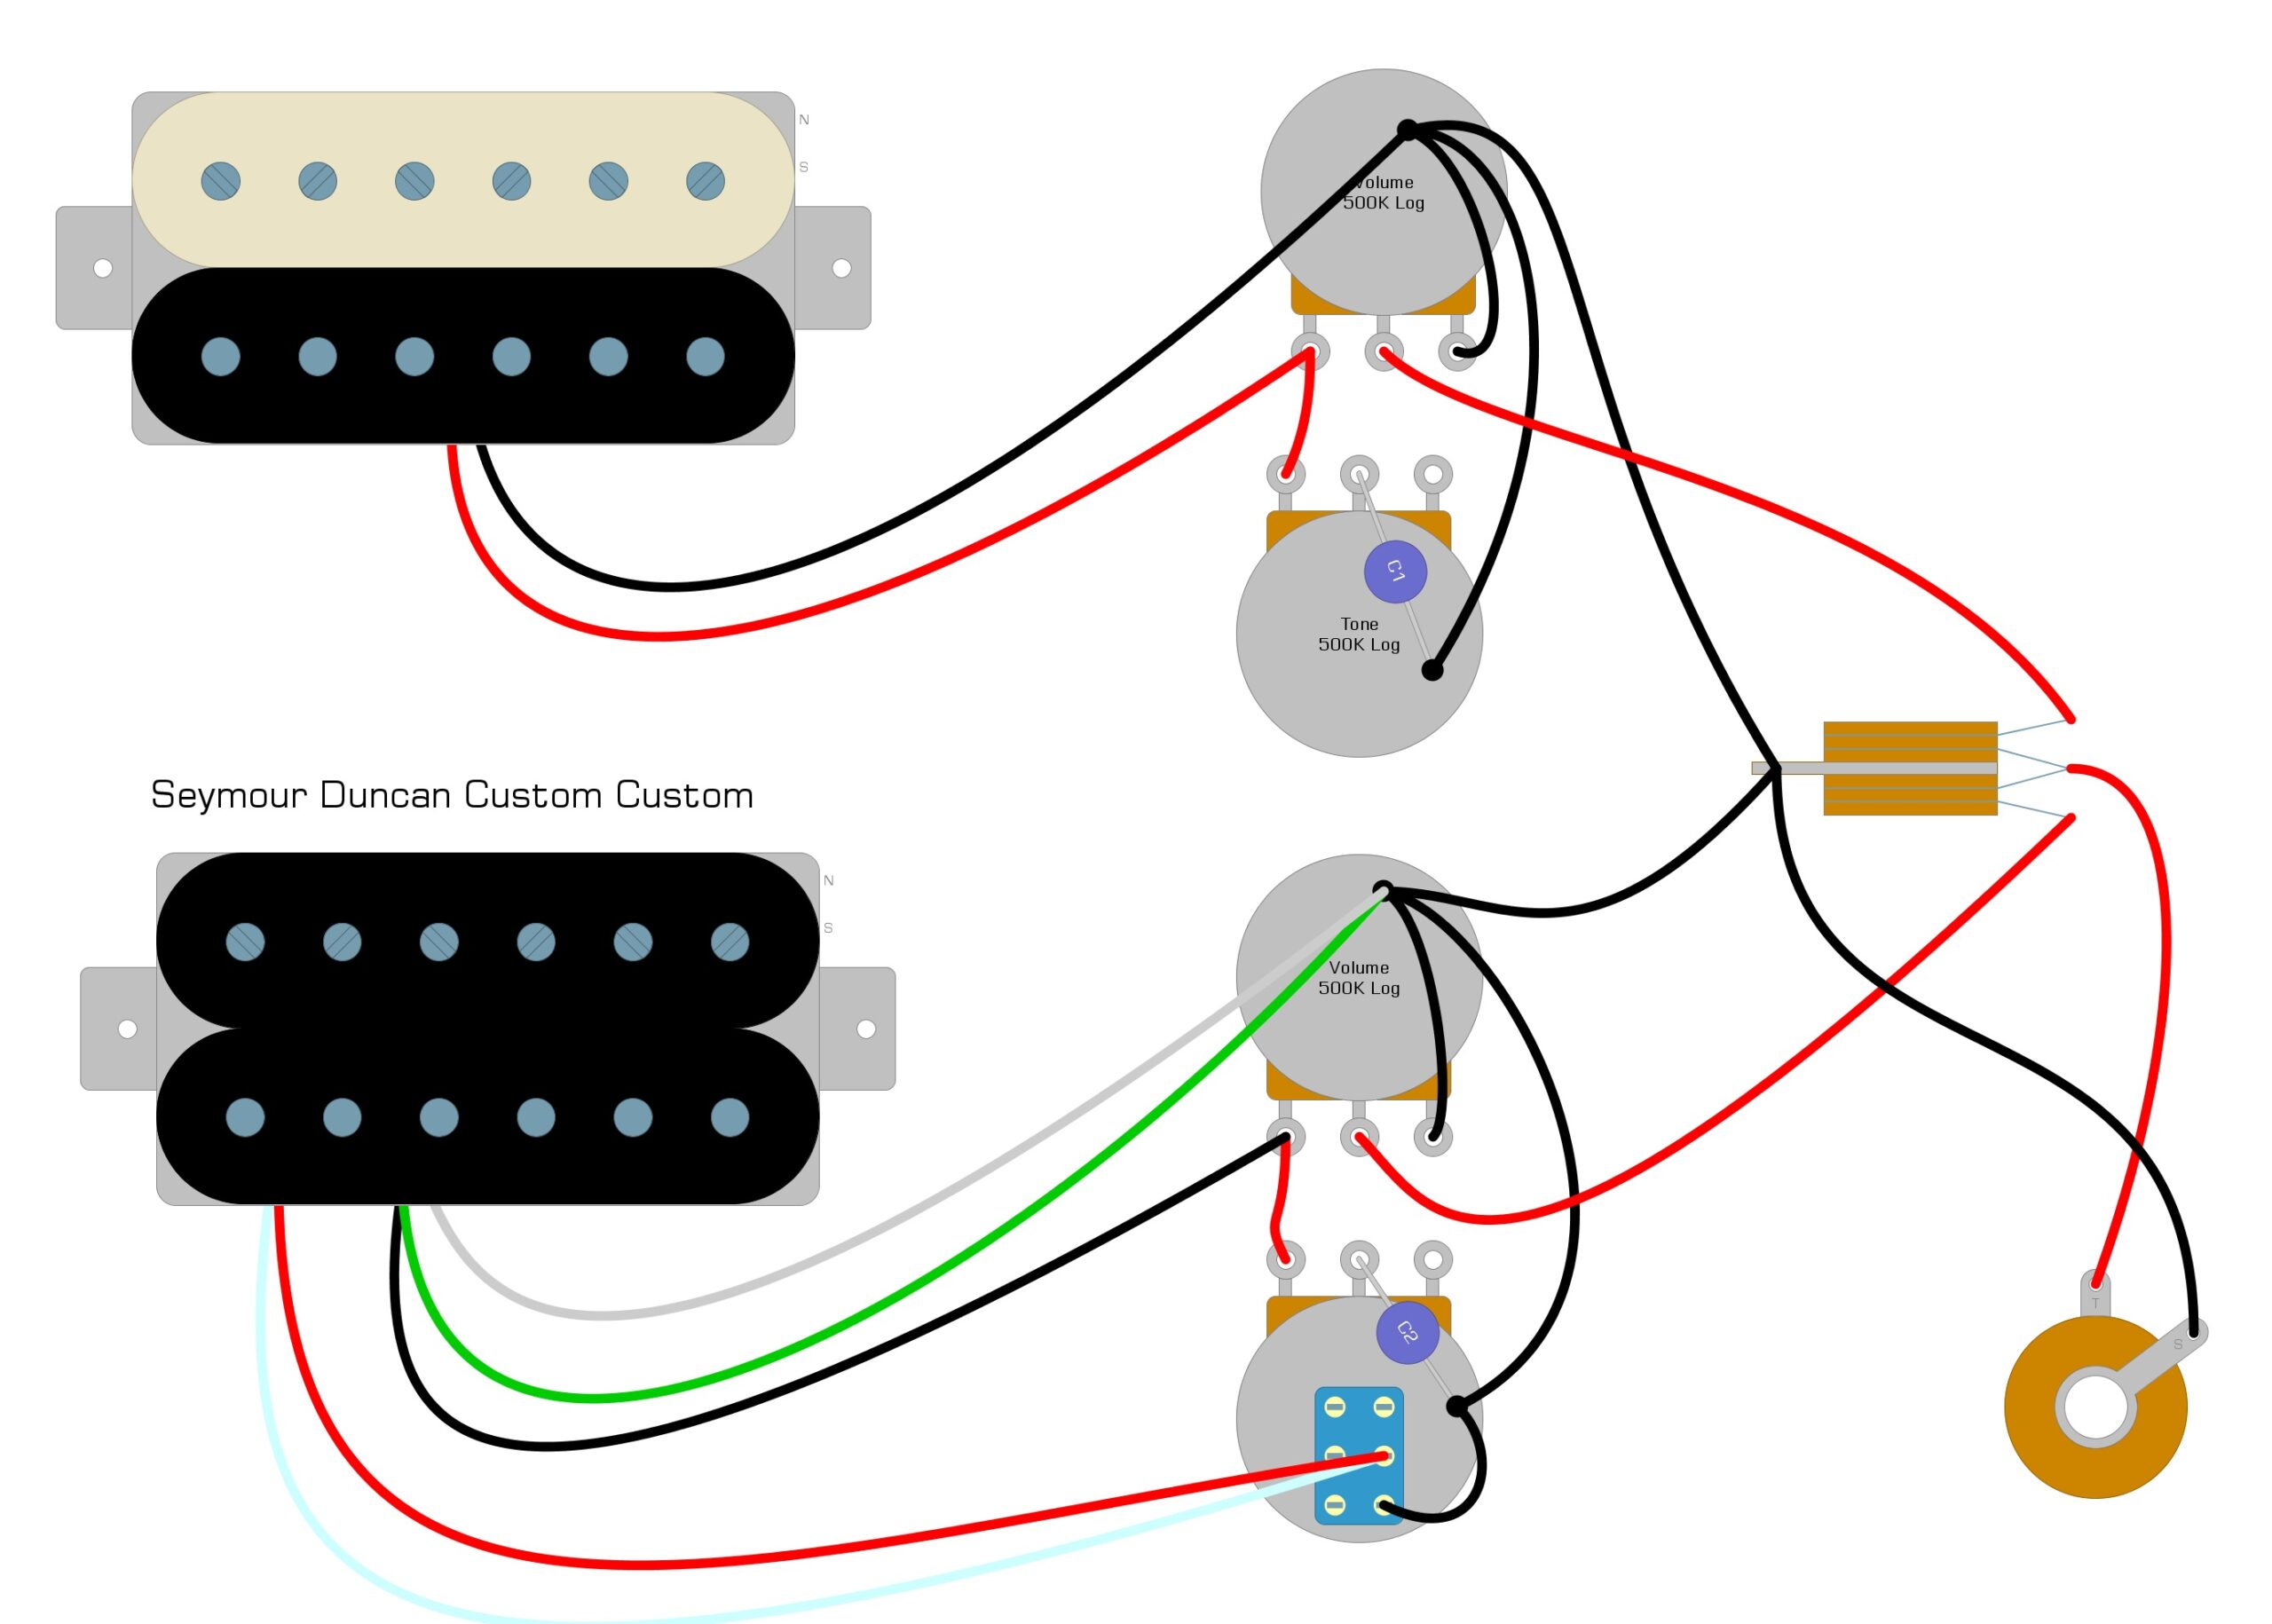
In Example 2, we illustrate the same circuit with the push-pull installed.
Example 2

Seymour Duncan Custom Custom Coil Splitting
Once we have the push-pull pot installed, we can complete our coil splitting modification. To do so, we connect the red and white wires to a lug on the switch mechanism on the push-pull pot. We will also need to connect a short ground wire from a lug on the switch mechanism to the back of the tone control to complete the modification.
We’ve illustrated the completed modification in Example 3.
Example 3
Summary
Coil splitting pickups is an easy modification that doesn’t require many tools. Some pickups will split up better than others, and once you’ve performed this modification, you’ll be able to do it again and again from memory. We hope you have enjoyed reading this Seymour Duncan Custom Custom coil splitting guide, and if you’ve found it helpful, please feel free share it on Facebook and Twitter. For more articles on guitar electronics, visit humbuckersoup.com.


