By Ed Malaker
Posted 08/11/2020
This discussion assumes that you already have your Railhammer Alnico Grande pickup installed and that it works correctly. If you need help with installation, please reference the Railhammer Alnico Grande Wiring Diagram .
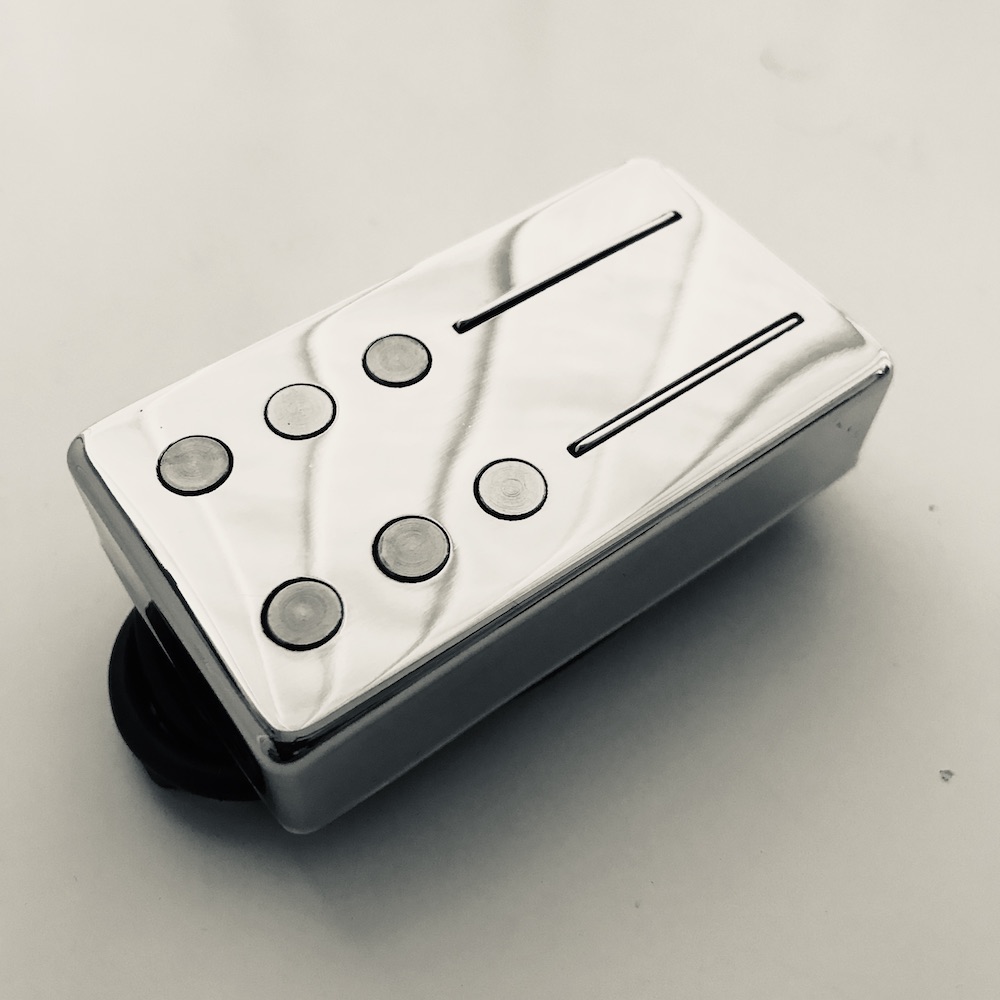
Railhammer Alnico Grande
Railhammer Alnico Grande humbuckers are a unique style of pickup that uses blades on one side and pole pieces on the other. These two styles blend to create a tone that is slightly different from more traditional brands. These are high-output pickups that are perfect for coil-splitting.
Many have asked if you can split Railhammer Alnico Grande humbuckers to make only the rail side work, or only the post side. The answer to this question is no; each of the two coils that make up the Railhammer Alnico Grande humbucker has both types of posts built-in.
Wiring Code
The Railhammer Alnico Grande has four colored wires and one bare wire. Sometimes the bare is a braided silver wire. The wiring code lets us identify the Hot and the Ground so we can install the pickup. The wiring code of the Railhammer Alnico Grande is as follows.
- Black = Hot
- Red + White = Soldered together and taped off
- Green + Bare = Soldered together; Ground
We have illustrated this wiring code in Example 1.
Example 1
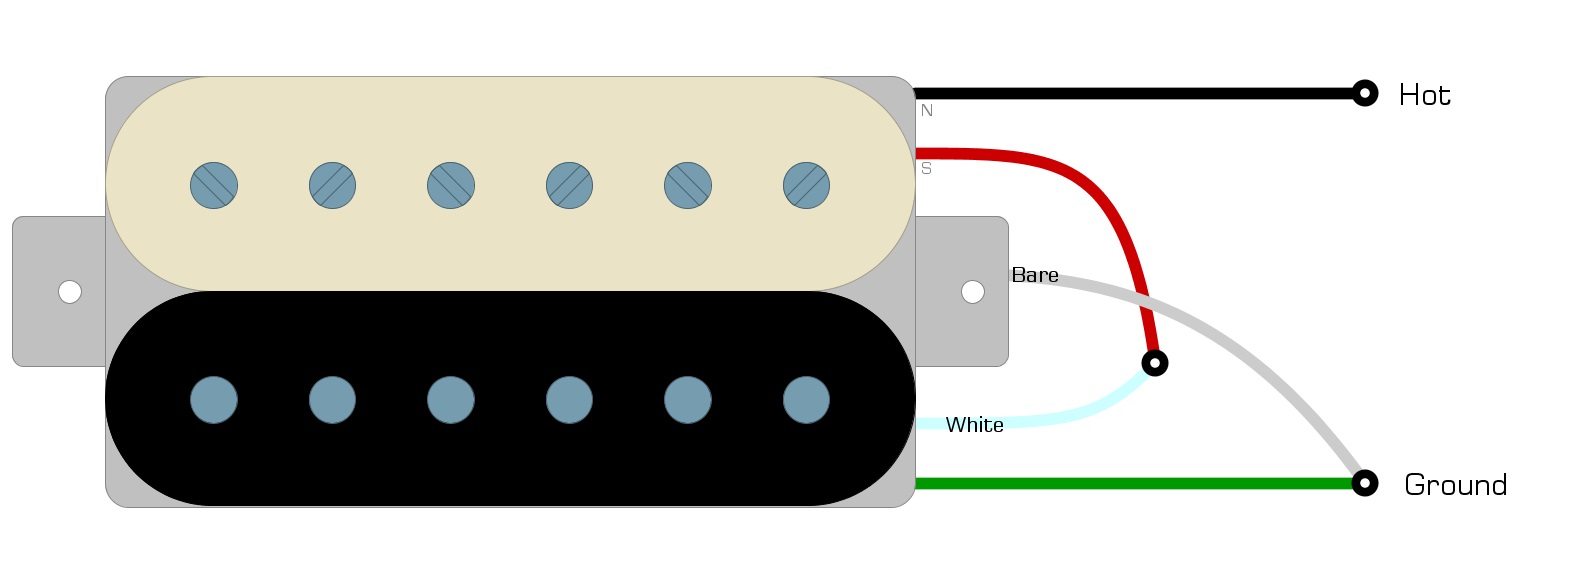
Even though we aren’t installing the pickup, the wiring code is still important because it tells us that we need the red and white for this modification.
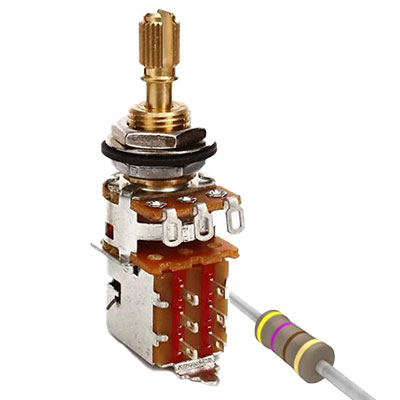
Push-Pull Pot
To toggle our Railhammer Alnico Grande coil-splitting modification on and off, we will need to use a switch. The push-pull pot is the best solution, because if you don’t like the modification, you can go back to the original. You can also use a mini-toggle switch, push-button switch, etc., but these will require drilling and making permanent changes to your guitar.
Installing the Push-Pull Pot
Installing your push-pull pot requires that you swap out either your volume or your tone pot. We recommend using a tone control because volume controls tend to have plenty of wires soldered to them, which can needlessly complicate the mod.
The push-pull pot has the same lugs that a standard pot has, and you can attach the capacitor and wire to them.
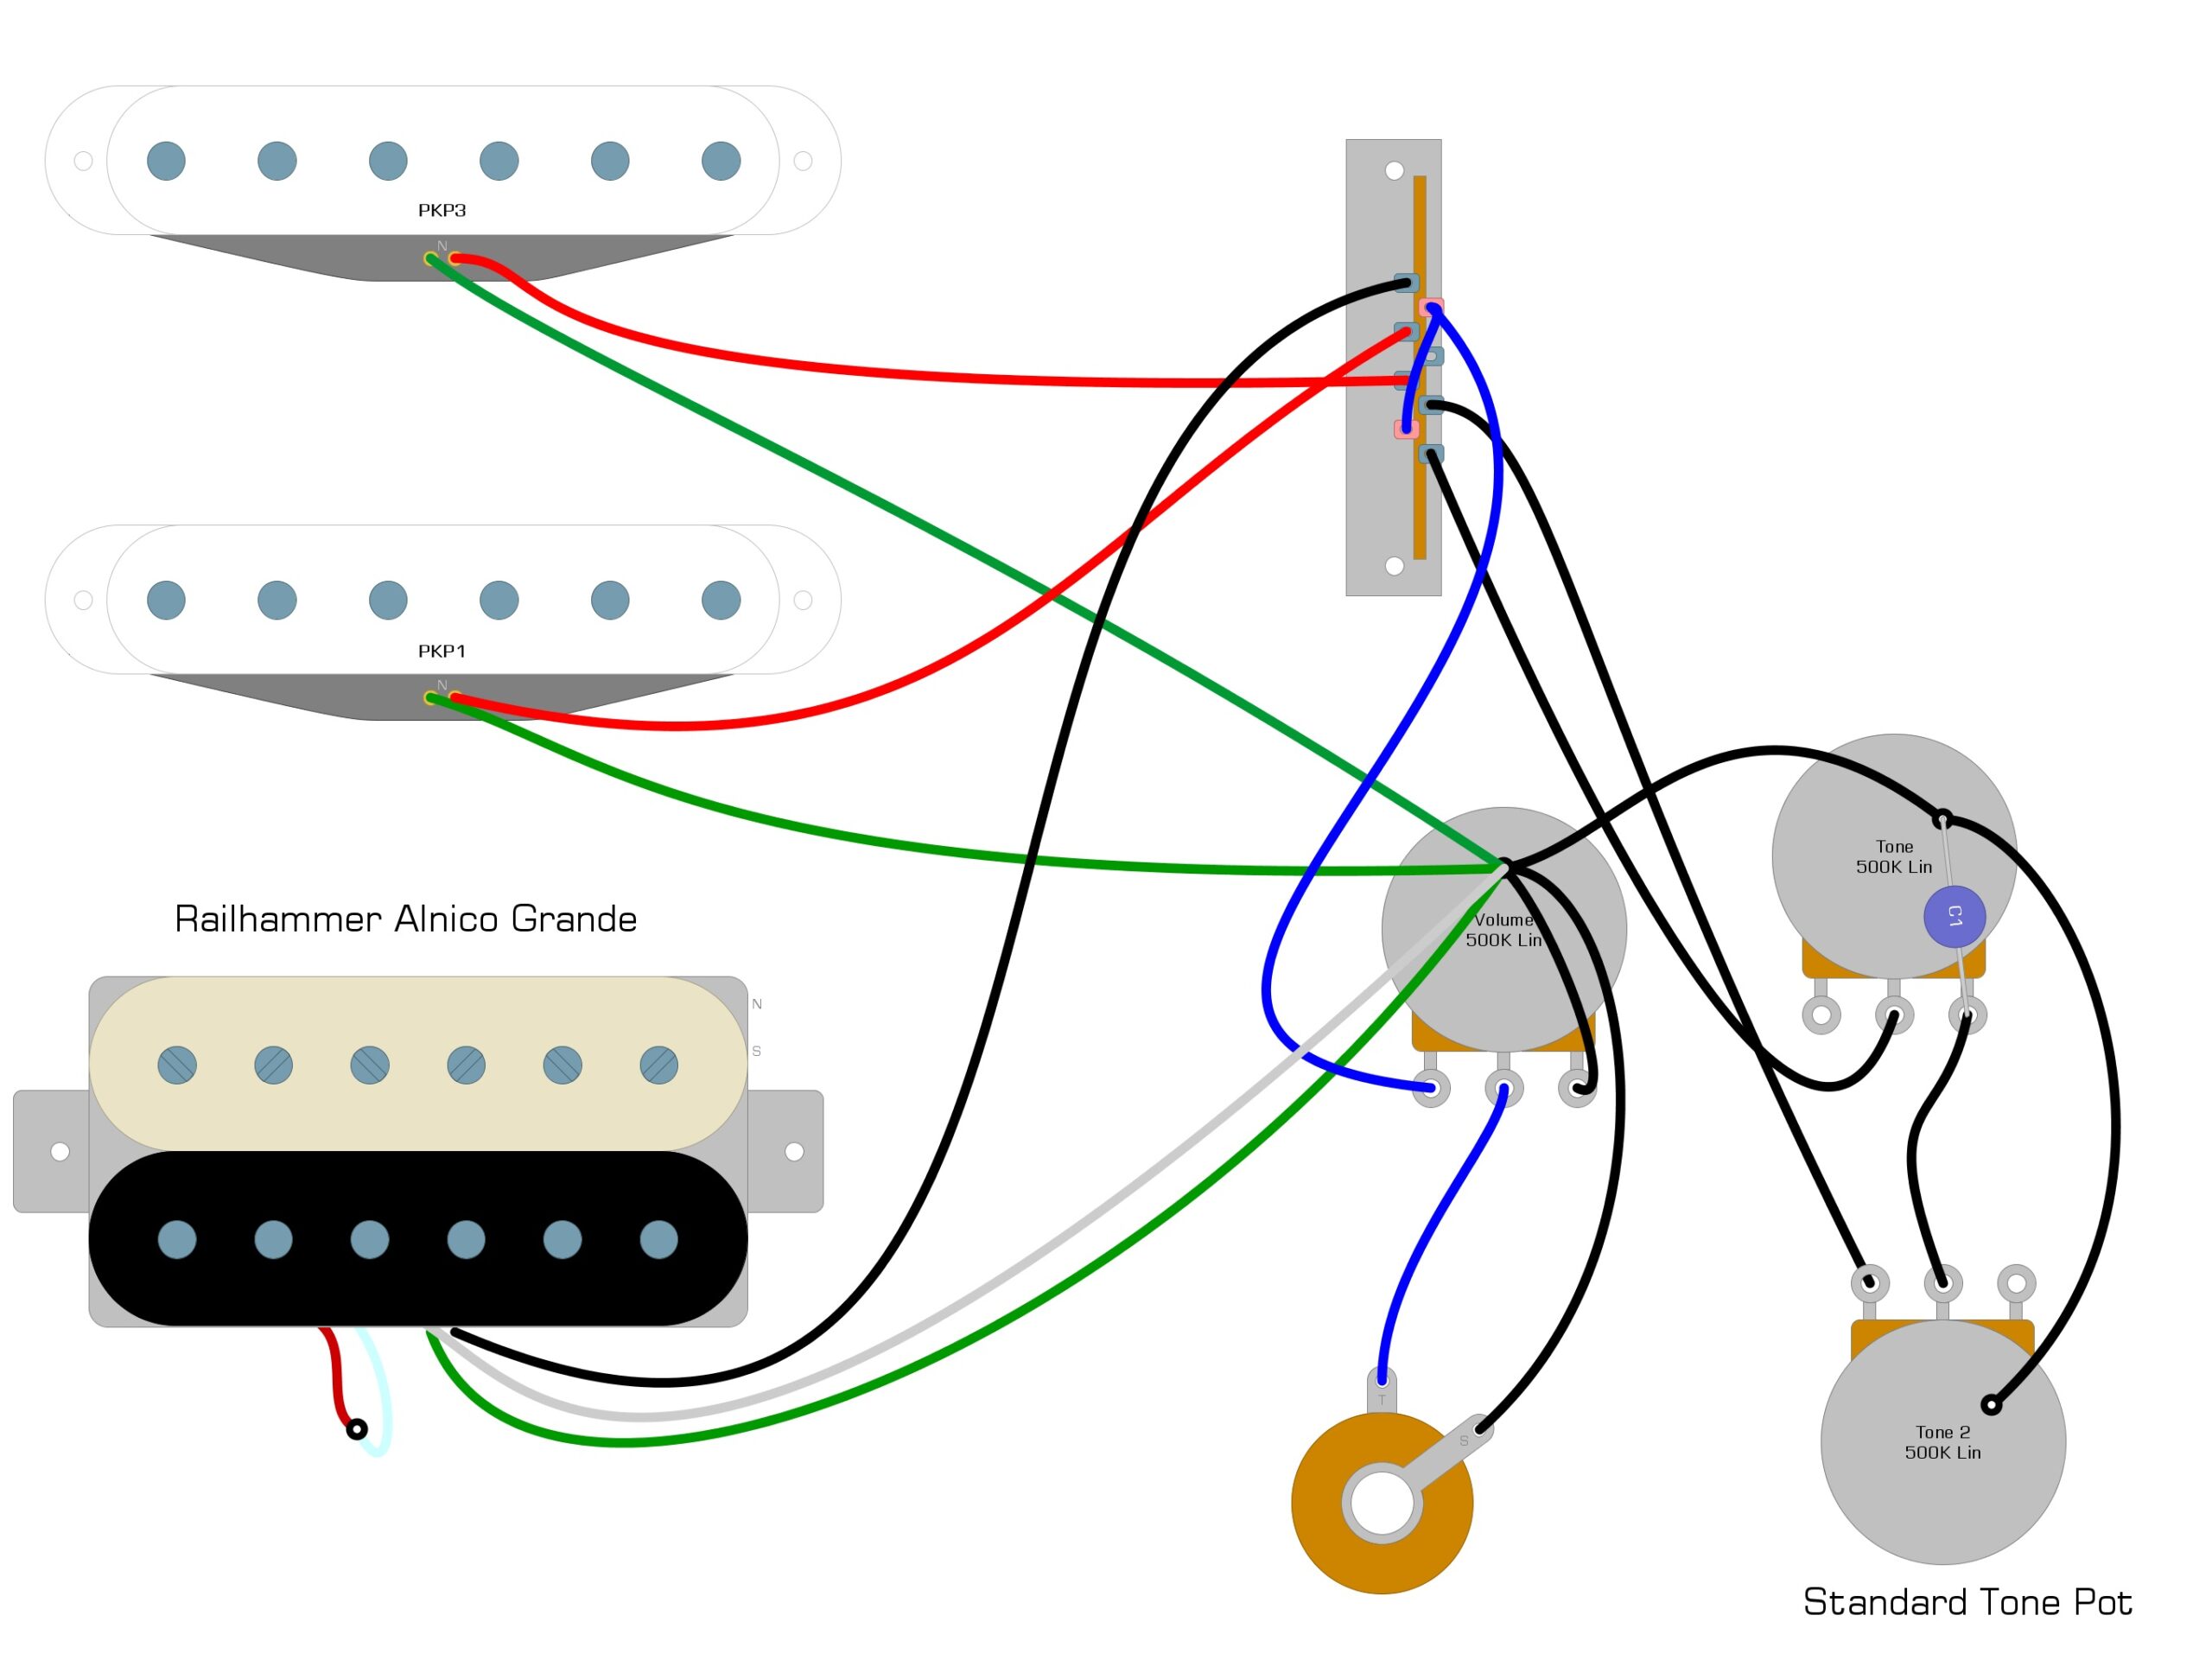
We illustrate what a standard tone control might look like in Example 2.
Example 2
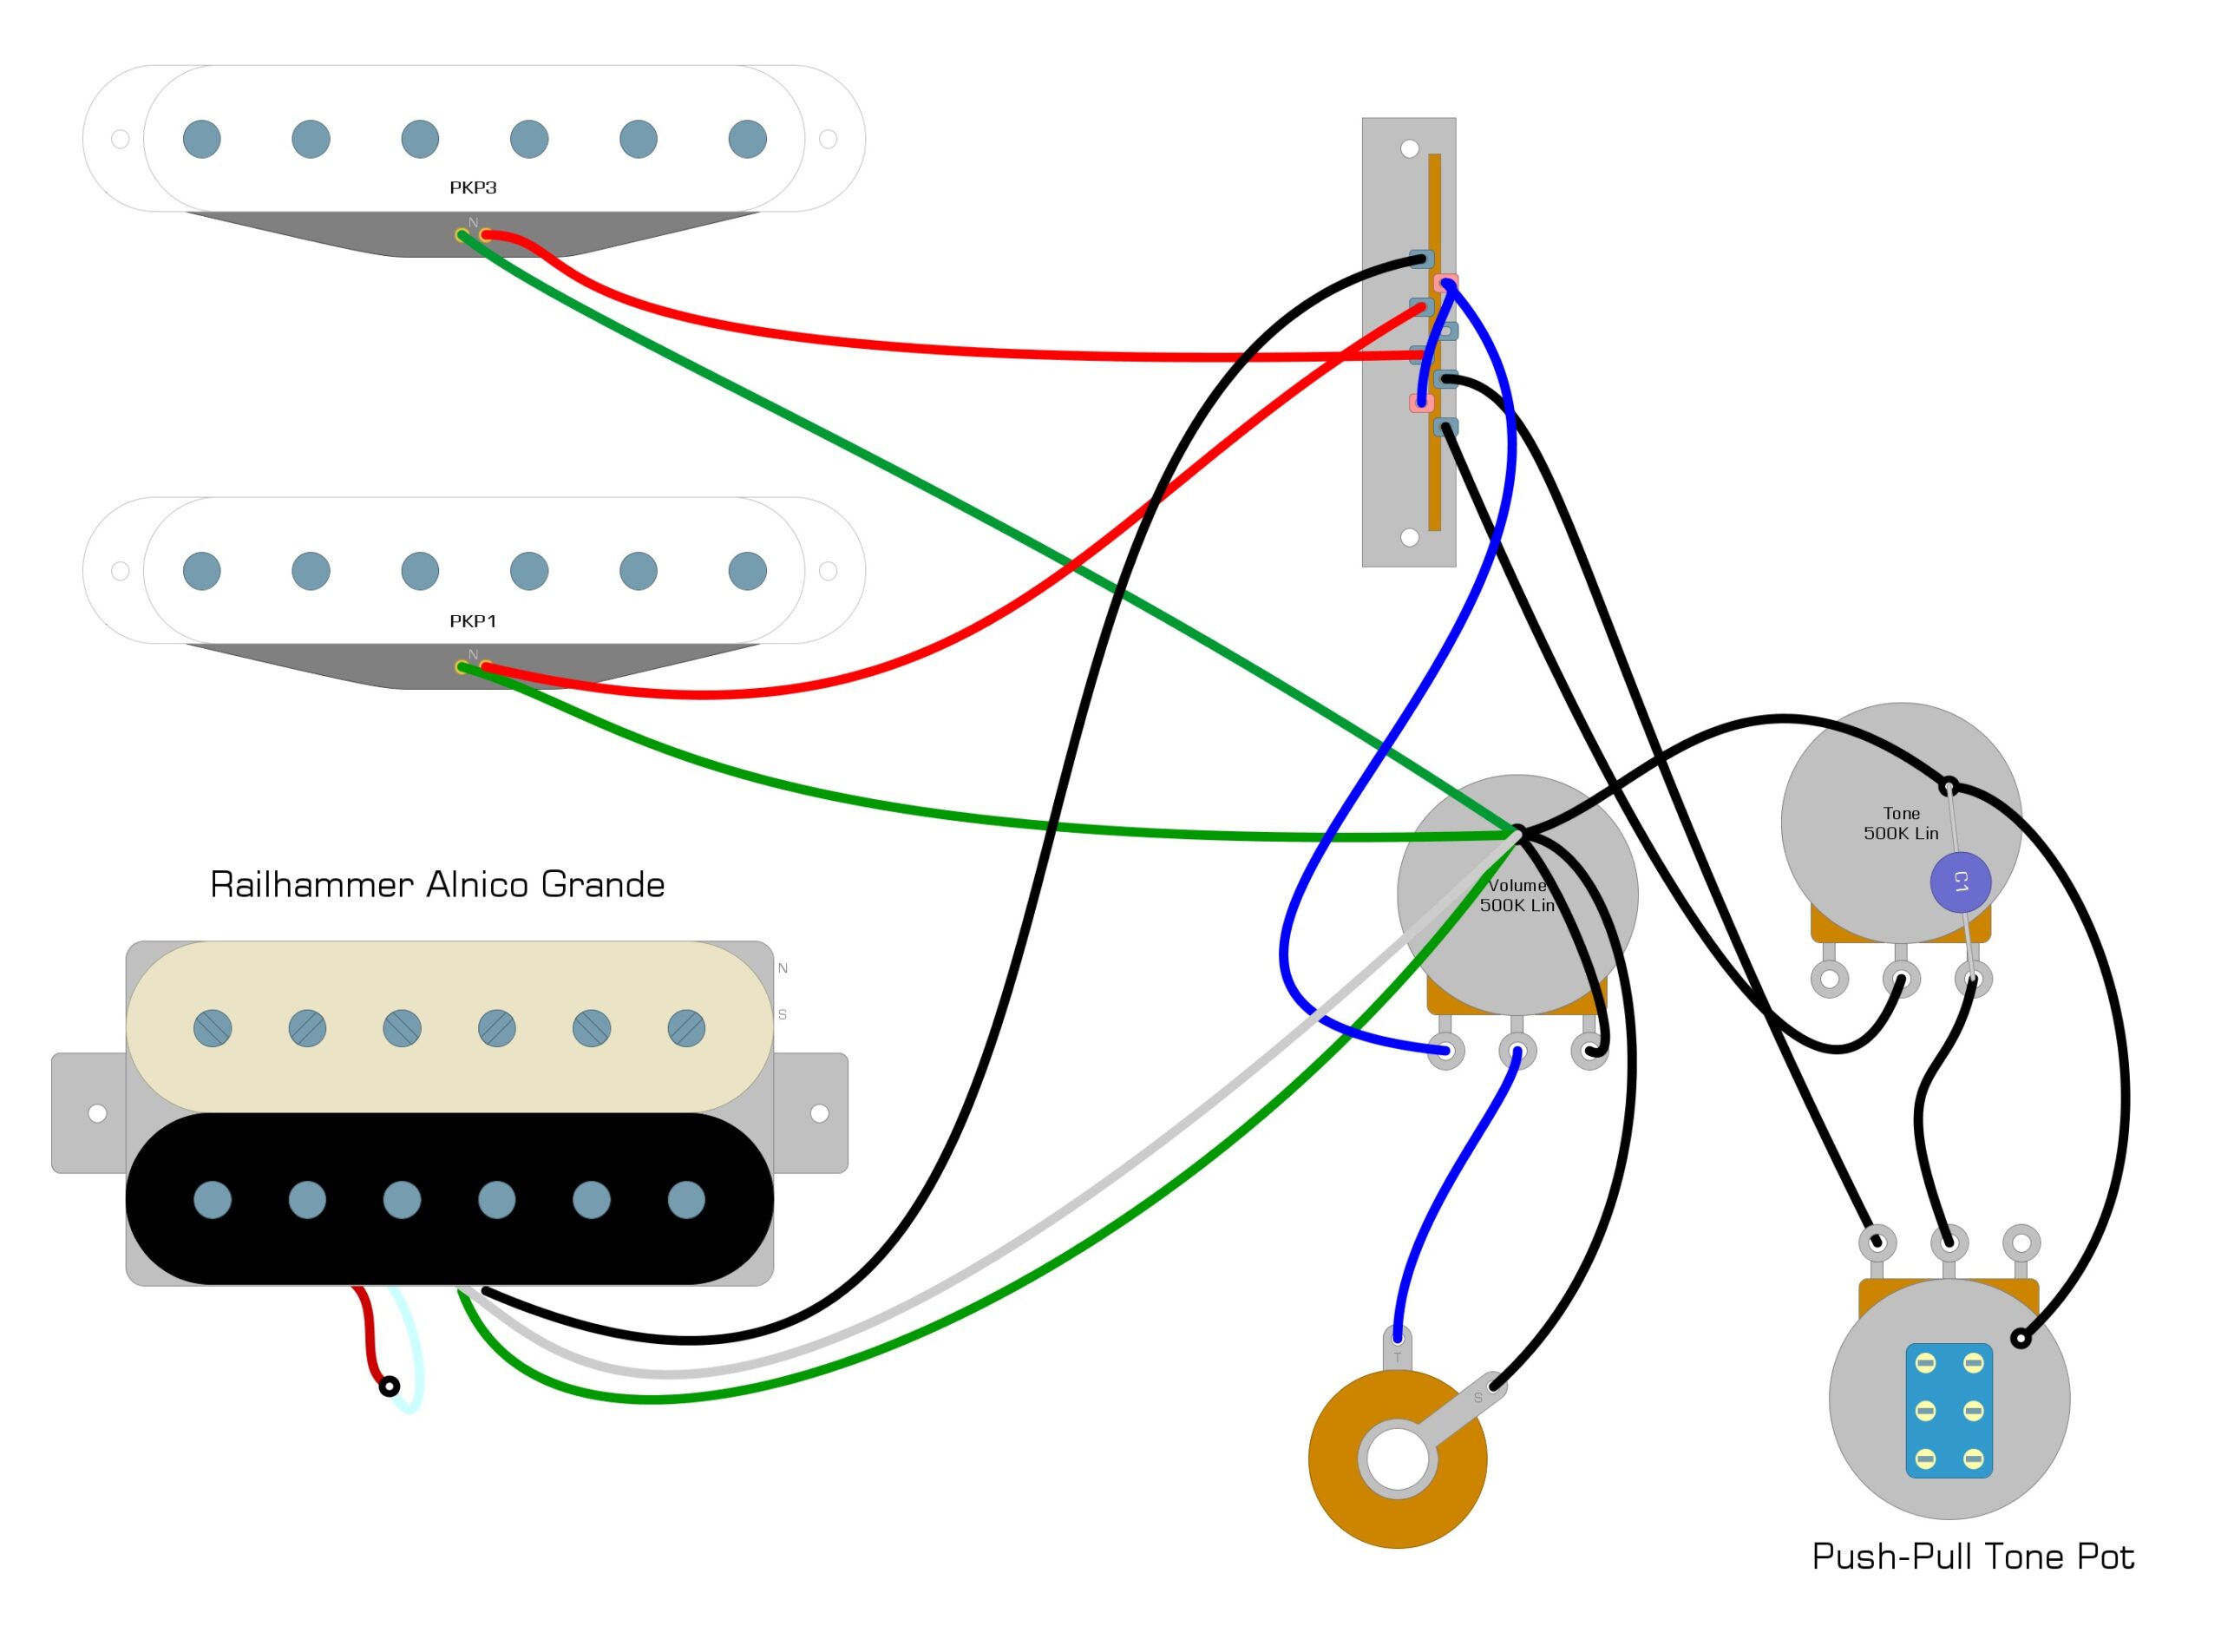
We illustrate what a push-pull tone control might look like in Example 3.
Example 3
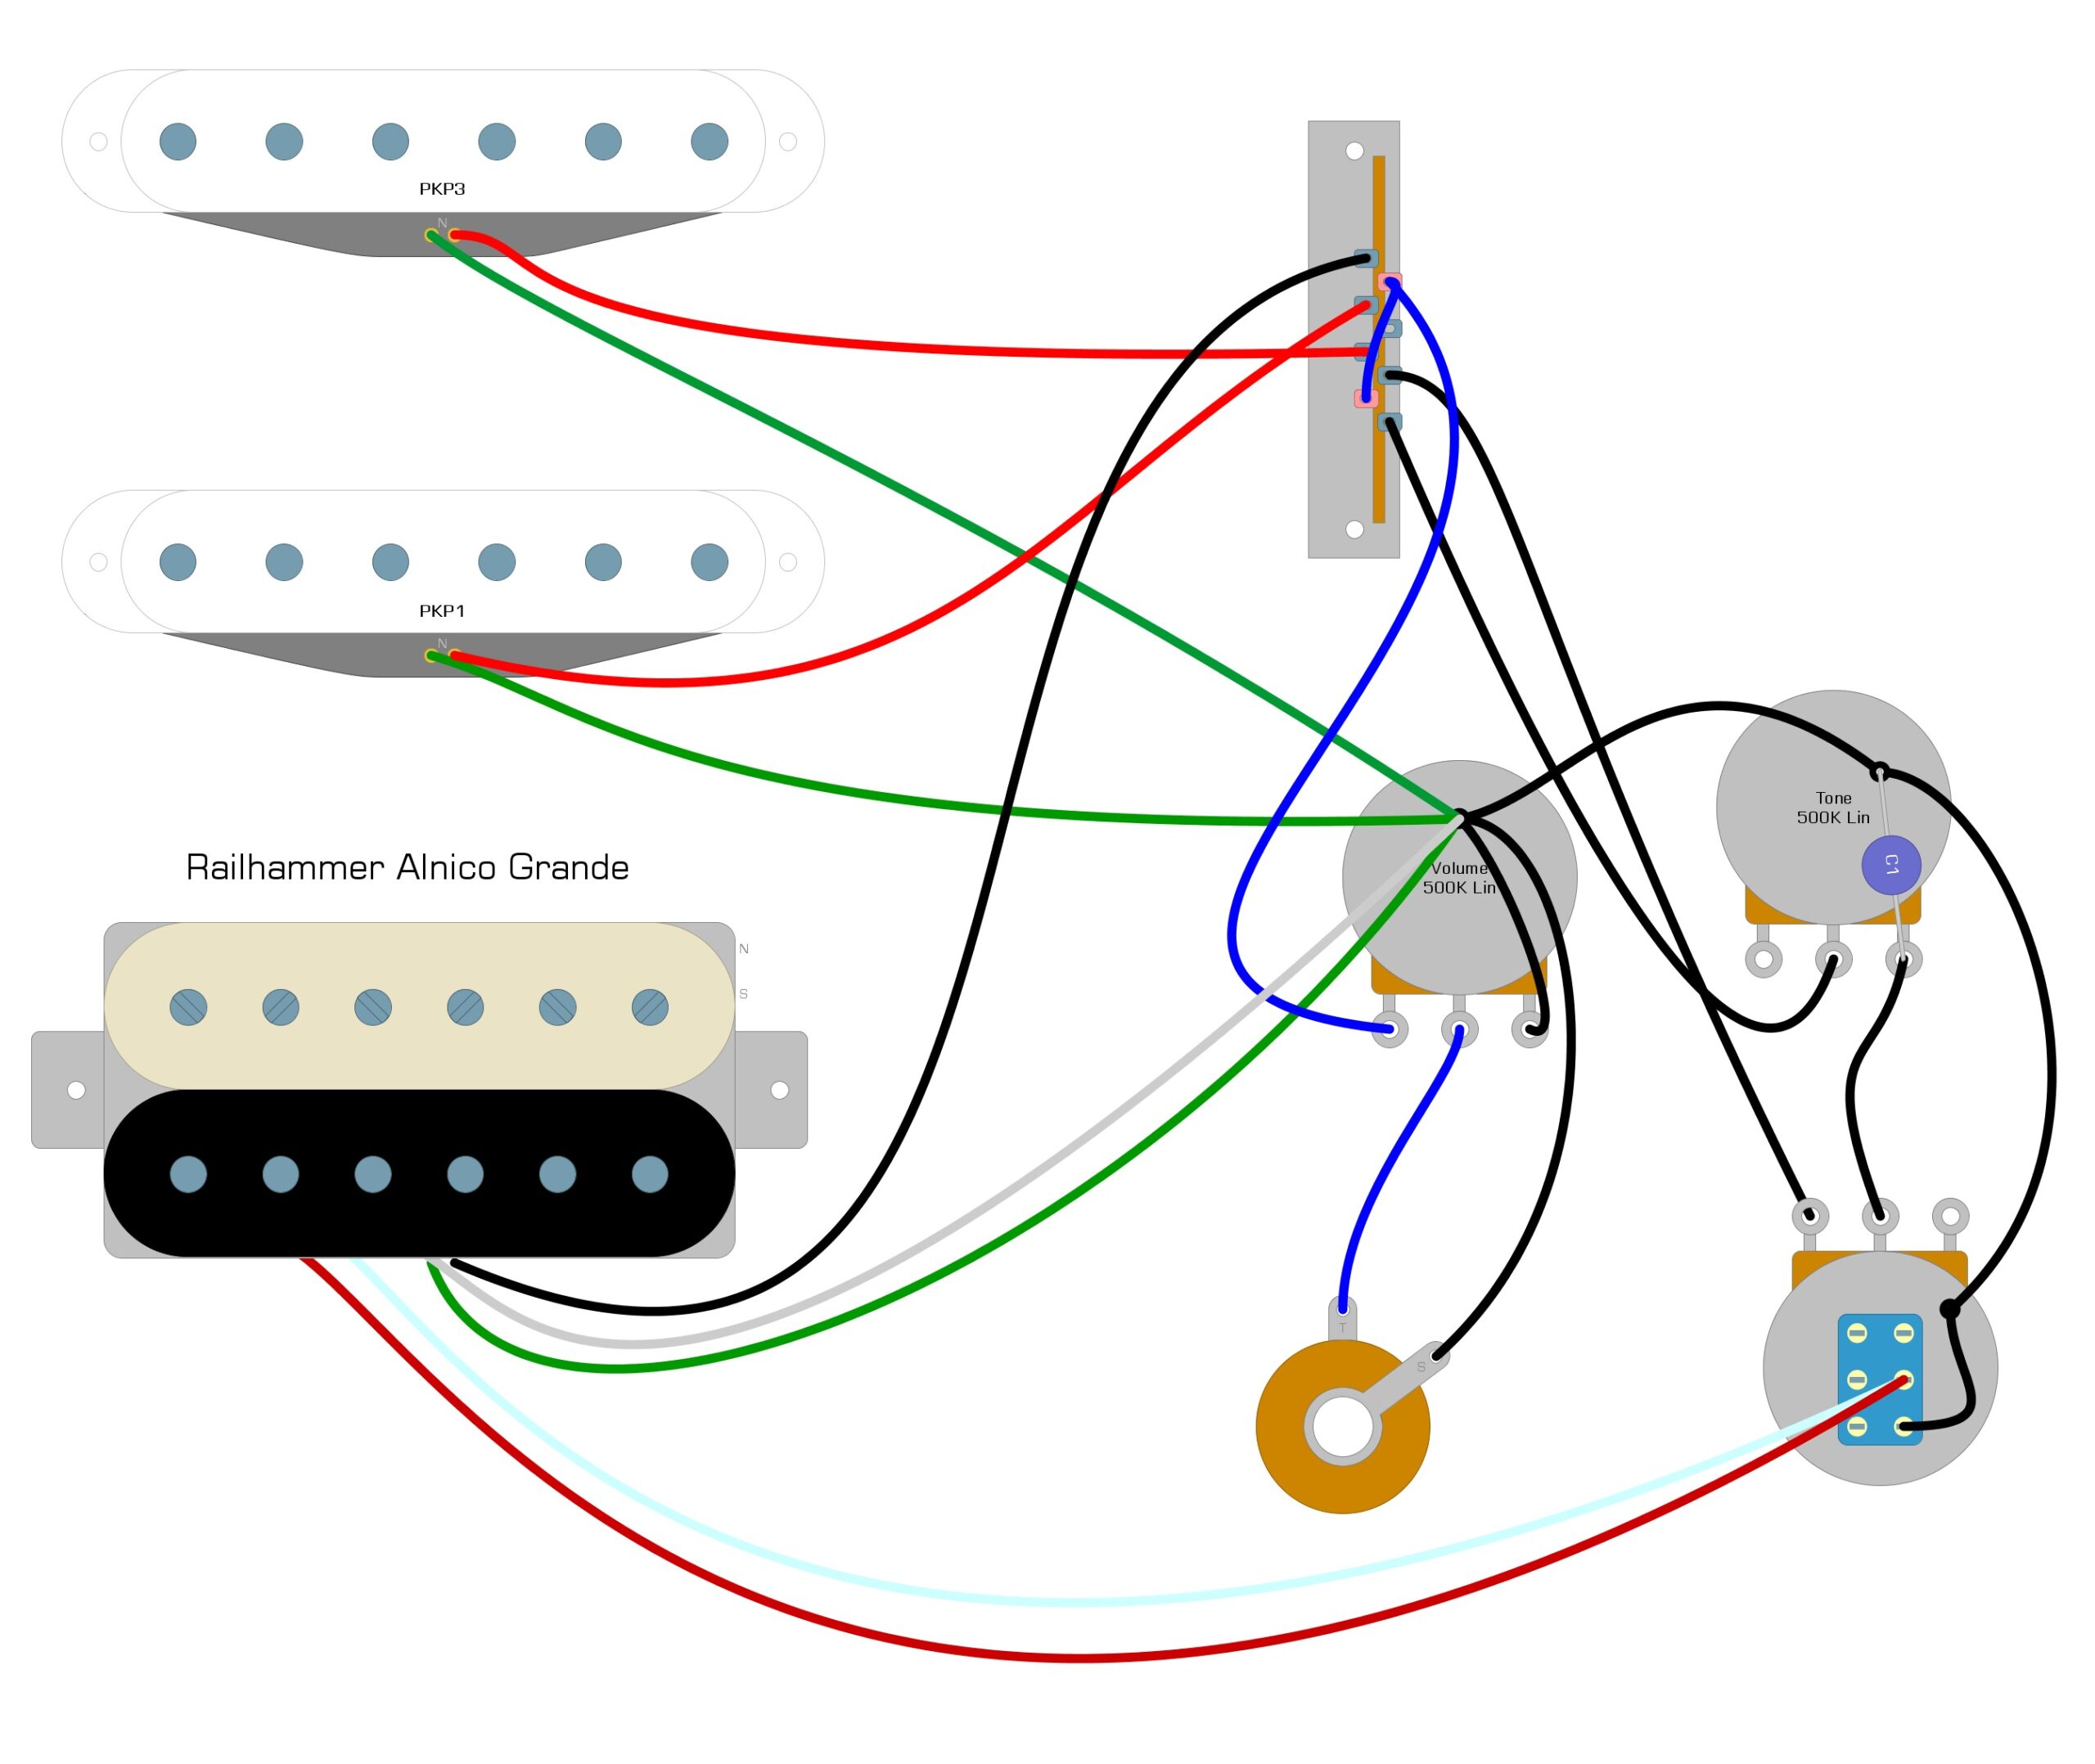
Coil-Splitting Diagram
Once you have the push-pull pot installed, most of the work is complete. The only step left is to solder the red and white wires to the switch part of the push-pull pot, then solder a ground wire from the switch to the back of the pot.
We illustrate what the completed Railhammer Alnico Grande coil-splitting modification might look like in Example 4.
Example 4
Summary
We feel that the most challenging part of this modification is changing the standard pot to a push-pull, but even this step shouldn’t be hard, even for beginners. Also, it’s great practice for getting ready to do more challenging projects. If we have helped you complete this mod in your guitar, please feel free to share this guide on Facebook and Twitter. For more articles on guitar electronics, visit humbuckersoup.com.