By Miguel Hernandez
Posted 07/16/2024
The monster rose from the table as the angry crowd with torches and pitchforks approached the castle walls with a thunderous clap of footsteps up the path, finally reaching the drawbridge…Oh wait! Wrong story…
Small Beginnings: No Limits as The Limit
There I was, on a rainy June evening with a fistful of money my father had given me in hand. I rushed over to my friend’s house to purchase my first electric guitar. I still remember the smell of the wood, the strings, and the case internals. It was a magical moment – an instance in time forever etched into my memory like ancient carvings in stone. “How much do you want for it?” I asked. y My friend responded with, “Whatever you want, just get it out of here!” and just like that, $70 later, my fate was sealed.
That was the day this southpaw bought himself a right handed no-name budget Stratocaster-style guitar and became the self-taught crazy man I am today!… Just kidding, my shrink says I’m quite sane… I think.
Whenever I open a guitar case to this day, that memory comes back to me like a flash of lightning. I’m sure we all have similar moments that stick out fresh in our minds, no matter how many years have passed since.
So… what’s the point? Well, in the 80’s when I learned to play guitar, there were no real budget options for beginners other than some really terrible guitars with action higher than a trapeze artist’s swing. My cheap Stratocaster copy was the catalyst that led me to where I am today. I wish I still had it. Decades later, I love to hot rod and upgrade inexpensive guitars.
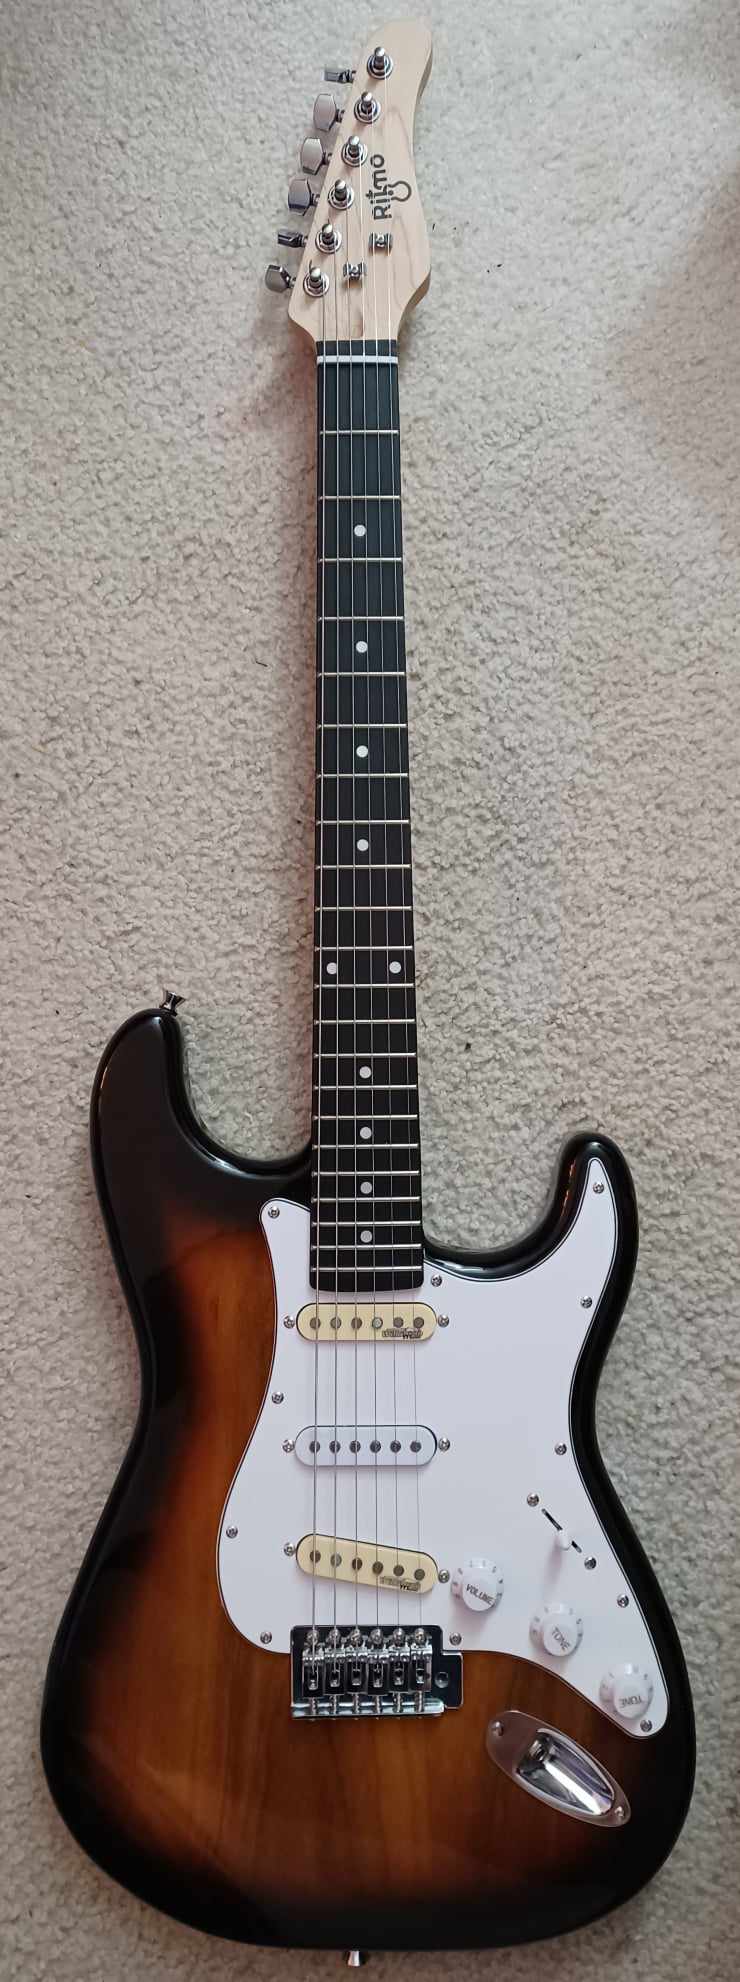
Ritmo pawn shop find. The body, bridge, and tuners were fine. Nice fast neck. Gutted the electronics and dropped in Wilkinson vintage voiced pickups with a new wiring harness.
Bring in the Budget
Don’t give up on that old guitar you have laying around. Let me show you how to extract some magic from it!. I do have a weakness for hard luck cases, and it’s so much fun. Nowadays, it’s very easy to upgrade and modify an old beater to new life.
I’ve done this many times over the years, and still do to this day. Let’s get to it.
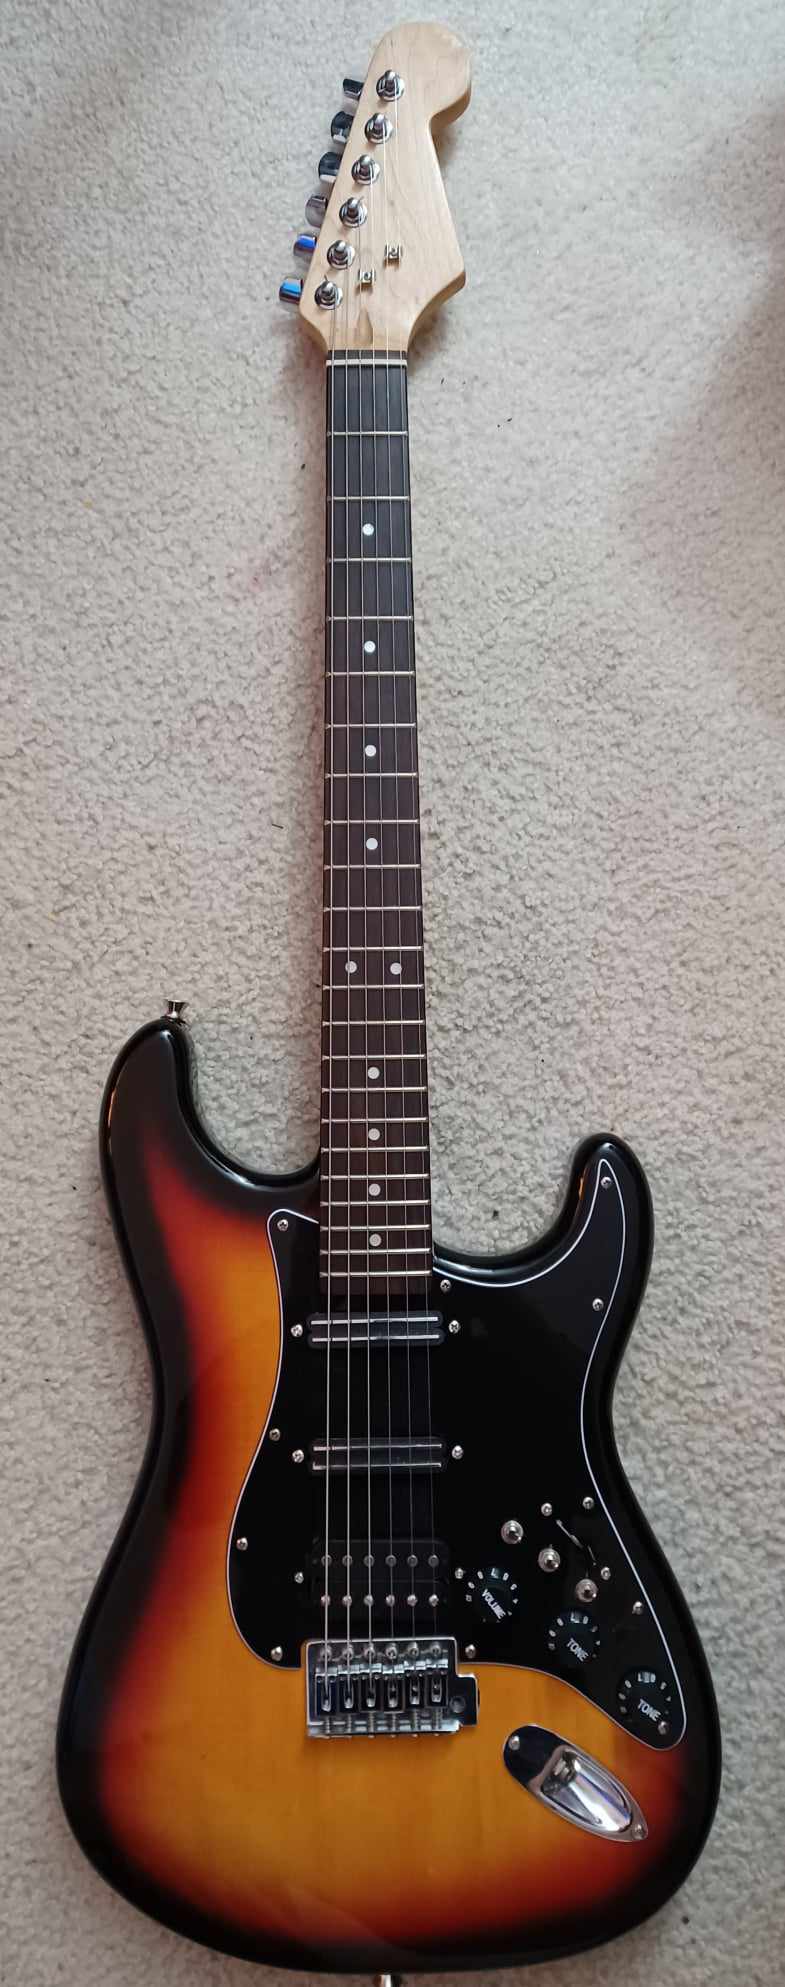
Dann Huff-inspired Strat. This is a total partscaster tribute to my guitar hero, formerly a Squier SE of some sort. Now it sports a Musiclily neck, graphite nut, Fender tuners, pre-wired HSS pickguard with rails and series parallel wiring. One of my favorites to play.
Disclaimer: The tips below can be done to almost any guitar and require no real special tools other than some basics you may already have on hand. It is also presumed that you have a decent working knowledge of the guitar and its components, and handy with said tools. Some basic soldering skills and setup knowledge of guitars are necessary and would be helpful. Don’t panic though, there are so many great tutorials and YouTube Channels to the rescue. These awesome resources were not available during my time.
This is not going to be an exhaustive tutorial, but just a bird’s eye view of the process that I use on budget axes all of the time to make them workhorses of mine.
The ”X” Marks the Spot: Not so Fast!
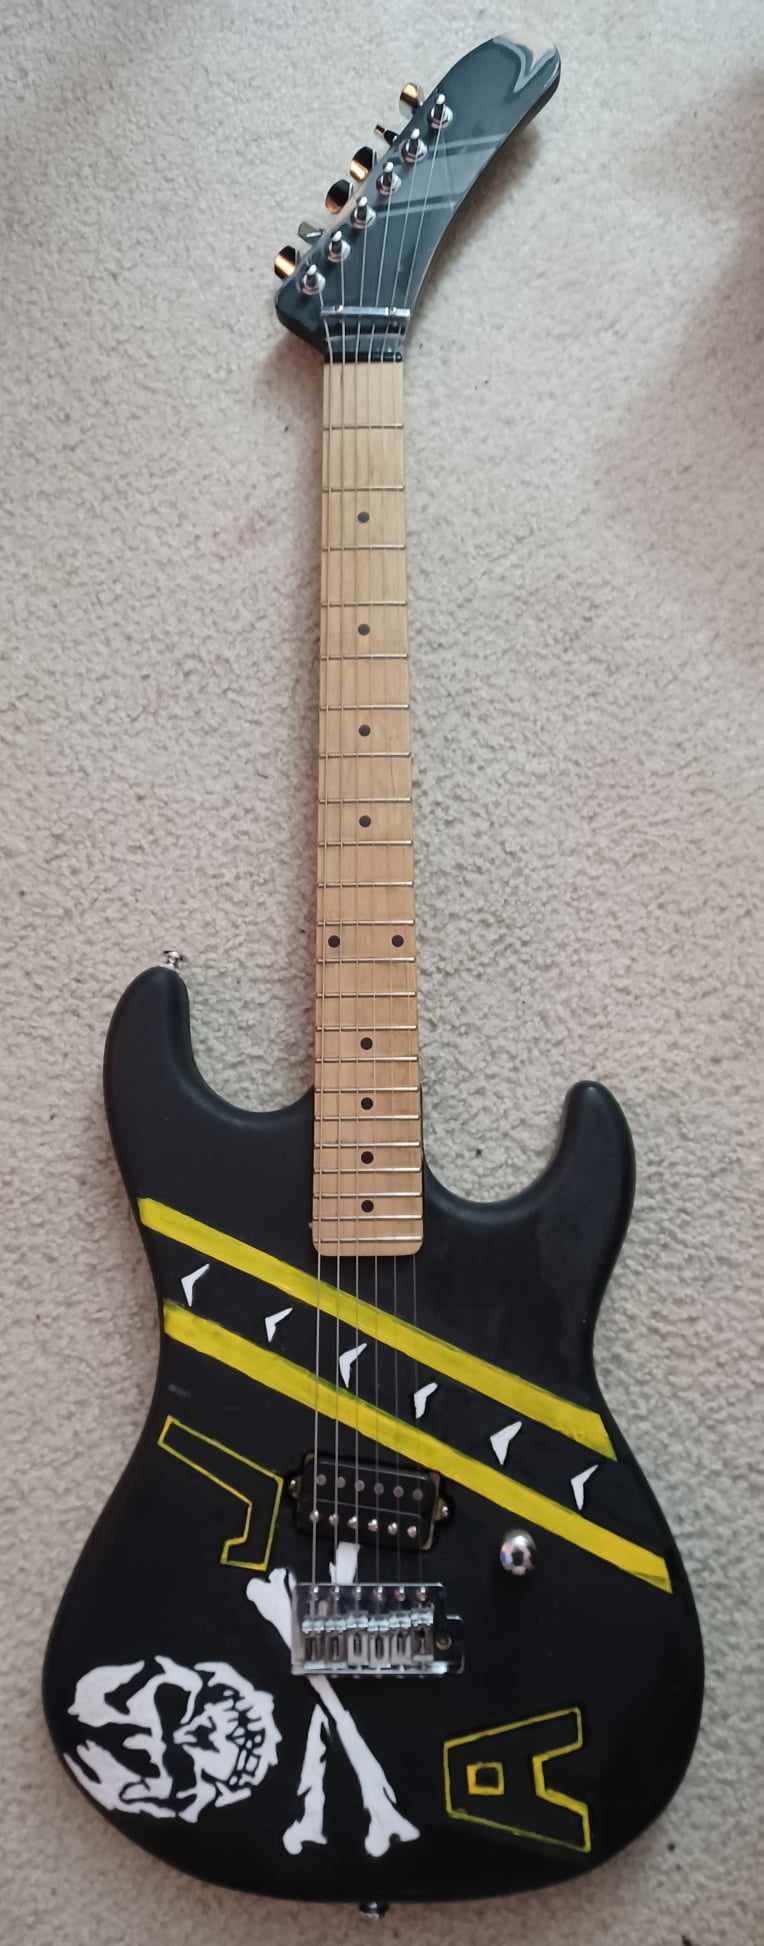
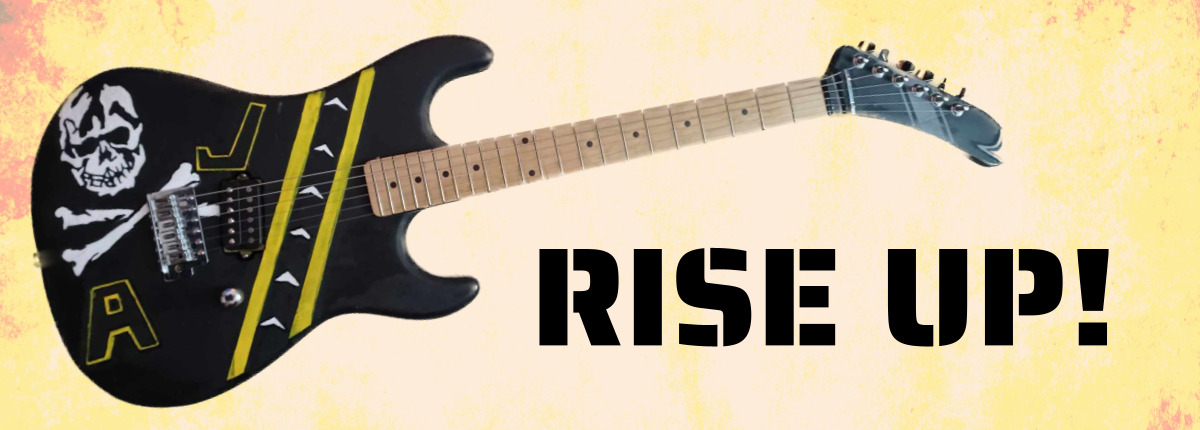
This was a real fun one. Import Kramer Baretta Special that I got in a trade. Mods were an ESP-style neck with banana headstock. This one has a brass block, Wilkinson EZ-Lok tuners and a Dimarzio Airzone pickup. It’s a beast. EVH tones for days. The paint job was done by hand in acrylics by my daughter, a tribute to the US Navy Jolly Rogers Squadron with their distinctive Skull and Crossbones insignia.
Buying budget, used, or used budget guitars, is always a crap shoot. You have to be somewhat knowledgeable and careful that what you’re buying is not merely firewood.
I typically find decent budget guitars in pawnshops. They are my favorite places to go, and most will let you try the guitar and check it out before you buy. Second might be Facebook marketplace from local sellers sacrificing gear. There are also some good local guitar buyer/seller Facebook groups in my area that I belong to. And lastly, there’s always Amazon if I want to buy a new decent budget guitar from the influx of new budget makers today. There are definitely tons of budget guitars from a wide variety of places on the market.
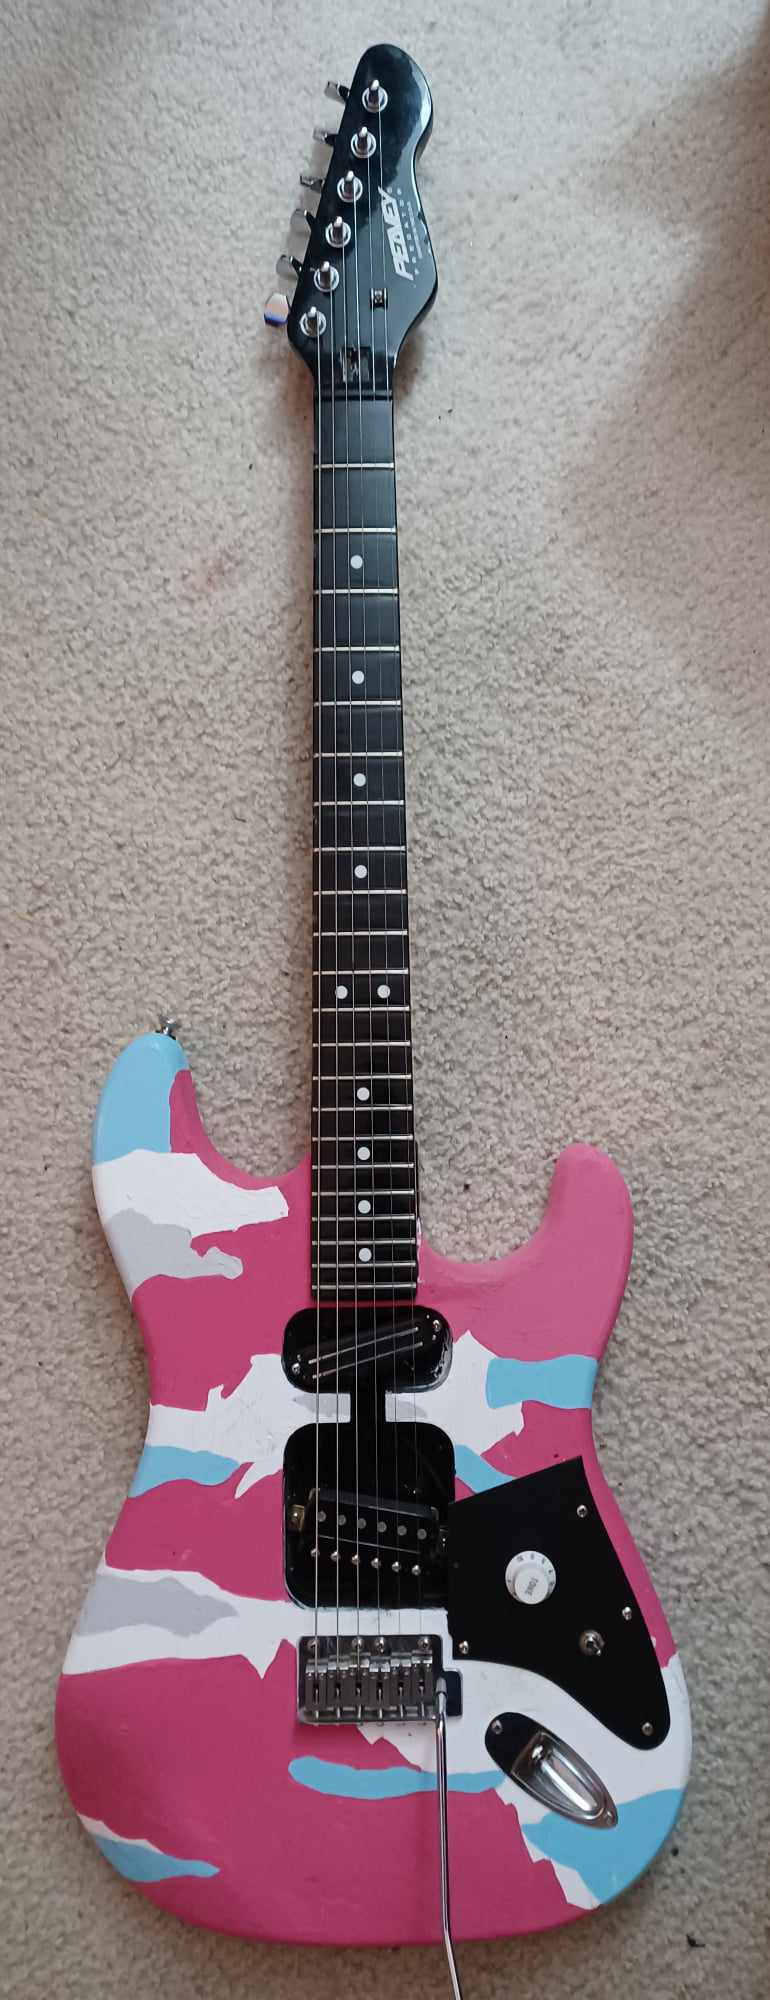
80’s USA Peavey Predator. Another pawn shop find. I’ve always wanted a Frankenstrat similar to EVH so I made my own. This guitar was originally a black and white Strat. Only the neck and body are stock. Epiphone hot bridge humbucker and an Artec rail in the neck. Steel block, Wilkinson EZ-Lok tuners, hand cut pickguard, wiring is a 3- way on/on/on mini toggle for bridge, neck, and both pickups in the center position. Paint job by my very talented daughter again, acrylics by hand done in a George Lynch 80’s Kamikaze camo pattern. Pink of course. Love it!
Divide and Conquer: Asses the Mess
Ok, so you’ve acquired the used guitar, now what? The very first thing that I do is obviously to assess the general condition and playability of the guitar, focusing especially on the most important parts, the playing surface, nut and bridge, paying special attention to the frets and condition of the neck. I generally don’t really care what the body looks like, but if the neck is a mess and needs work I pass on it.
The Goal: To use the guitar as a template for upgrades and “hot rodding”, not for luthiery which is outside the scope of this article.
Testing! Testing!
Next I check the electronics, if they’re working then it’s a plus and we have a winner! But this is never a guarantee. If not, don’t fret (pun intended) often, this is an easy fix, parts are easily obtainable via online vendors, or rescued from other projects.
Rust is a Bust: Cleanup Your Mess
Now it’s time to cut those old cruddy strings off and clean the guitar with some polish. Companies like Dunlop and Music Nomad make several great products for this. If you have a rosewood board, you need to re-hydrate and polish it with straight lemon oil – never use pledge or anything meant for furniture. Use nothing but a little guitar polish on maple boards.
Next, I polish the frets. I used fret guards and “0000” steel wool to rejuvenate back to their former glory, just make sure to cover the pickup magnets with some masking tape to keep the steel wool filings from getting everywhere. The guitar at this point is pretty prepped for any other work that may be needed before restringing and setup, which I always do last.
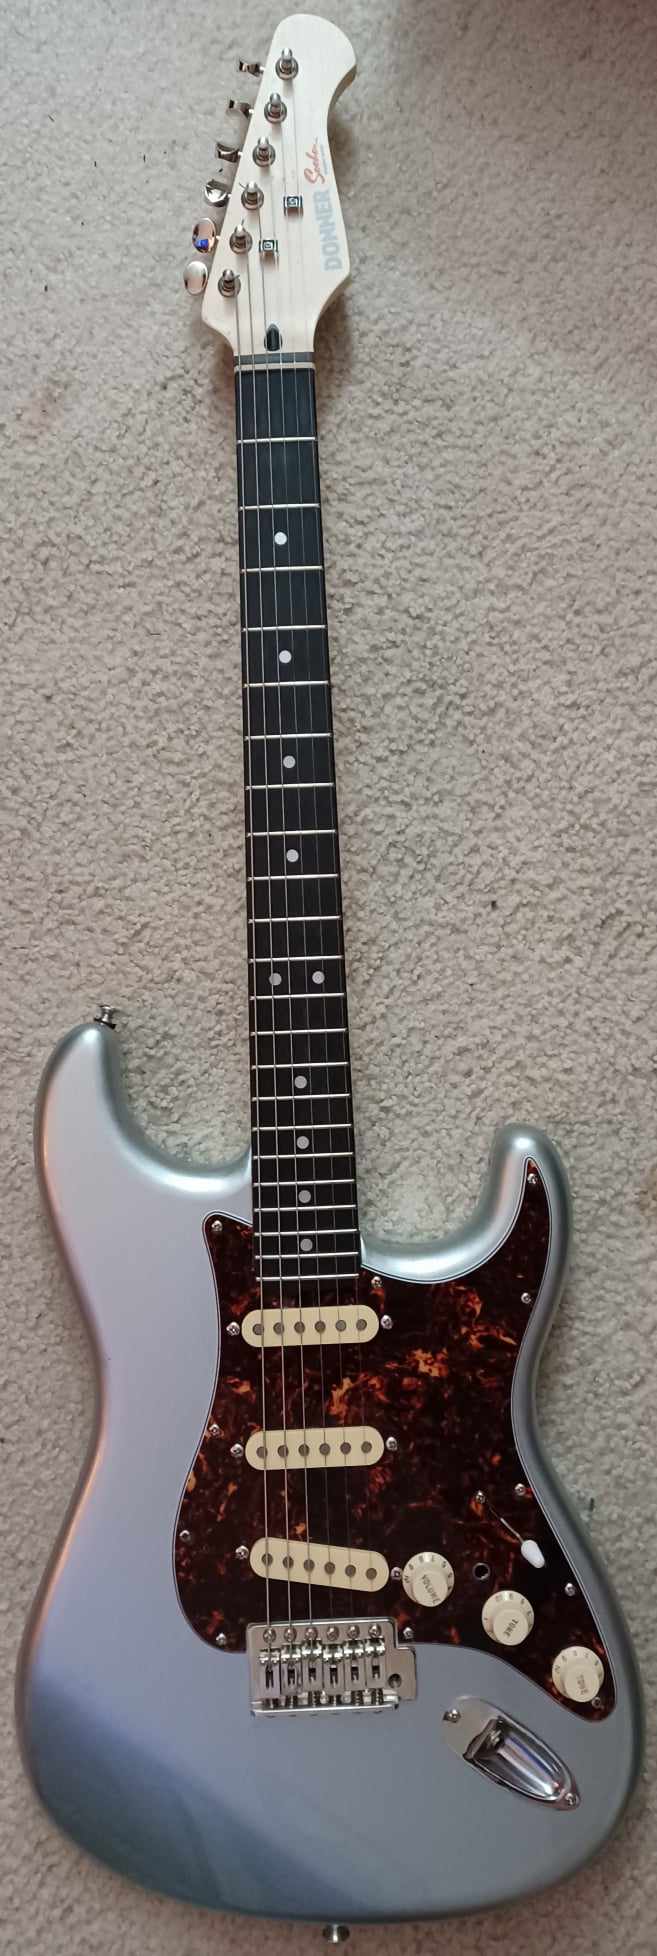
Donner DST-152, this was a Christmas present from the wife and kids and part of a budget Strat pack of theirs. Donner guitars are pretty good players and great for mods. This one plays great but the electronics were bad and lackluster. I wired up a pickguard and loaded it with hot vintage style-pickups I pulled from another project and wired them to a master volume, tone, and blend knob. The out of phase tones are great, and the guitar is a killer fun player now.
Electric Dreams : Wiring the Beast
This is where the real fun begins, now that you’ve cleaned, oiled, and polished your newly acquired ax. We’ve determined it to be worthy of our attention, so let’s rip out the old guts if needed and breathe some new life into it. This is not always a necessary step but it’s really exciting to hot rod at least the pickups from something lame or anemic into something that’s a real fire breather!
Luckily, choosing pickups and electronics these days have not only become easier, but cheaper as well. Buying a very decent pre-wired budget harness or pre-loaded pickguards is easy. I still do this today and get some really great results and tones out of my modded budget guitars.
Heavy Metals: Hardware
If there are any metal parts found deficient, they need to go. Critical parts like tuners and the bridge need to be replaced with new parts that will be stable and help the guitar stay in tune. There are tons of online vendors that are worthy of a look for decent tuners and bridges. I typically opt for electronics, tuners, and bridges from respected manufactures like Wilkinson. This is still a great budget-friendly option.
The End is Here: Putting it All Together
Summary
We purchased a budget guitar, we cleaned, oiled and polished it up, took it apart and replaced parts and electronics where necessary. Then we reassembled the guitar, strung it up, tuned it, gave the guitar a setup, and set the relief and intonation. Finally, we can enjoy the fruits of our labor.
If all goes well, crank up the new hot rod guitar through your favorite amp and pedal and enjoy. You’ve reached a rewarding end to what most of the time ends up being a fairly straightforward and easy process. I can almost guarantee you’ll be looking for your next guitar project immediately after.
Play loud! See you all in the next article.
Miguel
Buy Us a Coffee!
https://buymeacoffee.com/humbuckersoup