By Ed Malaker
Posted 01/04/2020
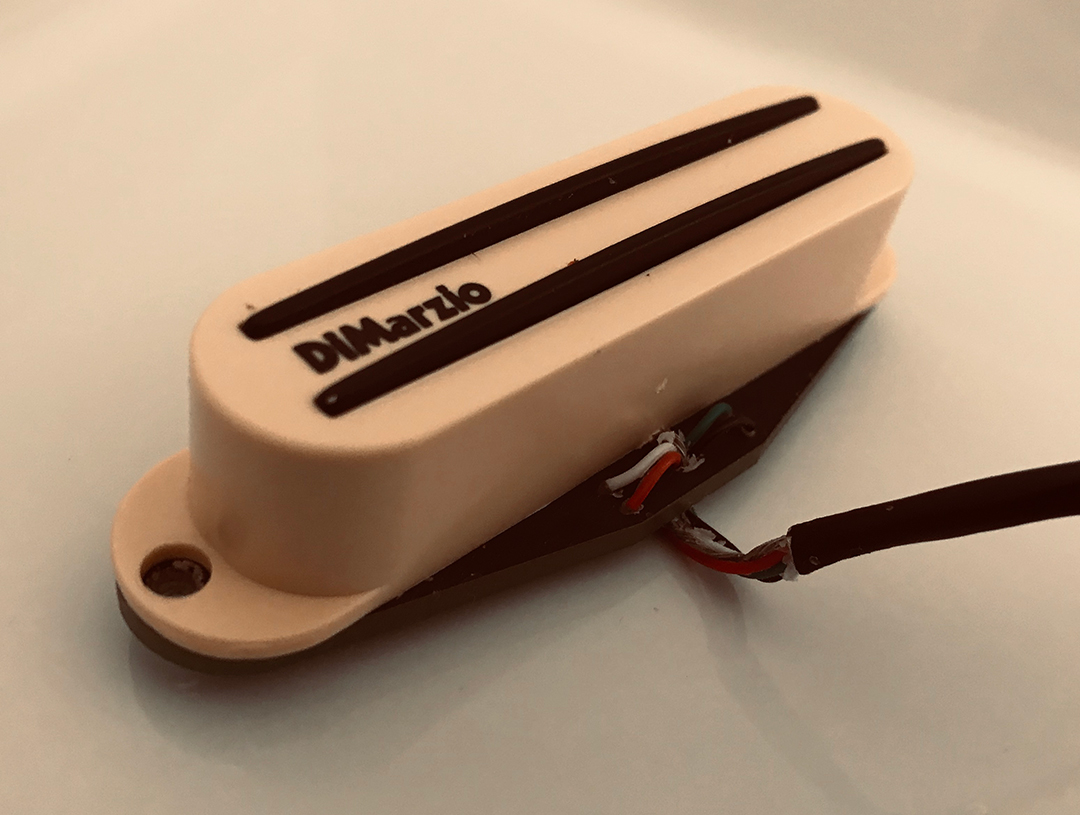
In this article, we’ll talk about how to wire a DiMarzio Fast Track 2 into your guitar. The DiMarzio Fast Track 2 is a mini-humbucker that uses two blades instead of steel posts in its design. The Fast Track 2 has a much higher output gain than the Fast Track 1. It’s an excellent choice for the bridge position, and it’s said to sound similar to DiMarzio’s top-rated Super Distortion pickup.
The mini-humbucker design allows the pickup to fit into a single coil space, and is a perfect choice for Strat-style guitars that use three single-coil pickups. The mini-humbucker can achieve the same high gain, warmer tones, and noise-canceling properties that full-size humbuckers deliver and can be coil-split or wired in parallel. The Fast Track 2 is installed using four colored conductor wires and a bare wire, which is most often just a wire without a cover, but it can also be a braided wire on occasion.
The Wires
We call the four colored wires “conductor,” or “lead” wires, because each of them carries electricity to and from the two coils in the humbucker. Each coil needs to have one Positive and one Negative wire, and these correspond to the beginning and end of each coil. The colors that go to each is what we call the pickup’s “Wiring Code,” and we can use this code to wire our pickups in many different ways.
There is no standard Wiring Code in place. They vary between manufacturers, and it’s the reason there are so many guides, such as this one, showing you how to install every brand of pickup. If you need it, we have several articles on our website on how to test an unknown pickup to learn its wiring code.
The Bare wire is the pickup Shield. The Shield’s primary purpose is to trap radio frequencies and other interferences as they come into contact with your pickup’s casing, then shuttle them to ground before they penetrate the coils, where they can cause hissing and degrade your signal. The Shield and the pickup coils are not connected, but the Shield does get soldered to Ground and is often attached to one of the pickup’s Negative wires.
The Wiring Code
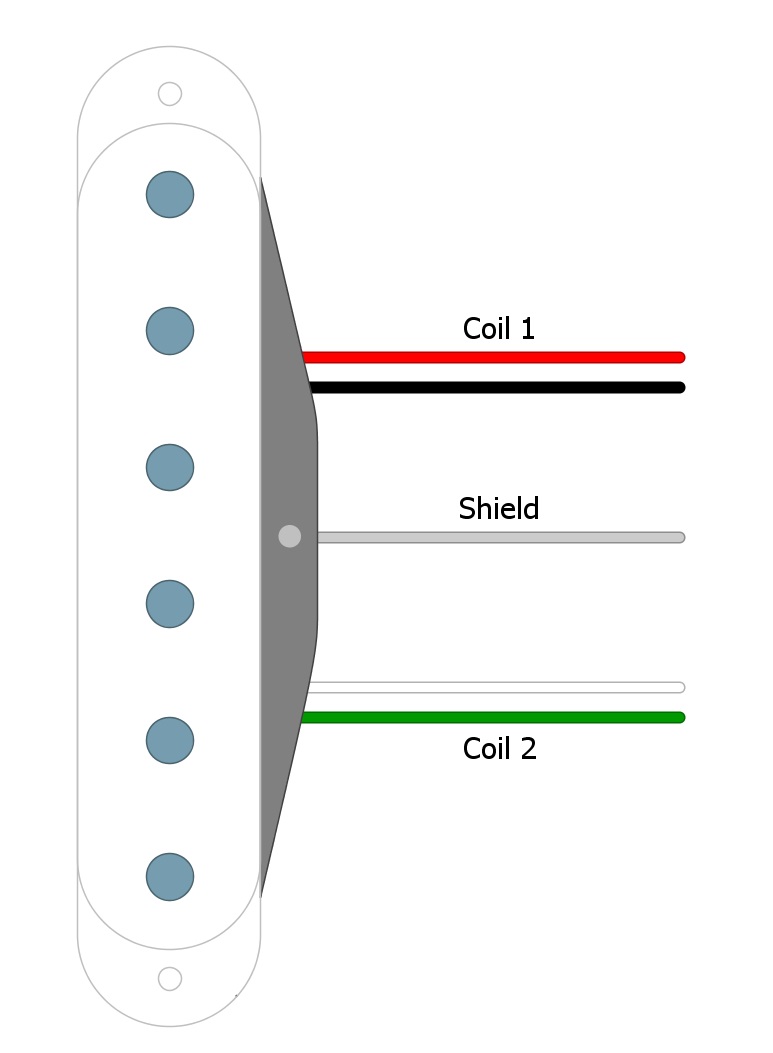
In the Fast Track 2, one coil uses White for Positive and Green for Negative, while the other uses Red for Positive and Black for Negative (Fig 1).
Fig 1
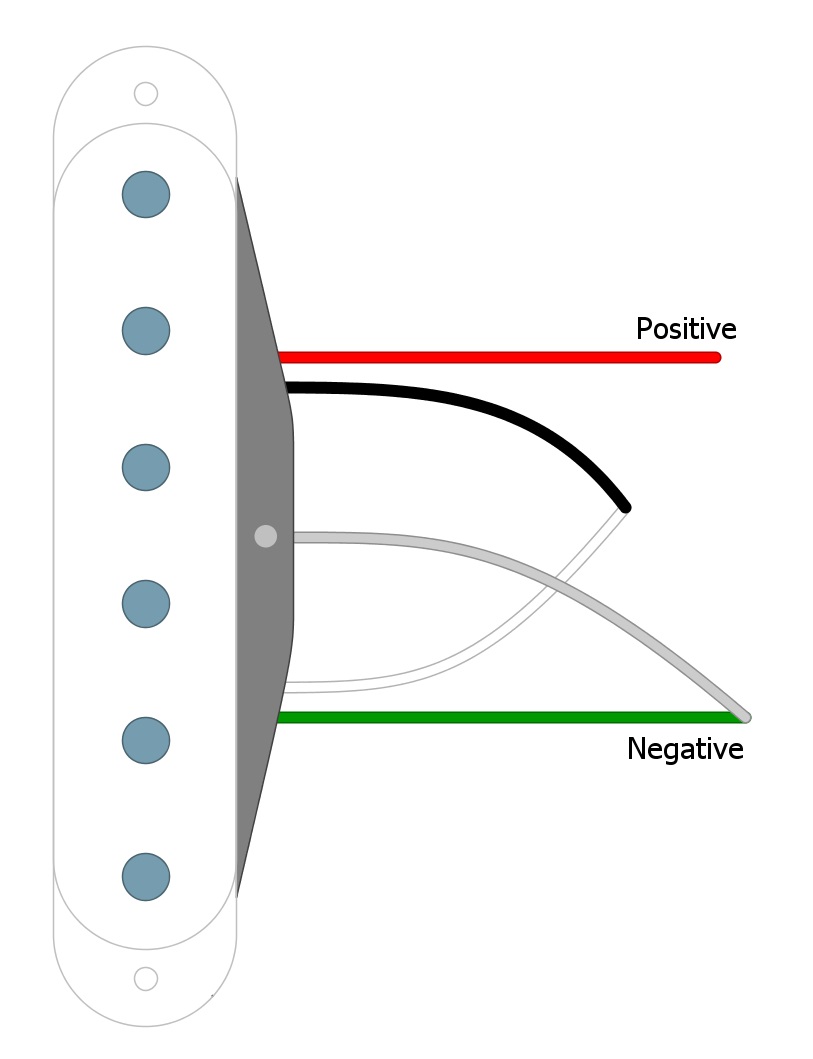
Humbucker coils are Series wired, which means that the end of the first coil is connected to the beginning of the second, to create one long continuous path for our signal to travel. Combining the coils in Series makes the humbucker almost twice as loud as a single-coil pickup, and it also helps give the humbucker its warmer tones due to phase cancellation caused by two coils being so close to each other.
Installation
We begin wiring by considering the Red wire to be the primary Hot and also the beginning of the first coil. The end of the first coil is the Black wire, so we solder that to the White wire, which is the beginning of the second coil. The end of the second coil is Green, and that is our primary Ground wire. It’s standard practice to solder the Green and Bare wires together (Fig 2).
Fig 2
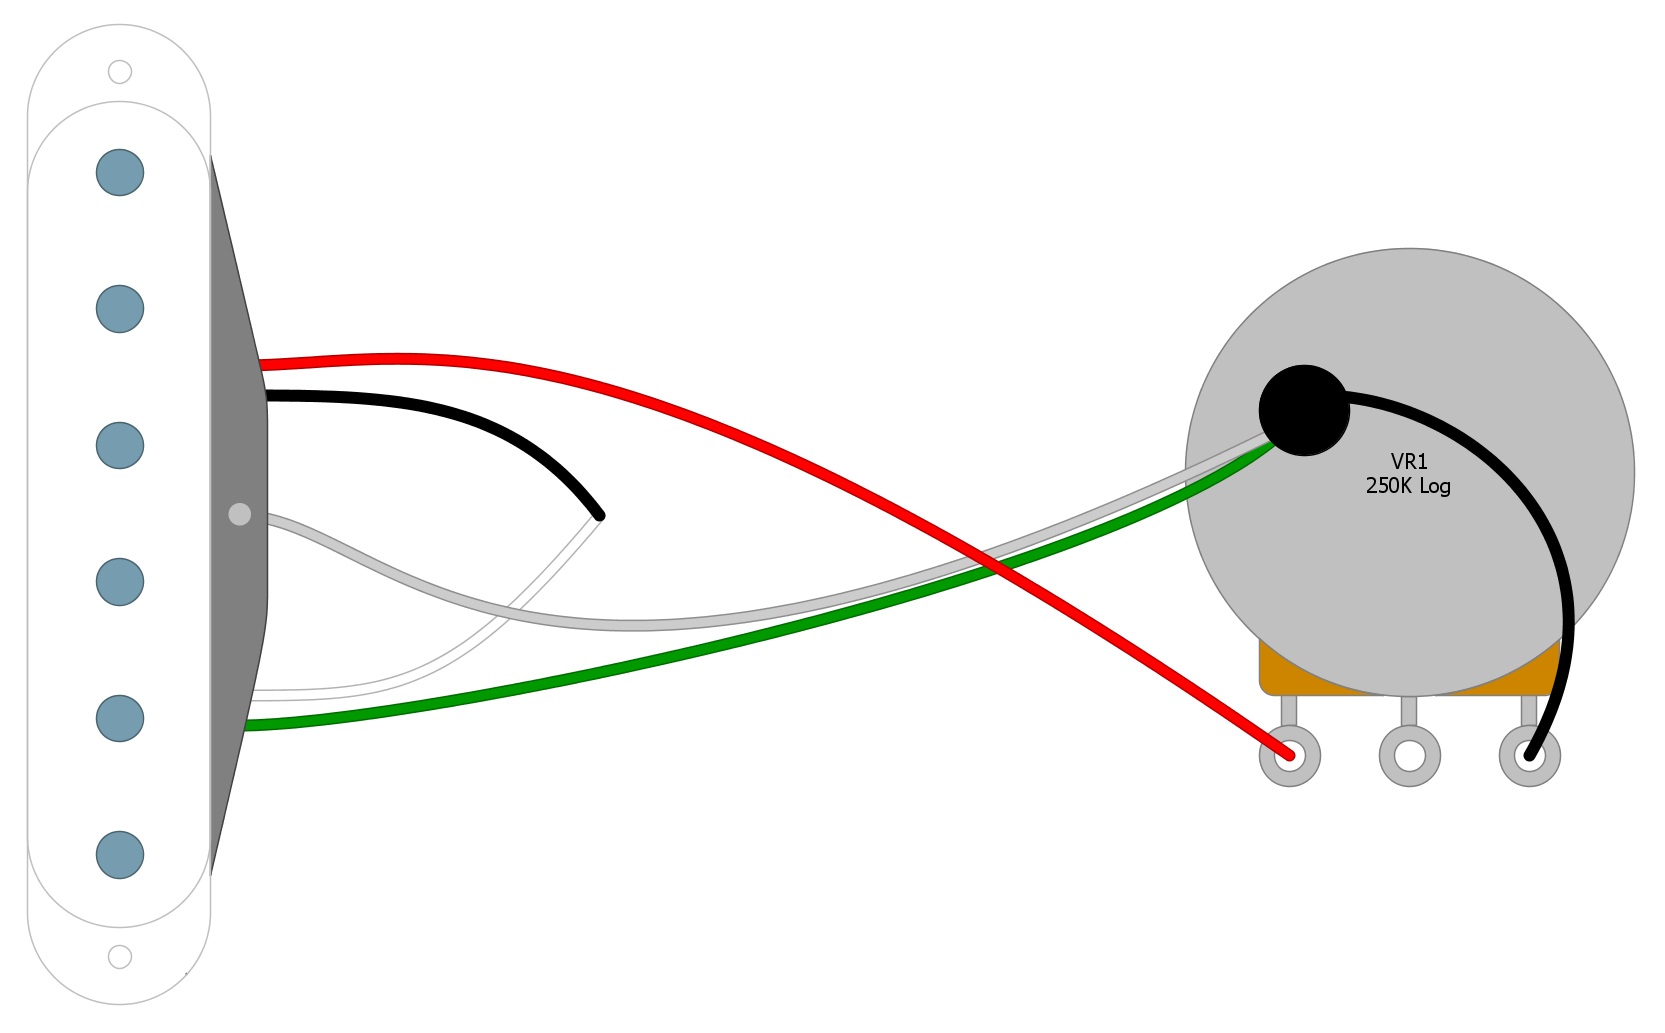
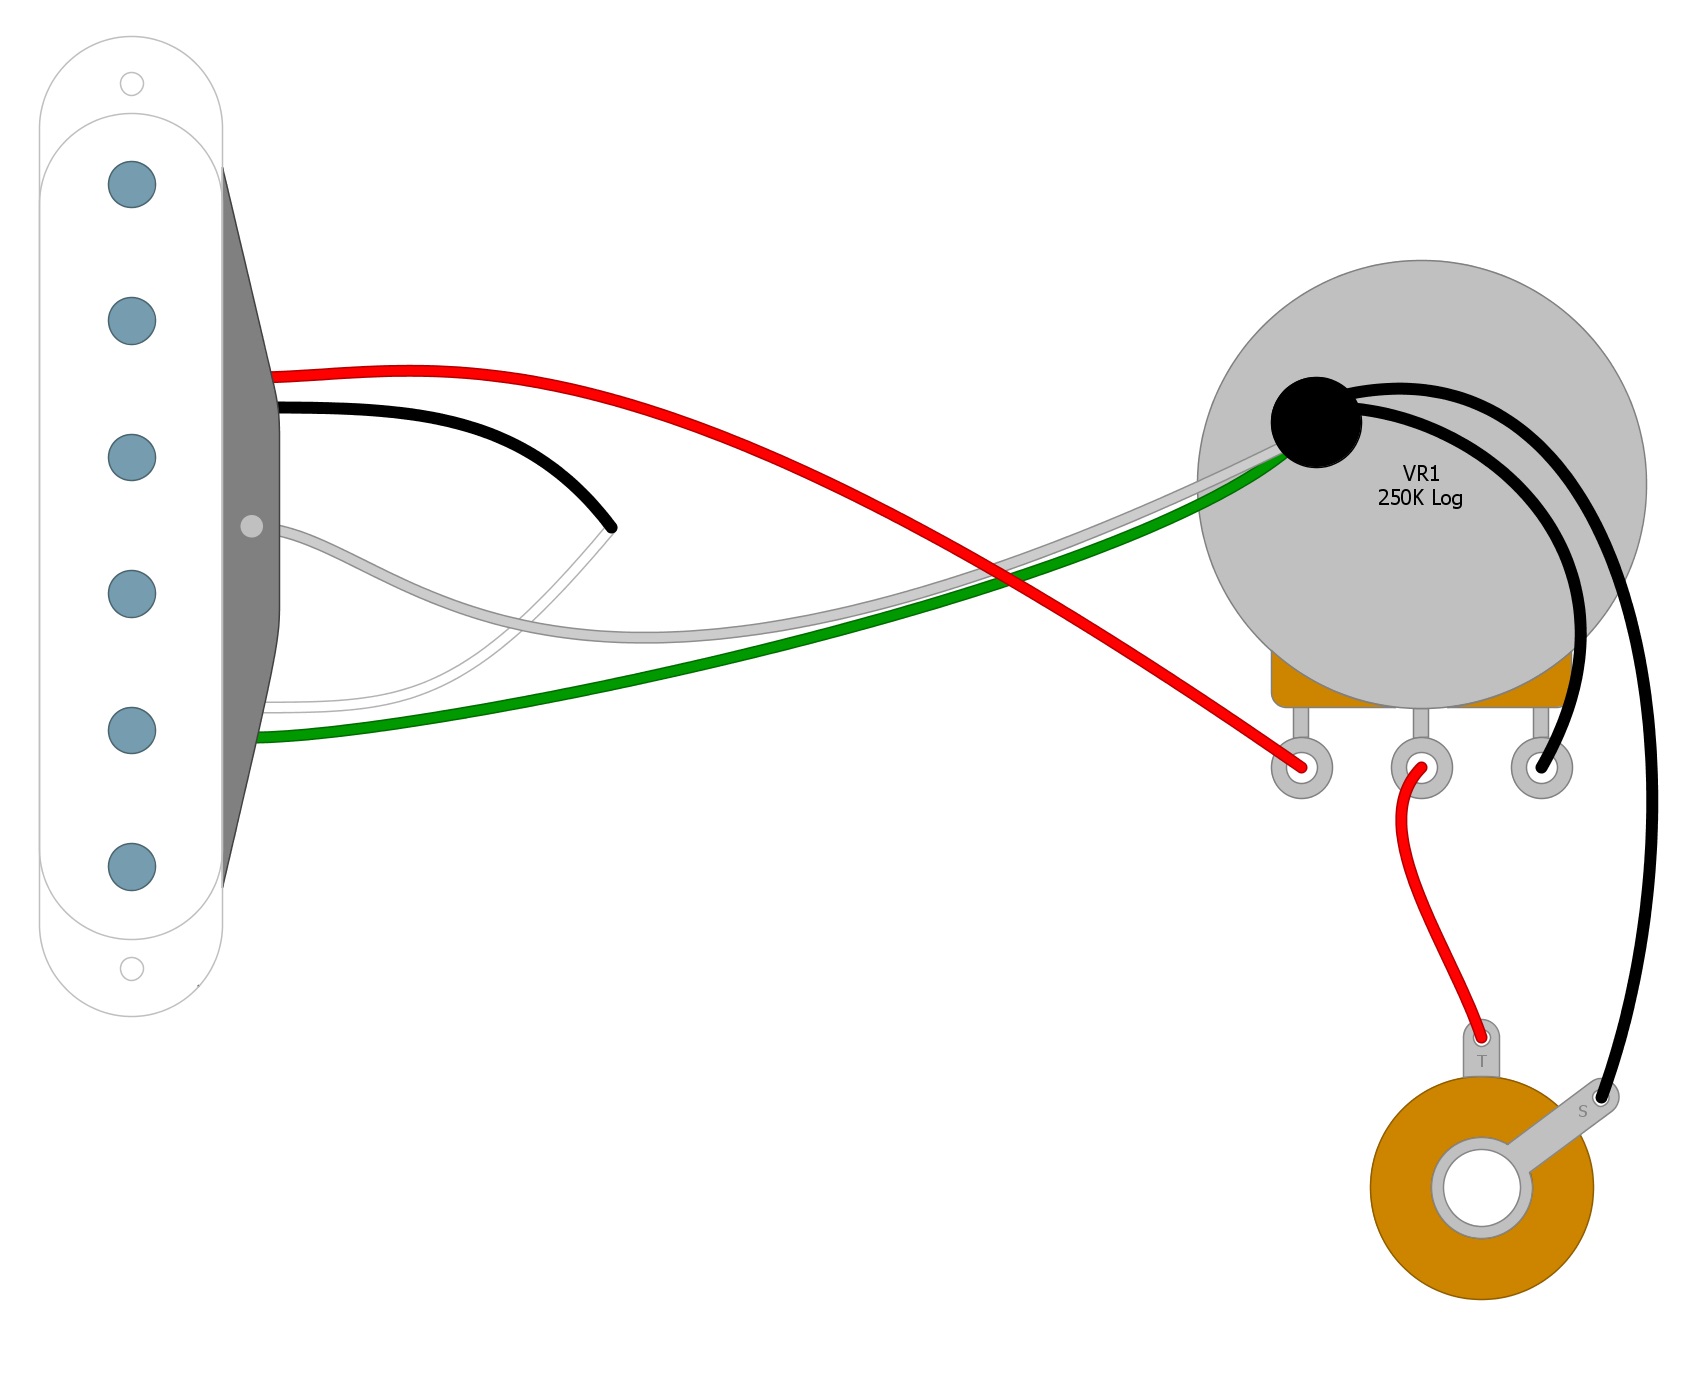
Now we are left with the Positive (Red) and Negative (Green) wires that we will need to install into our pickup. Solder the Green and the Bare wires to the back of the Volume pot (Fig 3).
Fig 3

Next, solder the Red Wire to the first tab on the Volume control. Then solder the third tab to the back of the Volume pot, either with a short wire or by physically bending it until it contacts the casing of the potentiometer and can be soldered in place (Fig 4).
Fig 4
Next, solder a wire from the center tab of the Volume pot to the Output jack. Then, solder a second wire from the Output jack to the back of the Volume control (Fig 5).
Fig 5
Once these final wires are in place, your project is complete!
Summary
This step-by-step guide presents the most common way to wire a humbucker pickup. Many modifications can be done using these four conductor wires, which can coax many new tones from your guitar.
Many other modifications, such as adding a toggle switch or tone control, are just components added on to this circuit. So, take a look around at our wiring diagrams for the many other ways that you can wire your humbucker and open up your tonal possibilities.
If you’ve found this guide helpful, please feel free to share on Facebook and Twitter. For more articles on guitar electronics, visit humbuckersoup.com.