By Ed Malaker
Posted 07/20/2018
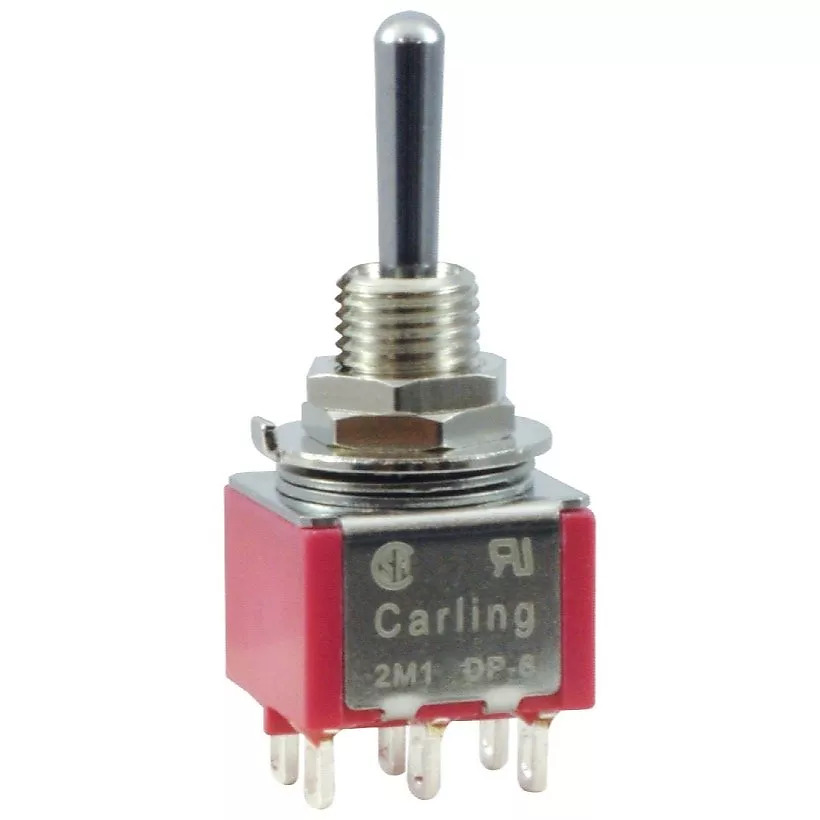
Why a Mini Toggle Switch?
A humbucker pickup contains two coils, and with a simple modification, we can use a switch to “shut off” one of the coils, causing the pickup to sound and act like a single coil. The choice to use a mini-toggle switch is purely aesthetic; you can use absolutely any kind of switch that you want, but you’ll need to modify your guitar to hold it. A mini-toggle requires drilling a hole less than 1/4 inch, and once in place, it takes up very little space.
If you have a guitar that requires you to drill a hole through the wood and into the electronics compartment to add a toggle switch, then we recommend taking it to a pro, unless you really know what you are doing. If you have a Stratocaster or other type of guitar with large pickguards that give you easy access to the electronics, then you can probably drill a small hole into the pickguard and add the toggle switch yourself, if you’re very careful and have the right tools.
 You might also like this HumbuckerSoup article: Coil-Splitting a Humbucker Pickup with a Push-Pull Pot
Sample Guitar
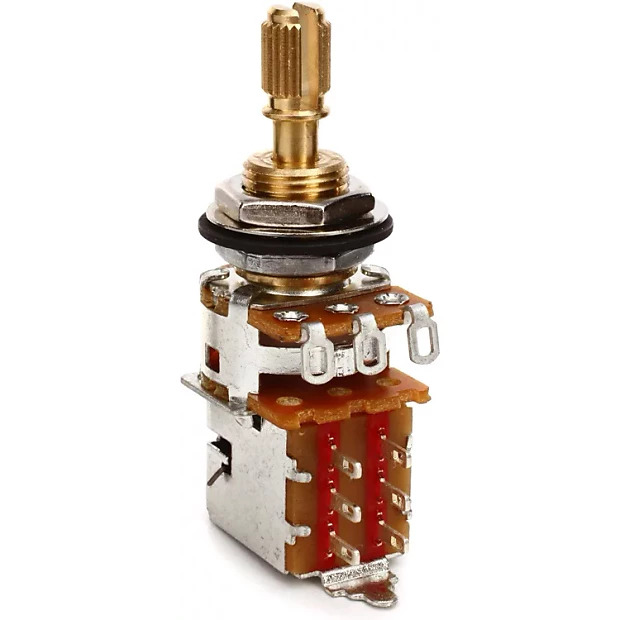
For this demonstration, the guitar has one four-wire humbucker, one volume control, one toggle switch, and an output jack. This article will be very similar to our post on how to wire a humbucker pickup using a push/pull volume control. The wiring is exactly the same for this example, but this time we’ll be using two separate components instead of the one push/pull pot to do the work of splitting the pickup. I prefer this method because if one of the components breaks we could just change it. With the push/pull pot, if the control gets dirty and starts creating static, or the push/pull part stops functioning, you have to change the whole push/pull pot. But the downside of using a toggle switch, of course, is that it almost always requires some type of modification to your guitar.
Wiring the Coil Split
We are going to wire the coil split using a Double Pole Double Throw (DPDT) mini toggle switch, but you can also use a Single Pole Single Throw (SPST) toggle switch to do this job if you prefer. We use a DPDT because the mini-toggle switch is much more common and versatile.
Poles and Throws
A Single Pole Single Throw switch will have two lugs on it (Example 1). With this switch, Down is “no connection” or Off, up is the “Throw” and means connection, or On. In Example 1 the pickup is On in the up position and Off in the down position.
Example 1

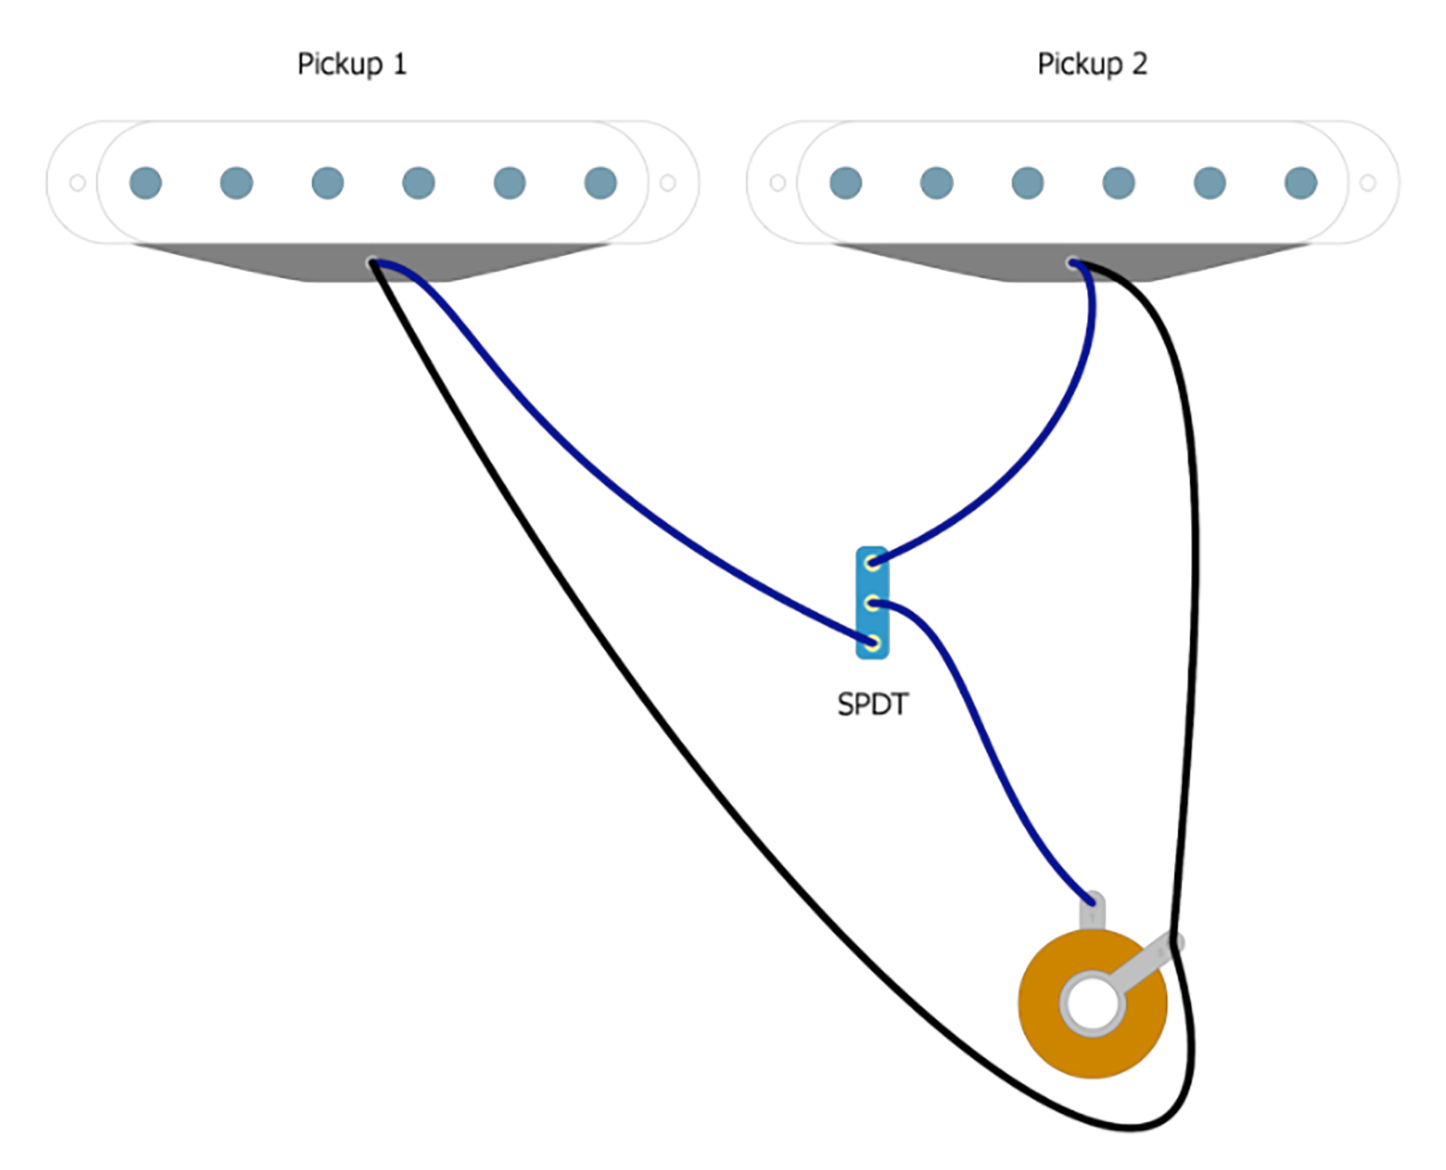
A Single Pole Double Throw switch will have three lugs on it (Example 2). It has two throws because Up can complete a connection and Down can also complete a connection. In Example 2, if the switch is in the Up position, Pickup 1 will be On and Pickup 2 will be Off. In the Down position Pickup 1 will be Off and Pickup 2 will be On. If you leave the top lug empty and only use the bottom two lugs, then this switch would act just like an SPST, and you can use an SPDT any time you need an SPST.
Example 2
A Double Pole Double Throw switch is simply two Single Pole Double Throw switches side by side in the same unit (Example 3), and it can do anything the other switches can do. In Example 3, if the switch is in the Up position, Pickups 1 and 3 will be On and Pickups 2 and 4 will be Off. In the Down position, Pickups 1 and 3 will be Off and Pickups 2 and 4 will be On.
Example 3

If your guitar is already properly wired up with a humbucker that you want to split, then once you add the toggle switch, skip to Step 5 and complete the final wiring.
You might also like this HumbuckerSoup article: Mini Toggle Switch FAQ – Coil-Split a Humbucker Pickup
Steps
Step 1 – Get the wires for each coil
The first step is figuring out the wiring code for your humbucker pickup. It should have four colored wires and a bare one. You will need a voltmeter to measure ohms.
Clip one of the leads from the voltmeter to one of the colored wires. Check each of the three remaining colored wires with the other lead of the voltmeter until you get a reading. Once you have a reading, you’ll have two wires for one of the coils; the other two wires will be for the other coil.
Step 2 – Get the Positive and Negative of each coil
Set the voltmeter to volts. Connect the two leads from the voltmeter to the two wires of one of the coils. Tap a coil with a screwdriver or other piece of metal and look at the reading on the voltmeter; if you don’t get any reading, tap the other coil. It will be very quick, so you have to keep tapping the pickup with your screwdriver. If you get a positive reading, then the wire going to the positive lead on your voltmeter is the positive wire of that coil. If you get a negative reading, then the wire attached to the negative lead on the voltmeter is your negative wire for that coil. Write down which coil it is, and which wire is positive and which is negative. Do the same for the other coil.
Step 3
Now you will take the Negative from the North Coil and solder it to the Positive of the South Coil. You’ll take the Negative from the South Coil and solder it to the Bare Ground wire. The North Coil’s positive wire is now your positive wire and the South Coil’s Negative wire is your negative wire. (Fig 1)
Fig 1
<https://humbuckersoup.com/wp-content/uploads/2022/09/coil-splitting-humbucker-mini-toggle-switch-figure-4.jpg” target=”_blank” rel=”noopener noreferrer”>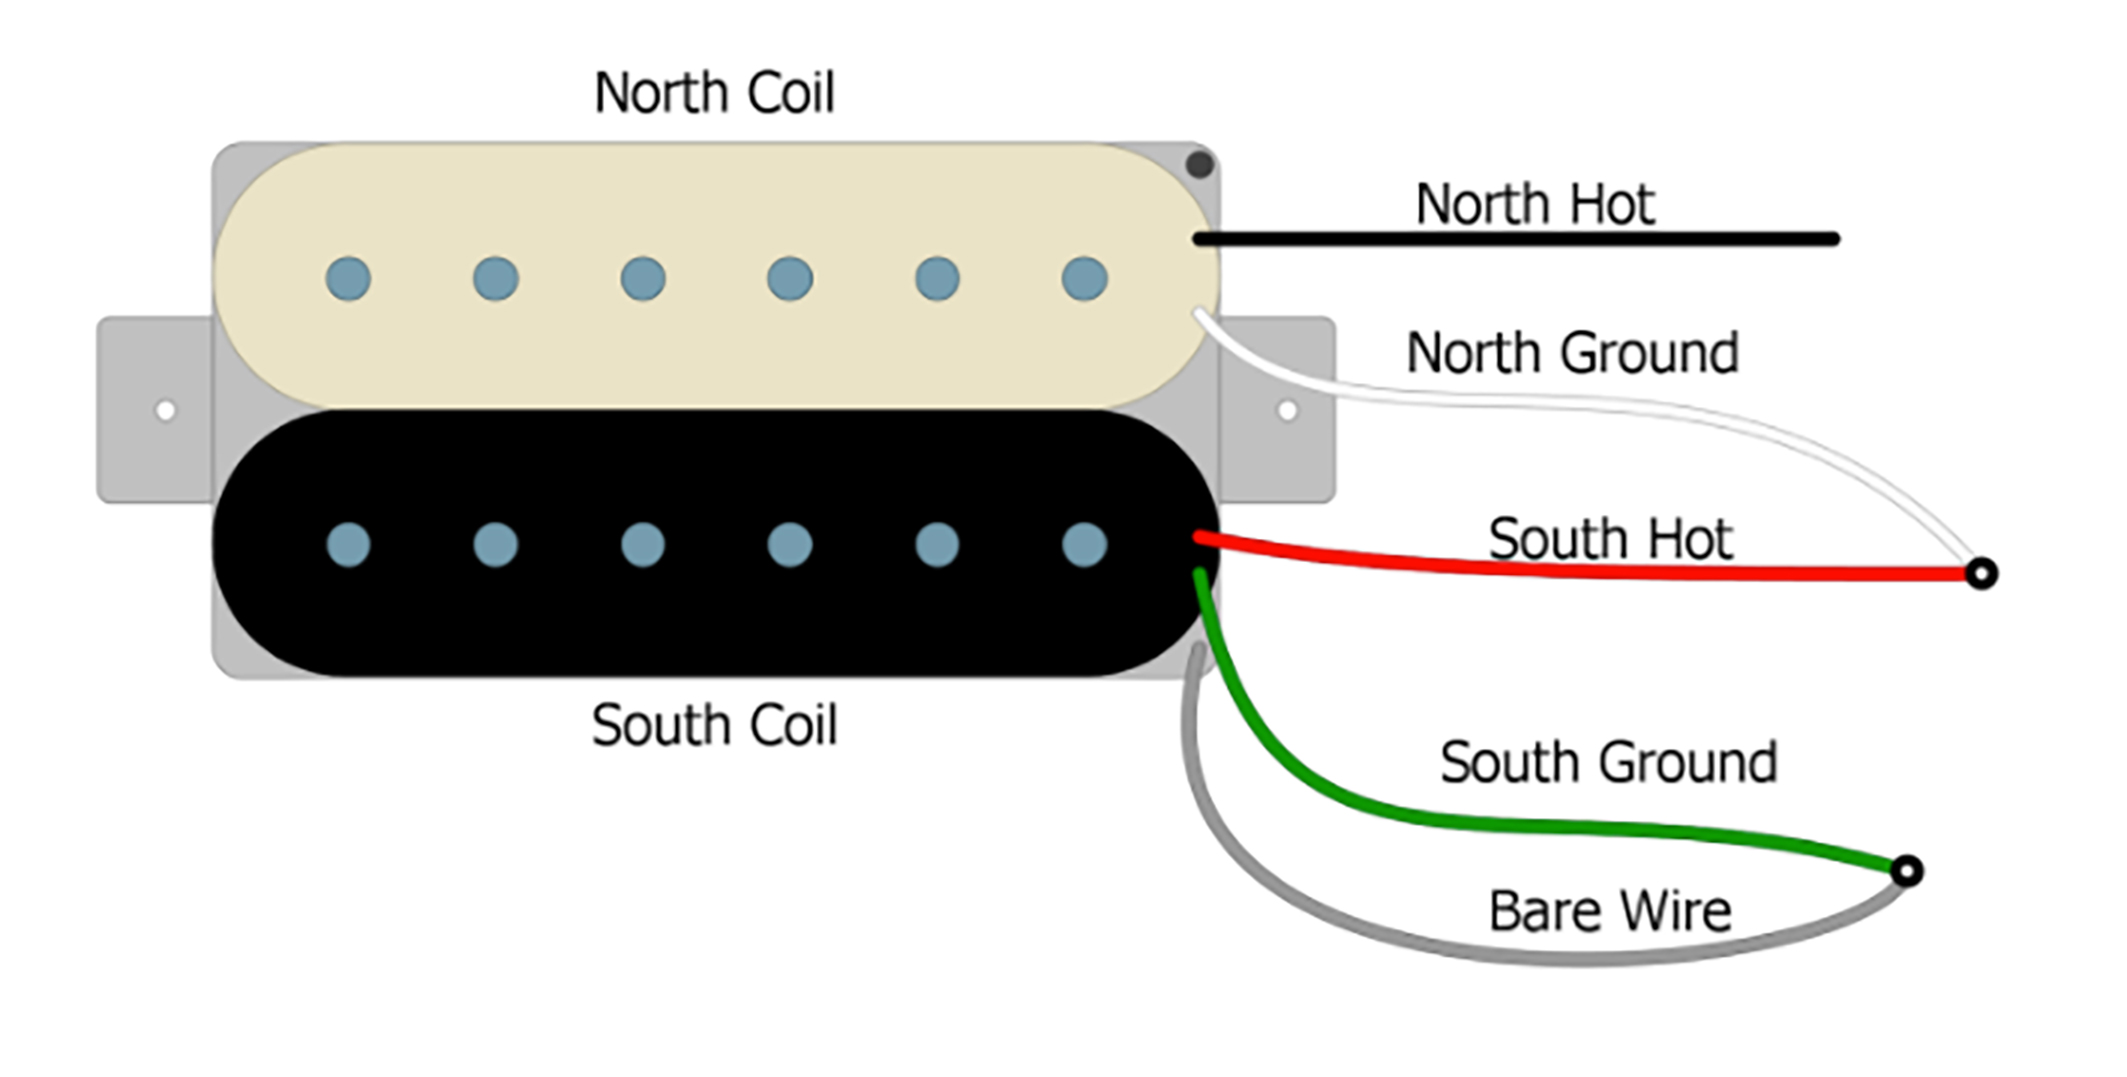
Step 4
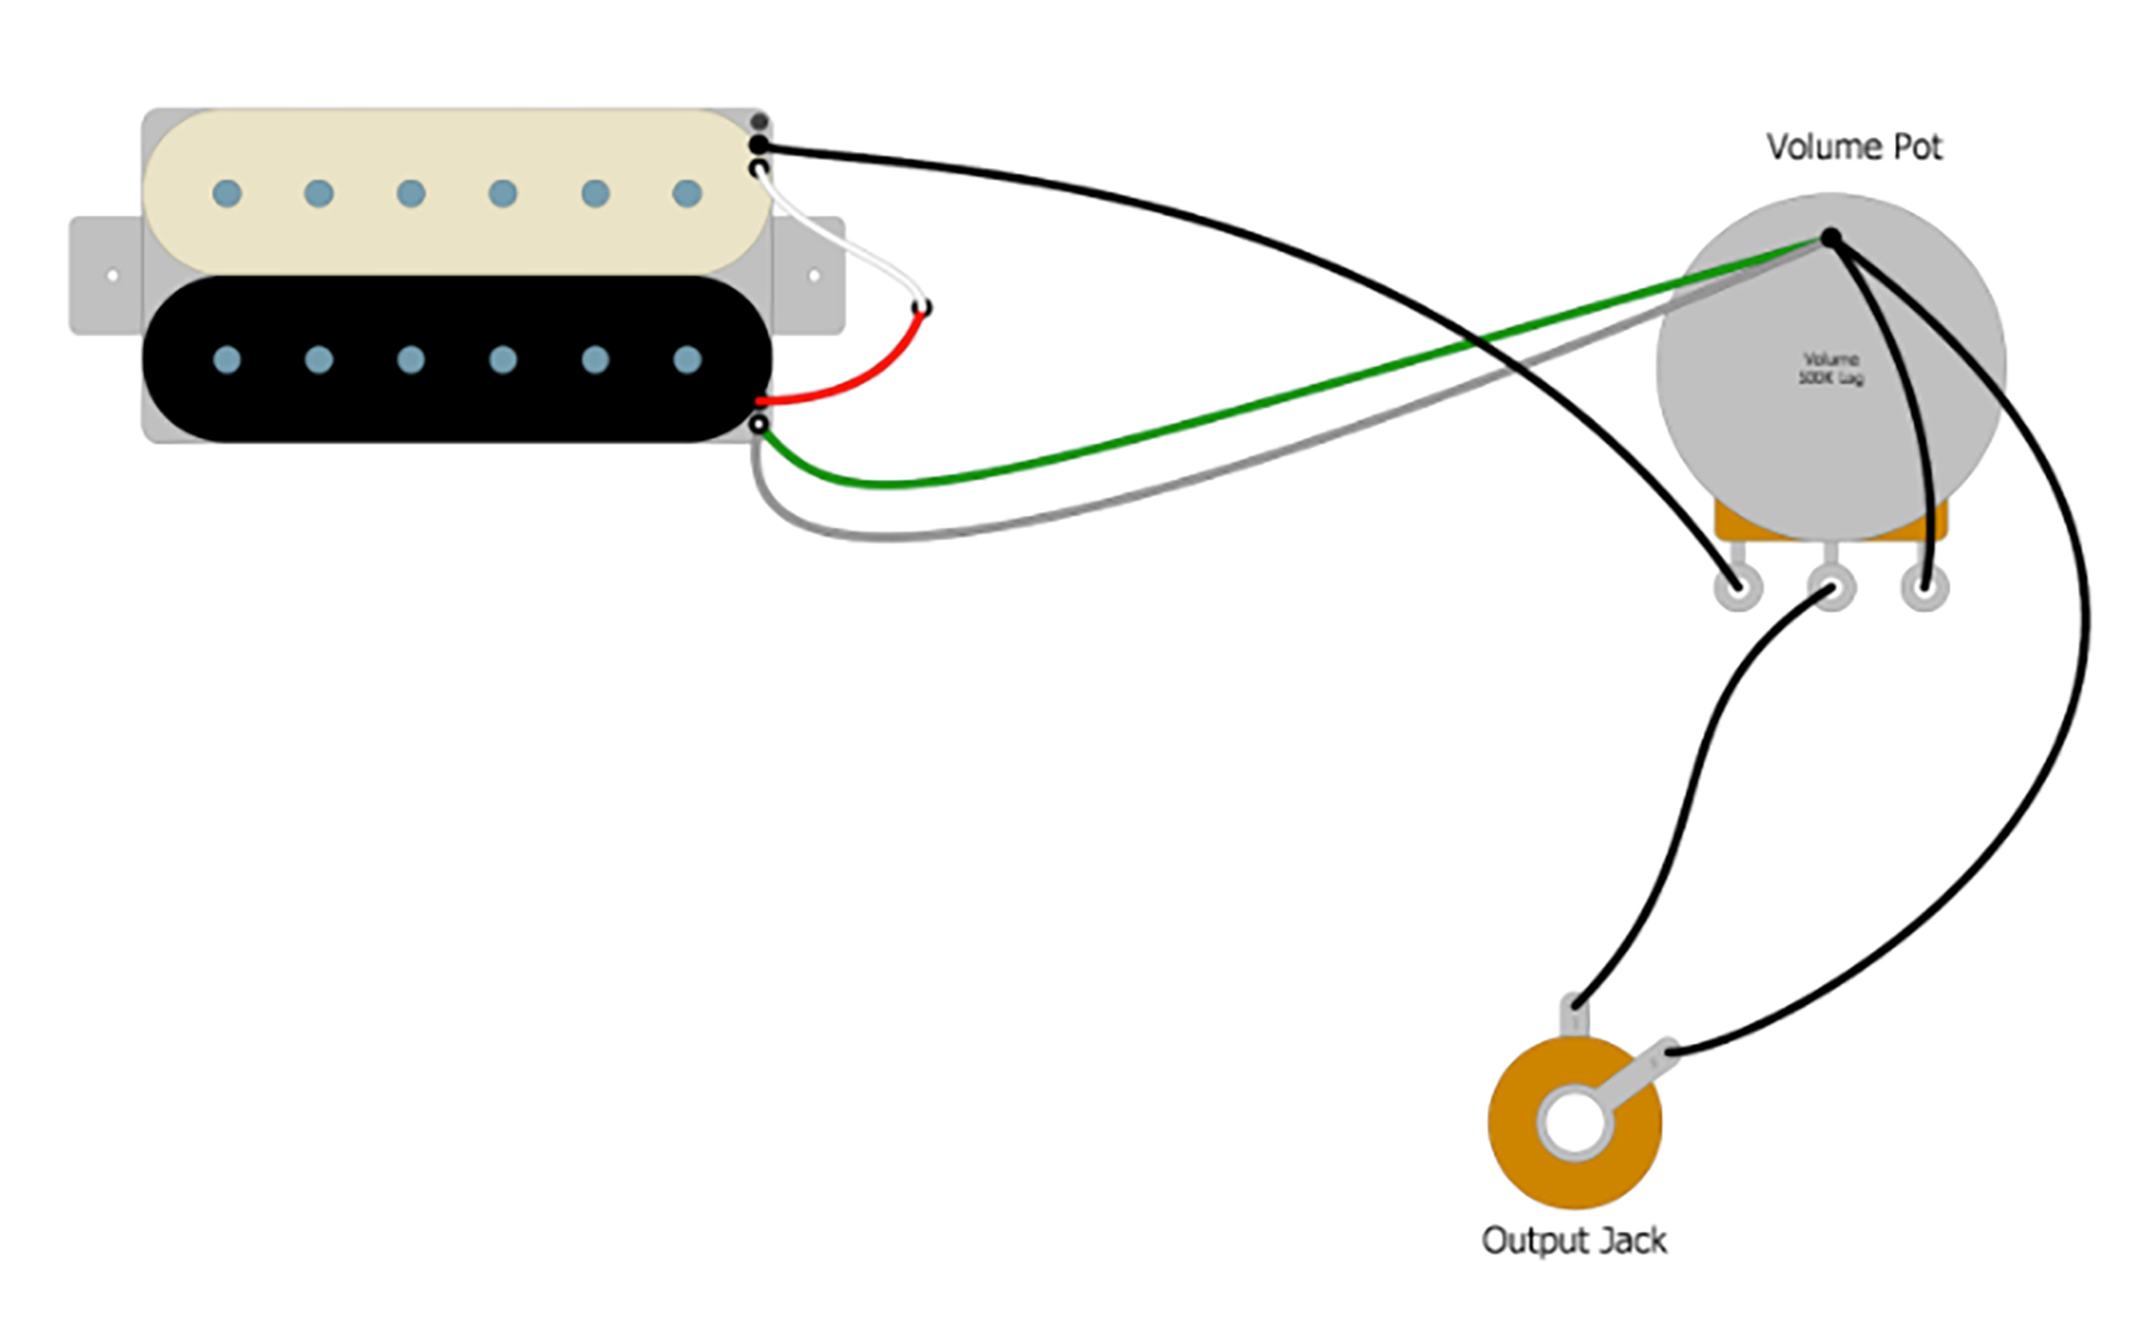
Solder your pickup’s Positive Wire to the first lug of the Volume Control and solder the pickup’s Ground wire to the back of the Volume pot. Now solder a wire from the third lug of the Volume Control to the back of the Volume Control pot.
Solder the wire from the Middle lug of the Volume Control to the Tip lug of the Output Jack. Now solder a wire from the Sleeve lug of the Output Jack to the back of the Volume pot. (Fig 2)
Fig 2
If you solder the main ground wire from the bridge or tremolo of the guitar to the back of the volume pot, it would be done in normal circumstances. Since we want to be able to split the humbucker, there’s one last step.
Step 5
If you hold the toggle switch upside down, you can see that there are two rows of lugs. We’ll label them Row A and B across, and number the lugs one, two, and three, from top to bottom.
Take those two pickup wires that were soldered together, the Negative of the North Coil and the Positive of the South Coil, and solder them to Row B, Lug 2. Now solder a wire from Row B, Lug 3 to the back of the Volume pot. (Fig 3)
Fig 3

Now, when you flip the toggle switch, the wires from the South Coils will be shorted to ground, leaving only the North Coil to produce sound.
So, there you have it: you’ve wired up your guitar so that you can split your humbuckers with a mini-toggle switch!


