
By Ed Malaker
Posted 07/05/2022
Ever wondered how to coil-split a Gibson 61 pickup? If so, this guide will help. Coil-splitting is when you use a switch to turn off one of the two coils in the humbucker, thereby creating a single-coil sound. This can help brighten your guitar tone when you need to cut through the mix.
For this article, we are going to assume you already have the Gibson 61 pickups installed in your guitar and just want to add the splitting modification. If you need help installing your Gibson 61s, please refer to our article titled Gibson 61 Wiring Diagram.
Required Materials
This modification requires a switch to turn the coil on and off. We recommend using a push-pull pot, but if you’re using a guitar with a lot of extra space in the pickguard, you can also use a mini-toggle switch. This Gibson 61 coil-splitting diagram can be used for either switch, as we’ll explain later.
These are the tools that you’ll need for the modification:
- Push-Pull pot or mini-toggle switch
- Soldering iron
- Solder
- Screwdriver
- Wire cutters
Getting Started
First, you’ll need to convert one of your tone controls into a push-pull pot tone control. If you’re going to go with a mini-toggle switch, you can skip this step and use this time to install the switch into your pickguard.
To convert your tone control to a push-pull, you’ll need to remove the existing tone control, install the push-pull, and wire it the same way.
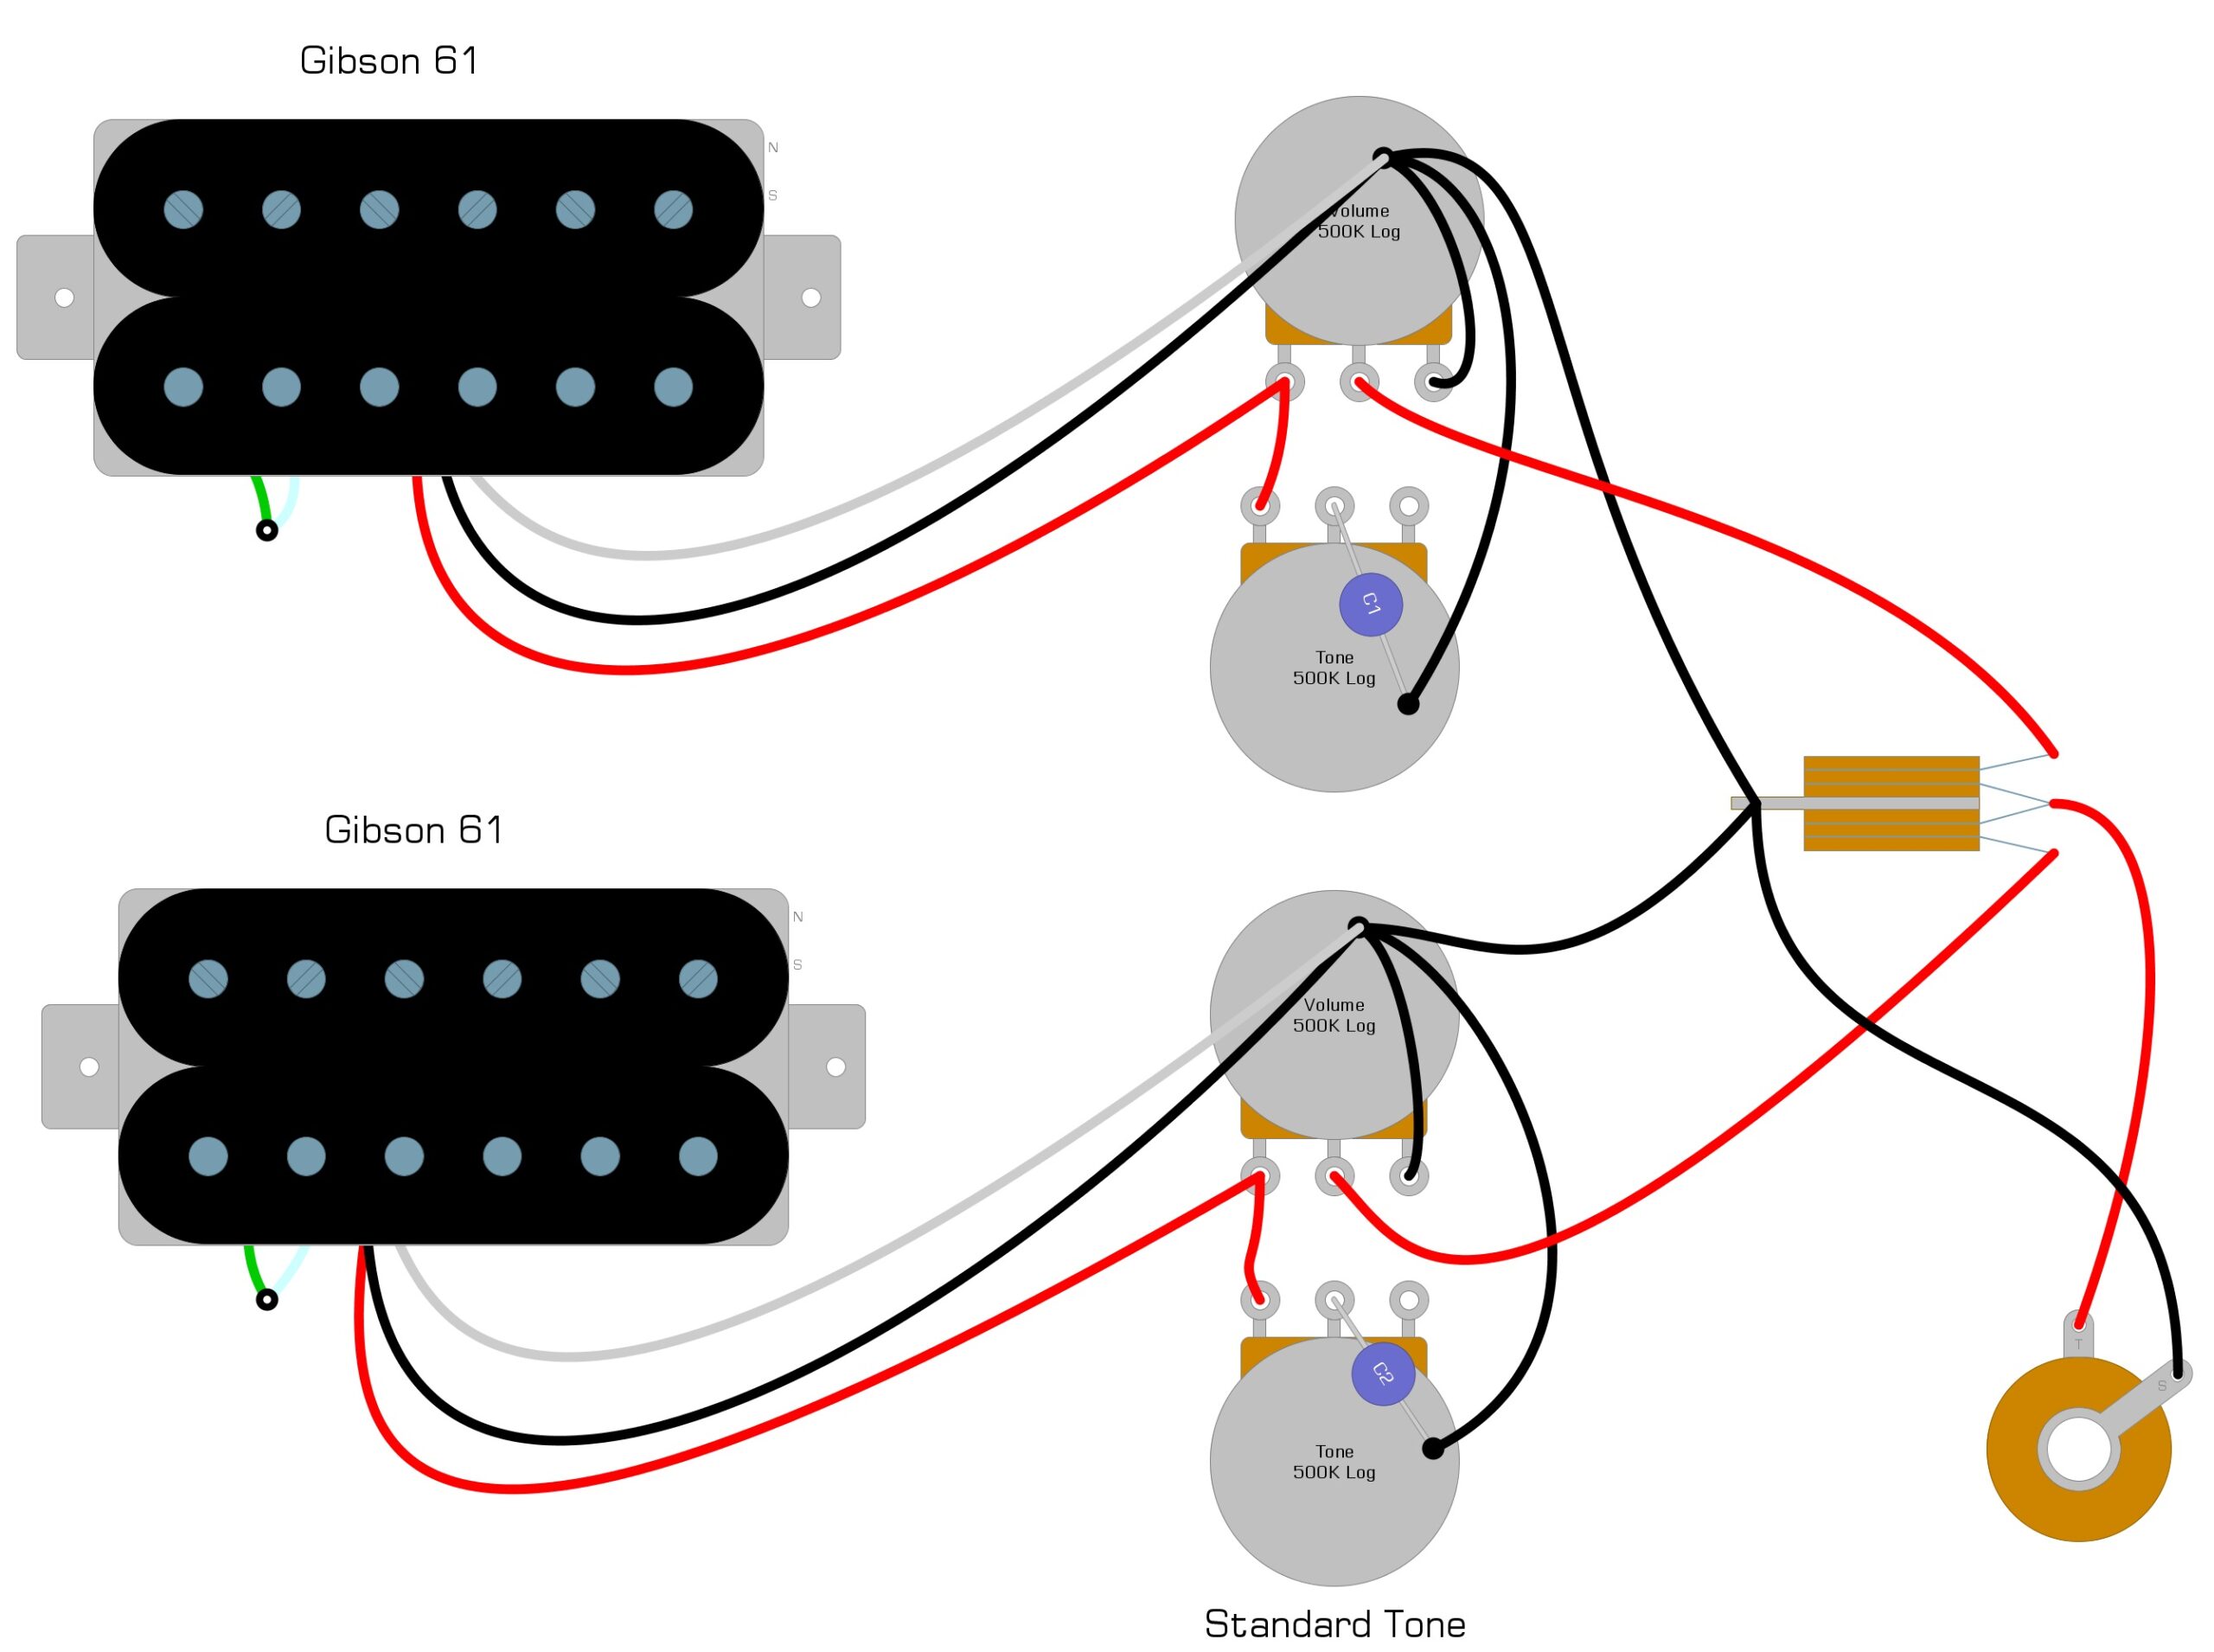
In Example 1, we show you a standard Gibson-style wiring with standard tone controls.
Example 1
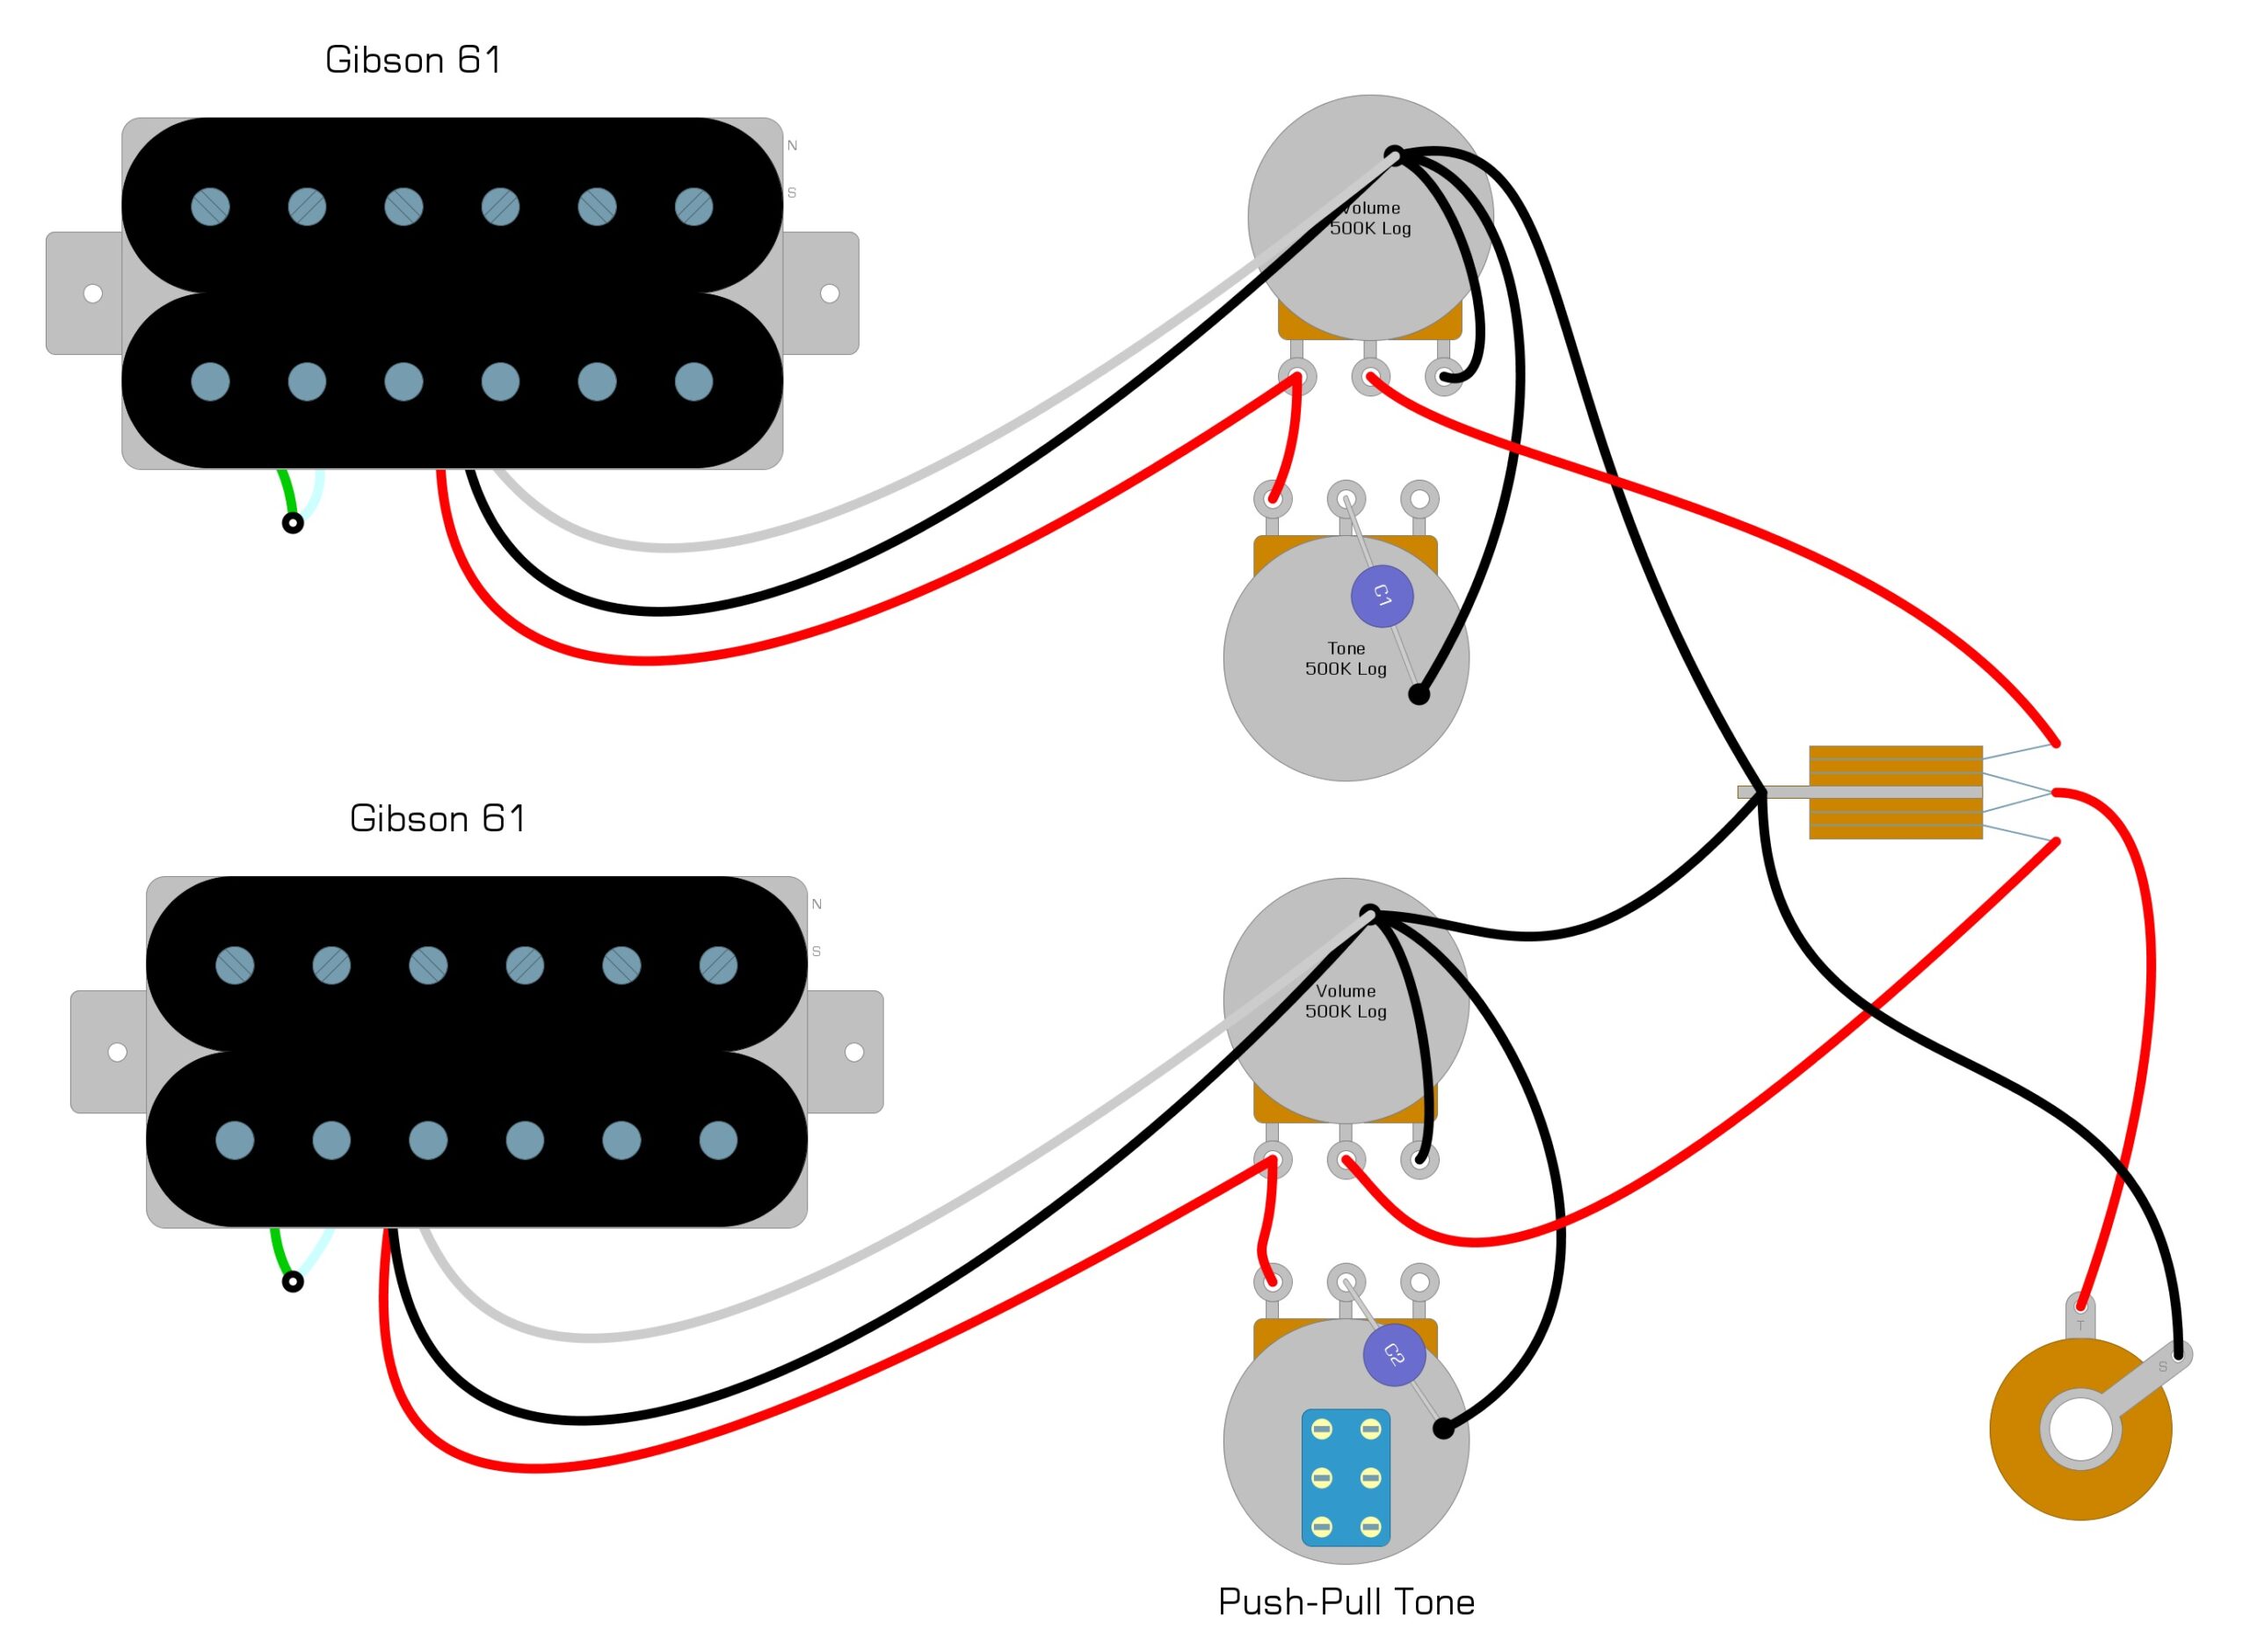
In Example 2, we show you this same diagram with the push-pull pot in place.
Example 2
Splitting the Pickup
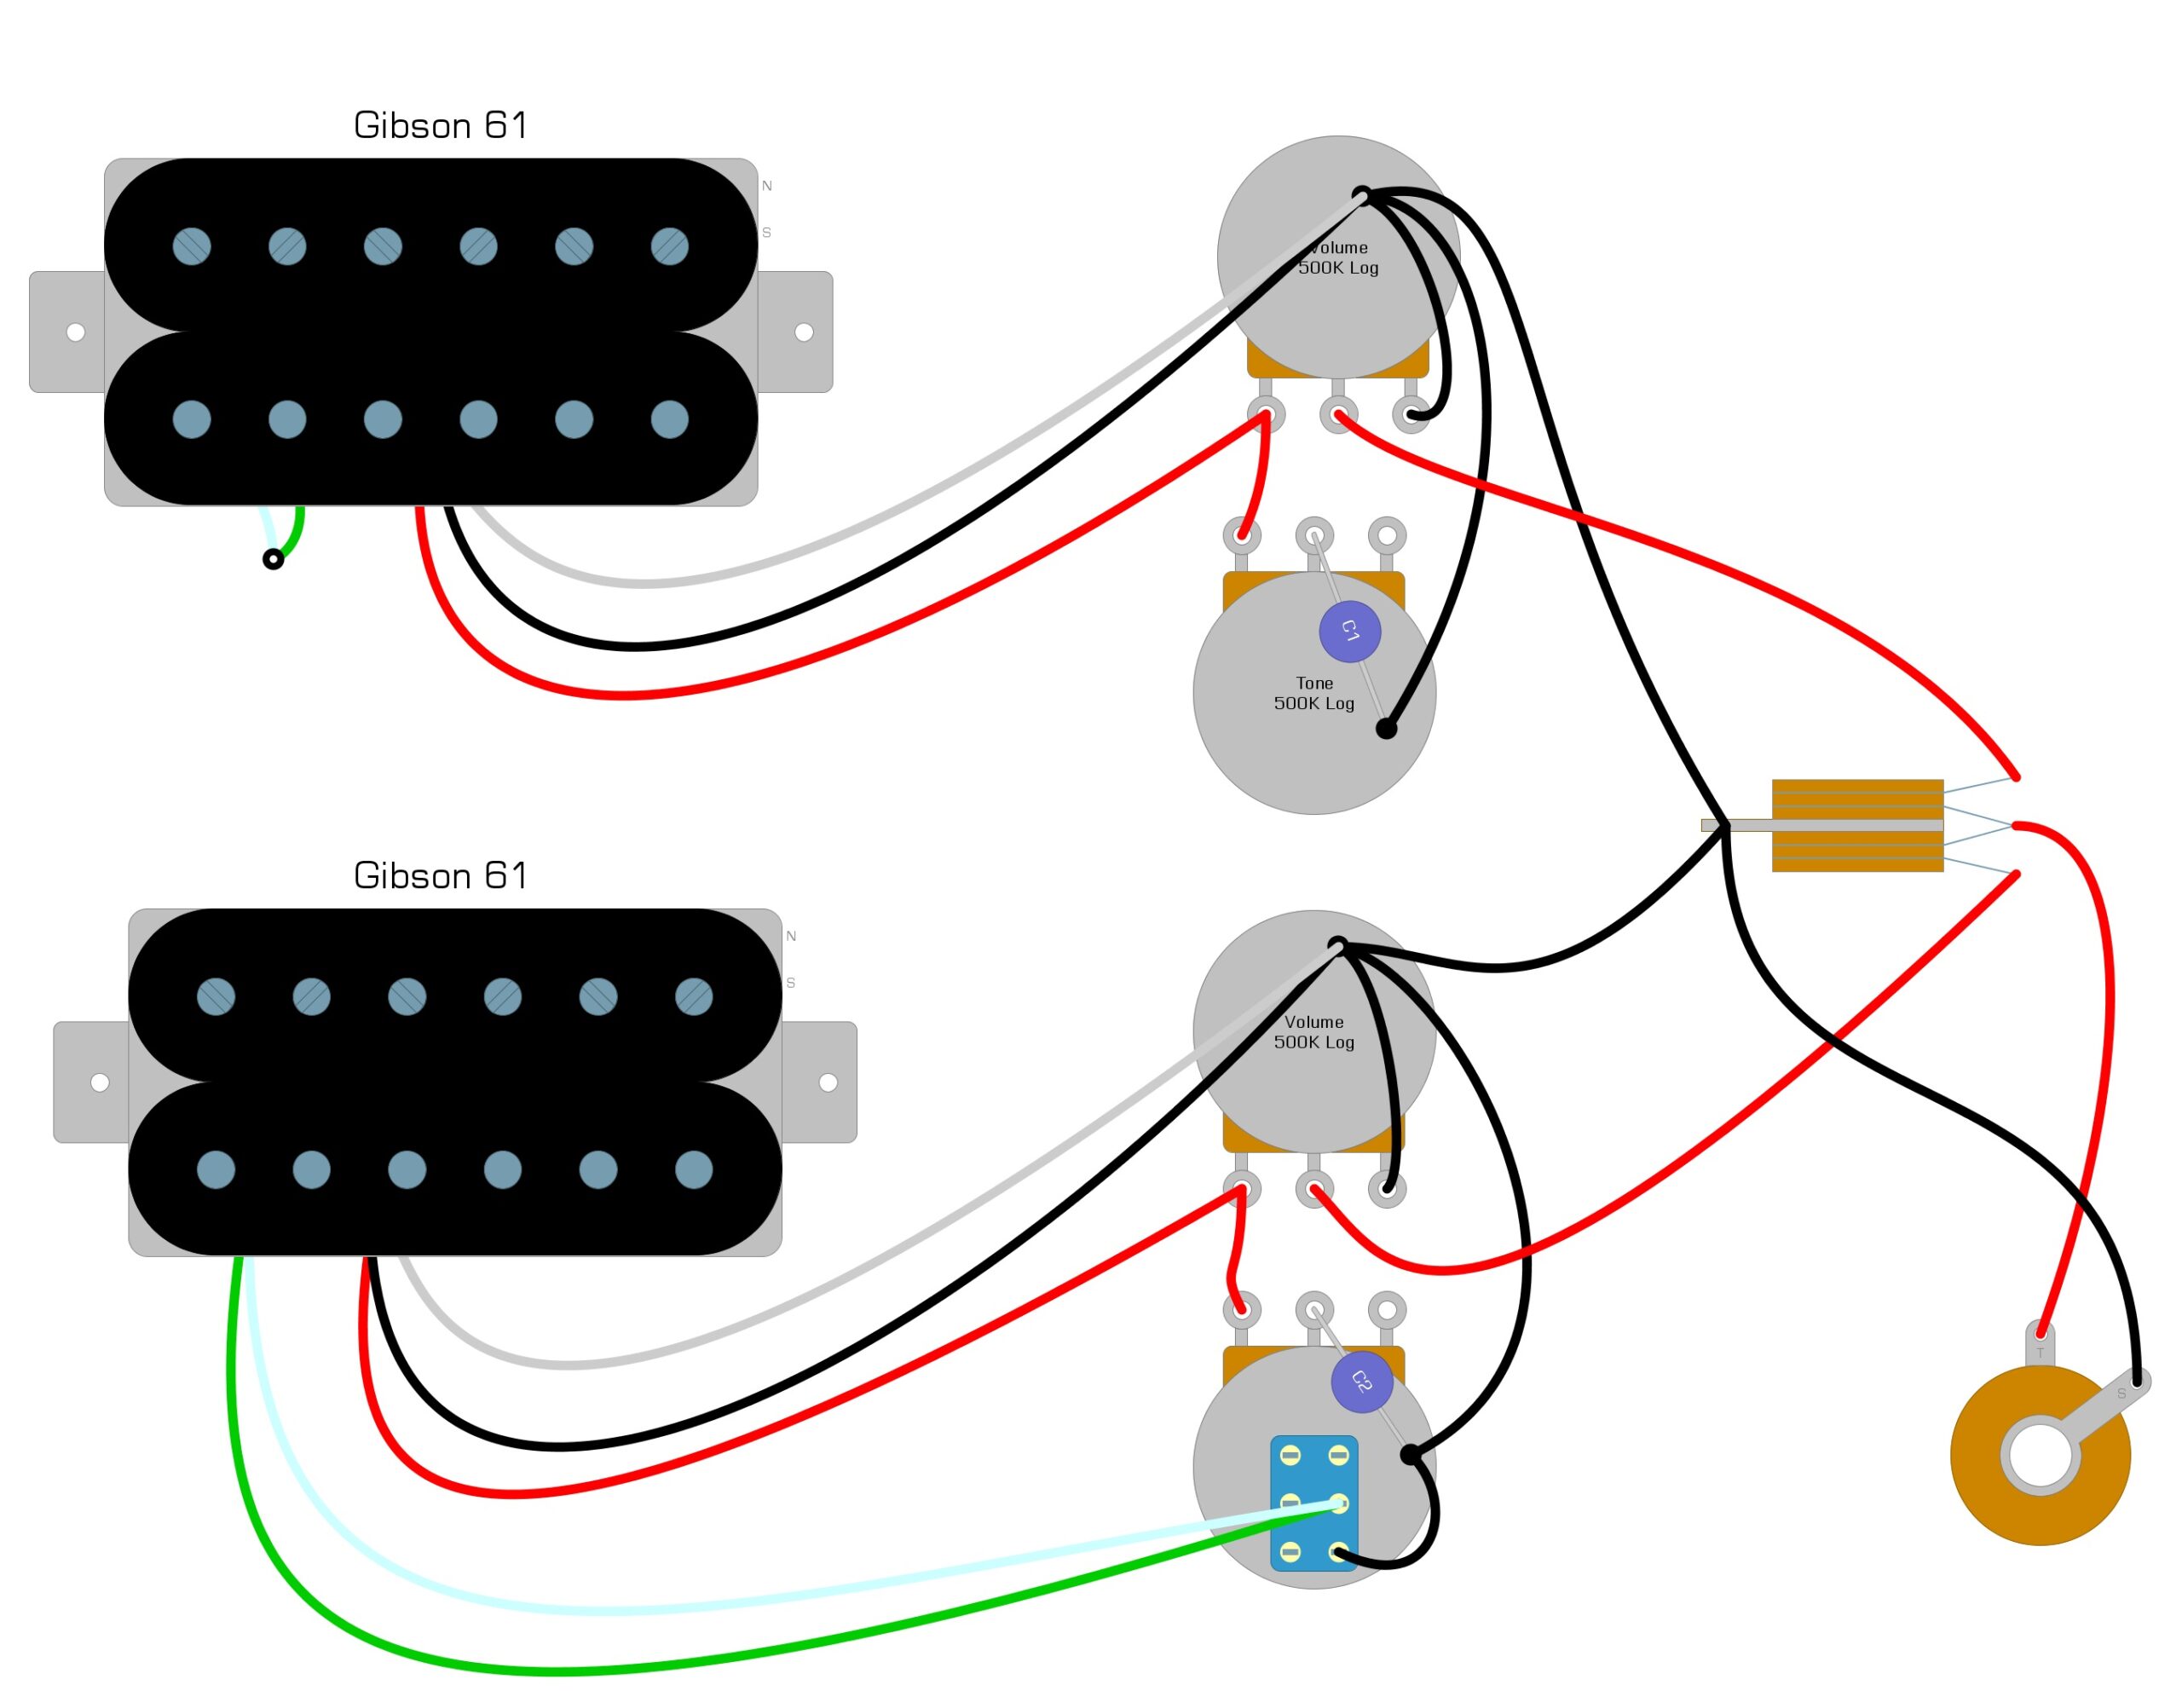
With the push-pull pot in place, we can split the pickup. If you are using a mini-toggle, this is also where you’ll want to pick up the discussion.
Lastly, connect the white and green wires that are tied together to the switch part of the push-pull pot. We will also need to add a new ground wire that goes from the switch to the back of the volume pot.
Example 3 illustrates what this might look like if we continue using the previous diagrams.
Example 3
How it Works
When you engage the switch, you open a path to Ground. This shorts out and turns off the second coil, so only one coil is activated. When you disengage the switch, this signal is allowed to pass through both coils as it normally does.
Since this coil has a lower output than some other humbuckers, we recommend modifying this circuit further using a trim pot to “dim” the second coil, instead of turning it off, so you can tune it to your liking. We have a step-by-step article about completing this modification, called Partial Tap Resistor – Advanced Techniques, which might be useful to you.
Summary
We hope that you’ve enjoyed reading this guide on how to coil-split a Gibson 61, and that you’ve split your humbucker successfully. If you have found this guide helpful, please feel free to share this guide to Gibson 61 coil-splitting on Facebook and Twitter. For more articles on guitar electronics, visit humbuckersoup.com.


