
By Ed Malaker
Posted 01/18/2021
In this article, we’ll illustrate how to install DiMarzio Vintage P90s into your guitar. The DiMarzio Vintage P90 is a single-coil pickup in the style of vintage Gibson PAFs. These soap bar pickups use dual Alnico 5 sand cast magnets, and coils wound on a vintage winding machine. Vintage coil tape, braided single-coil conductor wire, and lack of wax potting continue the vintage-themed construction.
The DiMarzio Vintage P90 has a boosted midrange, but retains plenty of clarity in the highs to cut through during solo performances. In addition, the bass frequencies are full and help give chords a harmonic balance.
Tools Required
Since you’re most likely replacing stock pickups with these, you probably don’t need to purchase any extra components like tone controls, capacitors, or an output jack, unless they need to be replaced. If you do purchase new pots to replace one or more volume or tone controls, we recommend 250k pots for this type of pickup. You will also need the following tools to install the DiMarzio Vintage P90:
- Soldering iron
- Solder
- Wire cutters
- Pliers
- Phillips screwdriver
Single Conductor
The DiMarzio Vintage P90 only has a single wire inside a braided metal sleeve. The inside wire is the Hot, while the braided metal cover is the Ground. You will need to solder both to your guitar for it to work properly.
- TIP – The metal braiding on DiMarzio Vintage P90s can be quite difficult to solder in place, and it’s one of the few times we recommend a higher setting on your soldering iron.
The DiMarzio Vintage P90 Wiring Diagram
Since you only need to make two solder connections for the wiring, the process is very easy and you will likely spend far more time uninstalling the old pickups and screwing these into place than soldering and wiring. Just be sure to pay close attention when you uninstall, so that you’ll be prepared to install your replacements.
In most cases, the Hot wire will go to either a switch or one of the lugs on the volume control, and you’ll solder the braided metal cover to the back of the volume pot.
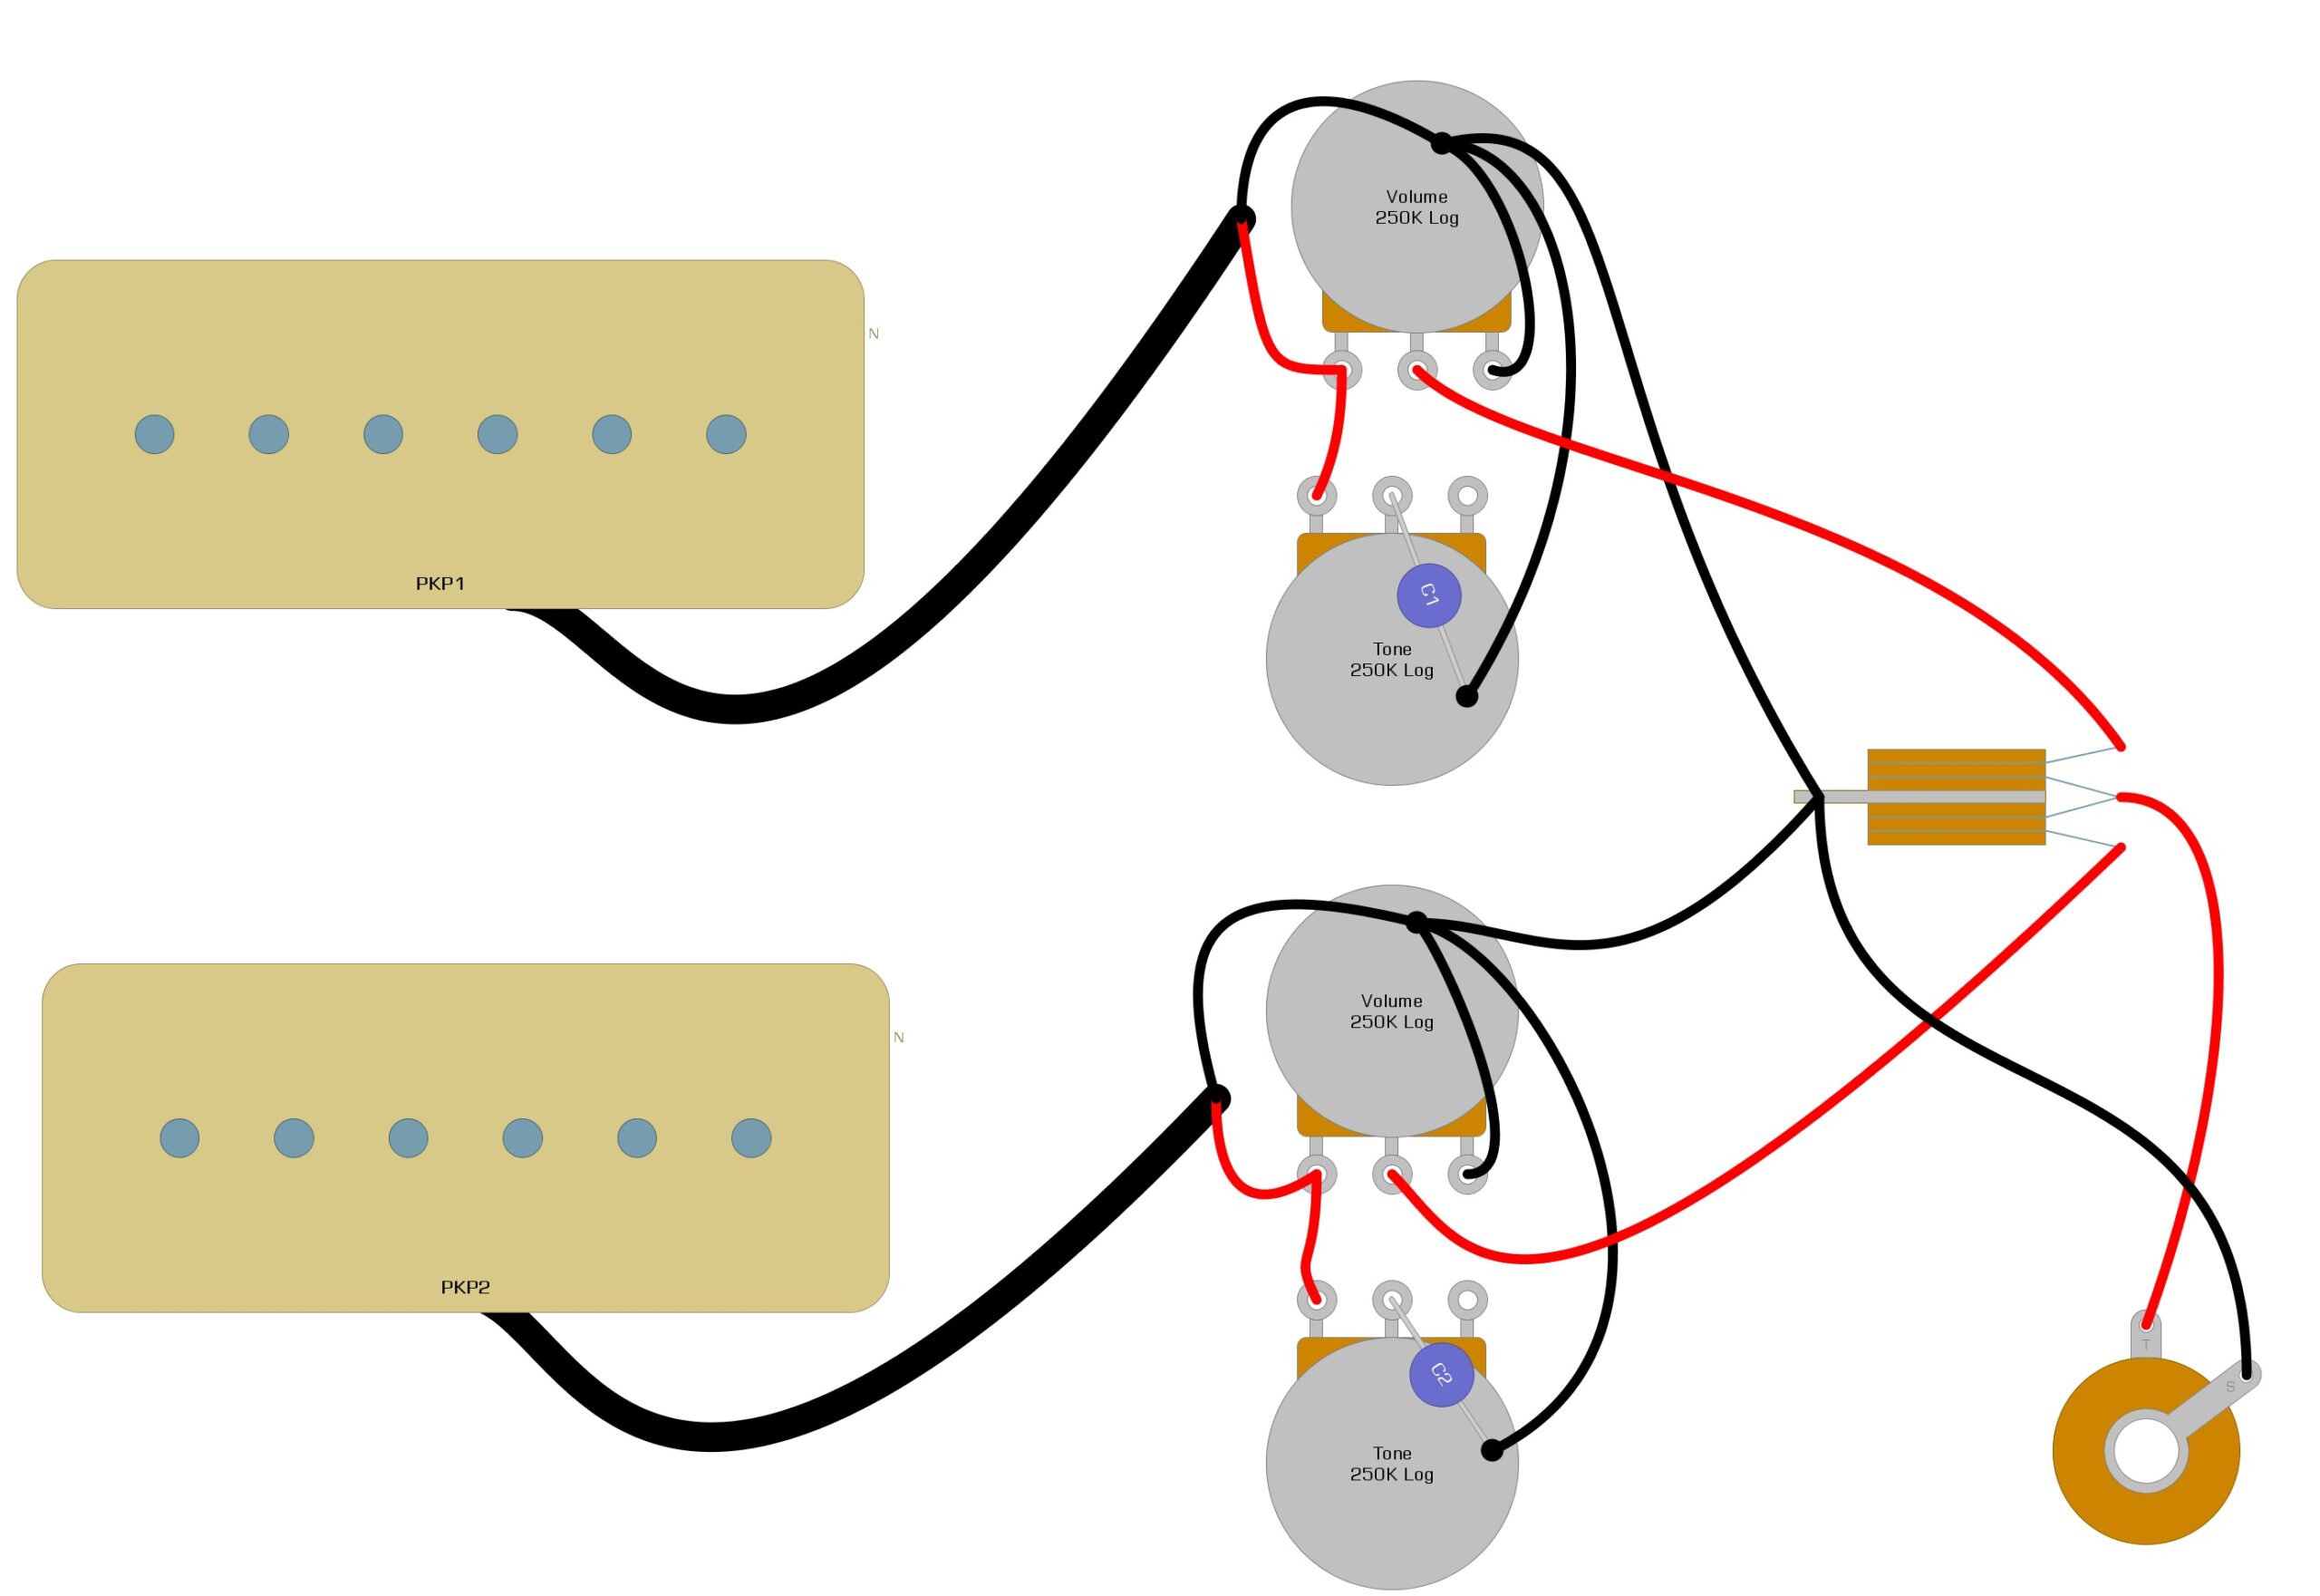
Gibson-Style
In Example 1, we illustrate what a DiMarzio Vintage P90 wiring diagram might look like in a Gibson-style guitar. The Hot wire is represented in red, while the wire braid is represented in grey.
Example 1
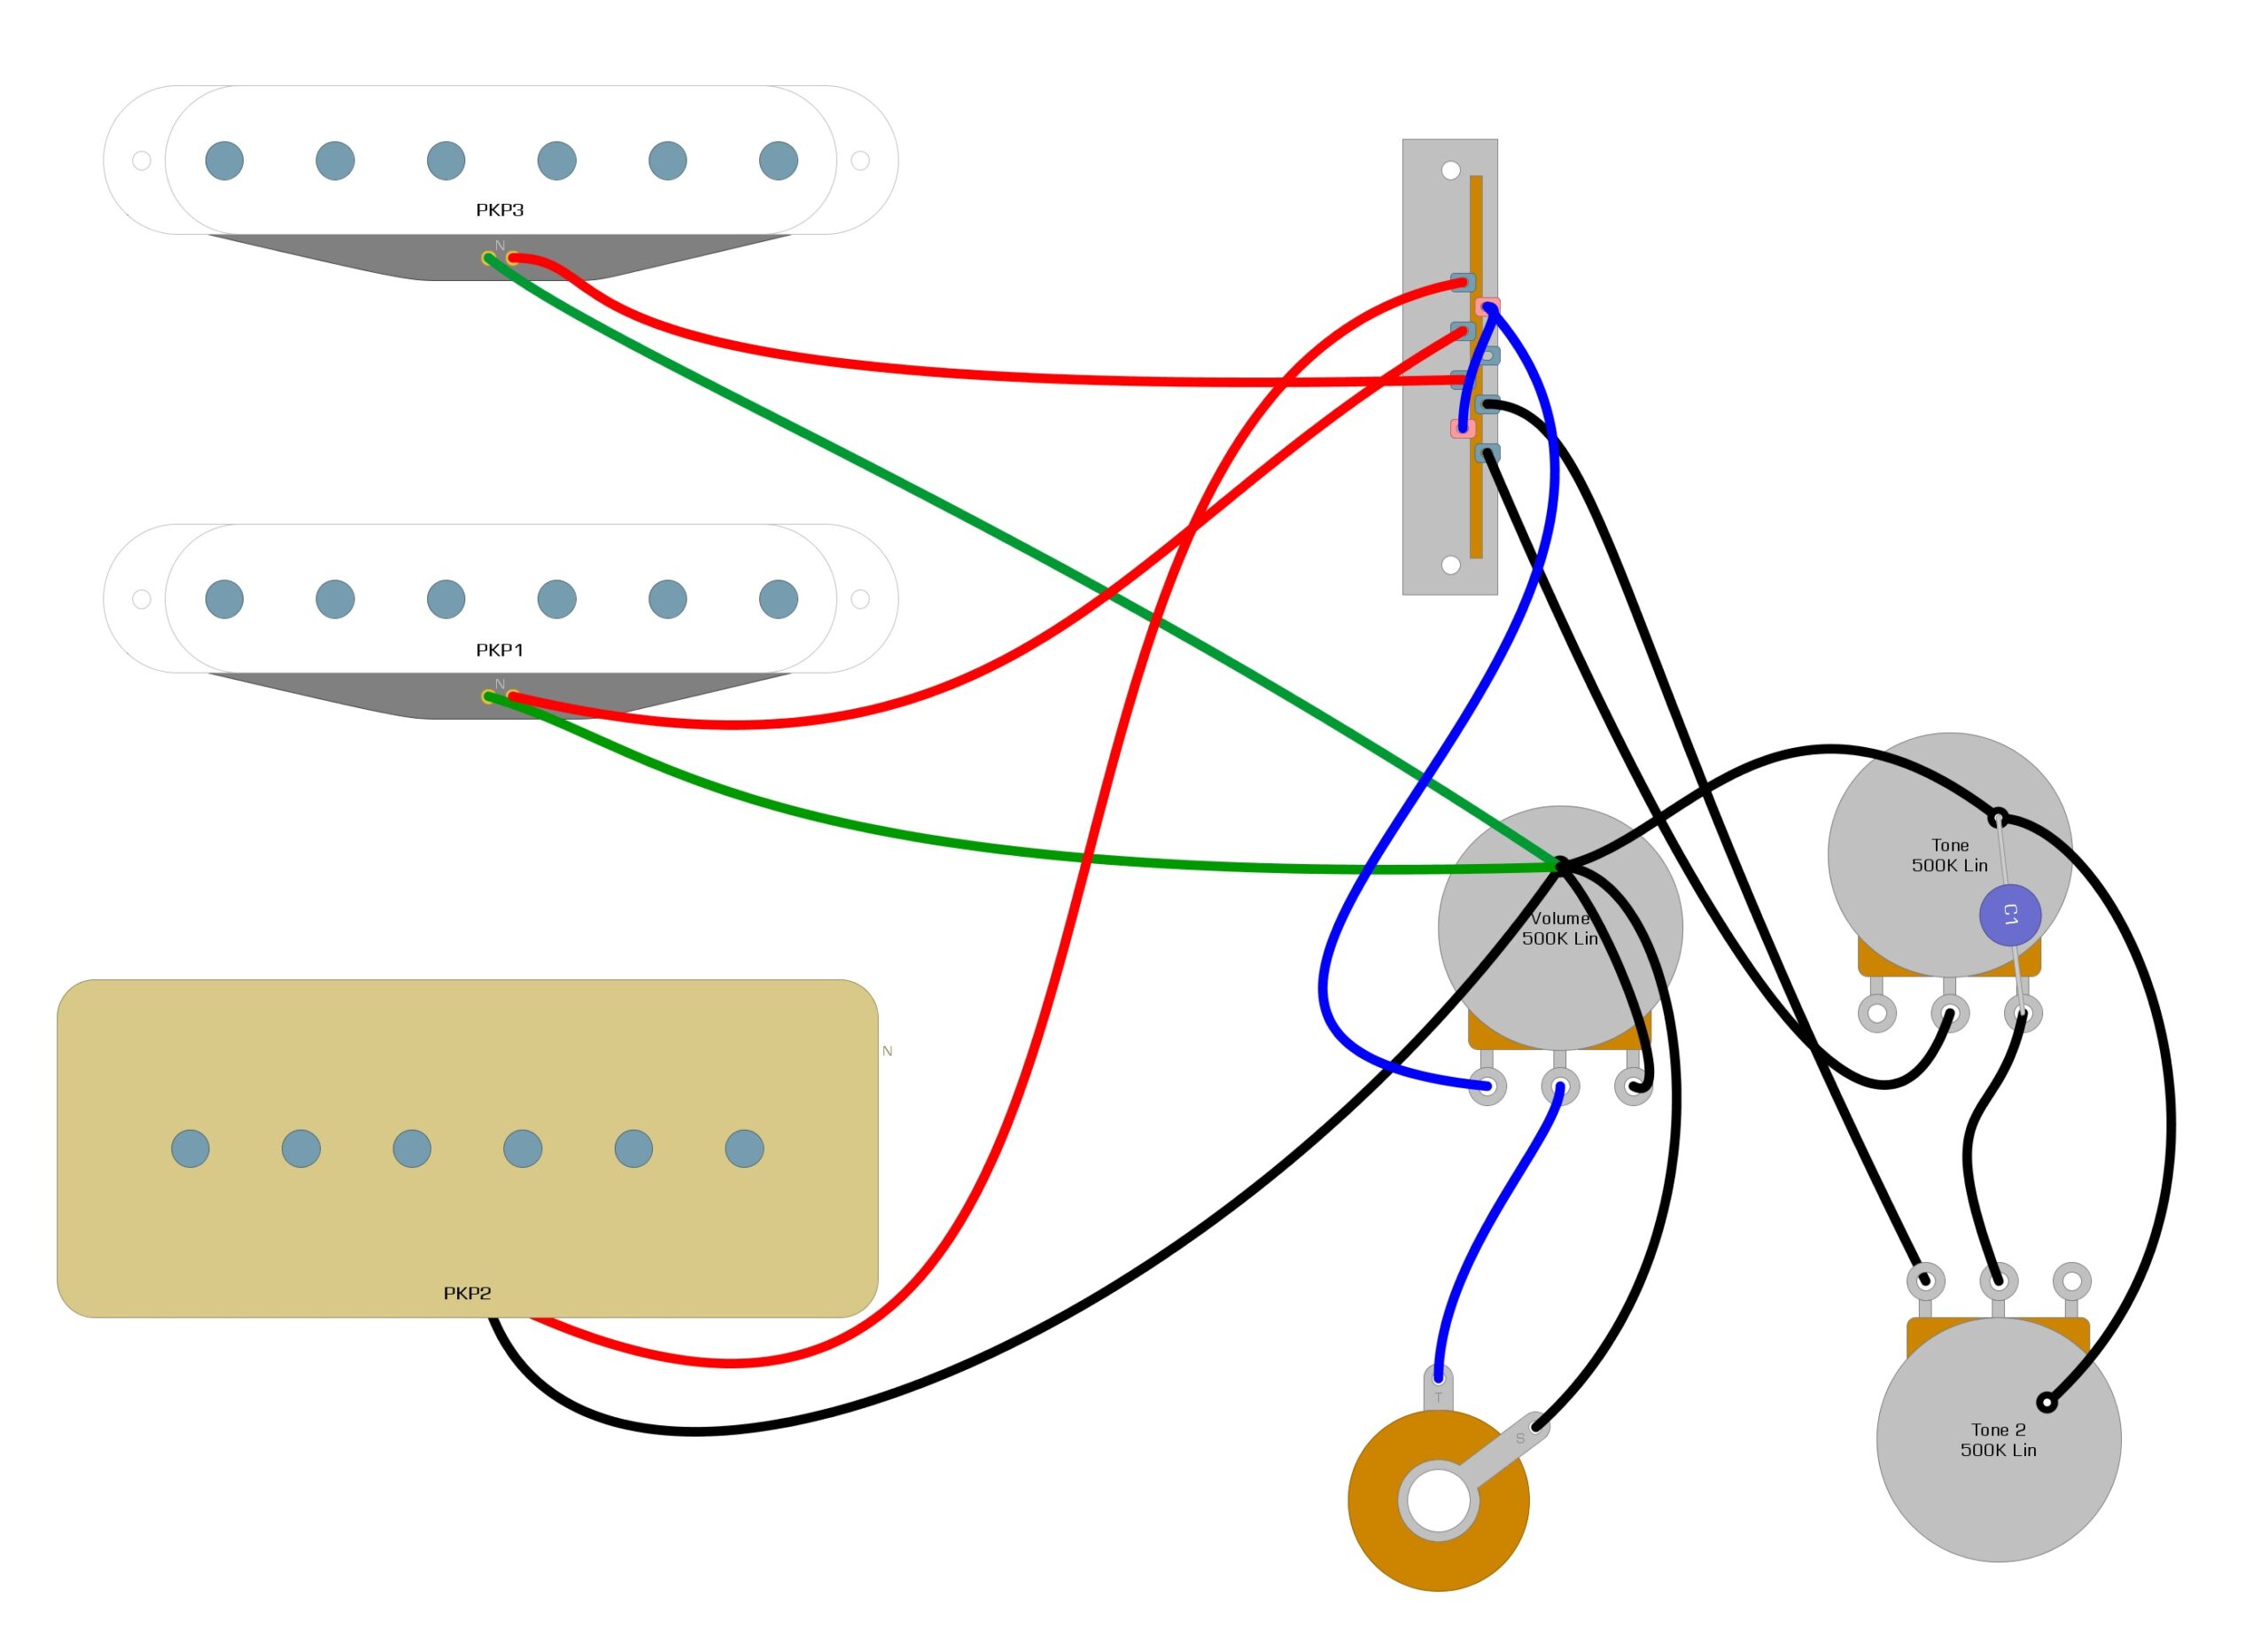
Strat-Style
In Example 2, we illustrate what a DiMarzio Vintage P90 wiring diagram might look like in a Strat-style guitar. The Hot wire is represented in red, while the wire braid is represented in black.
Example 2
Summary
Installing new pickups into your guitar is easy and is one of the best ways to improve the overall tone of your instrument. Once you have the knowledge and ability to change the pickups, you open a door to many more modifications that aren’t much harder to complete. Understanding these diagrams also helps you save money on repair bills because you’ve performed the maintenance yourself. You can personalize your tone in ways you could never describe to a guitar tech!
We hope that we have helped you get these pickups installed, and that you enjoy the tone that they produce. If you’ve learned something new, please feel free to share this DiMarzio Vintage P90 wiring diagram on Facebook and Twitter. For more articles on guitar electronics, visit humbuckersoup.com.


