
By Ed Malaker
Posted 11/20/2020
In this article, we’ll take a look at a DiMarzio EJ Custom wiring diagram, to help you get this great-sounding humbucker installed into your guitar. This pickup is designed to the exact specifications of well-known guitar virtuoso Eric Johnson. The EJ Custom is said to have a bright tone with a lot of presence, but it doesn’t become brittle or harsh even when playing high-pitched solos. It also doesn’t become muddy, no matter how much overdrive you add. It uses an Alnico 5 magnet and is available in several colors.
Tools and Materials
You will not need a lot of tools to install your DiMarzio EJ Custom. A soldering iron, a small amount of solder, electrical tape, and a screwdriver should be all you need to complete the project.
- Soldering iron
- Solder
- Electrical tape
- Screwdriver
Wiring Code
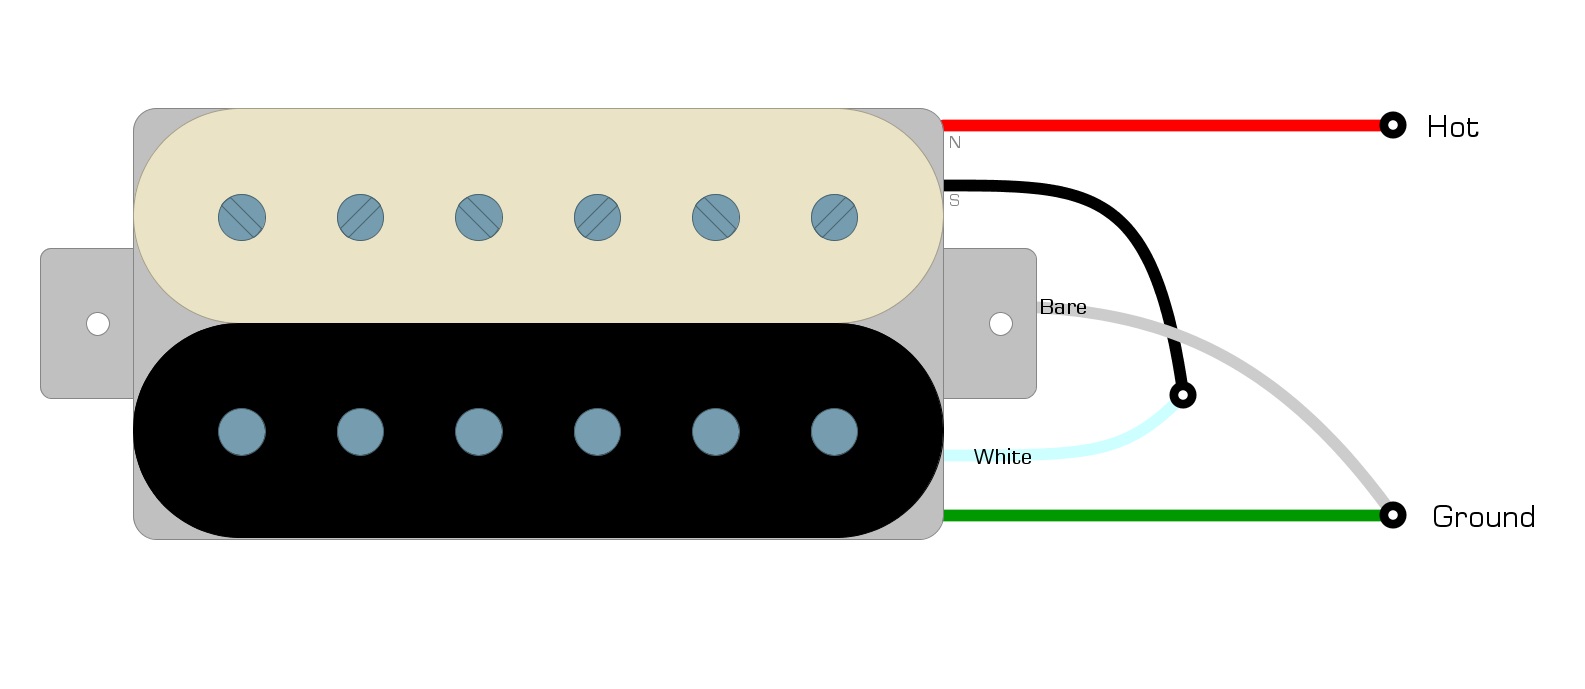
All pickups have a wiring code. Humbuckers have four colored wires and one bare wire, but to install a pickup, we only use a Hot wire and a Ground wire. The wiring code tells us how to find them. You can figure out the wiring code using a voltmeter, but since we are using a DiMarzio EJ Custom, we already know the wiring code is as follows:
DiMarzio EJ Custom Wiring Code
- Red = Hot
- White + Black = twisted together and taped
- Green + Bare = twisted together; Ground
We’ve illustrated this wiring code for you in Example 1.
Example 1
Uninstall the Old Pickup
Before we can install the DiMarzio EJ Custom, we need to remove the old pickup. To do that, you will likely need to remove the strings. Use the screwdriver to remove the screws that hold the pickup in place. Also, remove the screws that hold the control panel cover in place, so you have access to the wires inside.
With the pickup screws removed, you should be able to find which wires are coming from your pickup and where they connect in the control panel. Use the soldering iron to loosen the joints and free the wires so you can remove the pickup. Before you do this, make sure you take accurate notes of where everything is so you’ll know where to solder the wires for the new pickup.
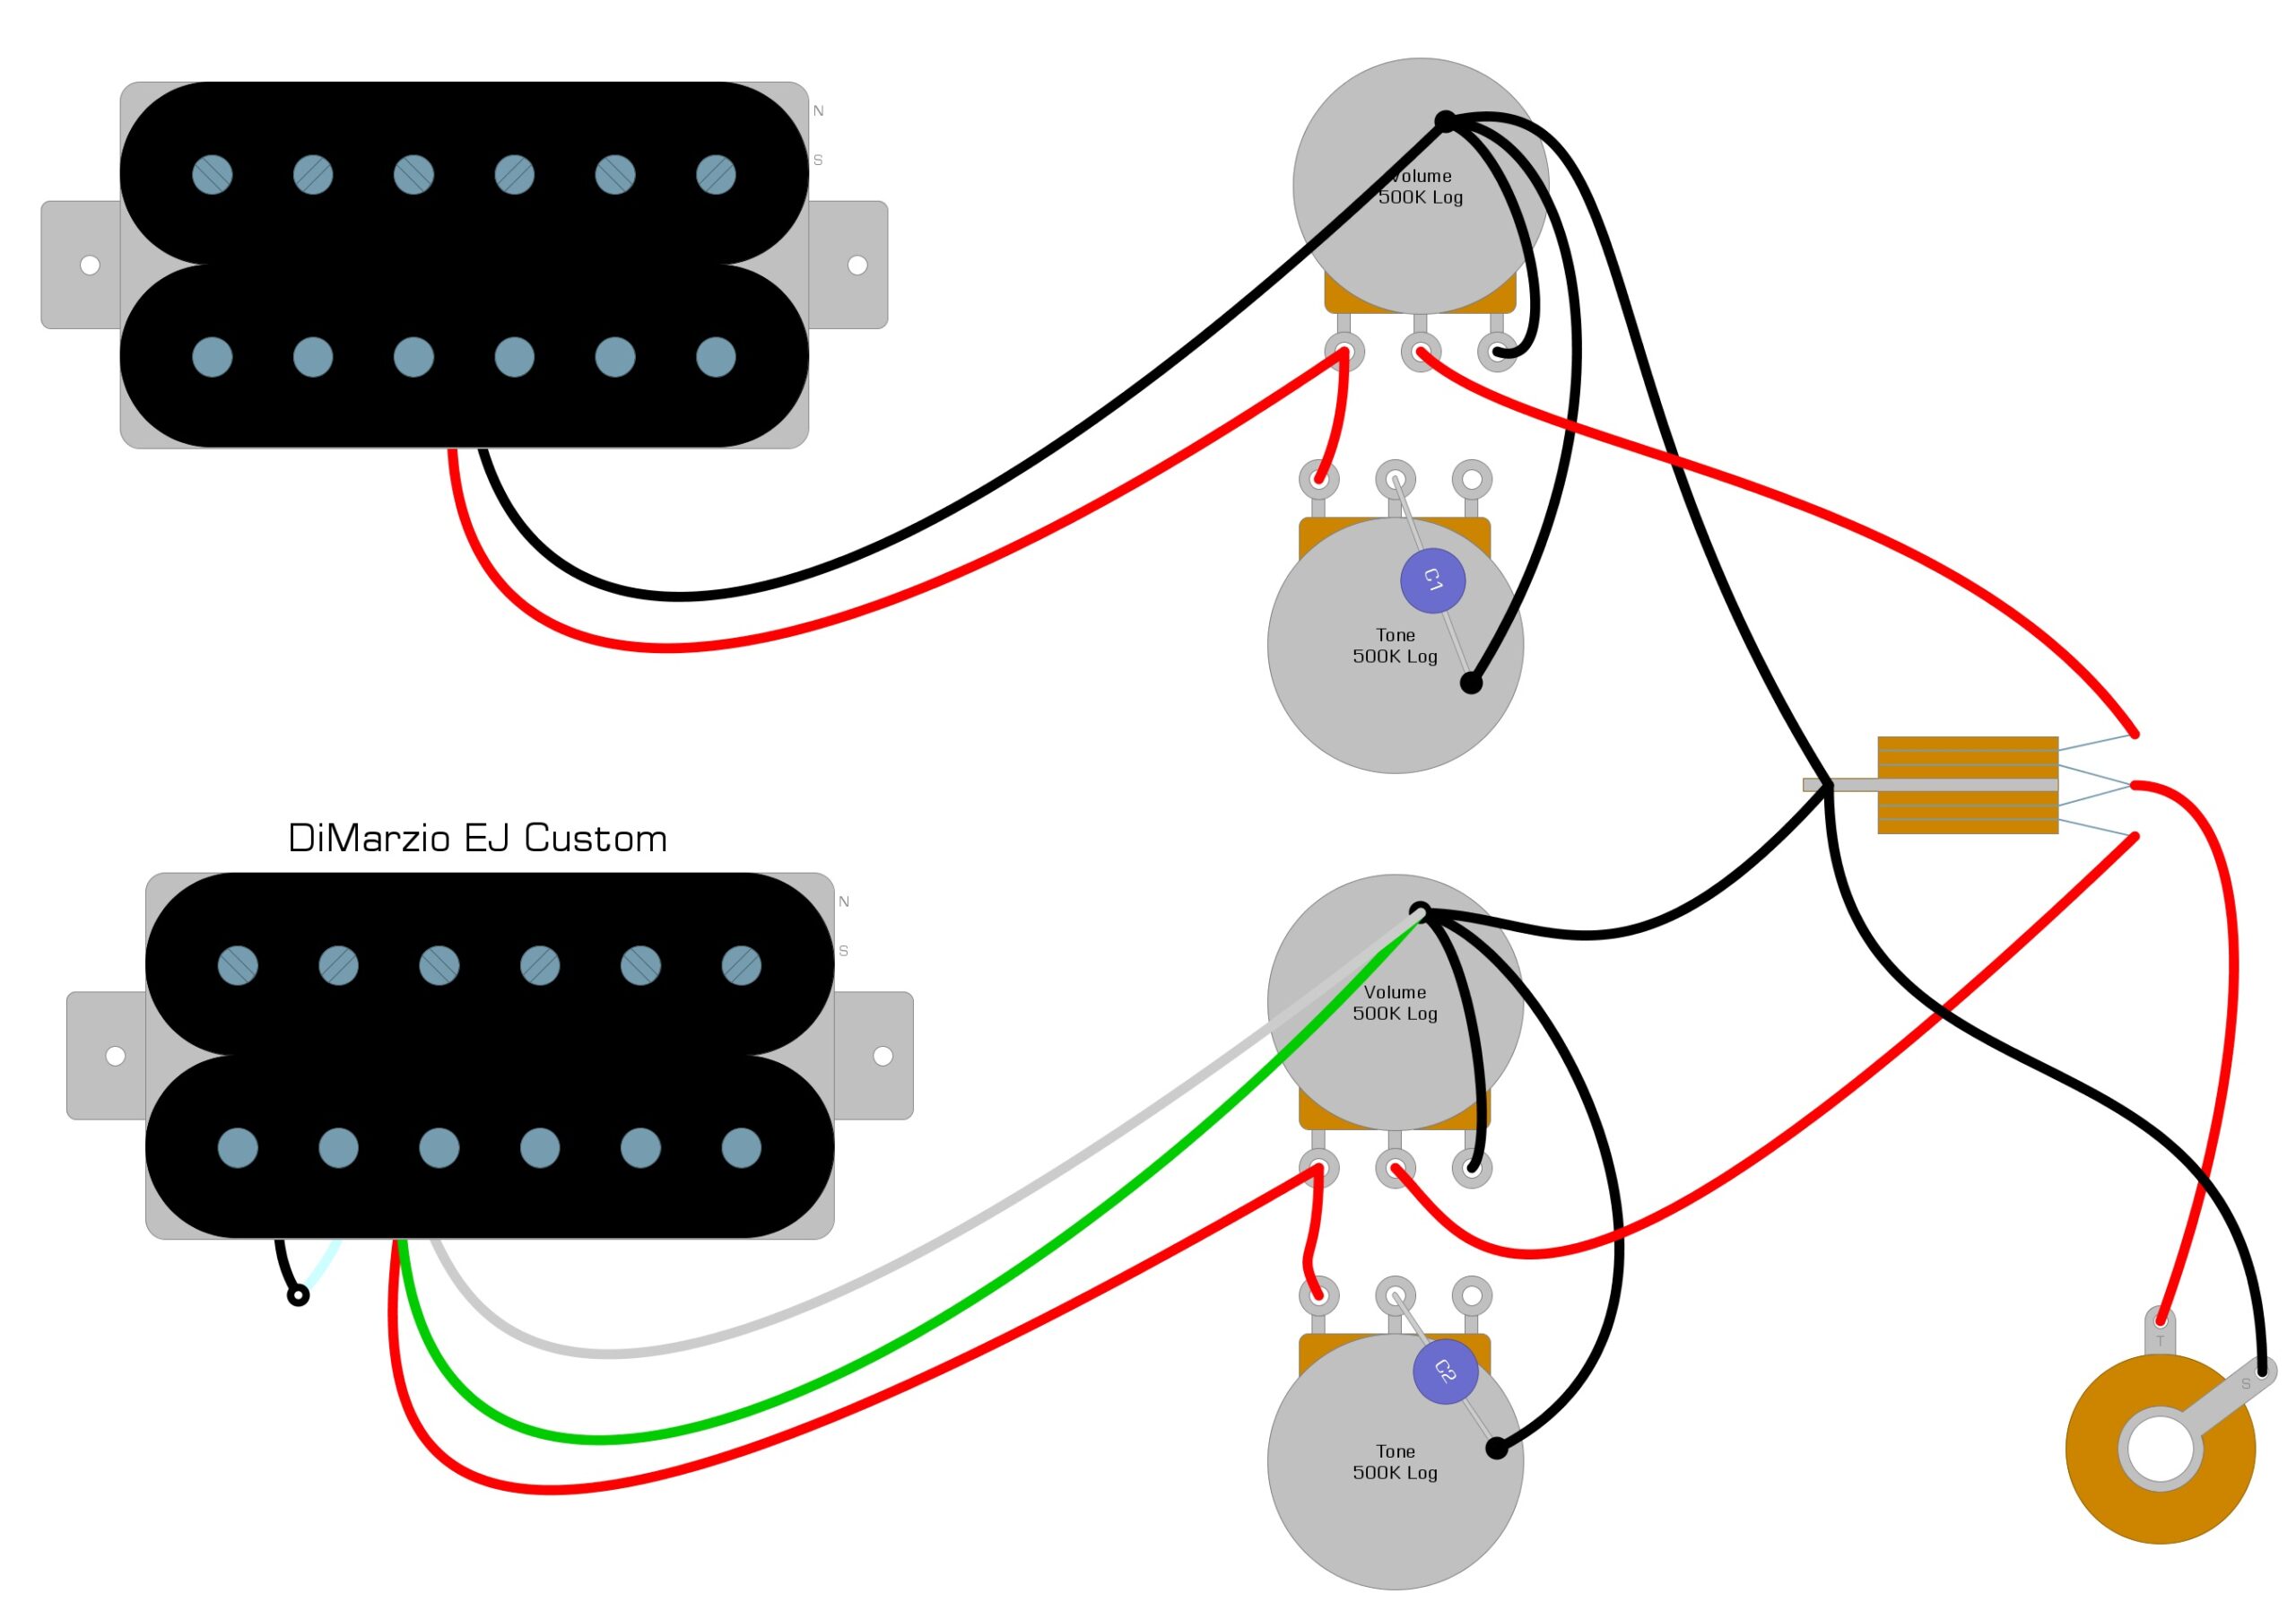
Wiring Installation
To install the EJ Custom, reverse the process you used to uninstall the first pickup. Feed the wires through the holes or channels until you can see them in the control panel. The red wire is the Hot, and this wire goes to a lug on the volume pot, or it goes to the pickup selector switch. The Ground will go to the back of the volume pot. These positions should sound familiar since you just removed those wires.
We have illustrated a common way to install the EJ Custom in a Gibson Les Paul-style guitar in Example 2.
Example 2
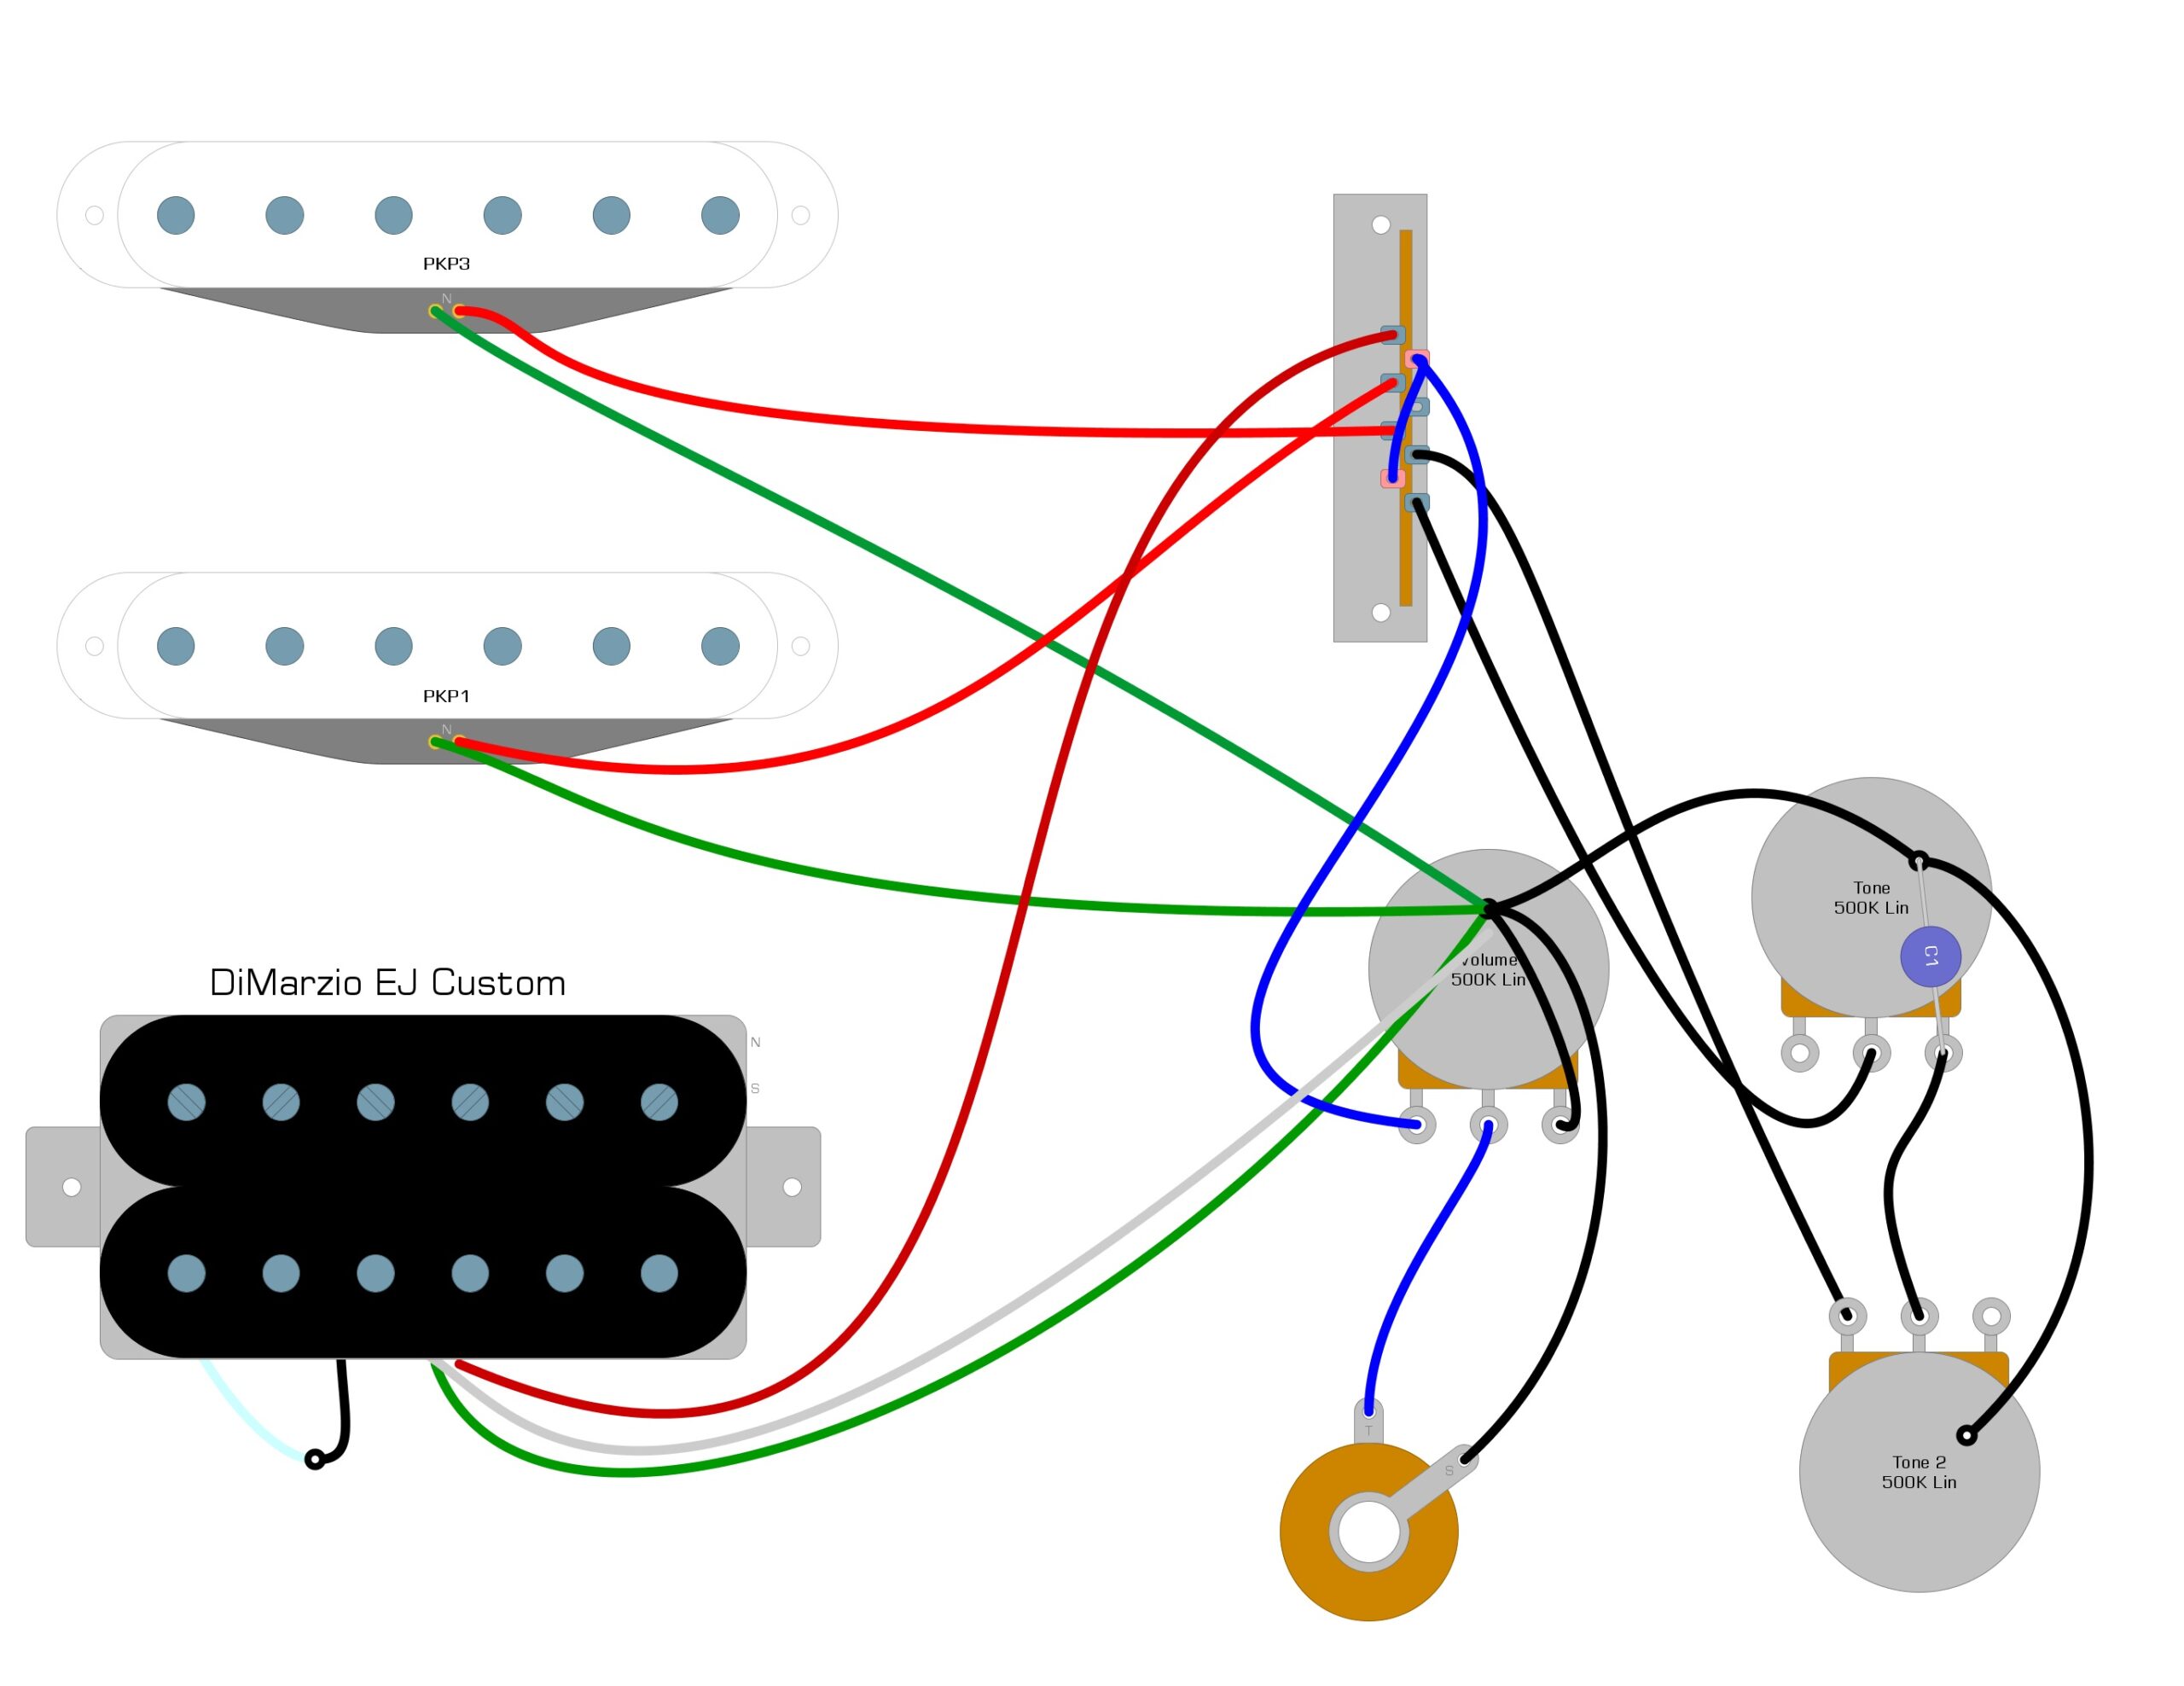
Here’s a common way to install the EJ Custom in a Super Strat-style guitar in Example 3.
Example 3
Once you solder the wires in place, you can replace the screws and string up the guitar.
Project Complete!
Summary
Changing pickups in your guitar isn’t very difficult, and it can have a huge impact on your sound. The DiMarzio EJ Custom is a great sounding pickup, especially suited for fast playing. Whether you’re playing clean or with heavy overdrive, the EJ Custom will sound clear without becoming brittle.
If you have enjoyed reading over this short wiring tutorial and you’ve found it helpful, please feel free to share it on Facebook and Twitter. For more articles on guitar electronics, visit humbuckersoup.com.