
By Ed Malaker
Posted 05/13/2025
Let’s take a look at how to install any type of Benedetto pickups into your guitar. Bob Benedetto started making high-end guitars in the 1960s, and the trend continues to this day. Benedetto guitars are mostly acoustic, hollow body, or semi-hollow body guitars, so his speciality is humbuckers with warm jazz tones.
Before You Begin
This Benedetto installation article is not a step-by-step guide, but will provide you with some important illustrations for installing Benedetto pickups in different kinds of guitars. It assumes you already know how to install pickups, read the diagrams, and use the tools. If you need a step-by-step guide, we recommend one of our many pickup wiring articles we have here at Humbucker Soup.
Humbucker Wiring (4-Wires)
Though Benedetto only creates pickups for their hollow body and semi-hollow body guitars, they will sound great in any other type of guitar if you want to install them in one. These pickups produce a warm, balanced tone with high definition and clarity between notes. Benedetto makes full-size and miniature humbuckers, and they all have four wires.
Each pickup has four wires because they have two coils, and each coil uses two wires. However, you must connect the two coils to get the pickup to work properly. To connect the two coils, you will need the correct wiring code. The wiring code for the Benedetto humbucker pickup is below.
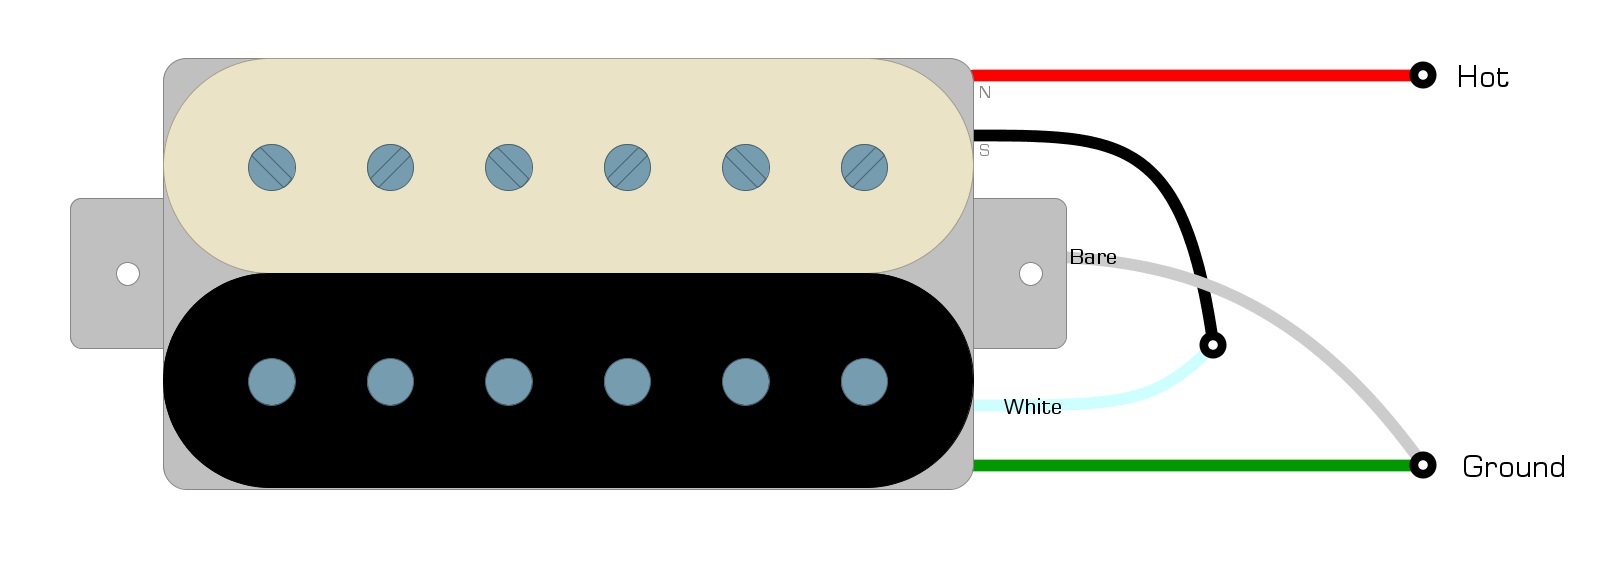
Benedetto Wiring Code
- Red = HOT
- Black + white = soldered together and taped off
- Green + bare = soldered together and GROUND
We’ve illustrated this wiring code in Example 1
Example 1
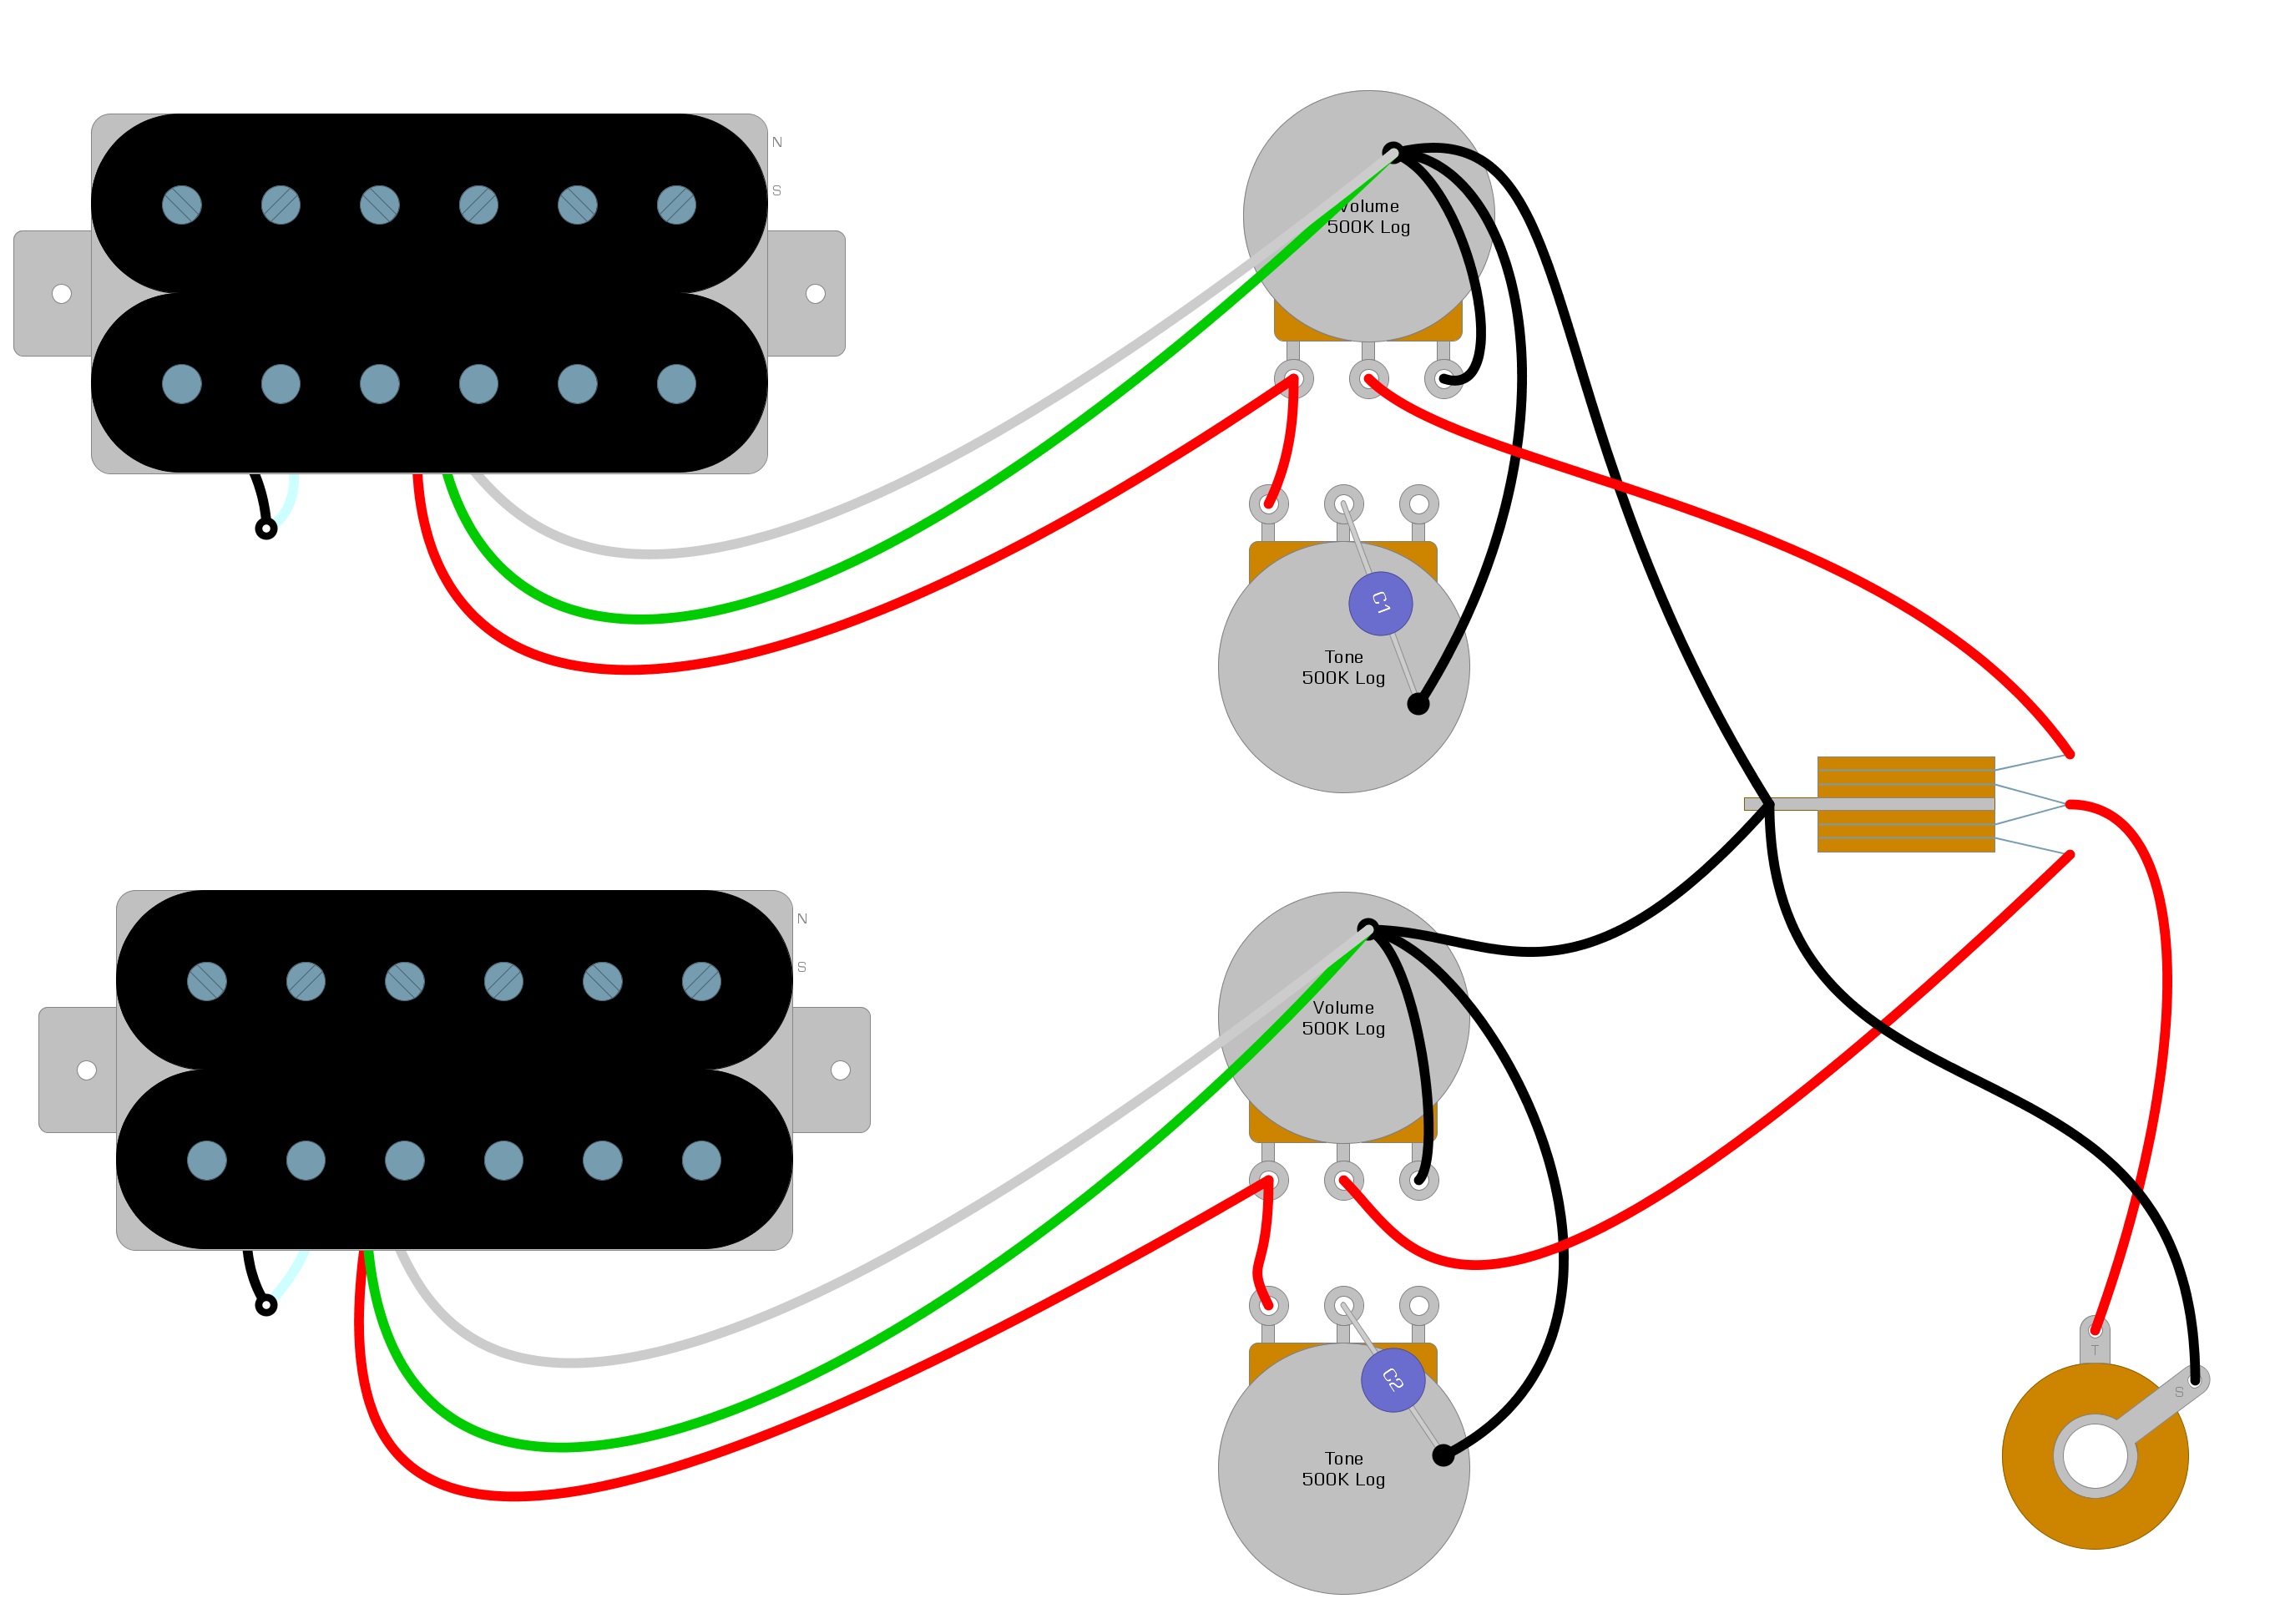
With this wiring code, you can install Benedetto pickups in any guitar using the HOT and GROUND wires. We’ve illustrated how to install Benedetto pickups in a semi-hollow body or Gibson Les Paul-style guitar in Example 2.
Example 2
Humbucker Coil-Splitting (4-Wires)
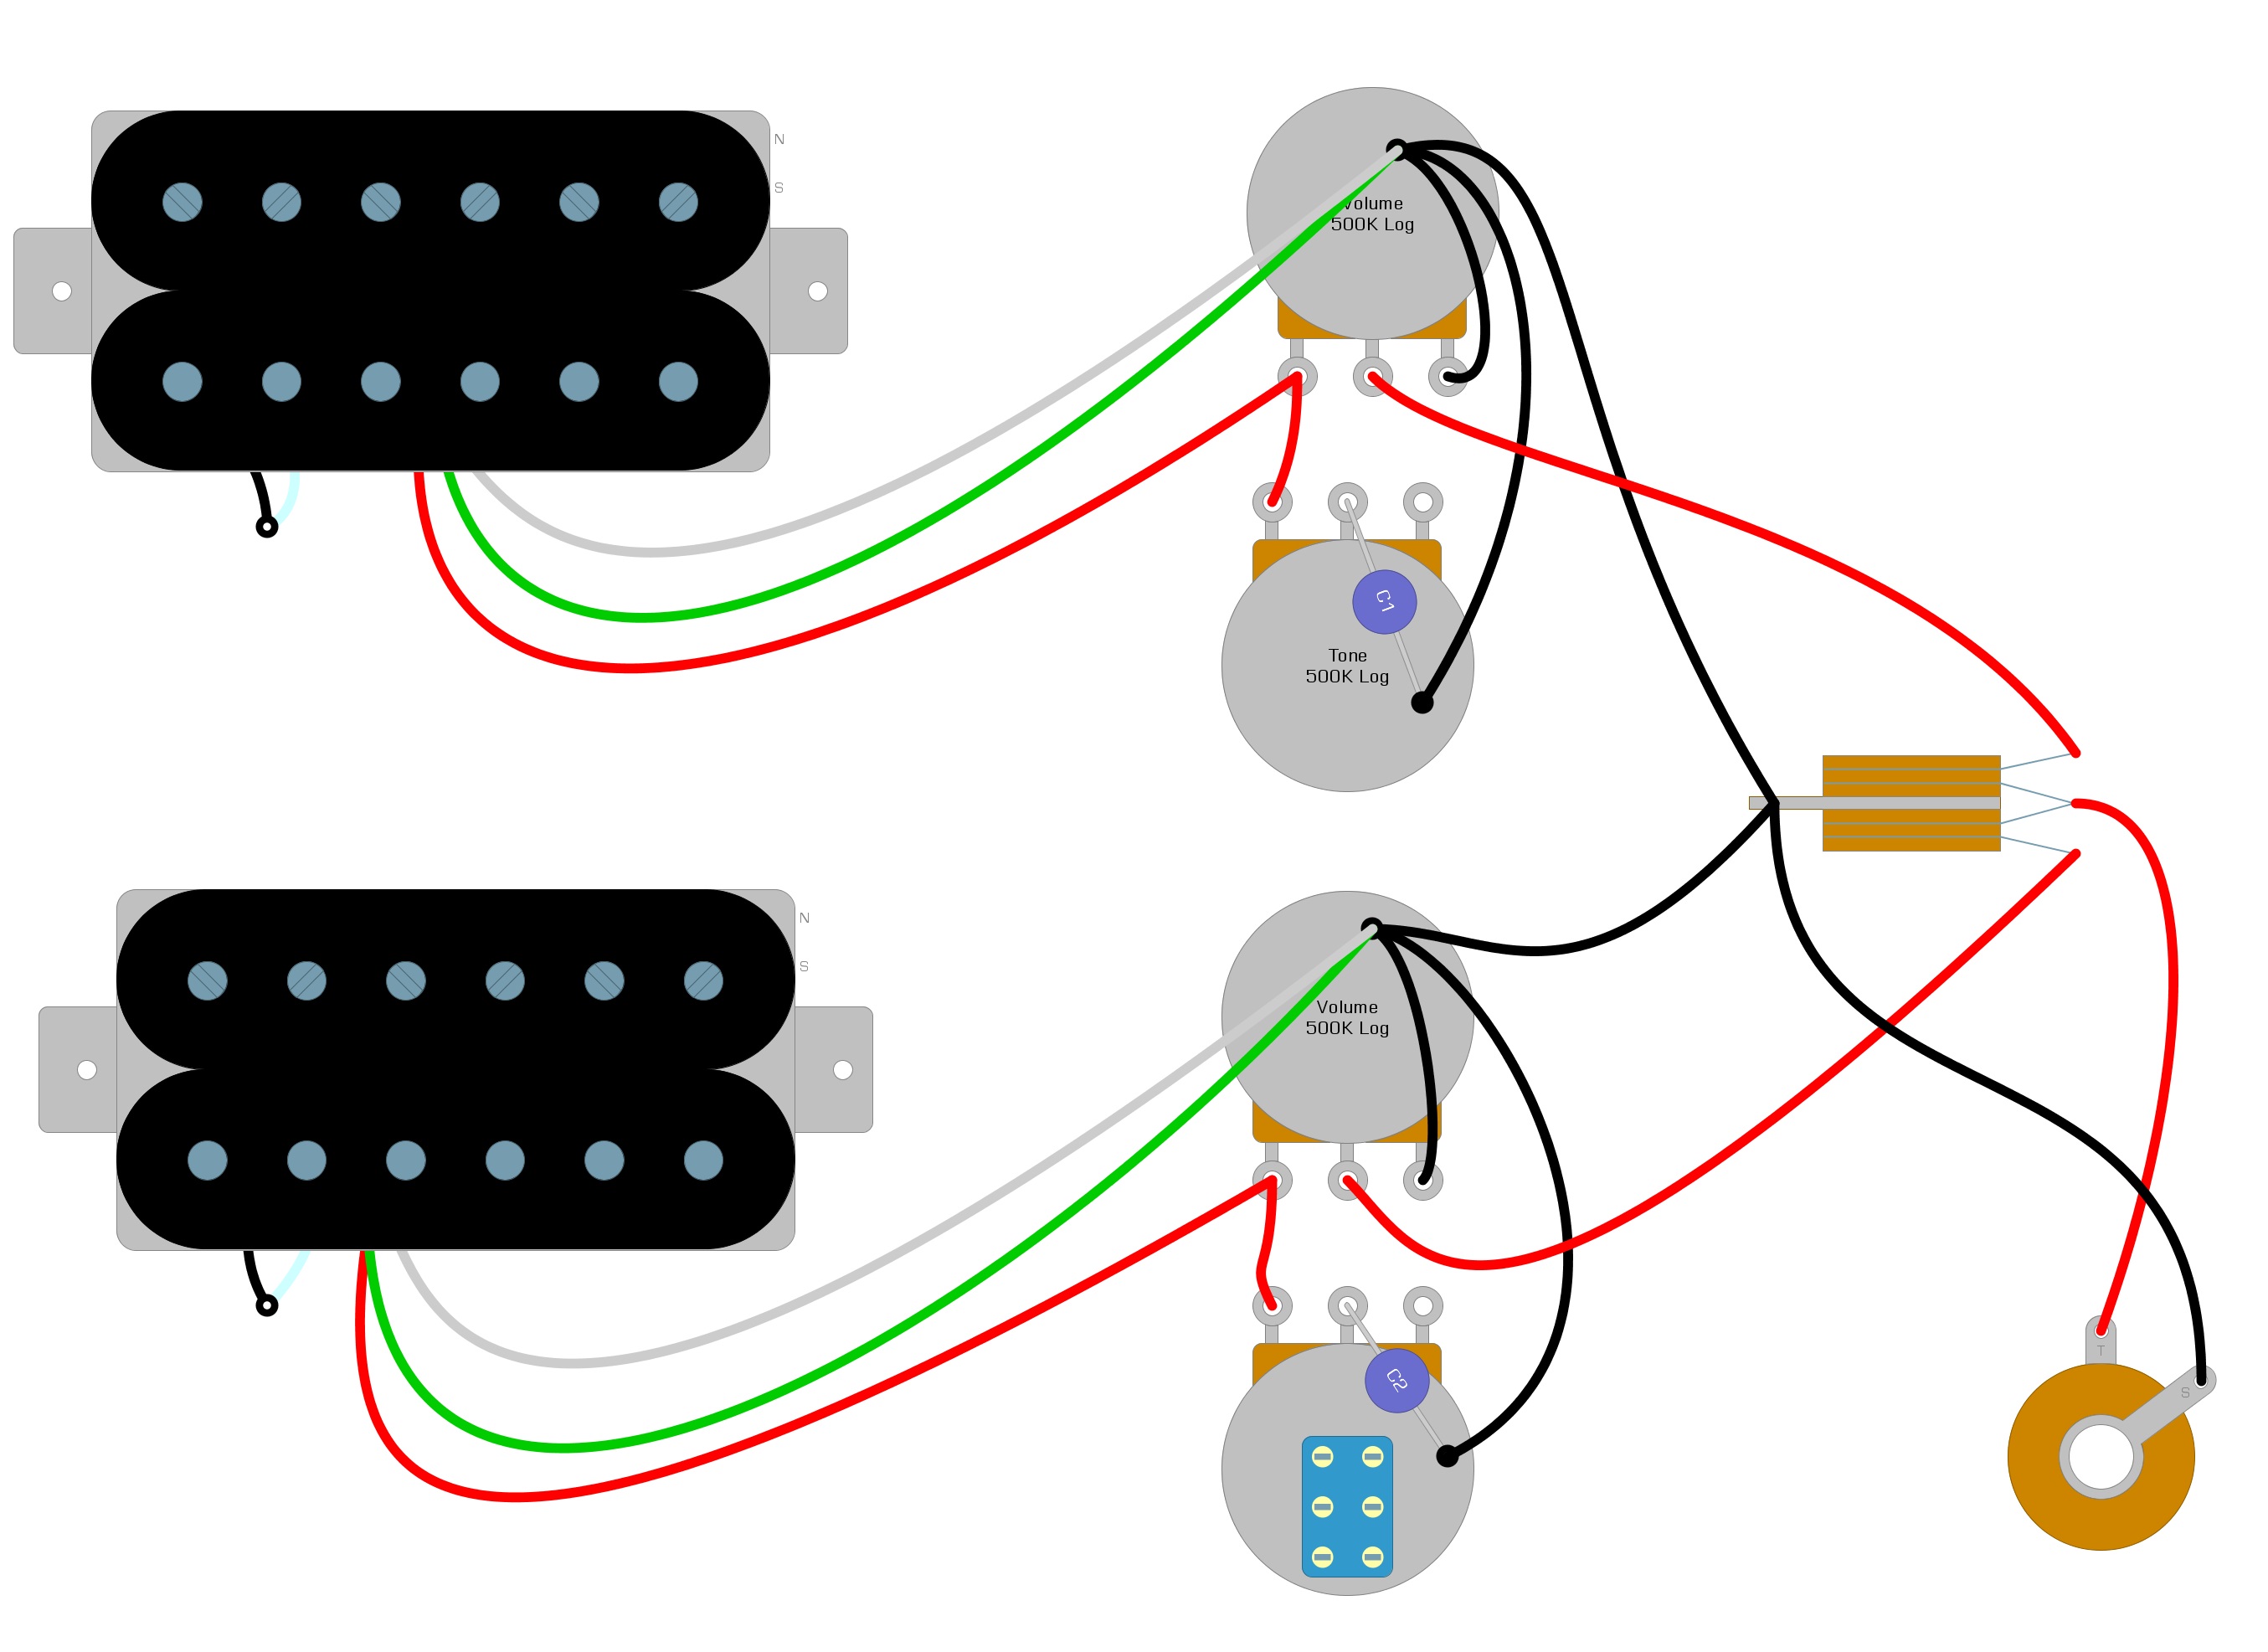
Once you have the humbucker installed, you can perform the coil-split modification. The coil-split modification requires you to make some small changes to the circuit, but gives you access to single-coil tones from a humbucker pickup. The modification is 100% reversible, so you won’t be doing any damage to the guitar, and it only requires changing one of your tone controls to a push-pull pot.
Converting Your Tone Control
Converting your tone control isn’t difficult, and the new component has all of the same parts, so you will install it exactly the same way. Write down where everything goes before you remove the standard tone control and replace it with a push-pull pot.
We’ve illustrated what the Gibson Les Paul from the last example would look like with the tone control converted in Example 3.
Example 3
Finishing The Wiring
To complete the wiring, connect the black and white wires from the Benedetto humbucker that you had taped off to the switch mechanism of the push-pull pot. You will also need to add a short GROUND wire from the switch to the back of the pot.
We’ve illustrated these connections in Example 4.
Example 4
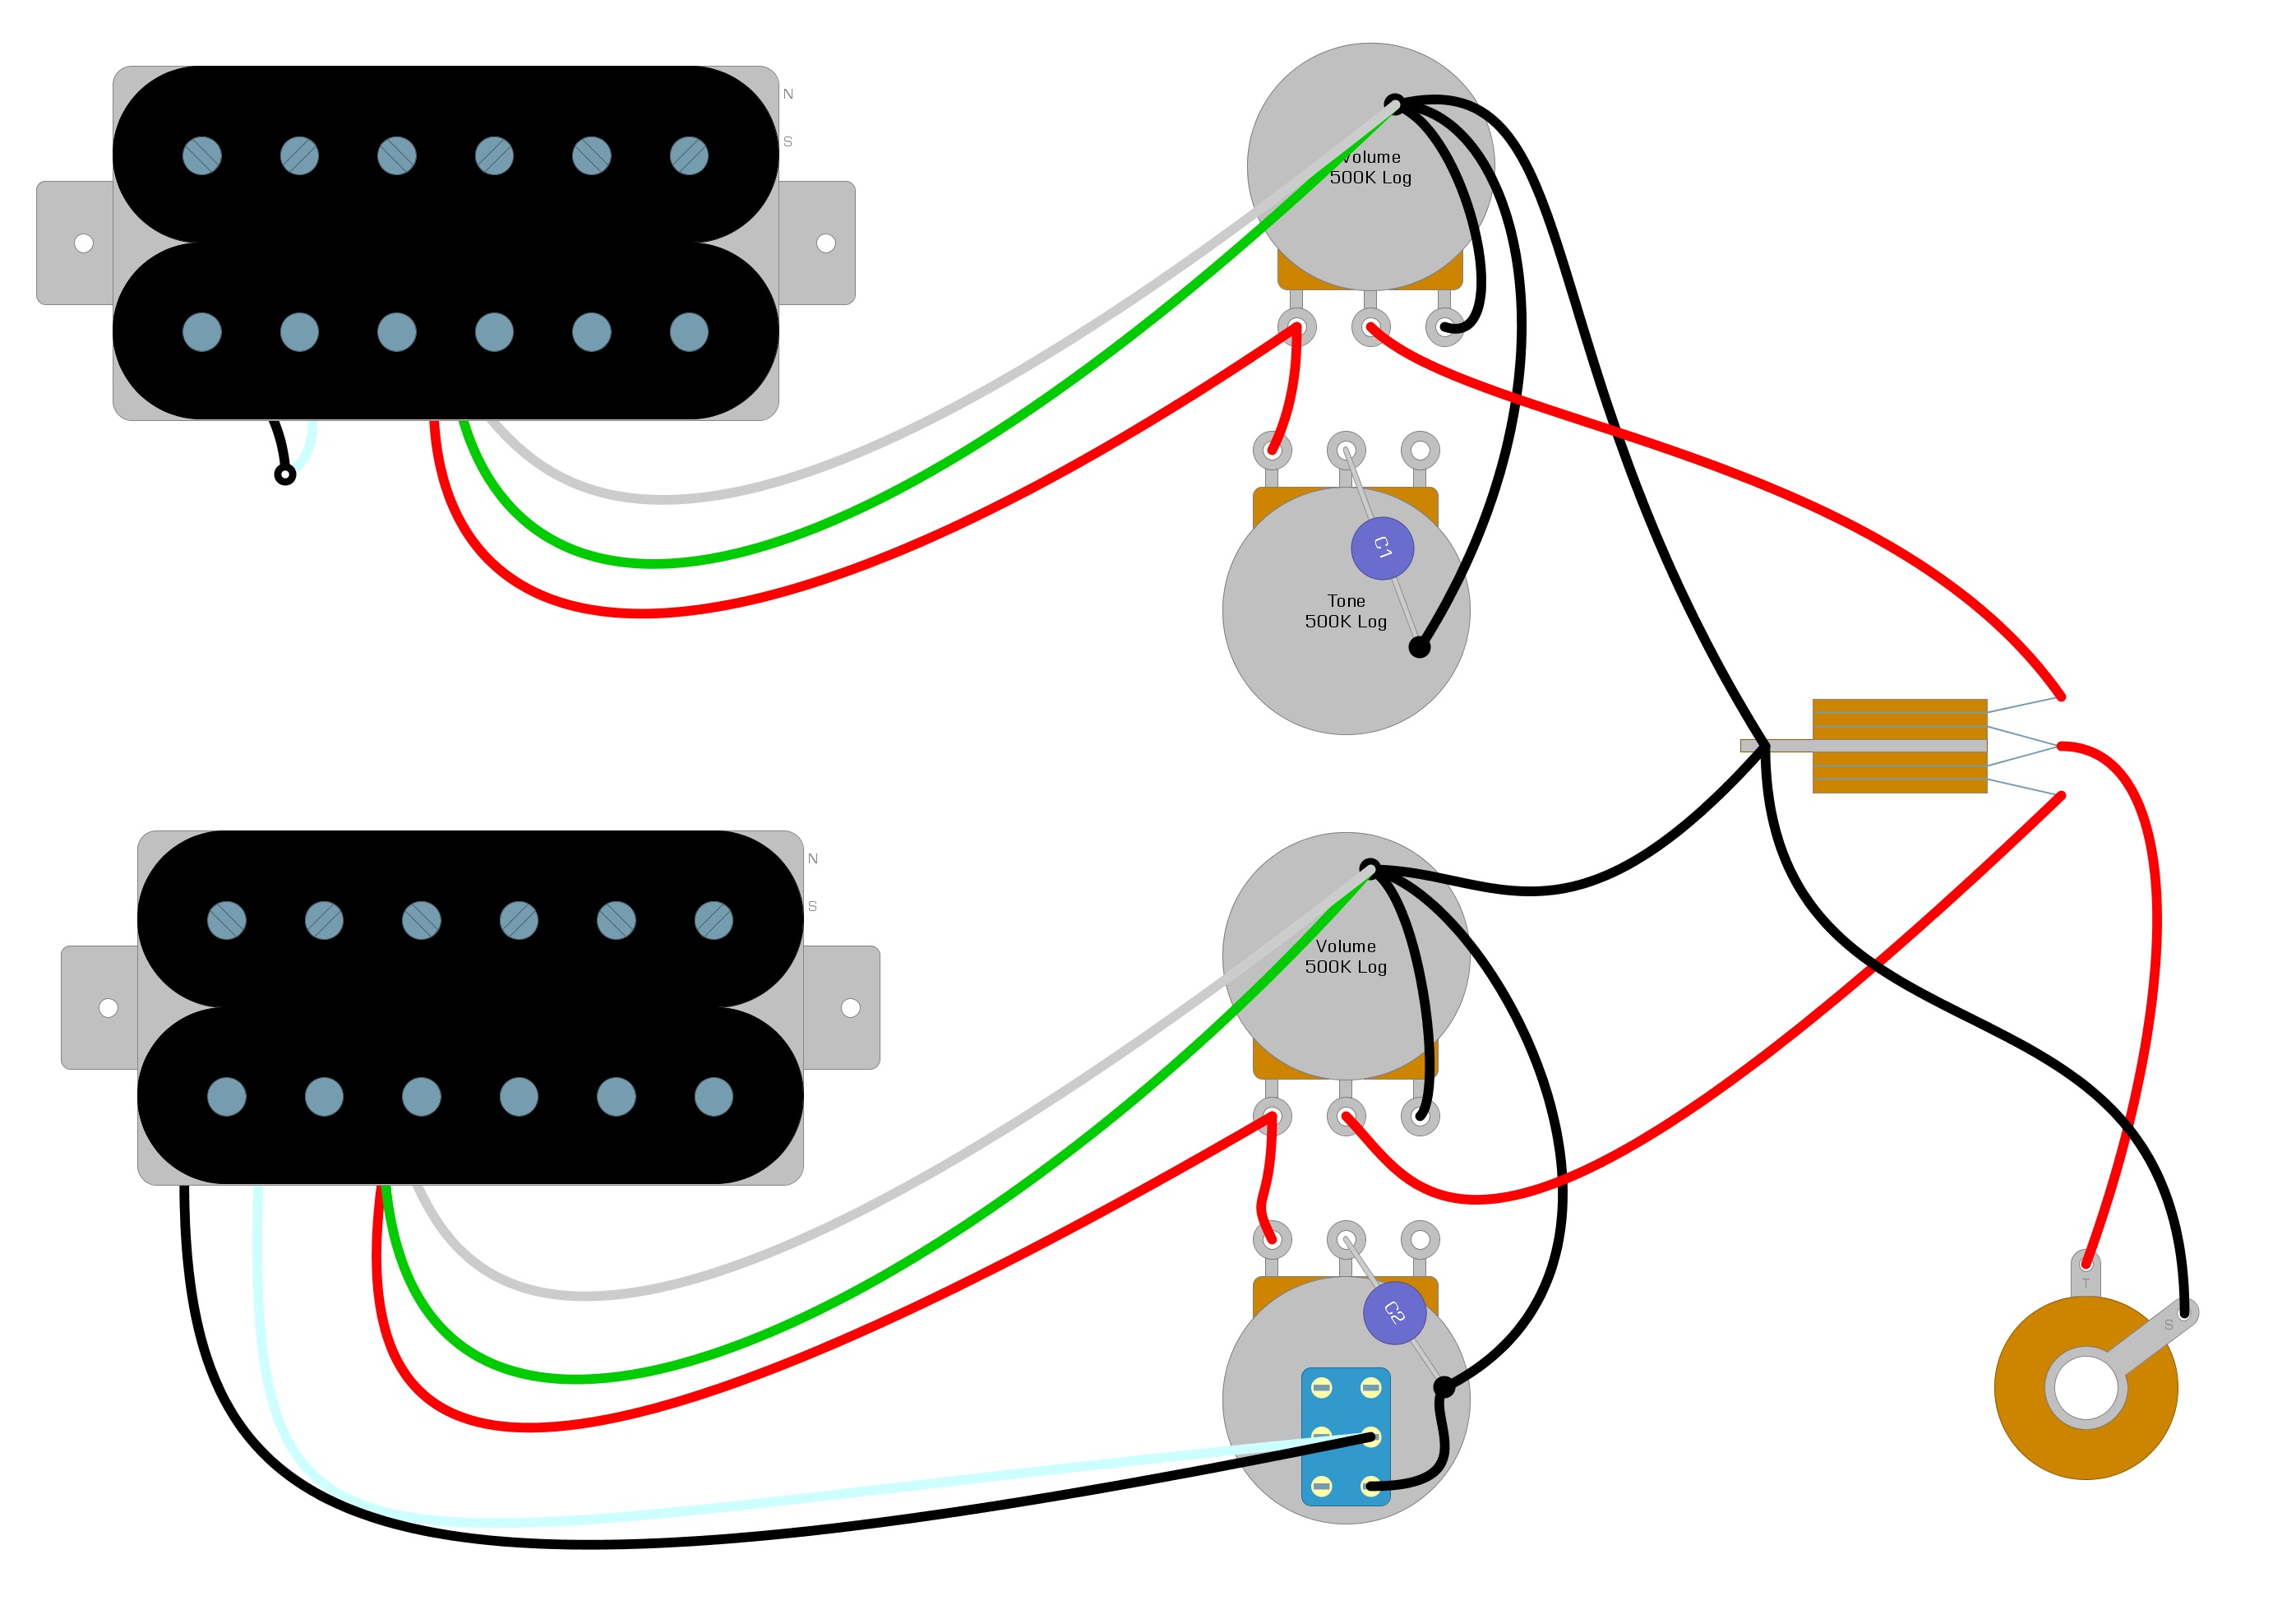
How It Works
The push-pull pot creates a path that the current running through the black and white wires can use to escape to GROUND. When you pull out the tone control, you open this path, and the current goes to GROUND instead of the second coil, effectively shutting it off. When you push the tone control back in, you break the path, and the current passes through the second coil, and the pickup behaves normally.
Summary
While finding a Benedetto pickup may be rare, having a guide like this to help you get them working is good to have as a reference. You will use the same wiring code for full size and mini-humbuckers, and once you have the wiring code, it’s easy to install. The HOT wire usually goes to a lug on the volume or switch, and the GROUND goes to the back of the volume pot.
If we have answered your questions and got your pickups working, please feel free to share this Benedetto pickup installation guide on Facebook and Twitter. For more articles on guitar electronics, visit humbuckersoup.com.


