
By Miguel Hernandez
Posted 03/16/2024
How many times have we heard this? “Don’t touch your truss rod, you might damage your guitar!” Or how about this one – “Truss rod adjustment should only be left to qualified professionals!” Well, that’s a load of hogwash! Or has this ever happened, you pick up your favorite axe and the action and feel just isn’t quite the same?
Fear not, we’re here to demystify this simple but critical component and put the myths finally to rest. With a few minutes and patience, you can adjust your truss rod easily and safely, and get your guitar playing great again in no time.
Back To Basics
Truss rods: what are they? Simply put, when guitar necks are constructed, there is a steel reinforcing rod (or rods, more on this later) inserted in a channel under the fretboard that counteracts the string tension against the neck when the guitar is tuned to pitch. The rod is anchored in such a way that allows the user to adjust the neck for optimal relief, action, tone, and playability.
Reasons
There may come a time where a trust rod adjustment on your beloved instrument is needed. Variables such as ambient temperature, climate, humidity, even geography play a role in the stability of the instrument’s setup and will have a direct effect on the wood. These changes influence how the neck “moves,” and in some cases, may require you to adjust it regularly. Fortunately for most, just a minor tweak of the rod will do the trick.
Truss rods are an often feared, misunderstood, and under appreciated part of guitar ownership. I often find myself being asked to set up a guitar, and after going through the entire instrument in detail, I see that just a simple tweak of the trust rod would’ve fixed the action or fret buzz. Clients are often reluctant to adjust it on their own.
If you follow a few basic principles, nothing that you do will damage or require the summoning of a magical guitar truss rod sage. Yes, you can be your own hero! So, grab your wrenches and let’s go!
Truss Rod Design
Not so fast! A quick discussion on truss rod types is in order. There are two types of truss rods generally used in most guitars.
Vintage-style single action rods, or compression rods, are typically installed in a curved channel in the neck and anchored on one end. This rod exerts force on the neck in a straightening fashion to counteract string tension pulling on the neck in the opposite direction. They’re typically lightweight and require less material to be removed during neck construction. These rods lack forward adjustment.
Dual action truss rods, or two-way rods, on the other hand consist of two bars connected sometimes welded vertically together, the top bar being of a fixed length, and the other rod having the ability to be adjusted in either direction thereby expanding or contracting the rod. Dual action roads are commonly used today due to this adjustability. A larger channel has to be routed for this design, but the benefits outweigh the cons due to their flexibility and stability.
Other Truss Rod Designs
There are some less common and unique designs such as the truss rods used by Rickenbacker Guitars. This design is a horizontal double rod design, in which the rods can be adjusted individually inside the neck.
End Goal : Adjusting Your Truss Rod and Why?
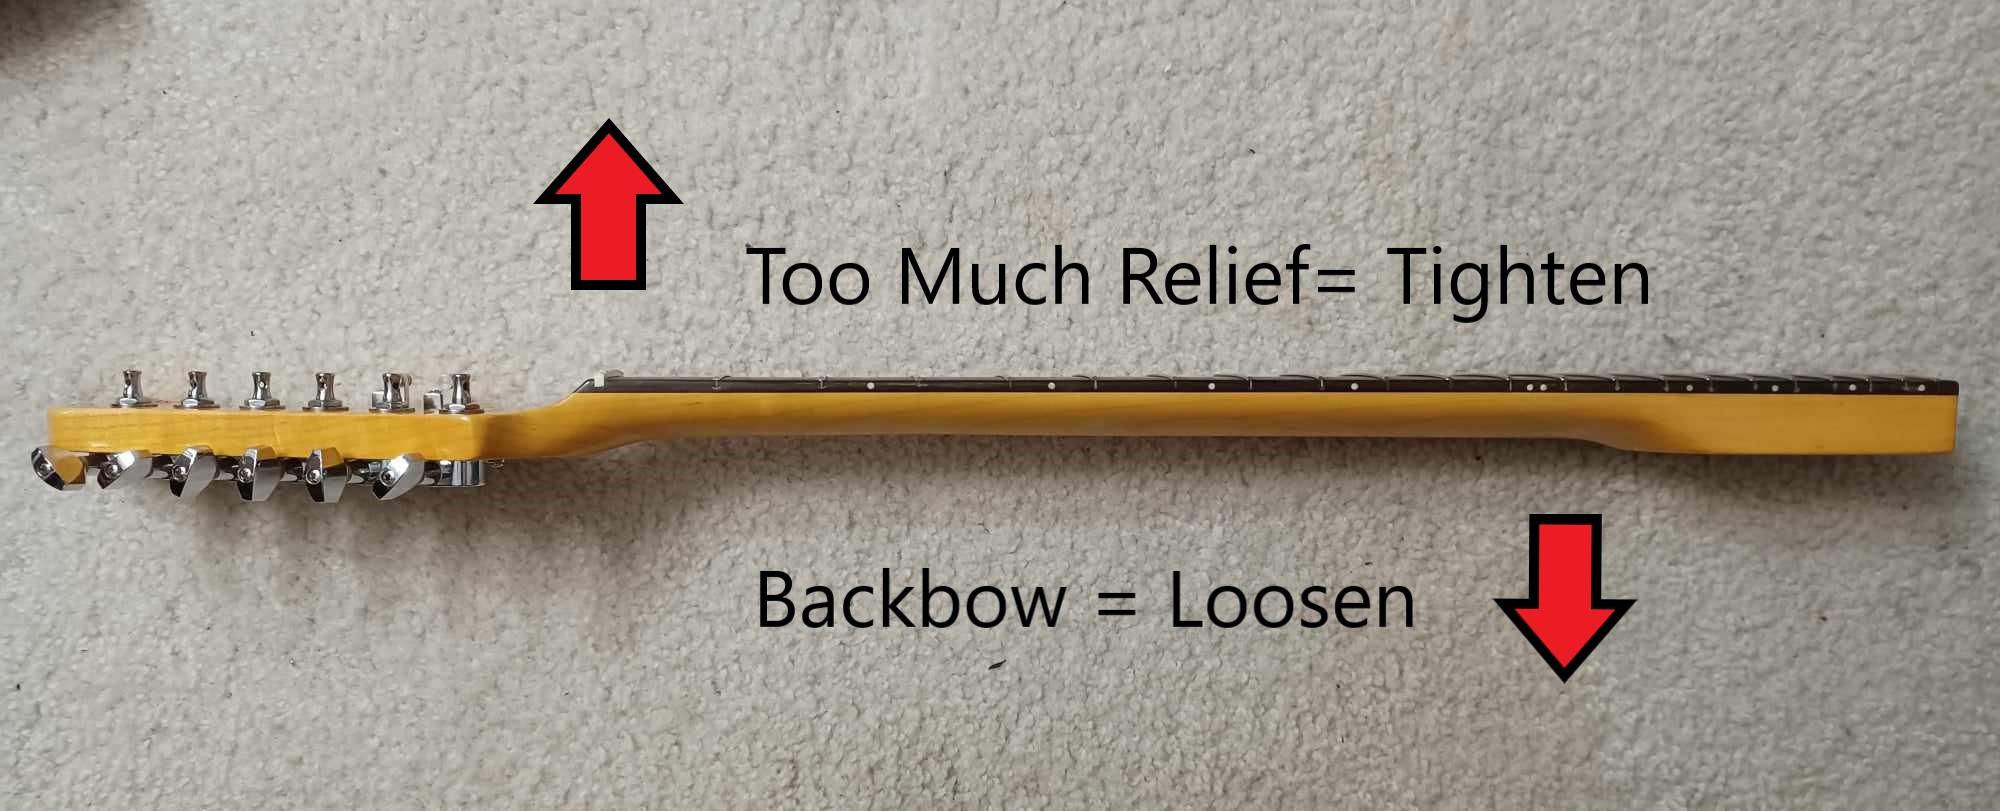
Regardless of their design and construction, all truss rods have one common purpose, they either add relief (forward bow), or take away relief (back bow or straighten) the guitar neck for maximum tone, comfort, and playability.
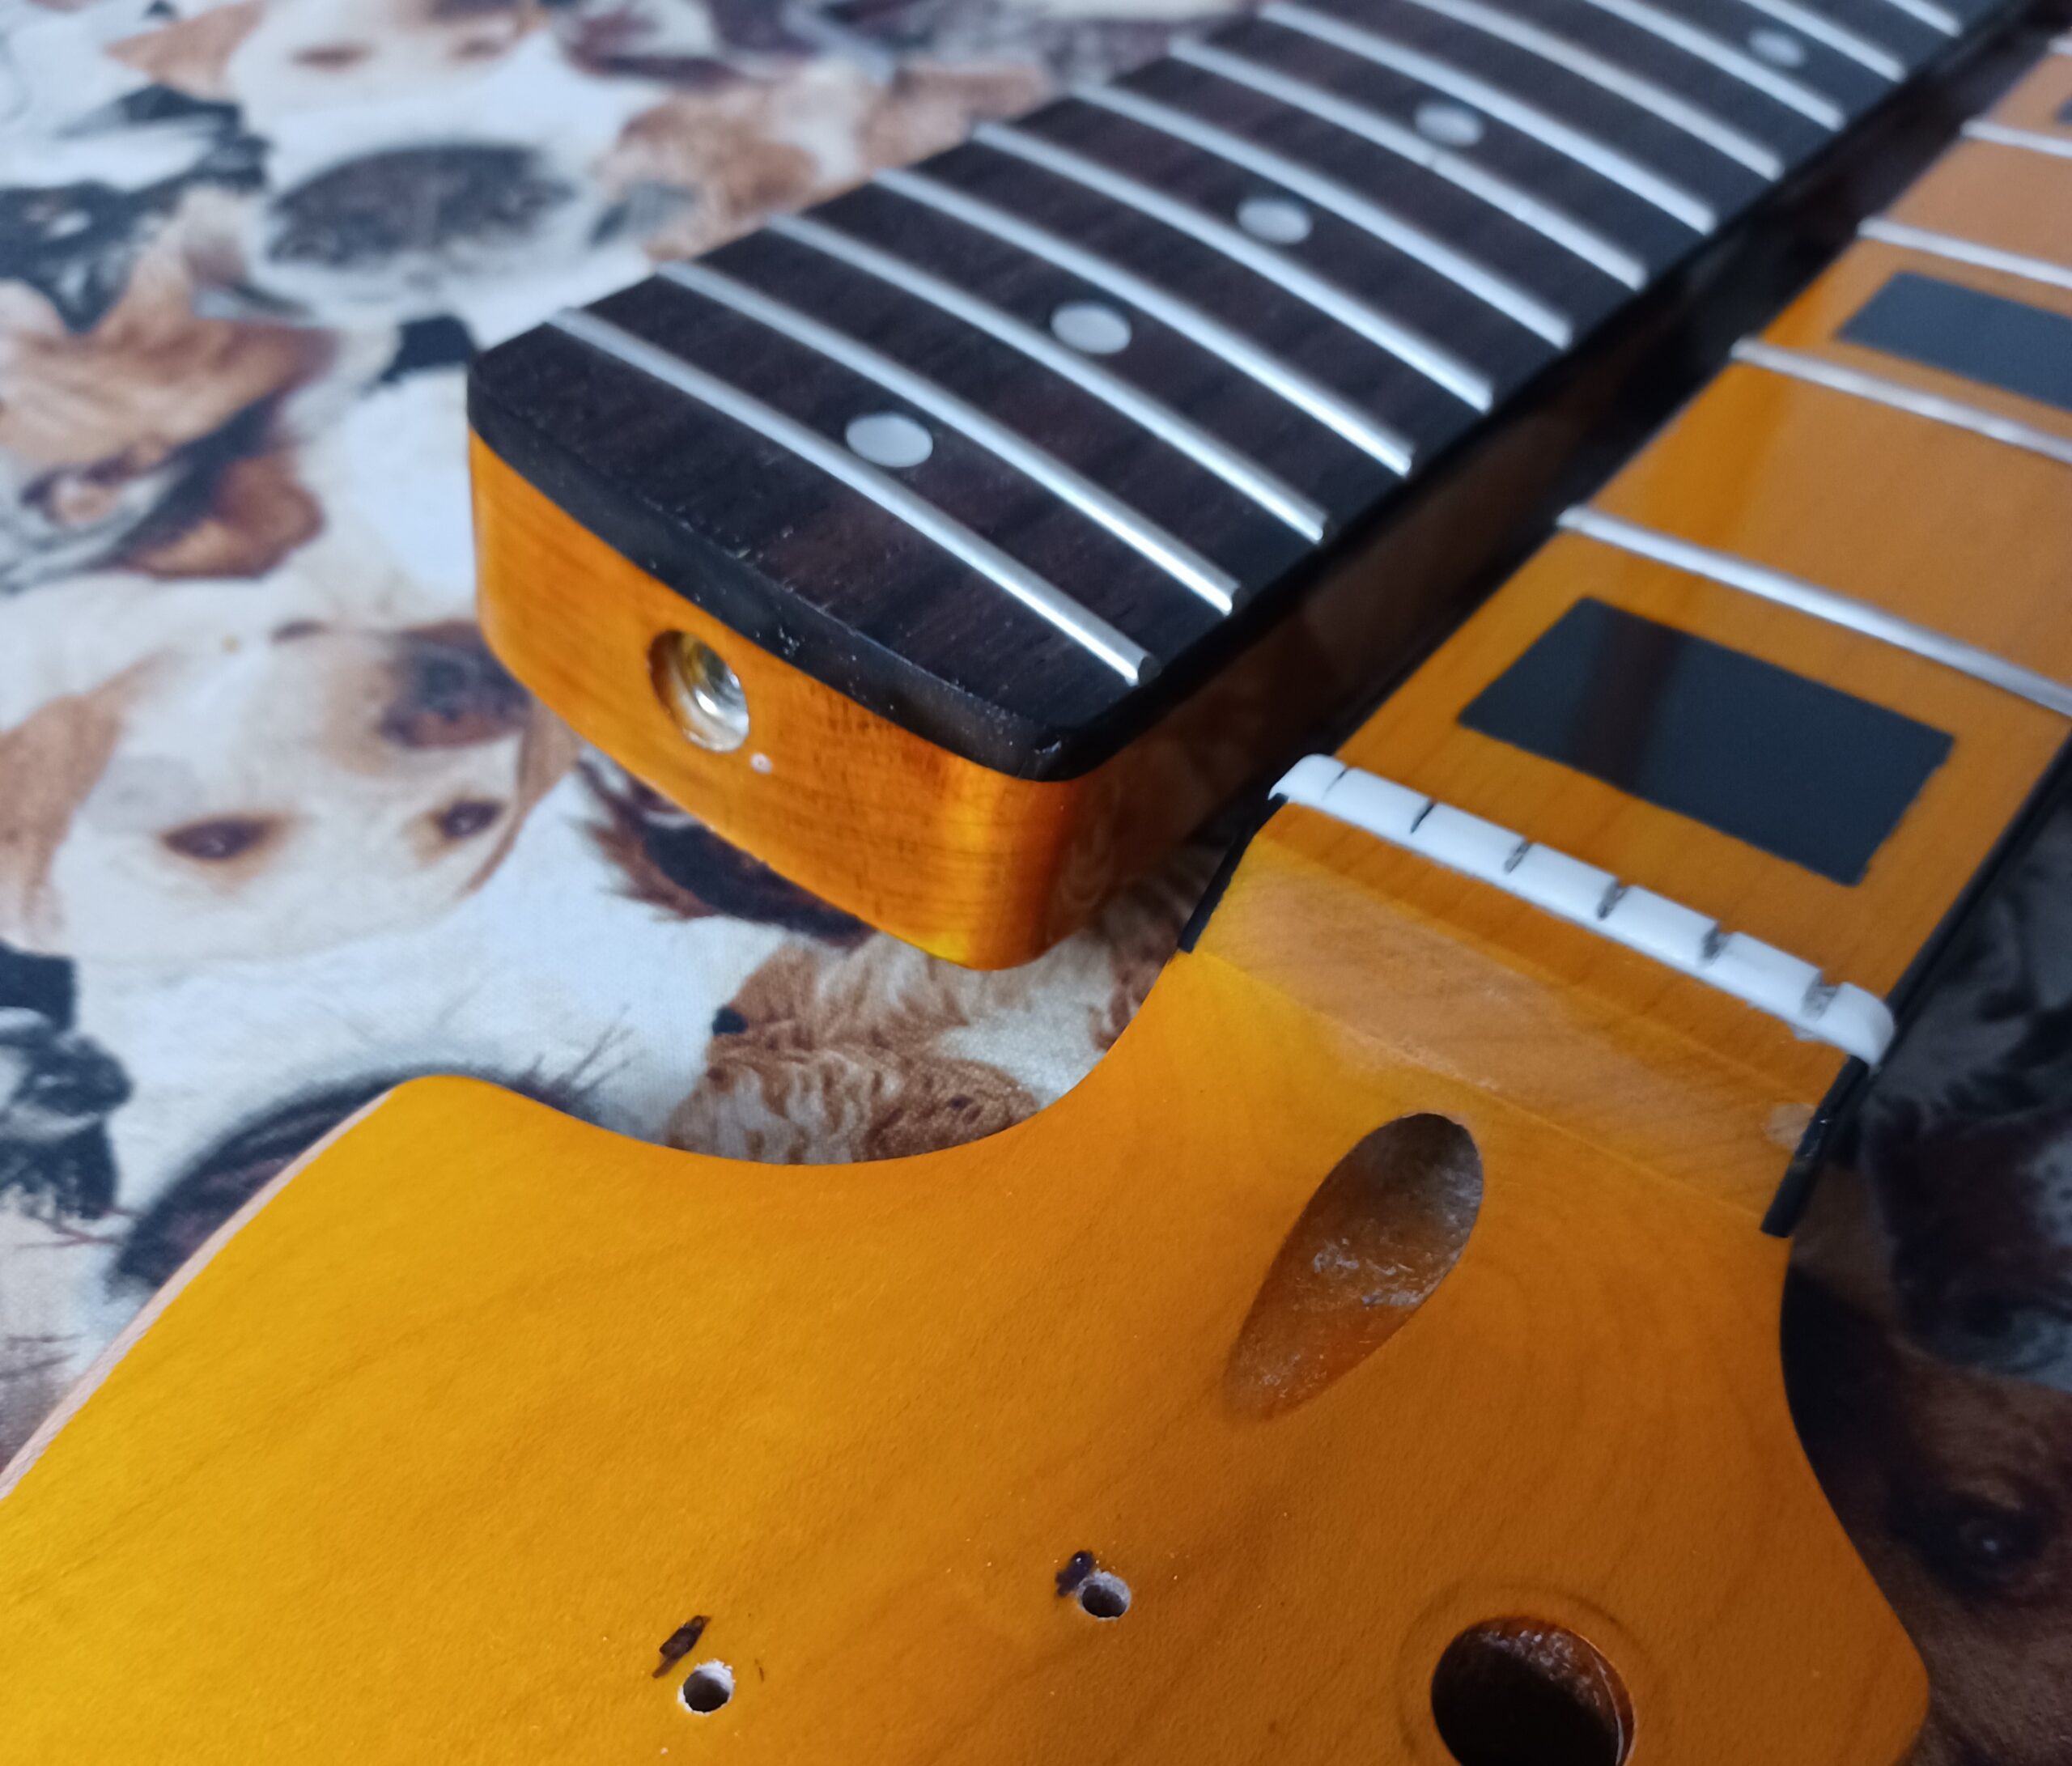
This is where we learn how to locate the bar on our instrument. Every guitar, acoustic or electric, has a truss rod installed for stability, and will have an adjustment point somewhere on either side of the neck, either at the headstock or at the heel end. Let’s go through them below.
Headstock Adjustment
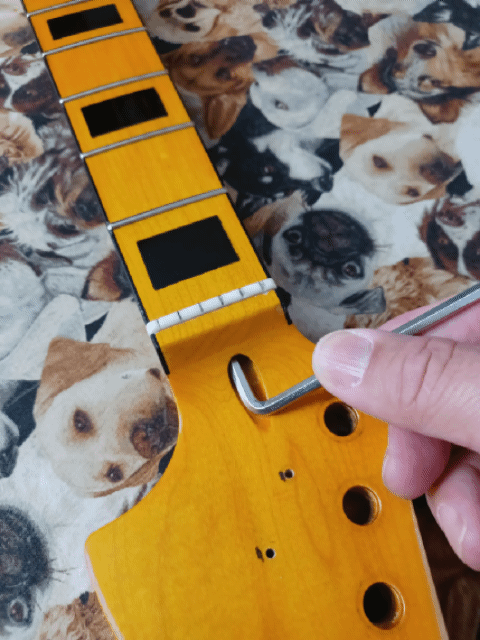
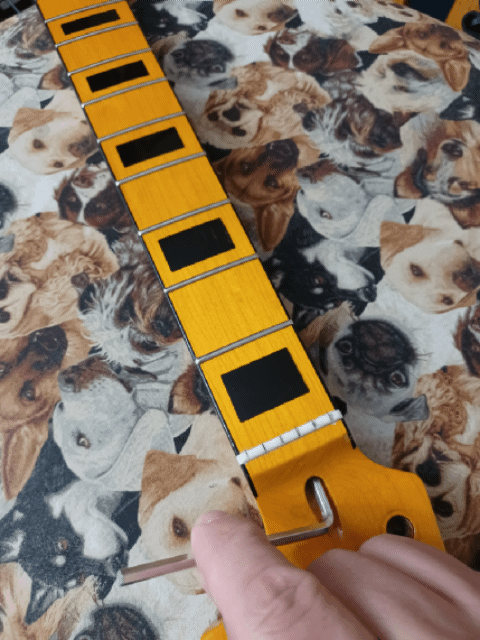
Headstock adjustment is typically done with a hexagonal or Allen head-type nut that requires a socketed wrench or screwdriver. It’s typically recessed into the headstock in a small cavity past the nut. Hex keys, “L” shape hexes, and other wrenches are typically included with all guitars for the truss rod.
Heel Adjust
This adjustment point, as the name suggests, is at the back end of the fingerboard, where the neck meets the guitar body. These come in several types:
- Standard heel adjust (neck removal) – traditionally a vintage design requiring neck removal to make adjustments to the neck then replacing the neck and checking your work. Can be tedious for some, and sometimes needs to be done several times to dial in the neck relief to taste. This method is not very popular with most guitarists for obvious reasons, and is favored by vintage guitar enthusiasts.
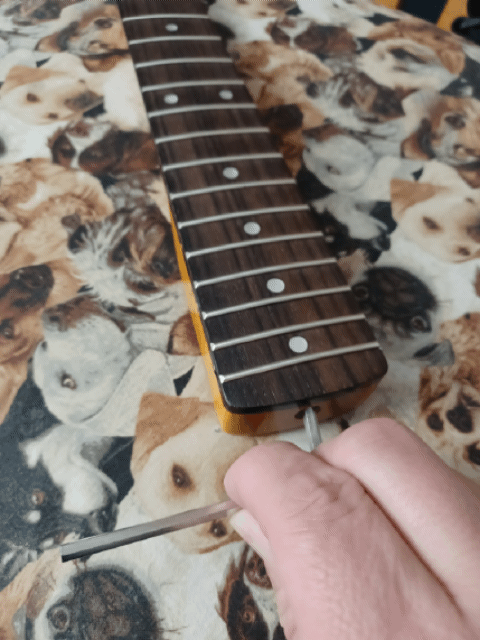
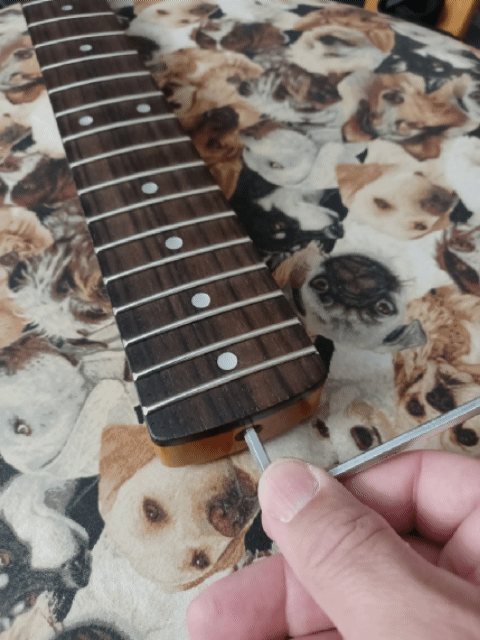
- Heel adjust (without neck removal) – More modern S-style guitar builders have adopted this method, since it does not require removal of the neck and the truss rod can be adjusted with the guitar tuned to pitch while under full tension. This heel adjust method allows for faster accurate adjustments to the neck by eliminating most of the guesswork created by separating the neck from the body. Access to the heel is routed out near the neck pickup for a wrench or screwdriver to fit. Another benefit is the ability to retain the vintage styling of the neck with easier access to the truss rod.
- Spoke wheel adjust – This is a more recent and popular approach adopted by builders that introduce a vertical wheel with holes along its rim, where a small tool or wrench can be inserted to make adjustments to the truss rod easily, requiring no specialized tools.
So, now that you’re well versed in the truss rod styles and tools needed, grab your guitar and let’s get cracking!
- Grab your guitar and tool/s
- Tune your guitar to pitch
- Sight down from the headstock down the length of the neck with one eye closed, do this on the high E and Low E side to check relief.
- Use the string as a straight edge along the edge of the neck, it will be apparent which way the neck is bending.
- If there is too much forward bow/relief, tighten the truss rod clockwise an 1/8 to ¼ of a turn and recheck.
- If there is too much back bow, loosen the truss rod to the left by the same increments above.
- Work slowly and always in very small increments as described above.
- Tune the guitar to pitch again. In playing position, check the relief and action by fingering the high E and low E individually, holding the string down and checking the action along the string. There should be no buzzing or fretting out and the action should be comfortable to play. Adjust accordingly as above.
- I recommend after adjusting to give the neck/wood time settle overnight and recheck the following day. Adjust if necessary.
- Great job!
I hope this has helped you take the mystery and apprehension out of this simple and rewarding tweak to any guitar! It is well worth the time and it’s an essential part of any guitar setup.
Have fun and keep playing!
Miguel Hernandez


