
By Ed Malaker
Posted 05/25/2020
Let’s take a look at this Gibson Les Paul wiring diagram, so you can use it as a reference when installing new pickups or changing an old component. There are many different brands of pickups you can install into your guitar, and once you know the pickup’s wiring code, the rest of the installation is the same.
Gibson Les Paul Wiring Code
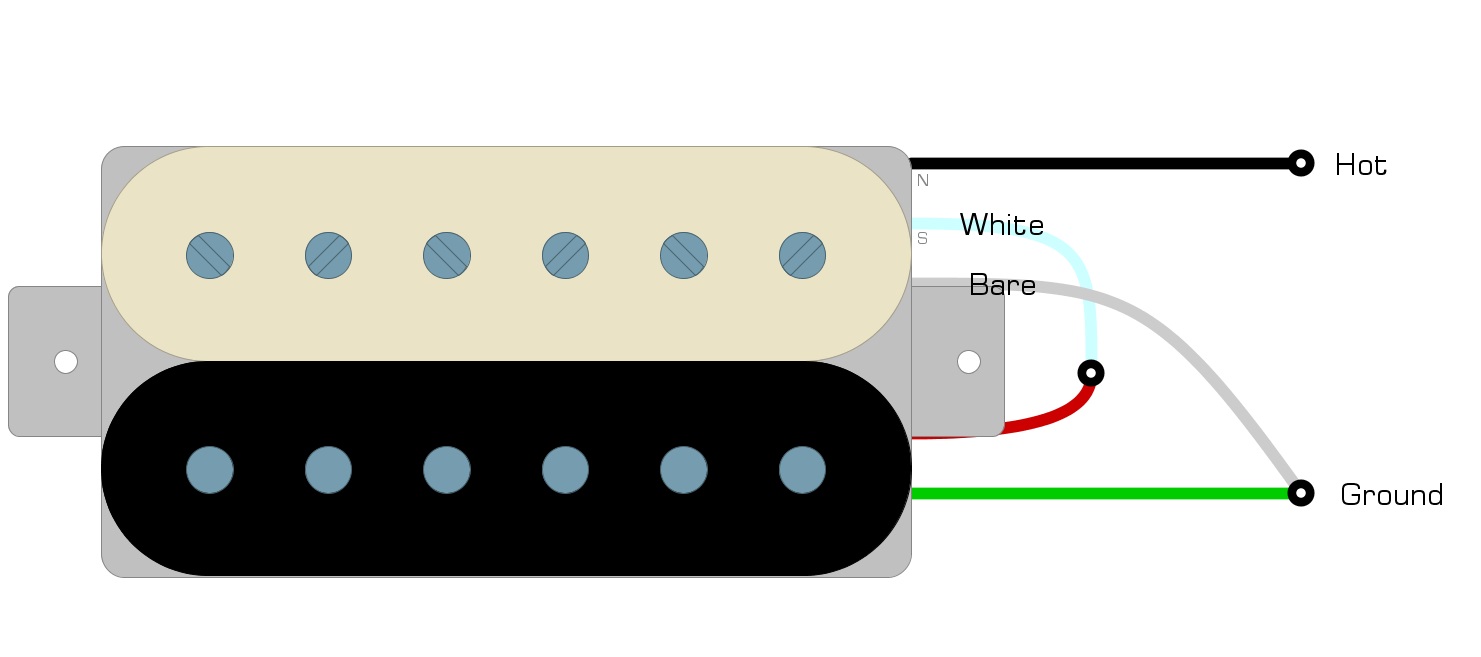
The wiring code refers to the four colored wires and one bare wire that most humbuckers have. You need to know which color is the HOT, which two colors are tied together and taped off, and which color you connect to the bare wire to create the GROUND. There are many different brands of humbucker that you can install, and many of them will use a unique wiring scheme. You will need to check your pickup’s documentation to get the wiring code.
The most important thing is to find the HOT and the GROUND so we can install it, as we see in Example 1.
Example 1
Gibson Les Paul Wiring Diagram
Once you know the HOT and the GROUND wires for each pickup, installation is straightforward. Wire your guitar to resemble the diagram in Example 2.
Example 2
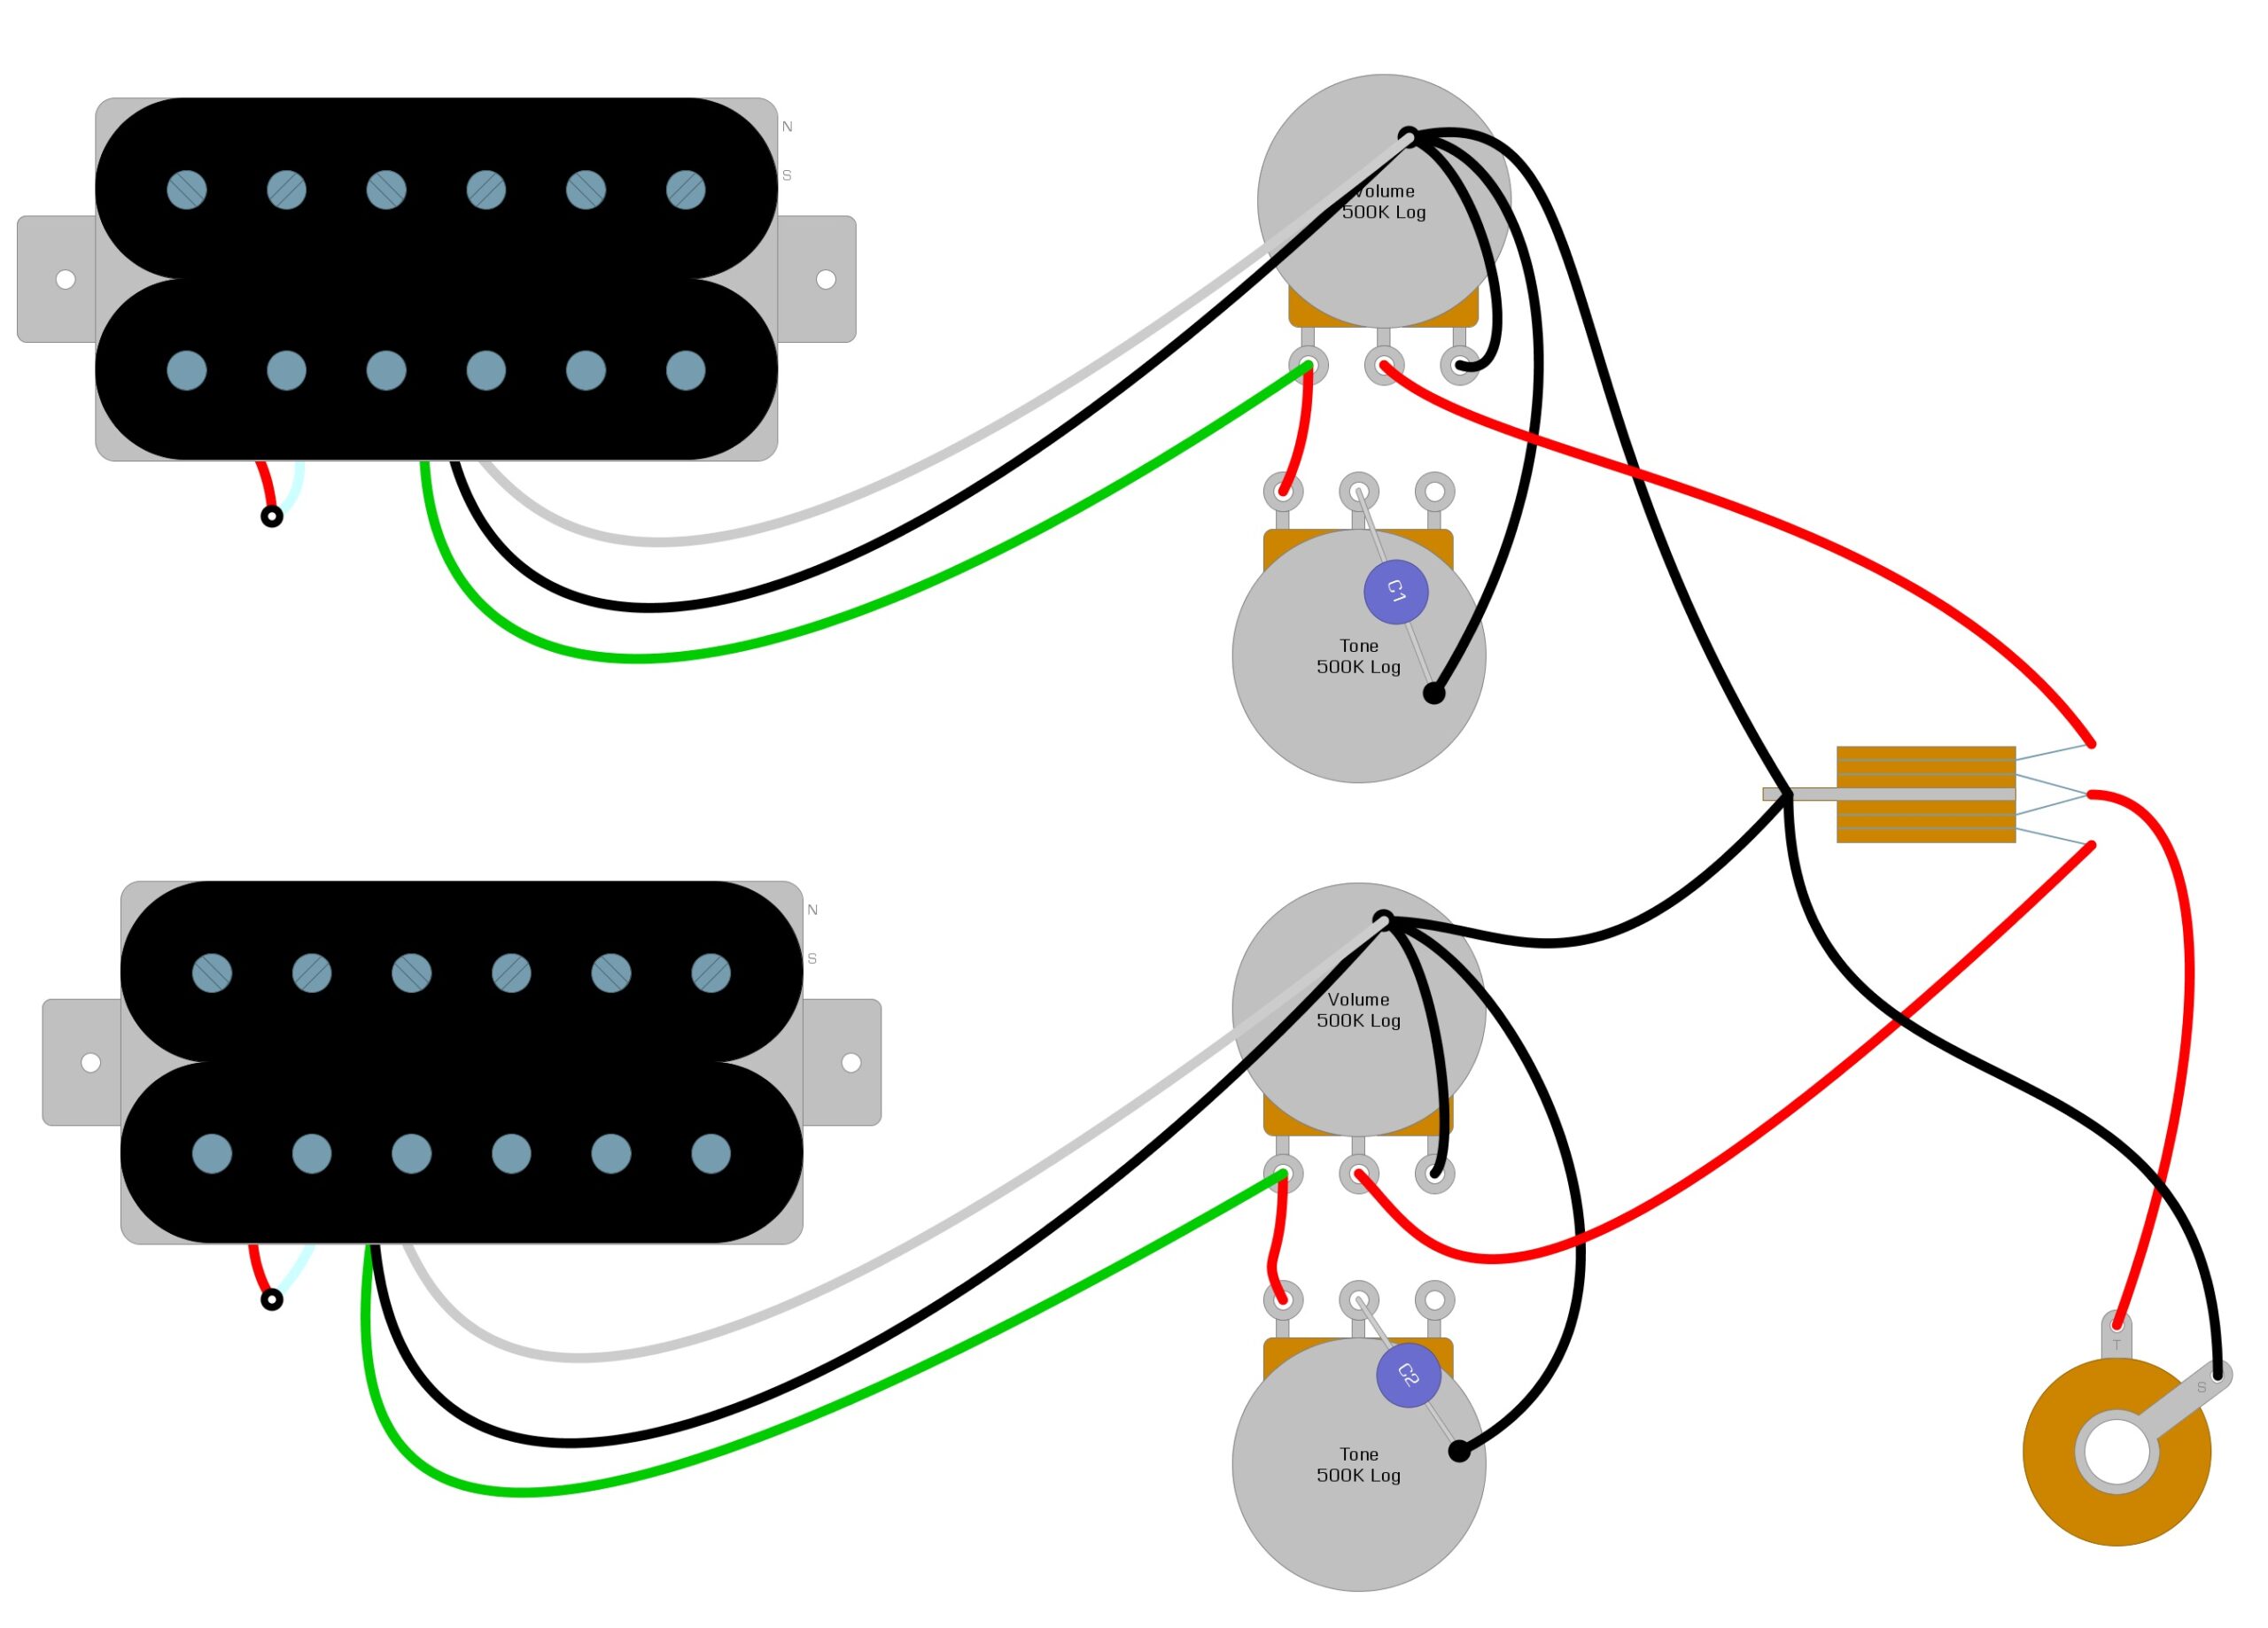
The only thing that might seem strange about this diagram is that most people will not use the black wire from the third lug of the Volume to the back of the Volume pot. Most people will instead bend the lug to contact the back of the pot and solder it into place.
Components List
These are the components you are likely to need if you are starting from scratch or are unsure about the replacement part.
Potentiometers
You are going to need four potentiometers. Two potentiometers are for the Volume controls, and two are for the Tone. Since we are using humbuckers, we use 500k pots. In the early days, Gibson used a 250k pot for the Volume and a 500k for the Tone. Modern guitars use two 500k pots. If you feel the Tone is too dark, you can try 1 Mega-ohm pots or no-load pots. We recommend starting with audio taper pots, but many people like to use linear taper in the tone control.
Toggle Switch
You will need a three-way toggle switch. Any 3-way switch with three tabs on one side and a ground on the other should work, as long as it fits into the hole.
Capacitor
Most of the older Gibson Les Pauls used a .047uf capacitor on each tone control. A more common modern value is the .022uf capacitor. You may want to experiment by going even lower to .01uf as some people feel it gives a broader tone control range.
Output Jack
The output jack is a simple and inexpensive component that you can find in almost any music store.
Summary
Installing new pickups or replacing malfunctioning components is a fantastic way to learn how to modify your guitar. With the diagram as your guide, you can always return to the original setup if you start experimenting with values.
We hope that you’ve enjoyed reading over this short Les Paul wiring guide and that it’s answered any questions you’ve had. If we’ve helped, please feel free to share this Gibson Les Paul wiring diagram on Facebook and Twitter. For more articles on guitar electronics, visit humbuckersoup.com.