By Ed Malaker
Posted 12/18/2019
Today we’ll cover installing pickups into a two-pickup guitar with a two-pickup guitar wiring diagram. So, to start, we’ll demonstrate by modeling our guitar circuit after the Fender Telecaster, which uses two pickups, one volume, one tone control, and one three-way switch.
If that’s the configuration you have, this circuit will work. But just be aware that you don’t need a Fender Telecaster per se. For example, you can use humbuckers, single coils, or any combination of pickups.
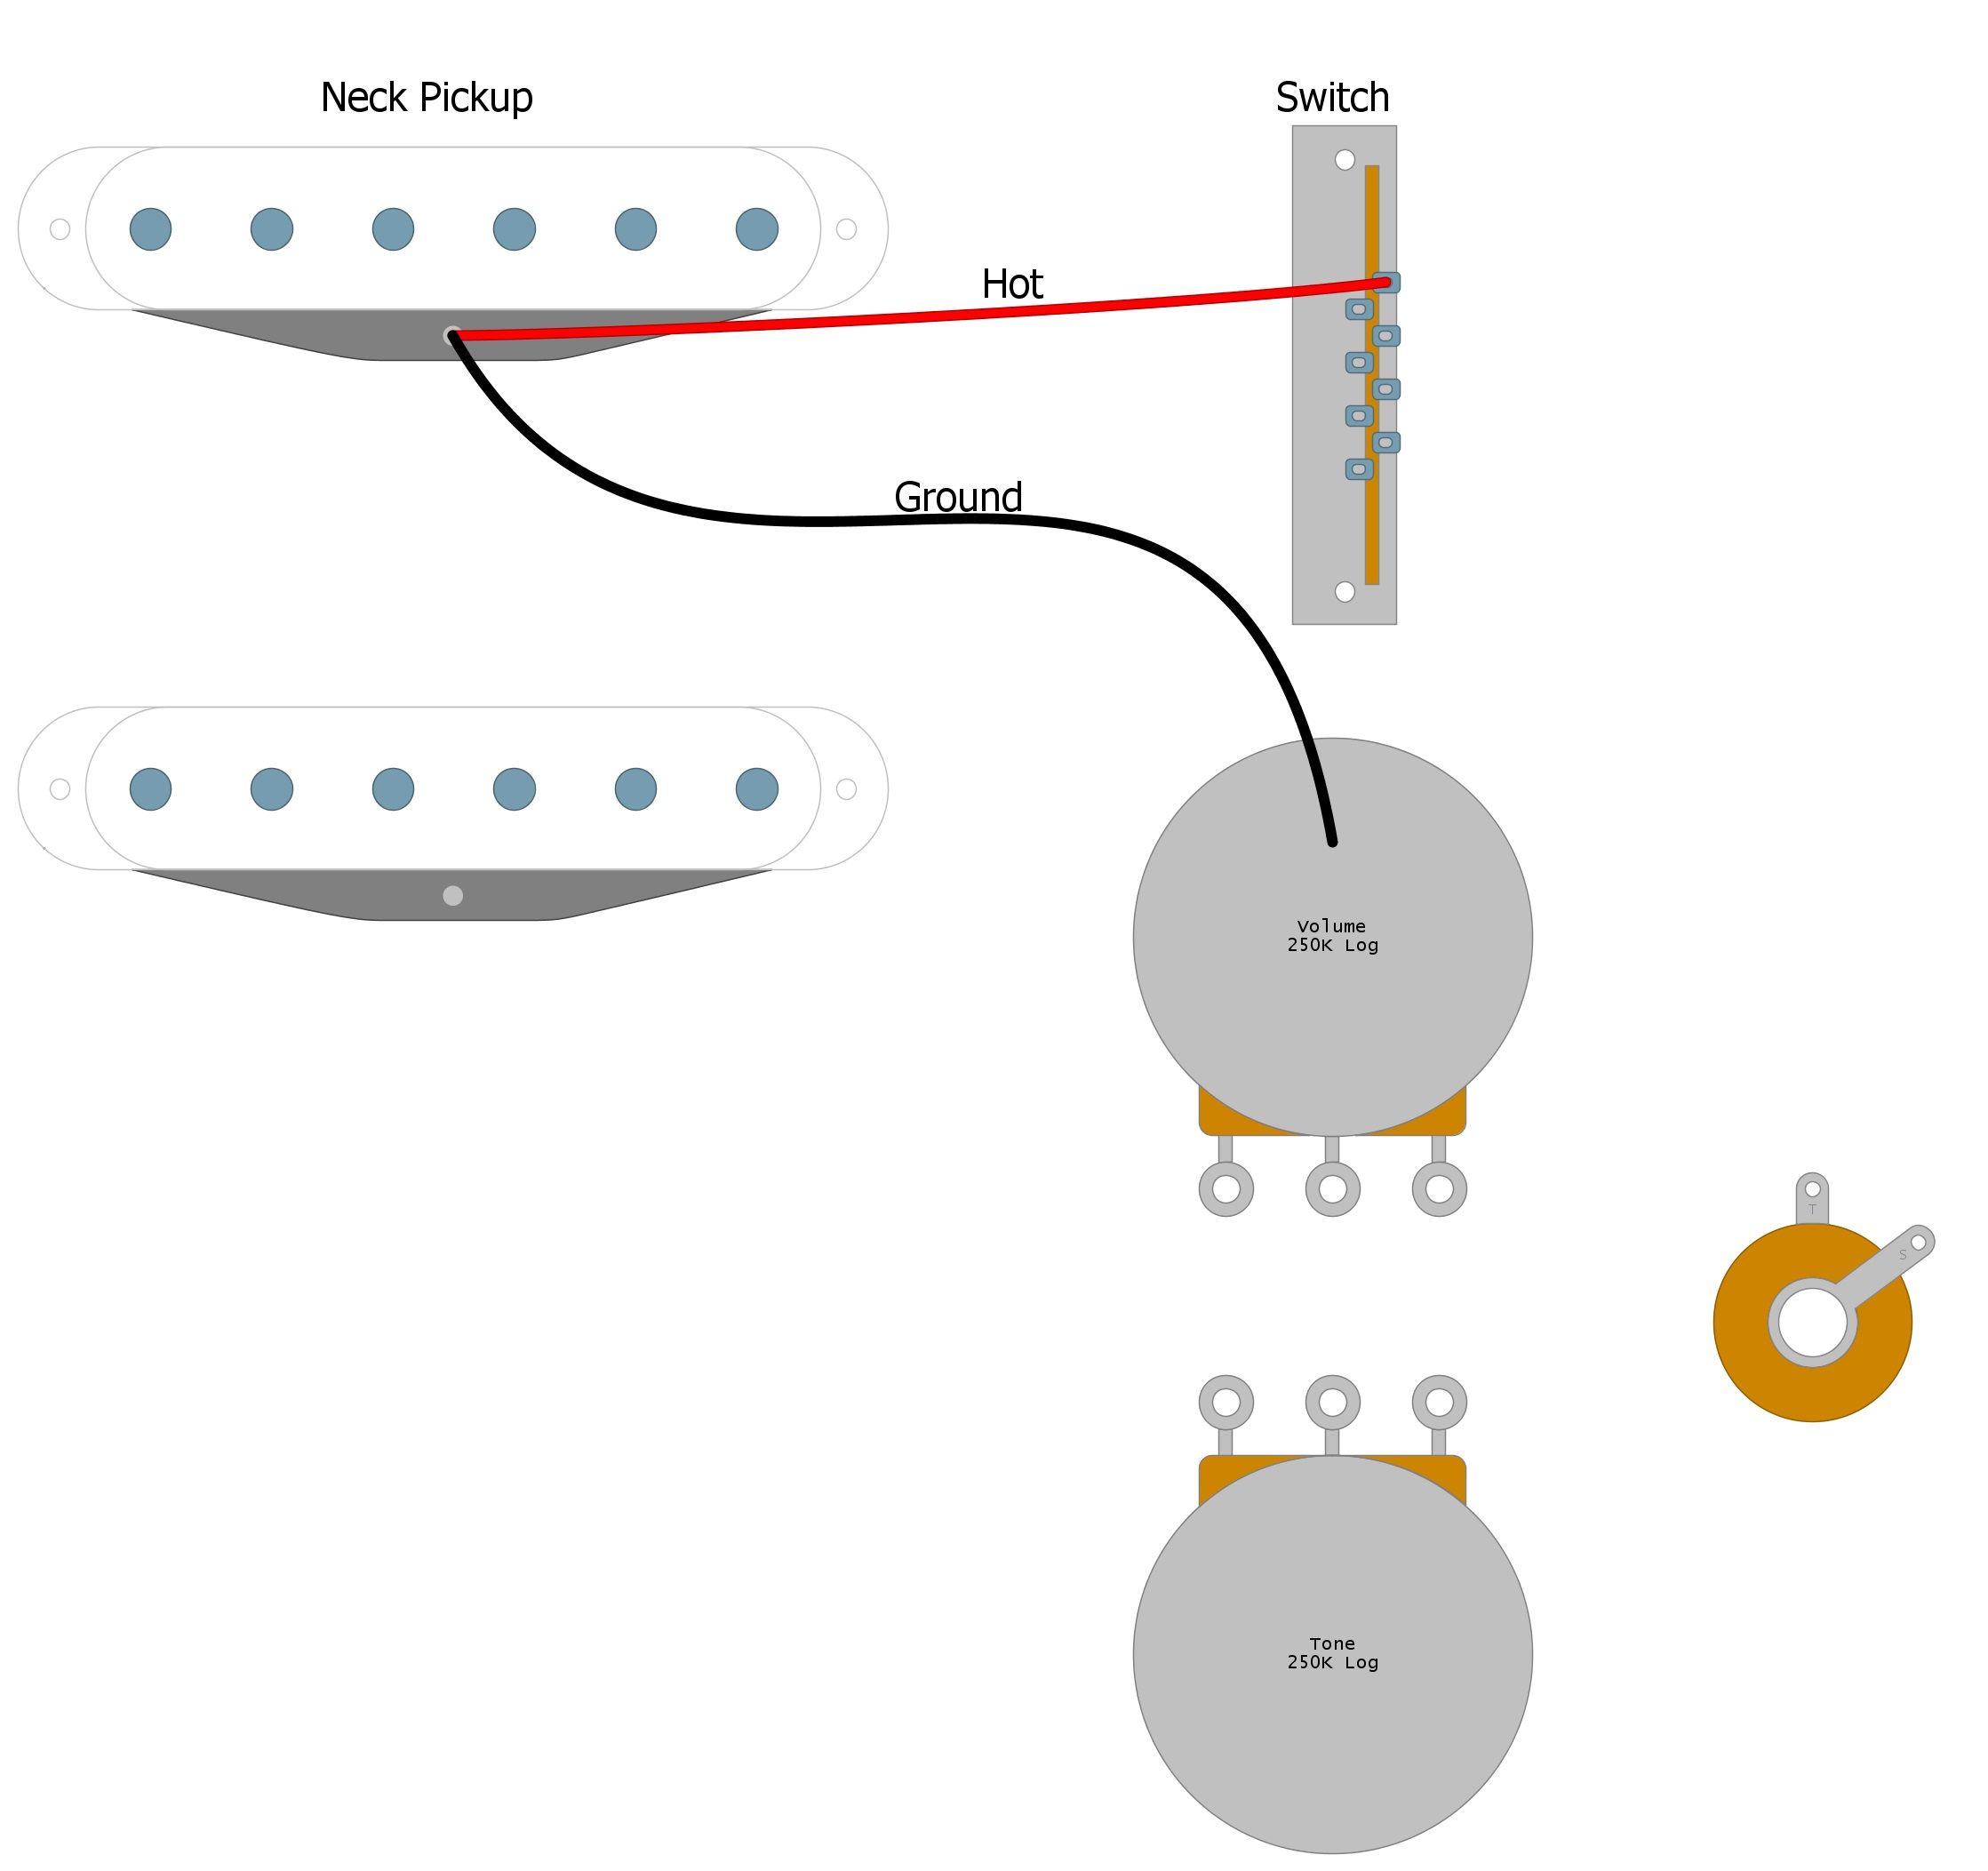
Step 1: Neck Pickup
The first step is to find the pickup located closest to the neck. This pickup will have two wires if it’s a single-coil and four wires if it is a humbucker. If it is a four-wire humbucker, two of the wires should be twisted together (consult the pickup documentation if they are not), leaving two free wires. One wire is the Hot, and one wire is the Ground. If you don’t know which one is Hot, you will need to consult your pickup documentation or test it using a digital multimeter.
Solder the Hot wire to tab one on the right side of the switch and solder the ground to the back of the volume pot as we do in Figure 1.
Fig 1
Step 2: Bridge Pickup
Just as we did in step one, we need the Hot and Ground wires from the bridge pickup.
Now solder the Hot wire to tab four on the left side of the switch and solder the Ground to the back of the Volume pot as we do in Figure 2.
Fig 2

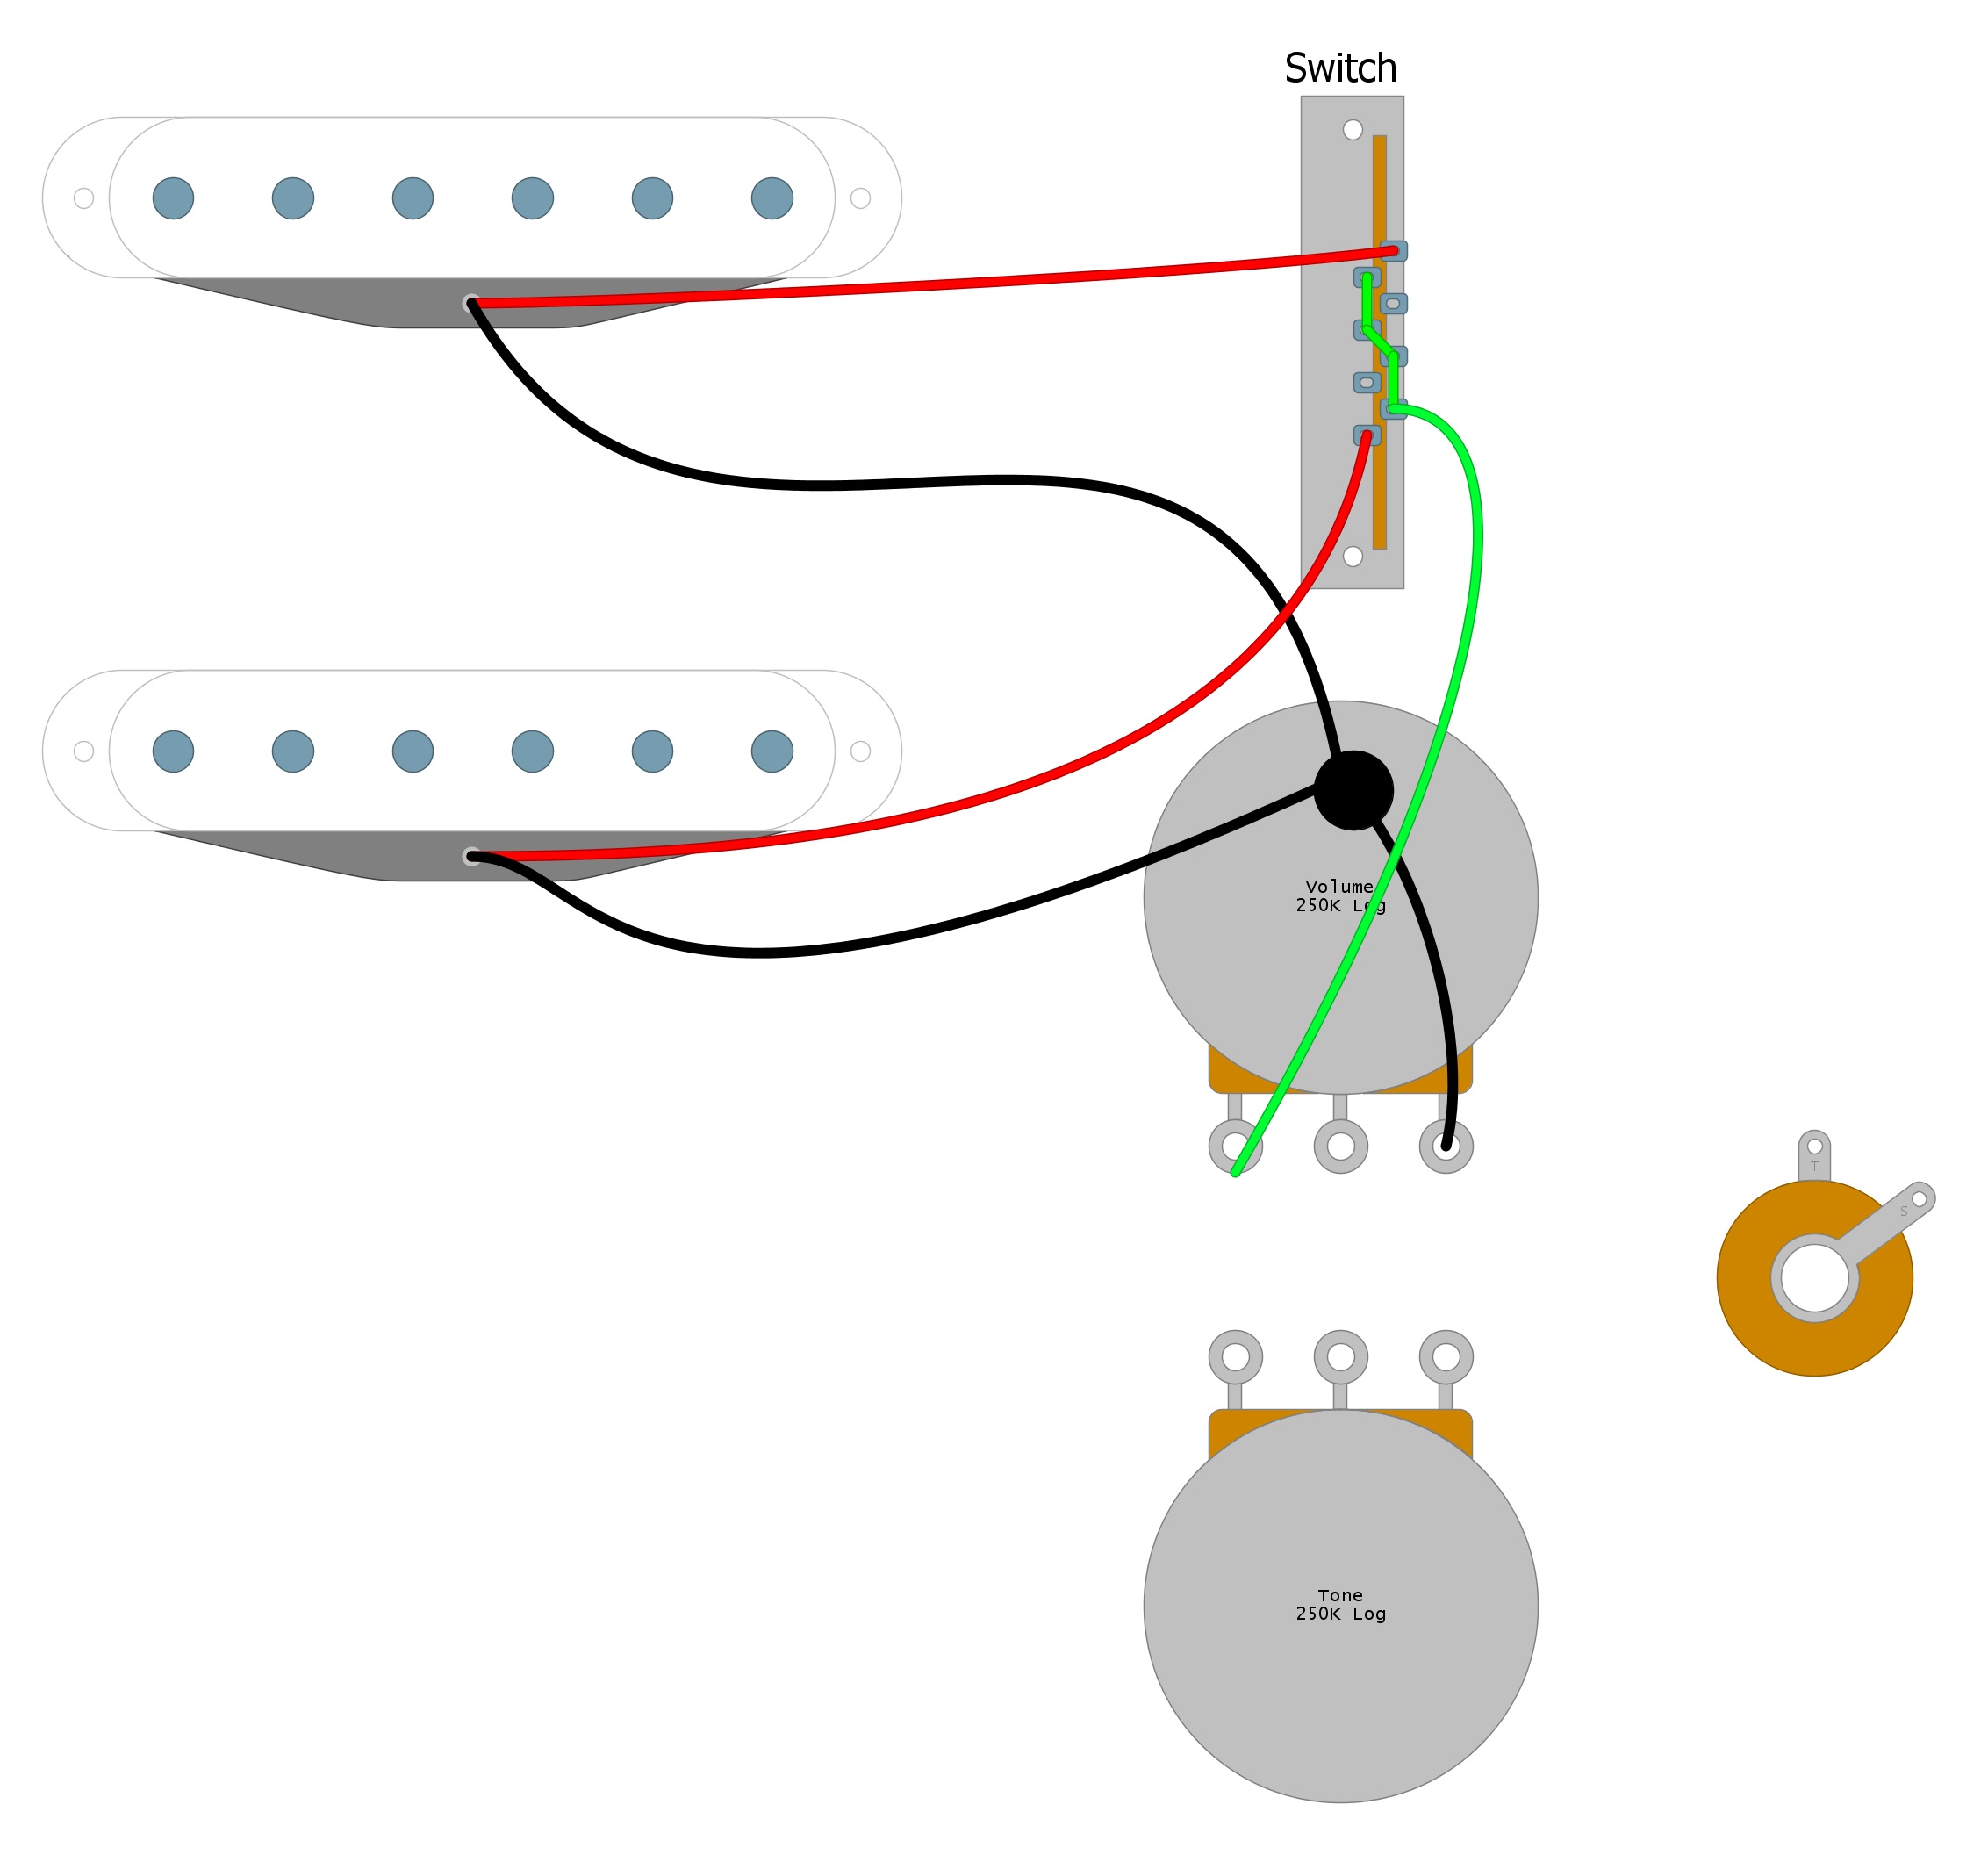
Step 3: Switch
Next, finish wiring the switch by connecting the tabs, using short pieces of wire, as we do with the green wires in Figure 3.
Fig 3

Step 4: Volume Pot
Next, connect a wire from tab four on the right side of the switch to the first terminal of the volume pot and connect the third terminal to the back of the volume pot, as we do in Figure 4.
Fig 4
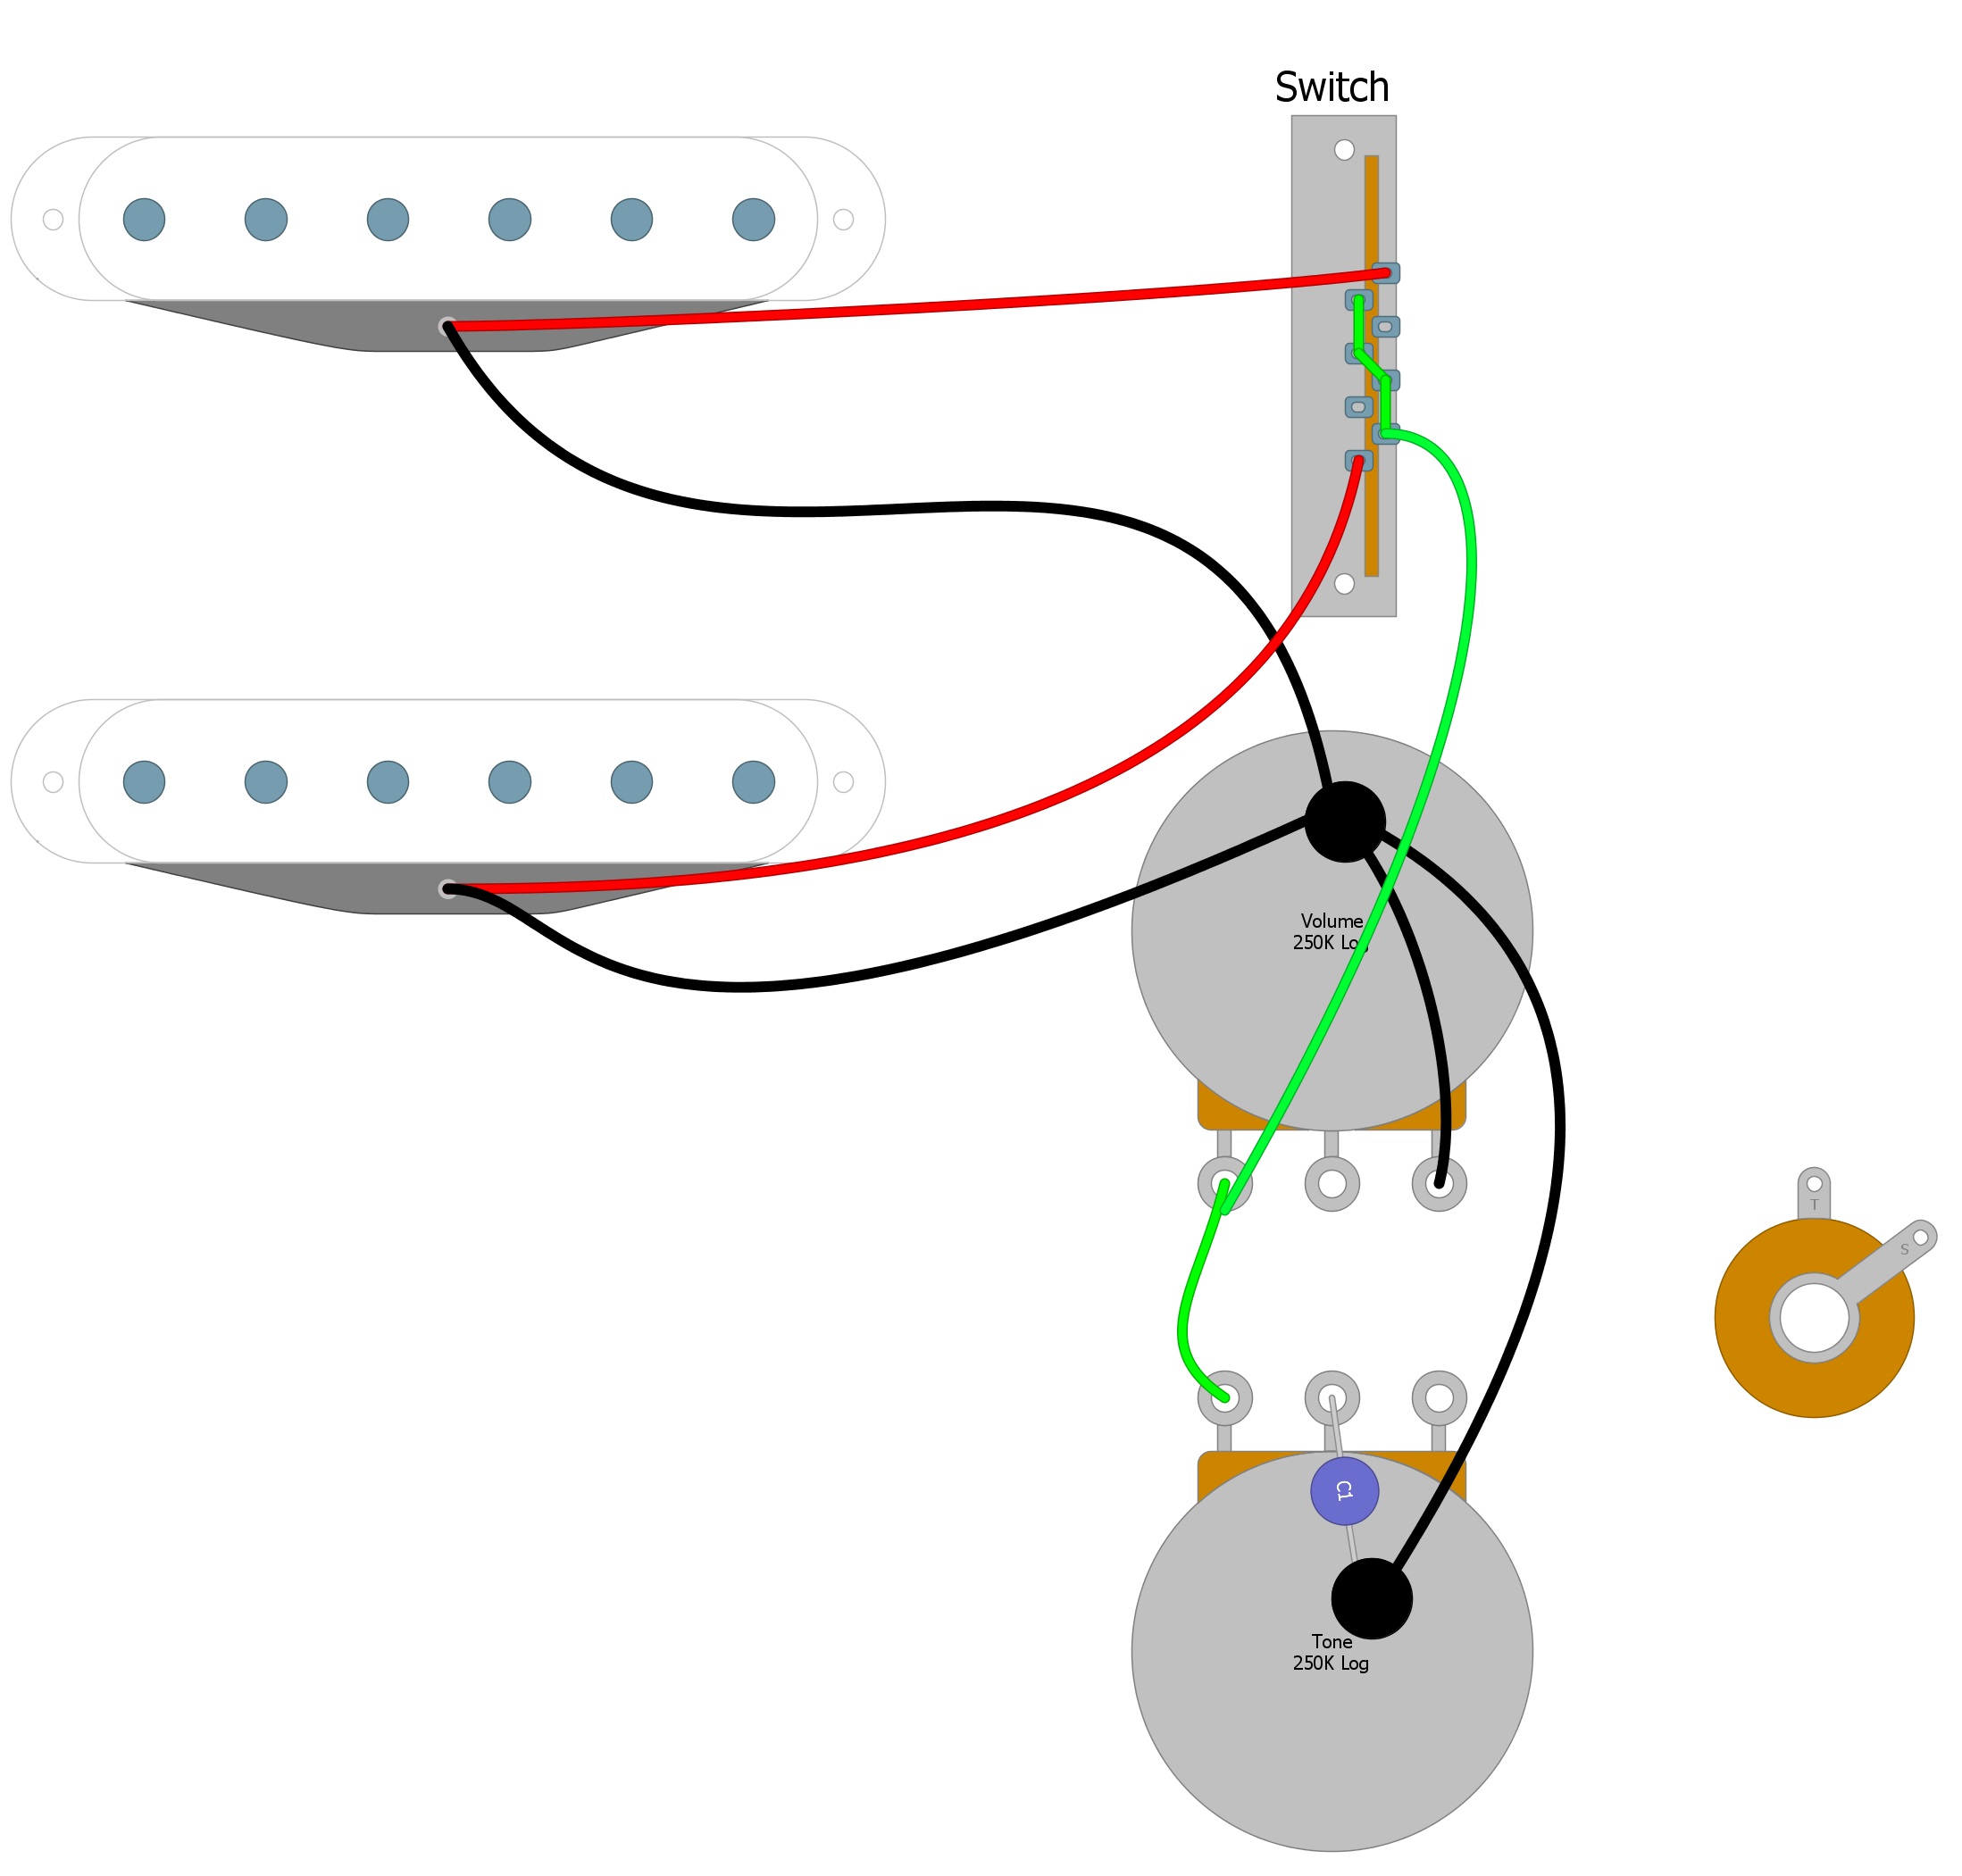
Step 5: Tone Control
Now add the Tone control by connecting a wire from the first terminal of the Volume pot to the third terminal of the tone pot. Next, connect a capacitor between the second terminal of the Tone control and to the back of the control. Then connect a wire from the back of the Tone control to the back of the Volume pot, as we do in Figure 5.
Fig 5
Step 6: Output Jack
Finally, connect the output jack. To do this, we solder a wire from the second terminal of the Volume pot to the tip of the output jack. We then solder a wire from the back of the Volume pot to the sleeve of the output jack, as we do in Figure 6.
Fig. 6
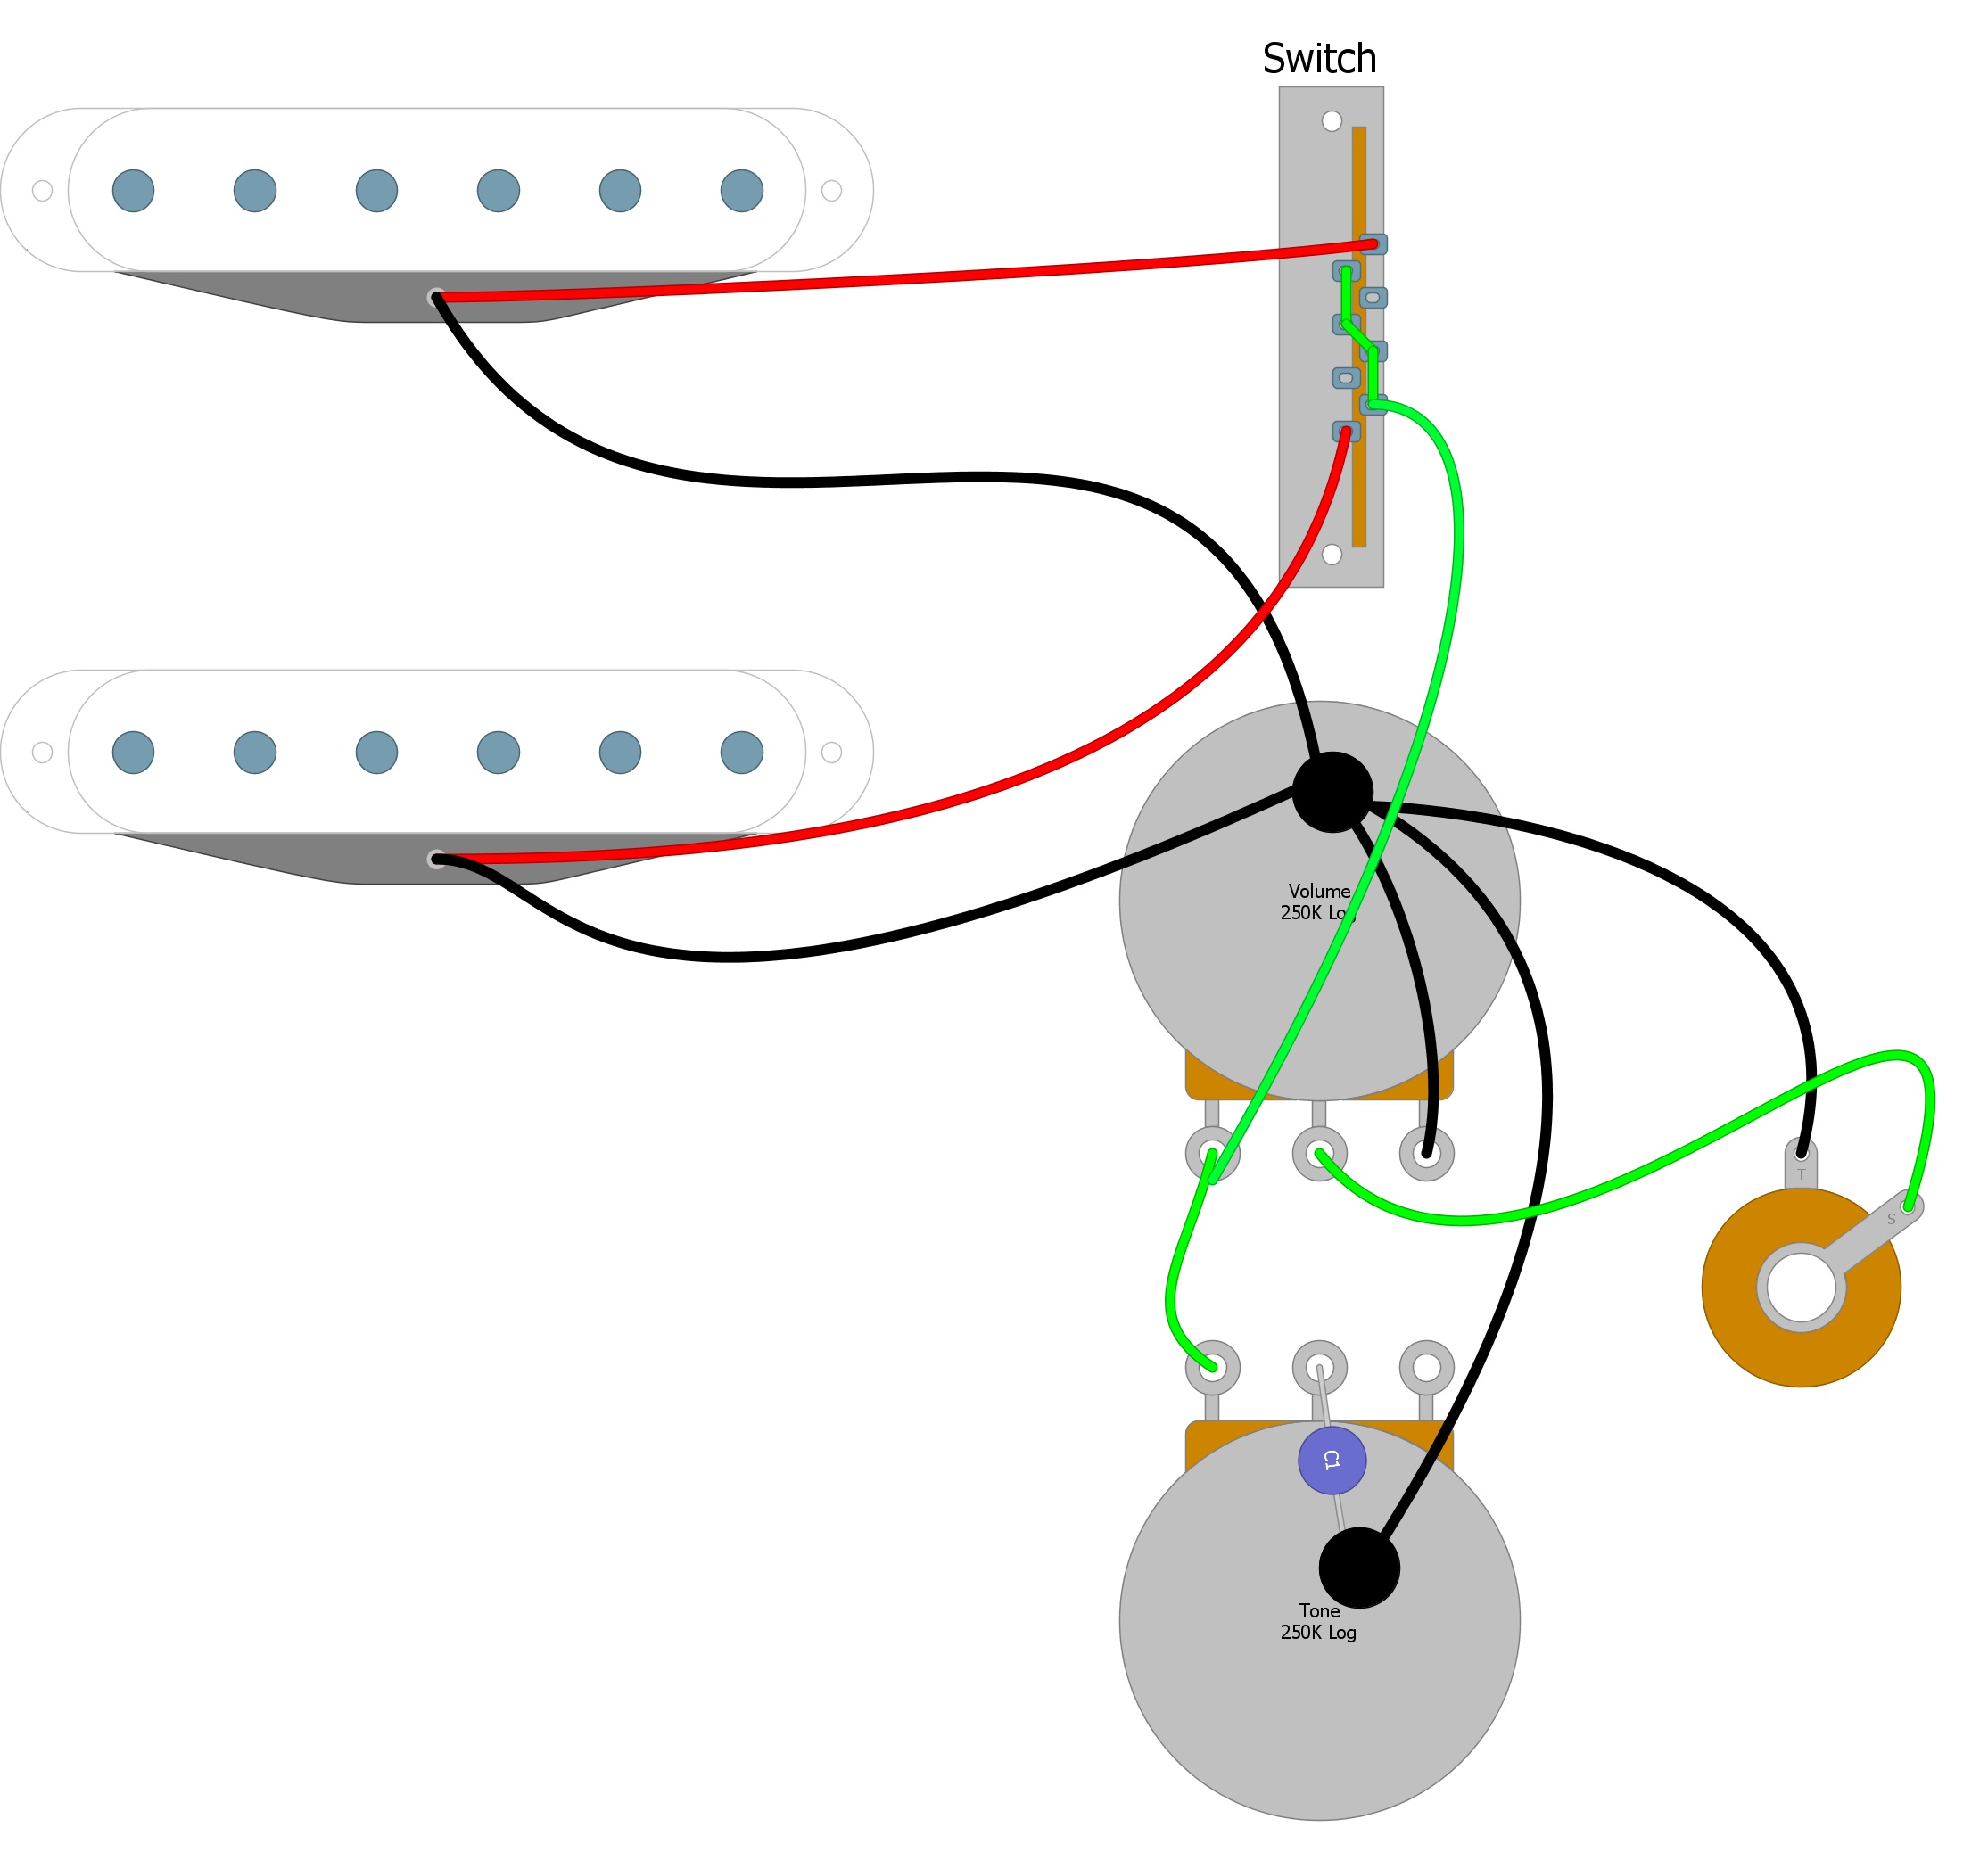
Conclusion
So now, Figure 6 presents us with a complete two-pickup guitar wiring diagram. This circuit will work for any guitar that has two pickups, a three-way switch, and two knobs.
We hope that we have helped you understand how to wire your guitar using our two-pickup guitar wiring diagram, and we hope it works out well for you. If you enjoyed reading this article and it has been helpful, please feel free to share it with your friends on Facebook and Twitter. And don’t forget to check out our other articles on guitar electronics on our humbuckersoup.com site.